Category Mapping
Overview
Category mapping creates a clear, multi-level category tree (for example, Electronics → Wearables → Smartwatches). Each category links to its parent and children. This keeps your catalog organized and easy to navigate. It also improves search accuracy. You can apply templates or automated workflows based on a category’s position in the tree. As you add more products, simply add or rename branches. This keeps your site user-friendly and your team’s work scalable.
Example of a Category Tree:
- Electronics
- Computers & Accessories
- Laptops
- Desktops
- Mobiles & Tablets
- Smartphones
- Tablets
- Audio & Video
- Headphones & Earphones
- Speakers
- Cameras & Photography
- DSLR Cameras
- Mirrorless Cameras
- Computers & Accessories
- Fashion
- Men's Clothing
- Shirts
- T-Shirts
- Women's Clothing
- Dresses
- Tops & Blouses
- Footwear
- Sneakers
- Boots
- Sandals
- Accessories
- Bags & Backpacks
- Men's Clothing
Navigation
To navigate to the Category Mappings page:
- Click the Taxonomy tab.
- Select Category Mappings.
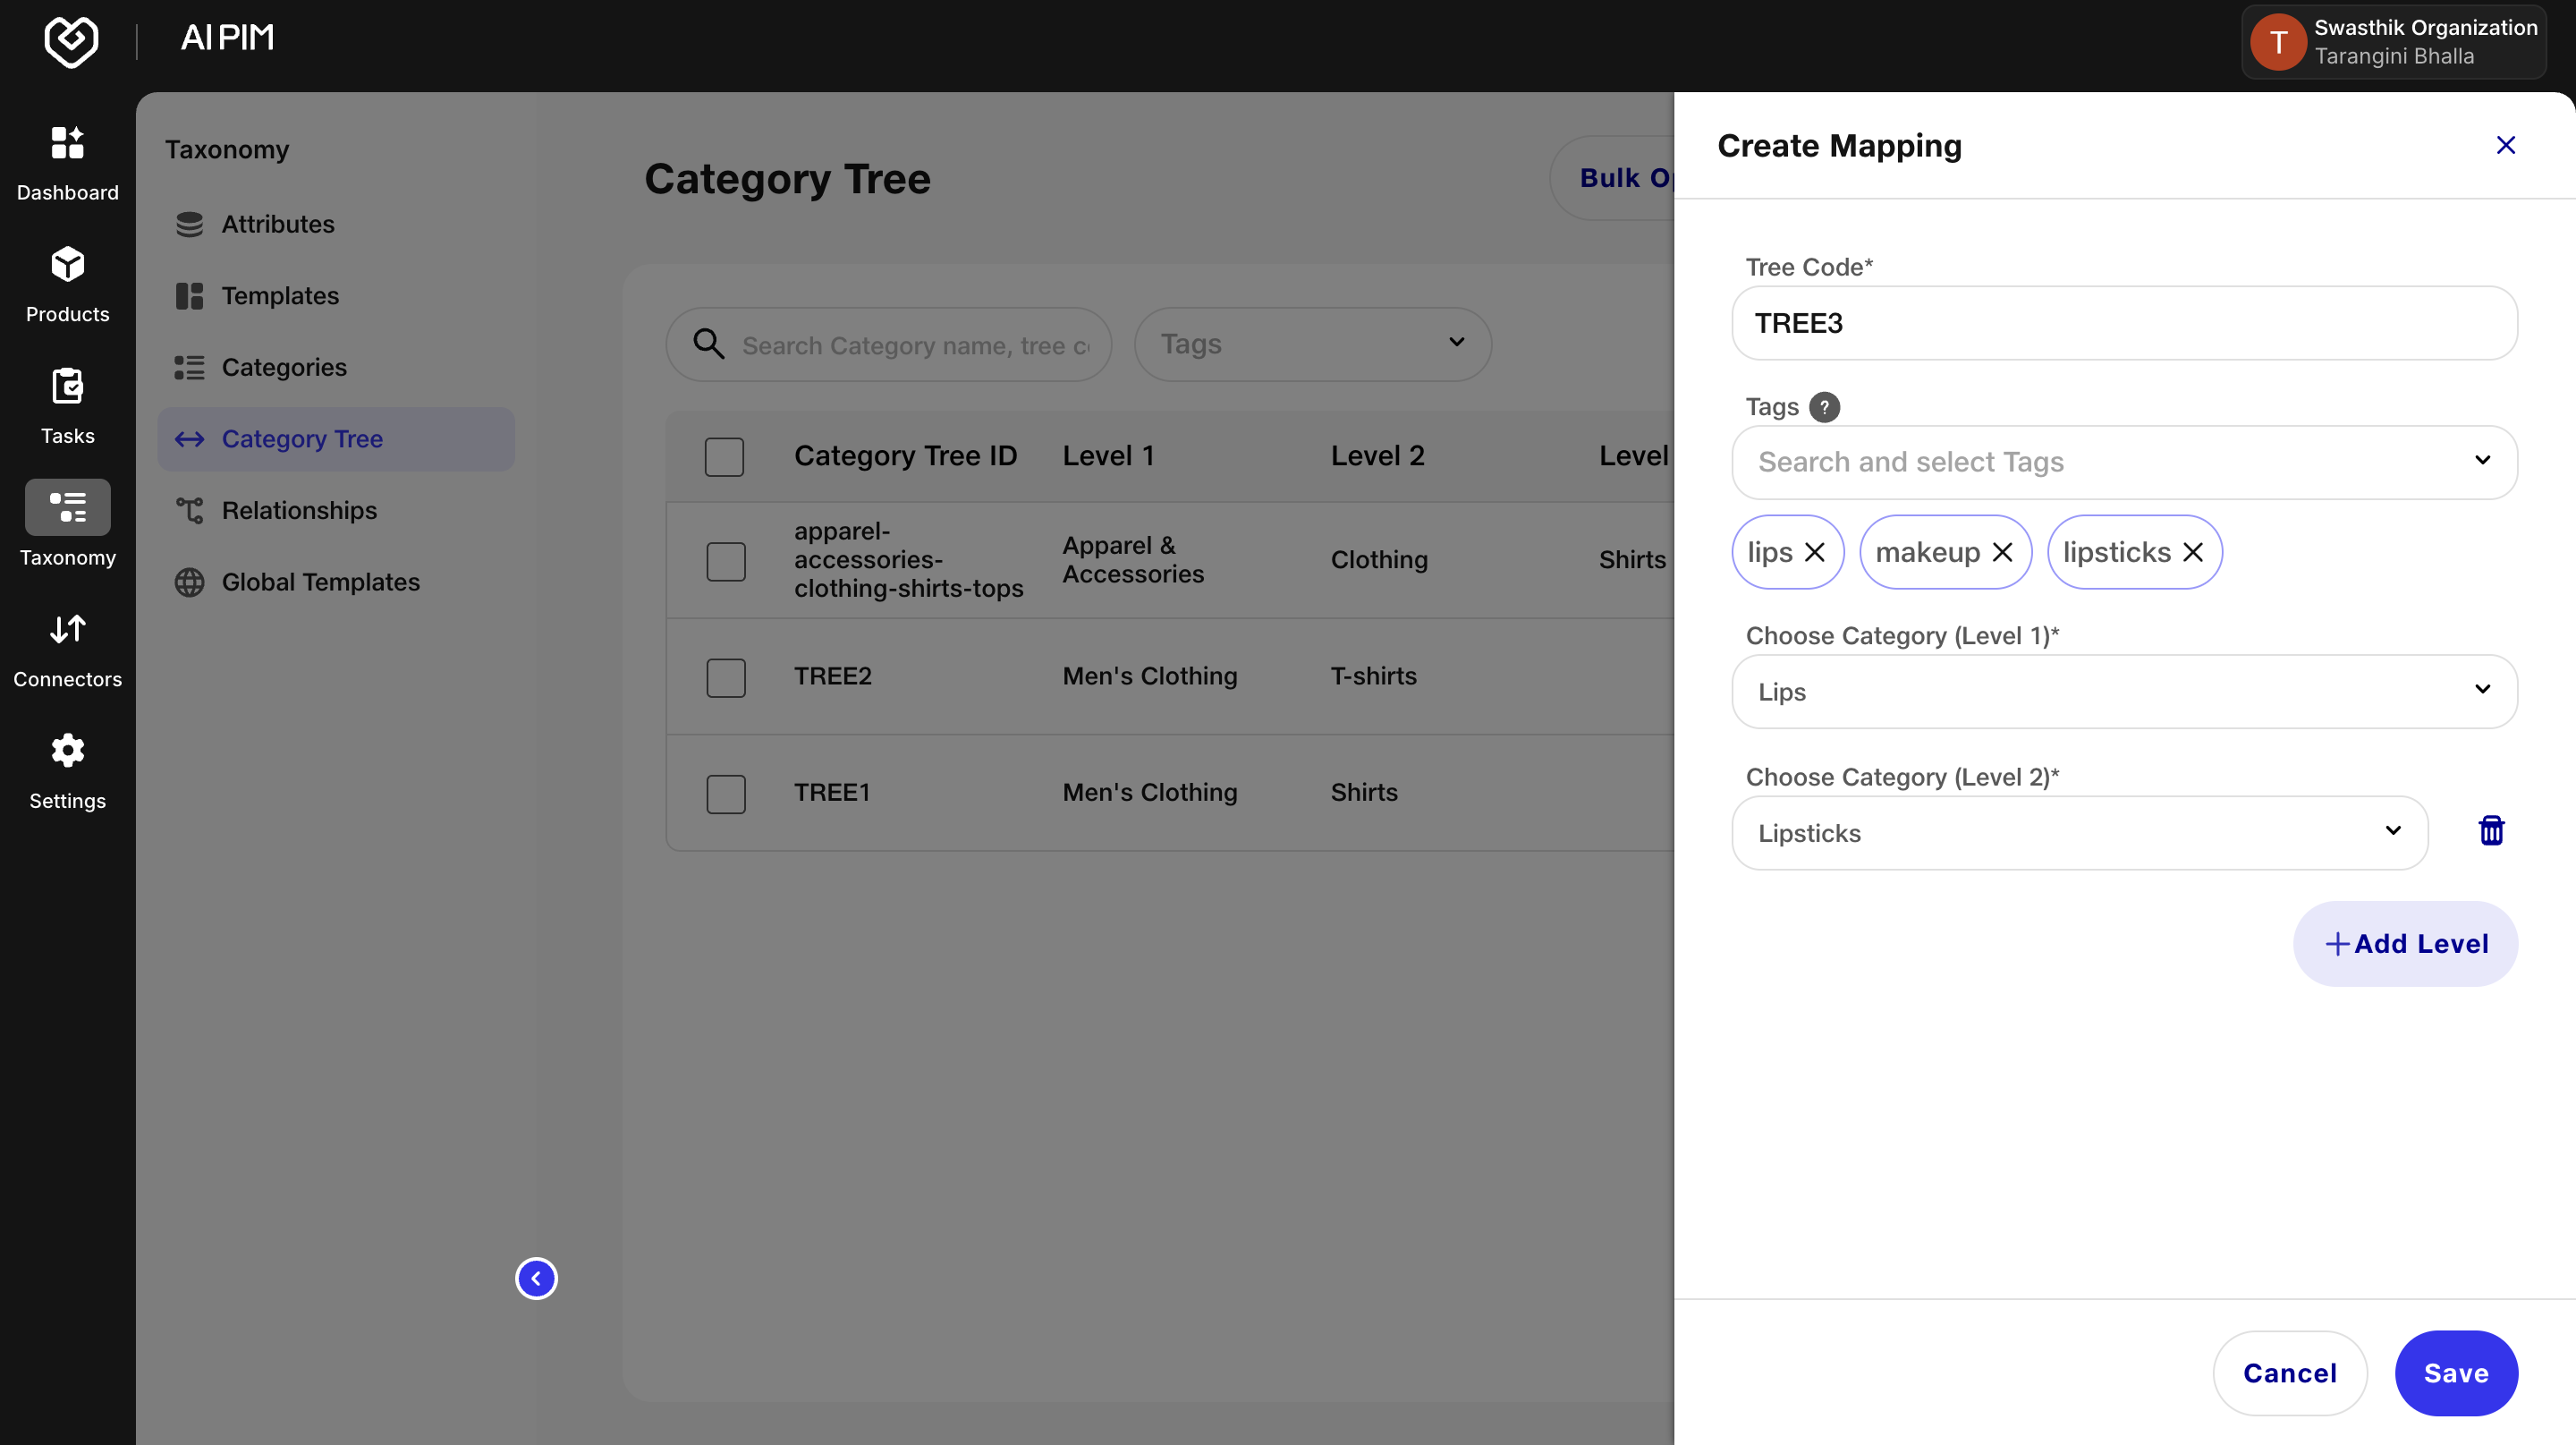
Creating a Category Mapping
To map your categories into a hierarchical tree, please follow these steps:
- Create a New Tree
In the top-right corner, click Create Category Tree.
Enter Tree Details
- Tree Code: A unique identifier for this tree.
- Mapping Code (Brickcode): (Optional) Your internal code for reference.
- Tags: Any keywords to help you search or filter trees later.
- Define Your Levels
- For each tier in your hierarchy, select the appropriate category:
Example:
- Level 1: Bottomwear
- Level 2: Casual
- Level 3: Trousers
- Level 4: Tapered
- Use the dropdown beside each level to pick the category node you created earlier.
- Click Add Level to introduce additional tiers as needed.
- Save Your Tree

- You’ll receive a confirmation notification when your new category tree has been successfully created.
Next Steps:
After creating a category tree, you can attach a template to it (see Template Builder for details). When users add or manage products within this hierarchy, the associated template will automatically display.
Updating a Category Tree
- Locate the Category Tree you wish to update on the dashboard.
- Click the pencil icon next to the Category Tree name.
- In the edit view, you can update the Mapping Code and Tags associated with the Category Tree.
- Click Save to apply and confirm your changes.
Deleting a Category Tree
- Locate the Category Tree you want to delete on the dashboard.
- Click the trash icon next to the Category Tree name.

- A confirmation prompt will appear. Review the warning and confirm the deletion.

Deleting a Category Tree will permanently remove it from all associated SKUs and templates.