Templates
Only Brand Admins and Brand Supervisors can define Templates.
By using the Template Builder, you can define the specific attributes that enrichers must fill while creating a product. This ensures consistency and accuracy across different product categories. For example:
- A Mobile template under the Mobile category may include attributes such as Color, Memory, RAM, and Primary Camera.
- A Shirt template under the Casualwear category may require Size, Color, Material, and Brand.
Creating a Template
Click Create Template.
You will now enter the Template Creation Flow, which includes the following tabs:
- Template Details & Attribute Selection
- Attribute Grouping
- Category Mapping
1. Template Details & Attribute Selection
In this section:
- Enter a Template Name and an optional Description.
- Use the toggles to indicate whether the product is:
- Expirable (e.g., food items)
- Physical (e.g., shoes, electronics)
- Both (e.g., pharmaceuticals)
- Select or create Tags for easier filtering and categorization.
- Choose a Mapper if applicable – this allows you to transform incoming data during import.
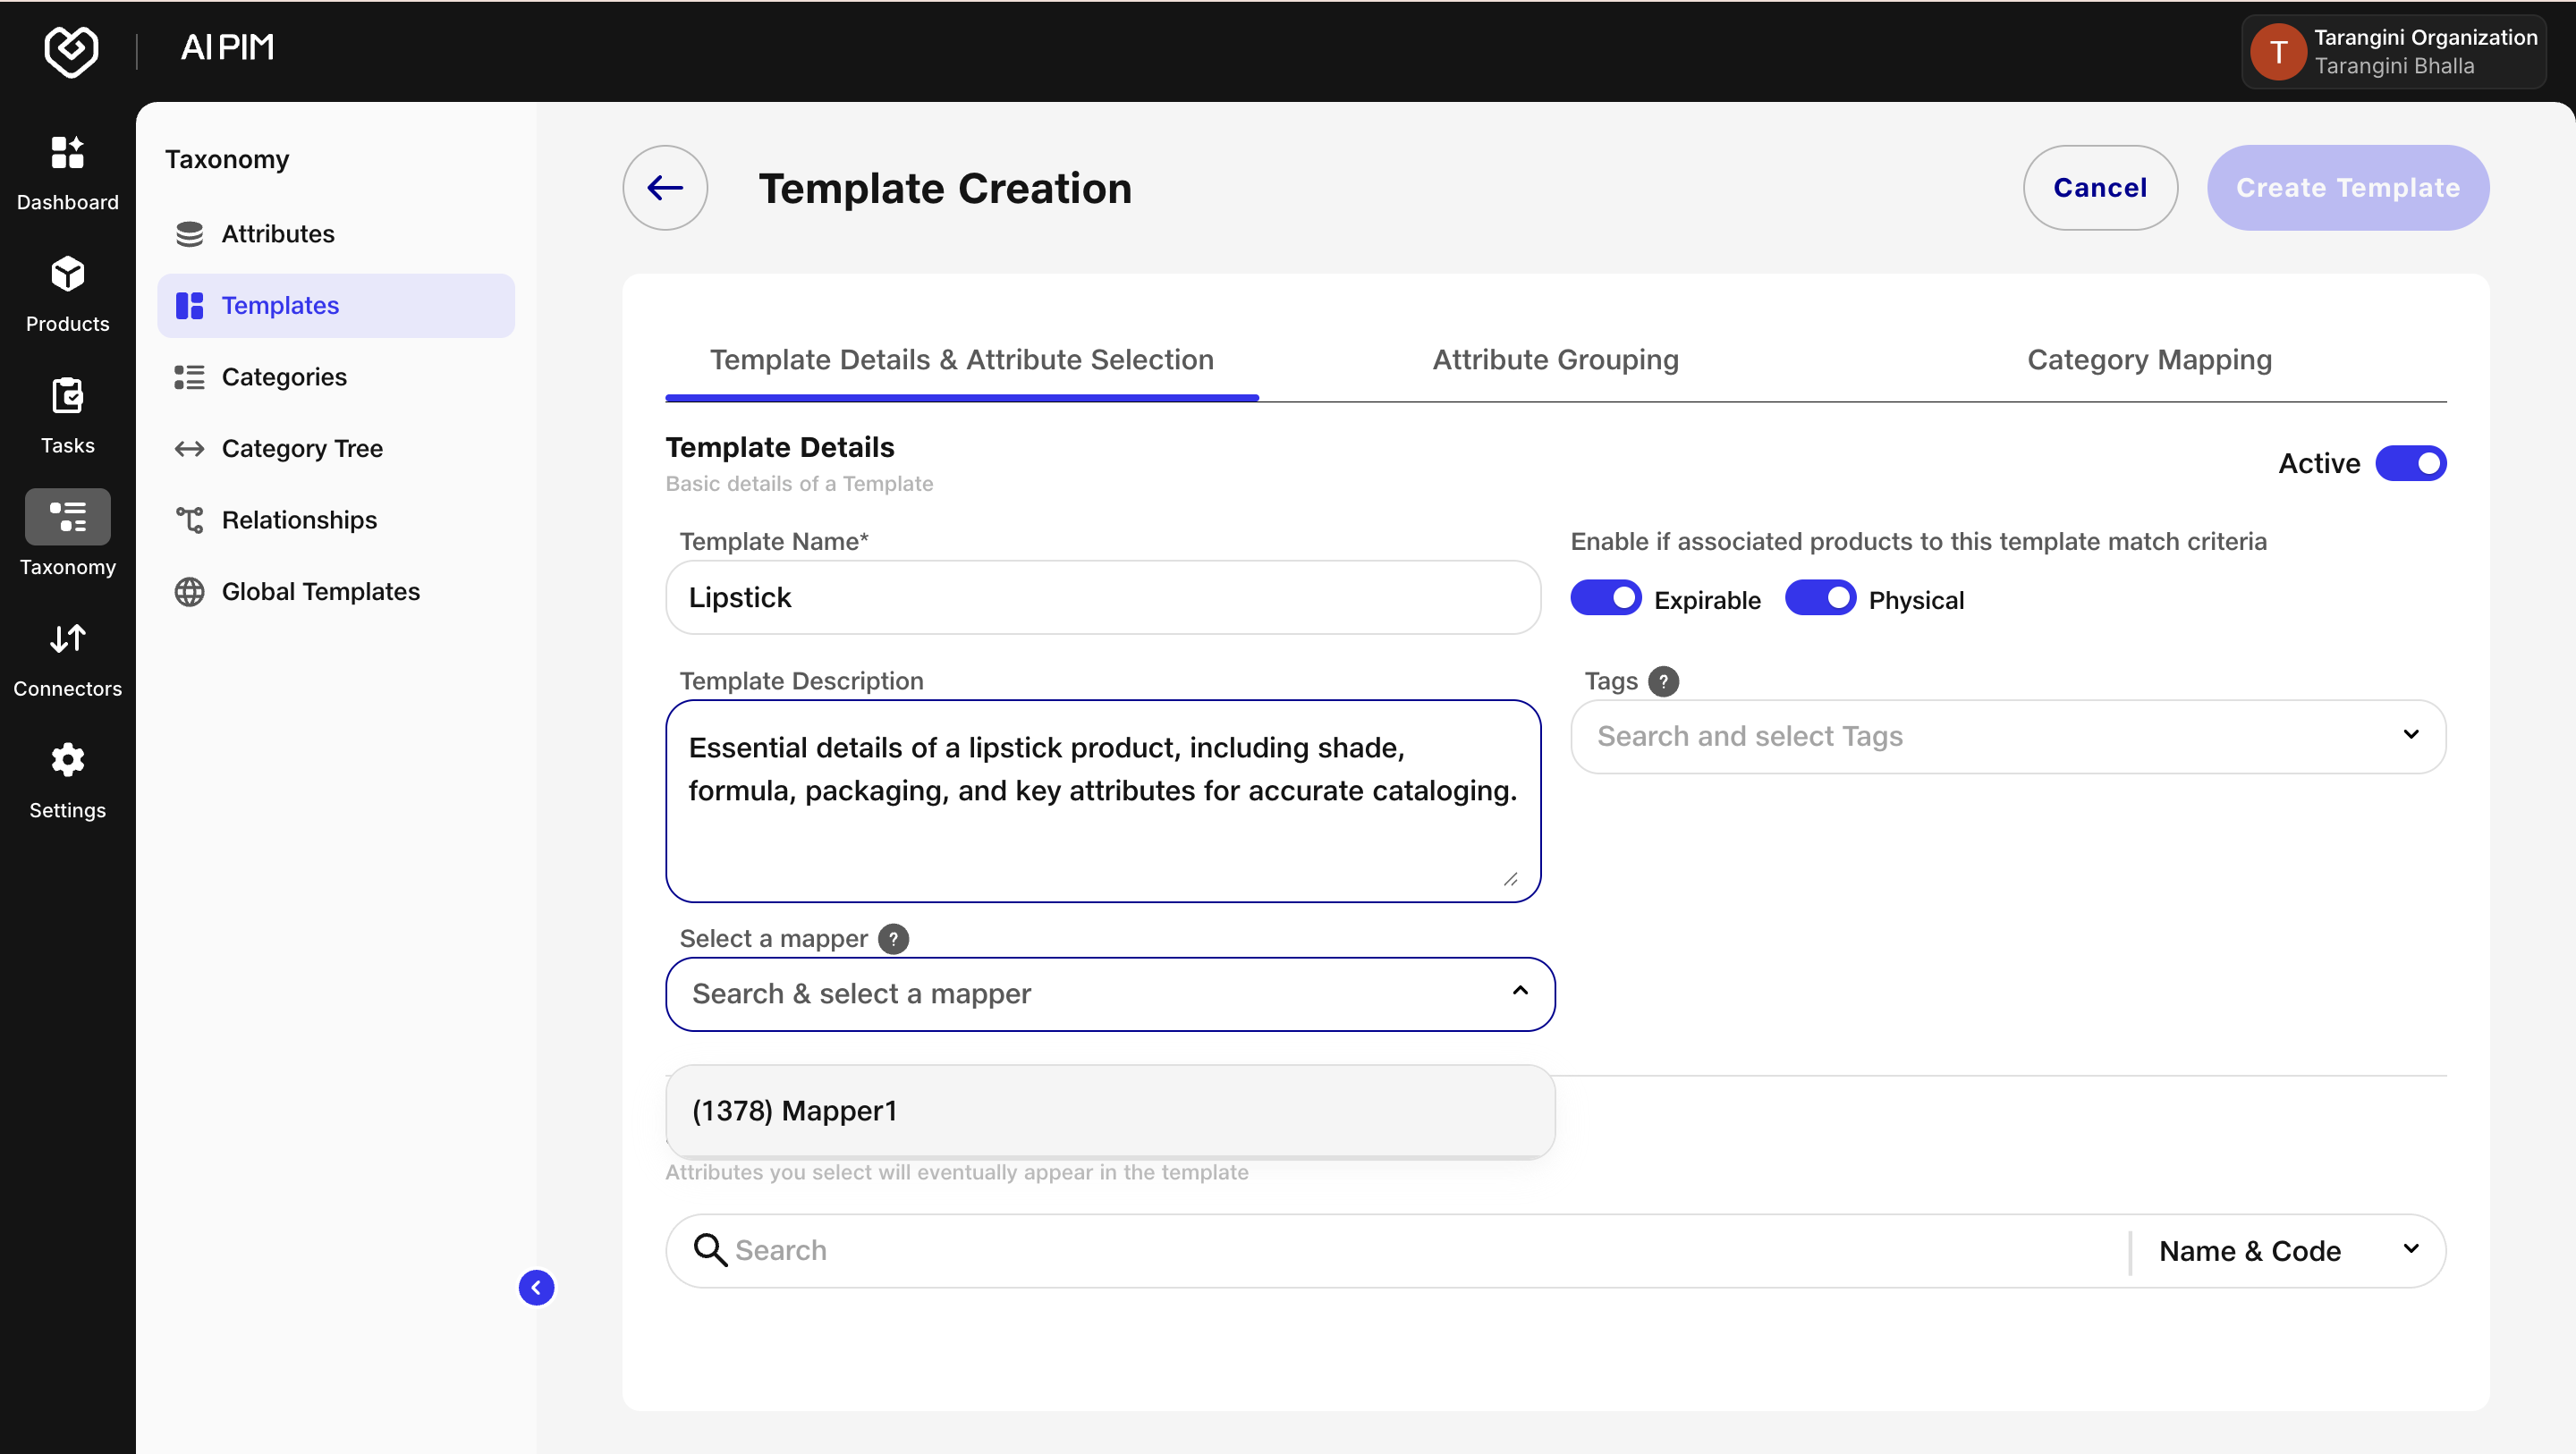
- Search and select attributes relevant to the product category.
Example: A Footwear template may include attributes such as Boot Length, Color, and Arch Type.
Once all required fields are filled, proceed to the next tab, Attribute Grouping.
2. Attribute Grouping
After selecting the attributes:
- Click the Attribute Grouping tab.
- Click Create Attribute Group.
- Provide a Group Name (e.g., Dimensions, Appearance).
- Select relevant attributes from the dropdown (populated based on your earlier selections).
- Toggle Active to "On" to make the group (and its attributes) visible in the final template.
- Click Create.
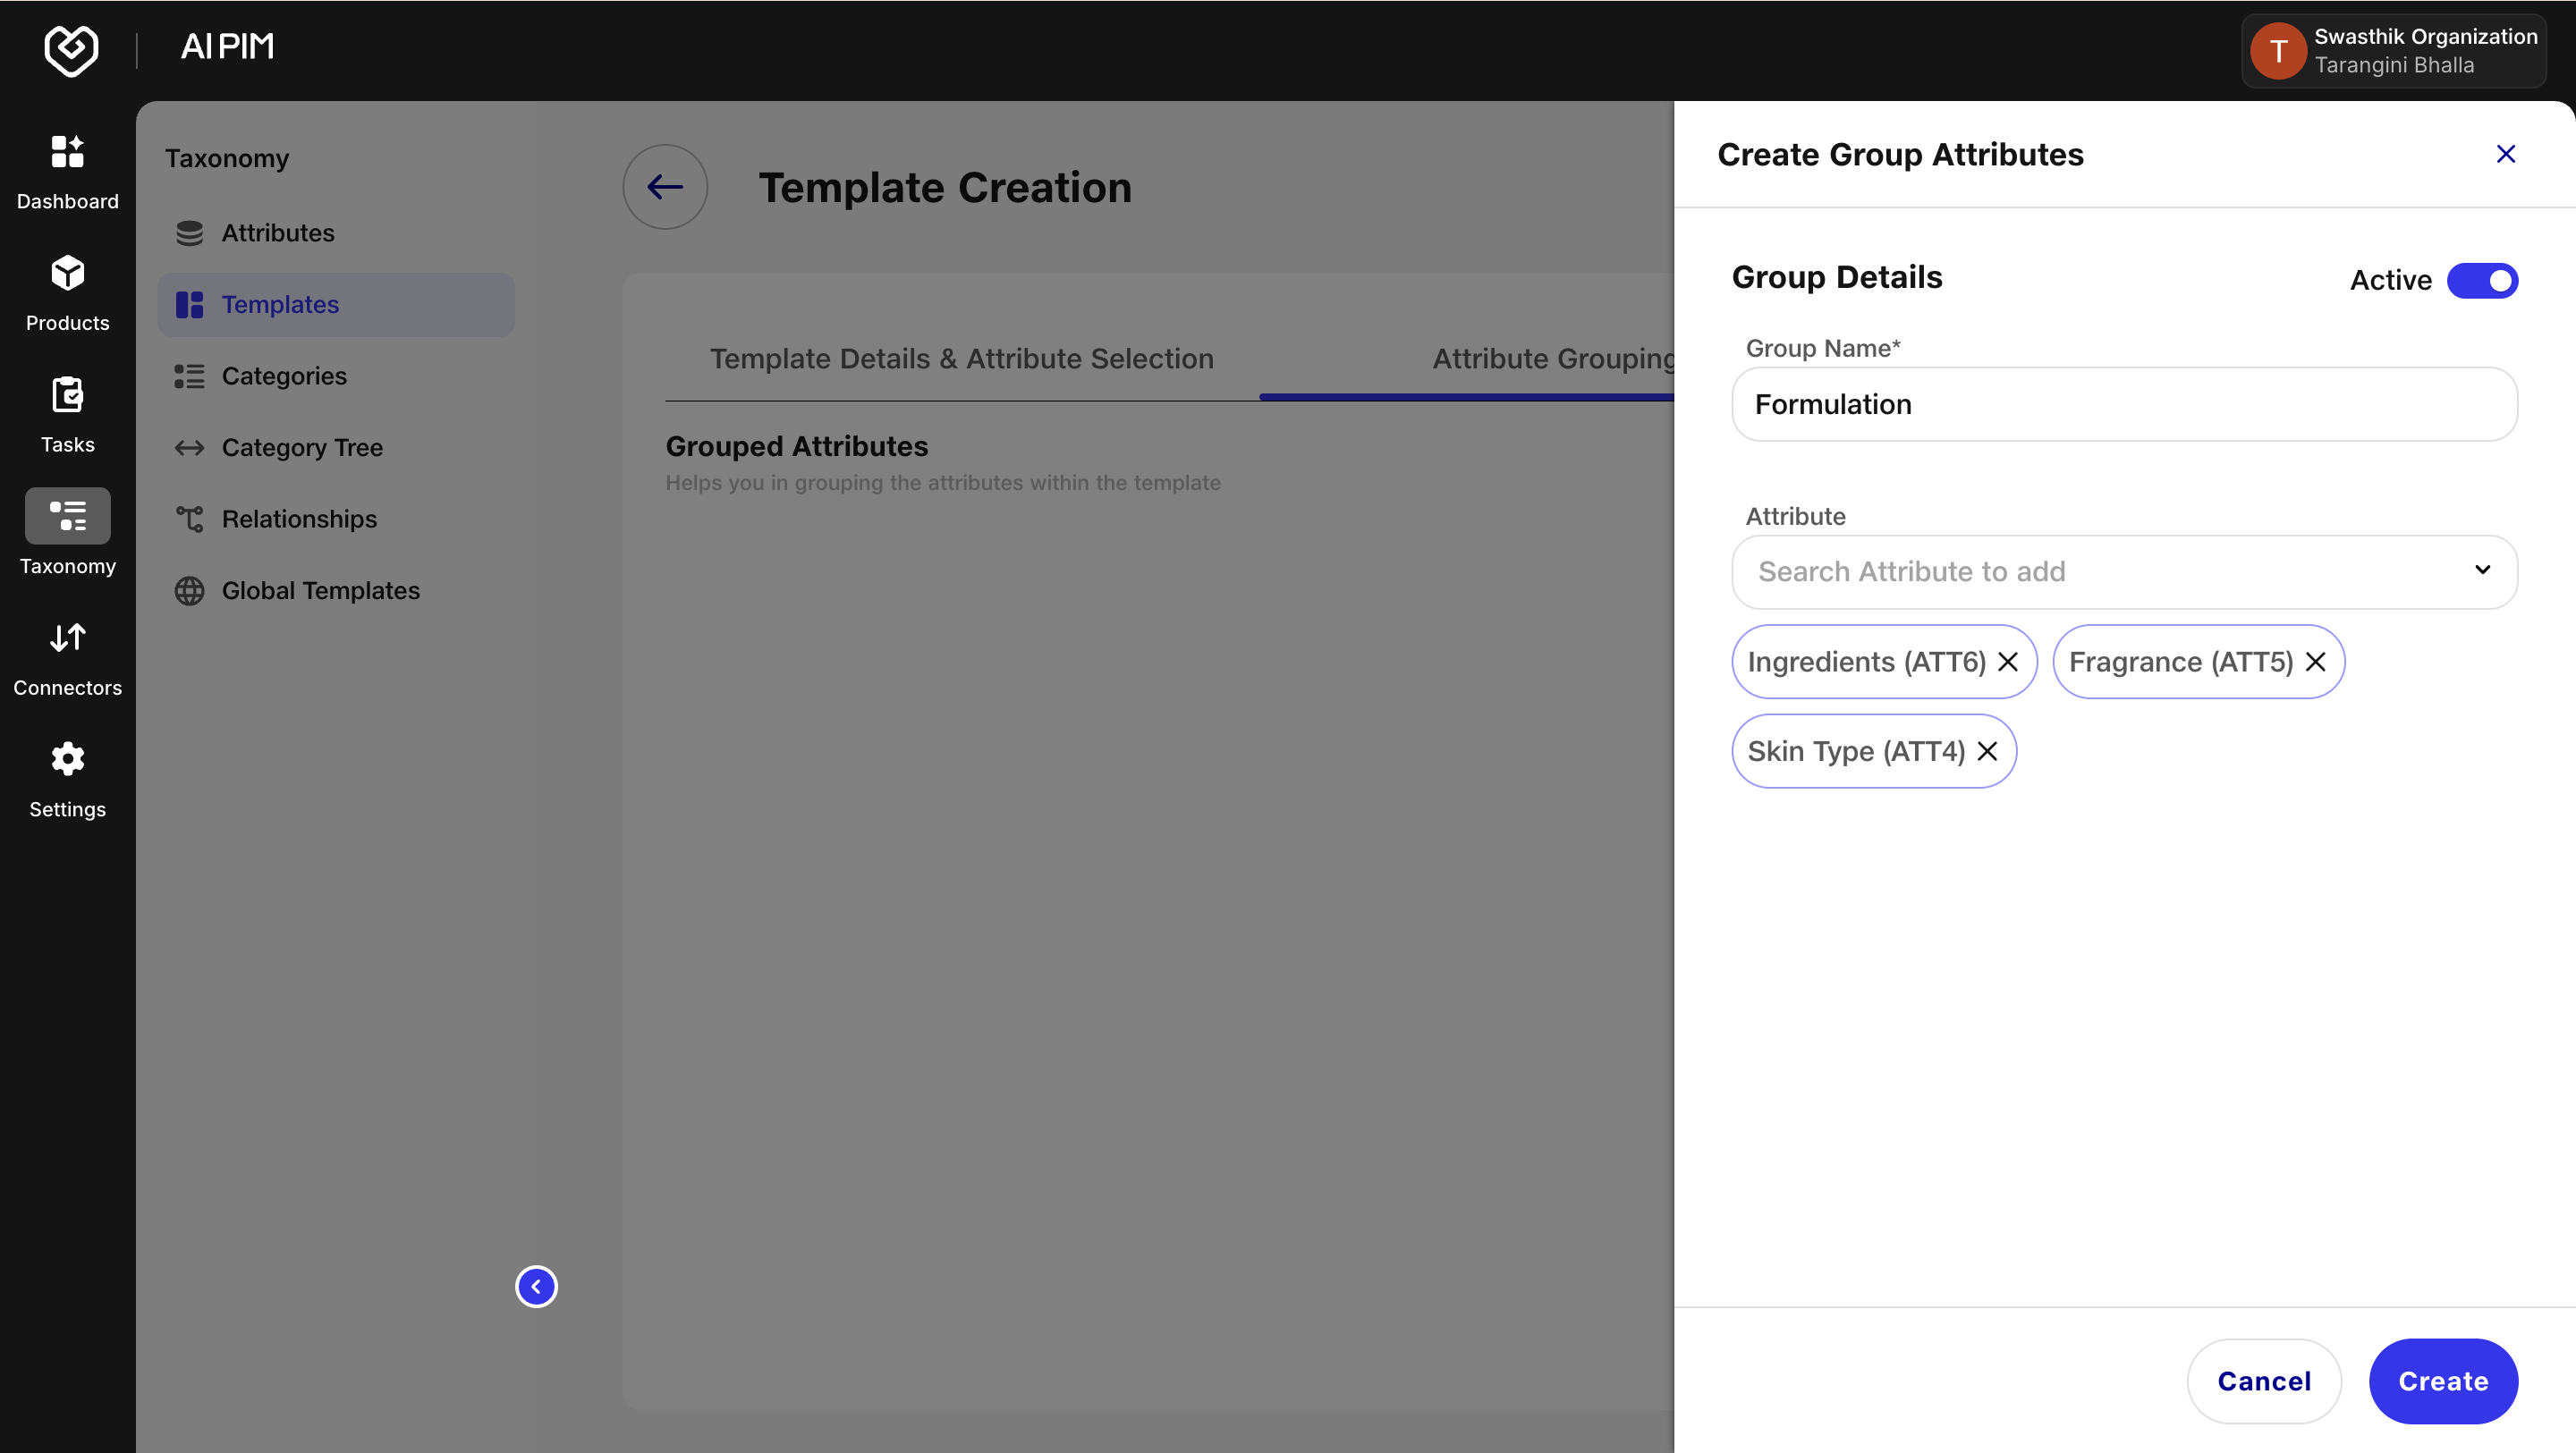
You can repeat this process to create multiple attribute groups. Example: A group called Dimensions might include Heel Height and Size.
3. Category Mapping
- Click the Category Mapping tab.
- Select one or more Category Trees from the dropdown to associate with your template.
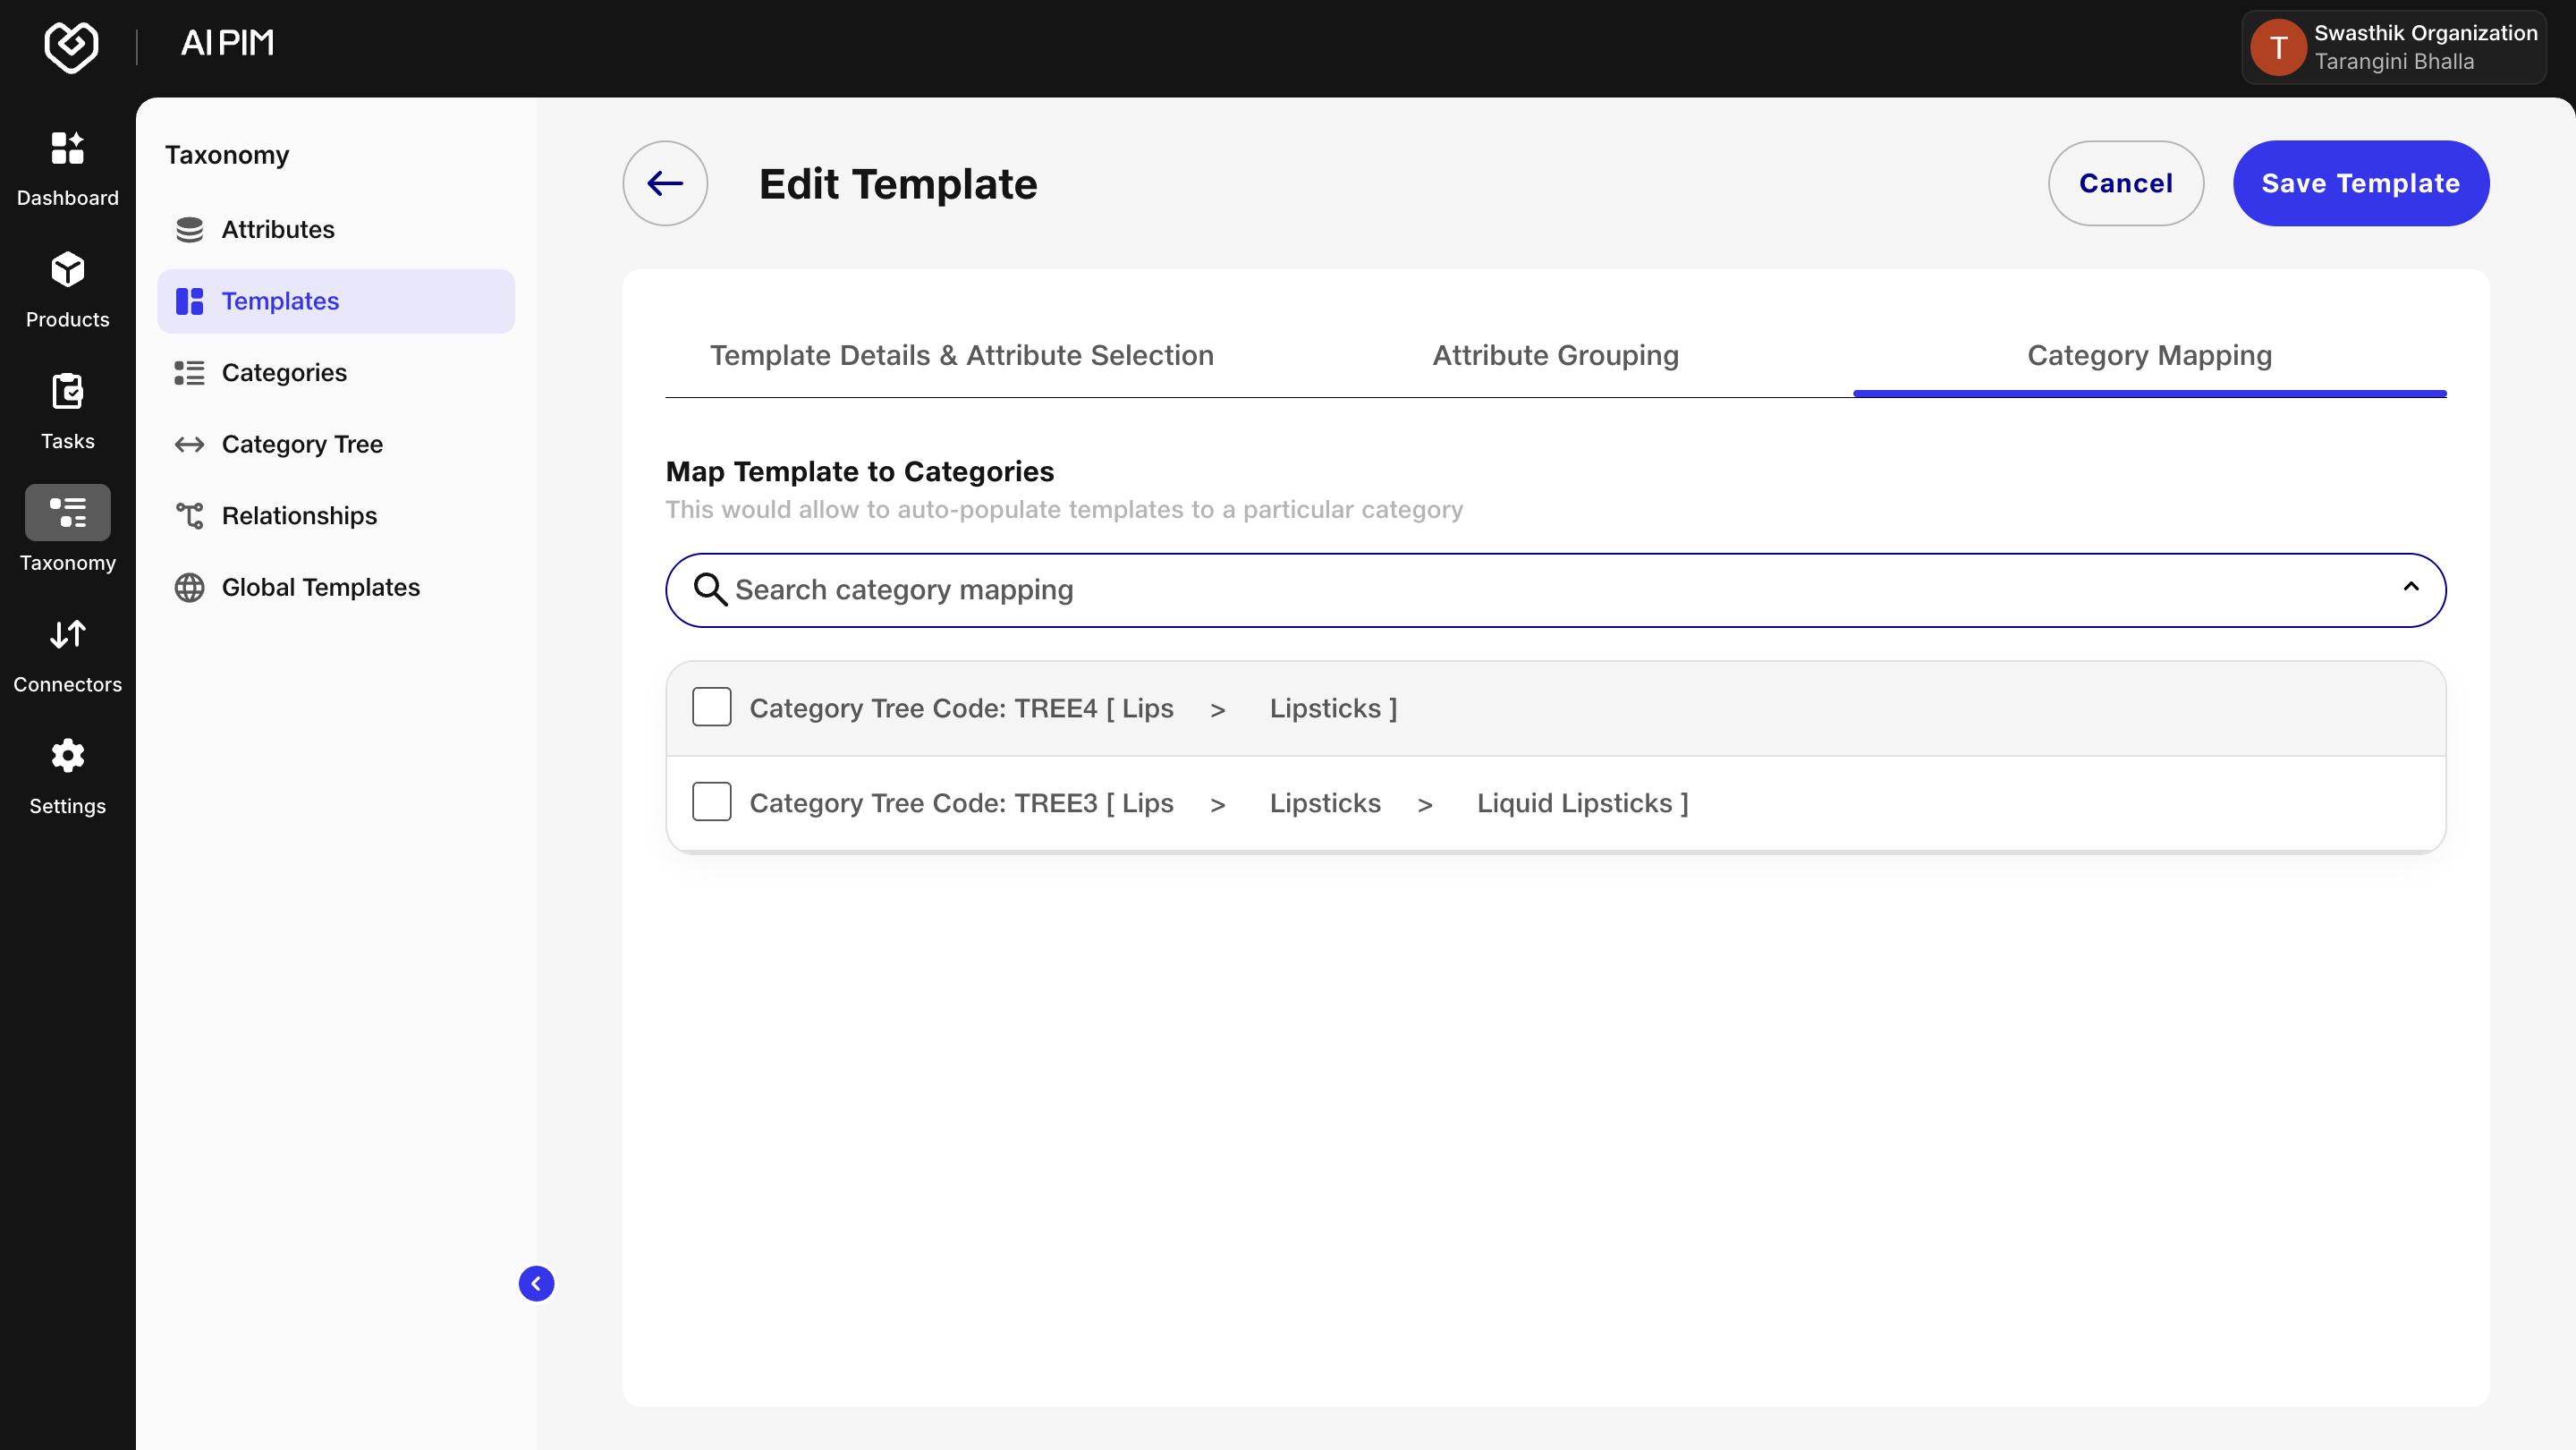
This ensures that your template appears only for relevant product categories when users are managing or creating products.
Updating a Template
- Locate the template you need to update.
- Click the pencil icon on the right of it.

- You can make the following changes:
- Activate/Deactivate a template
- Change the name or description of a template
- Add new attributes or remove previous attributes from a template
- Activate/Deactivate an attribute group
- Add new attributes or remove previous attributes from a group
- Rearrange the sequence of attributes in an attribute group
- Add/Delete an attribute group
- Rearrange the sequence of attribute groups
- Link/unlink a category tree
- Click Save Template. A success notification will appear when the template is successfully updated.
Deleting a Template
Follow these steps to delete a template:
- Locate the template you need to delete
- Click the bin icon on the right of it.

- Provide your confirmation to delete the template. A success notification will appear when the template is successfully deleted.
