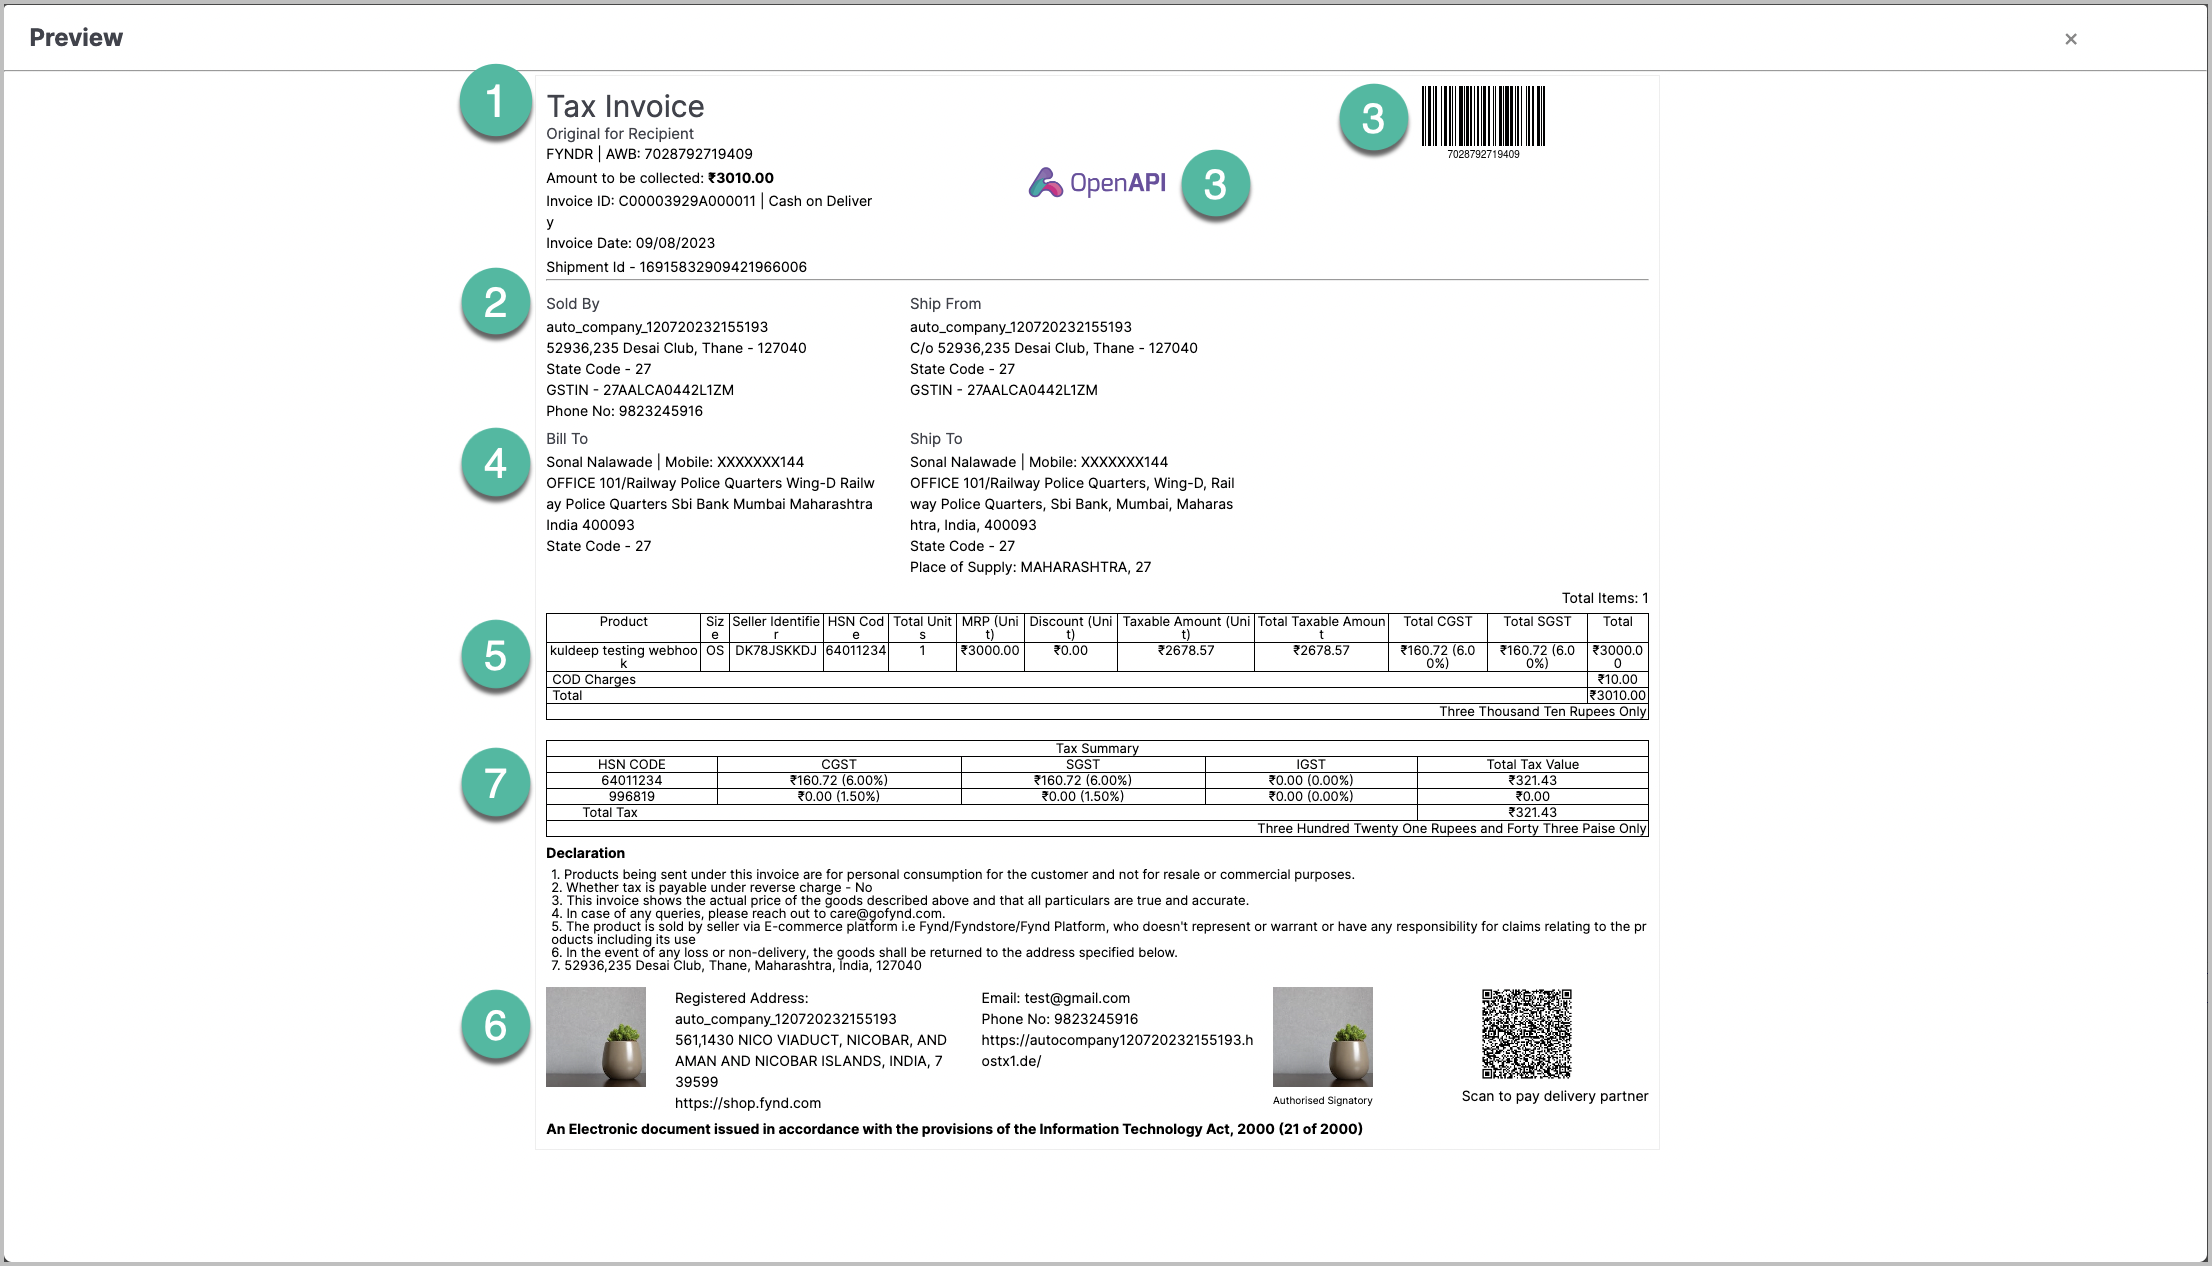
This guide explains how to customize every major element of your HTML invoice template using the built-in editor. It provides detailed, step-by-step instructions written in simple, non-technical language, with minimal code references, so even non-developers can comfortably configure the template.
The invoice title is the main heading displayed at the top of your invoice. It usually appears as “Tax Invoice” by default. To change this, scroll through your template and locate the heading tag that defines the title. It typically looks like:
<h1 class="heading">Tax Invoice</h1>
You only need to change the text between the tags. For example, to rename it to “Sales Invoice,” simply replace Tax Invoice with your preferred title. No other formatting changes are needed. This update immediately reflects on the invoice and helps you align the document with your business or compliance requirements.
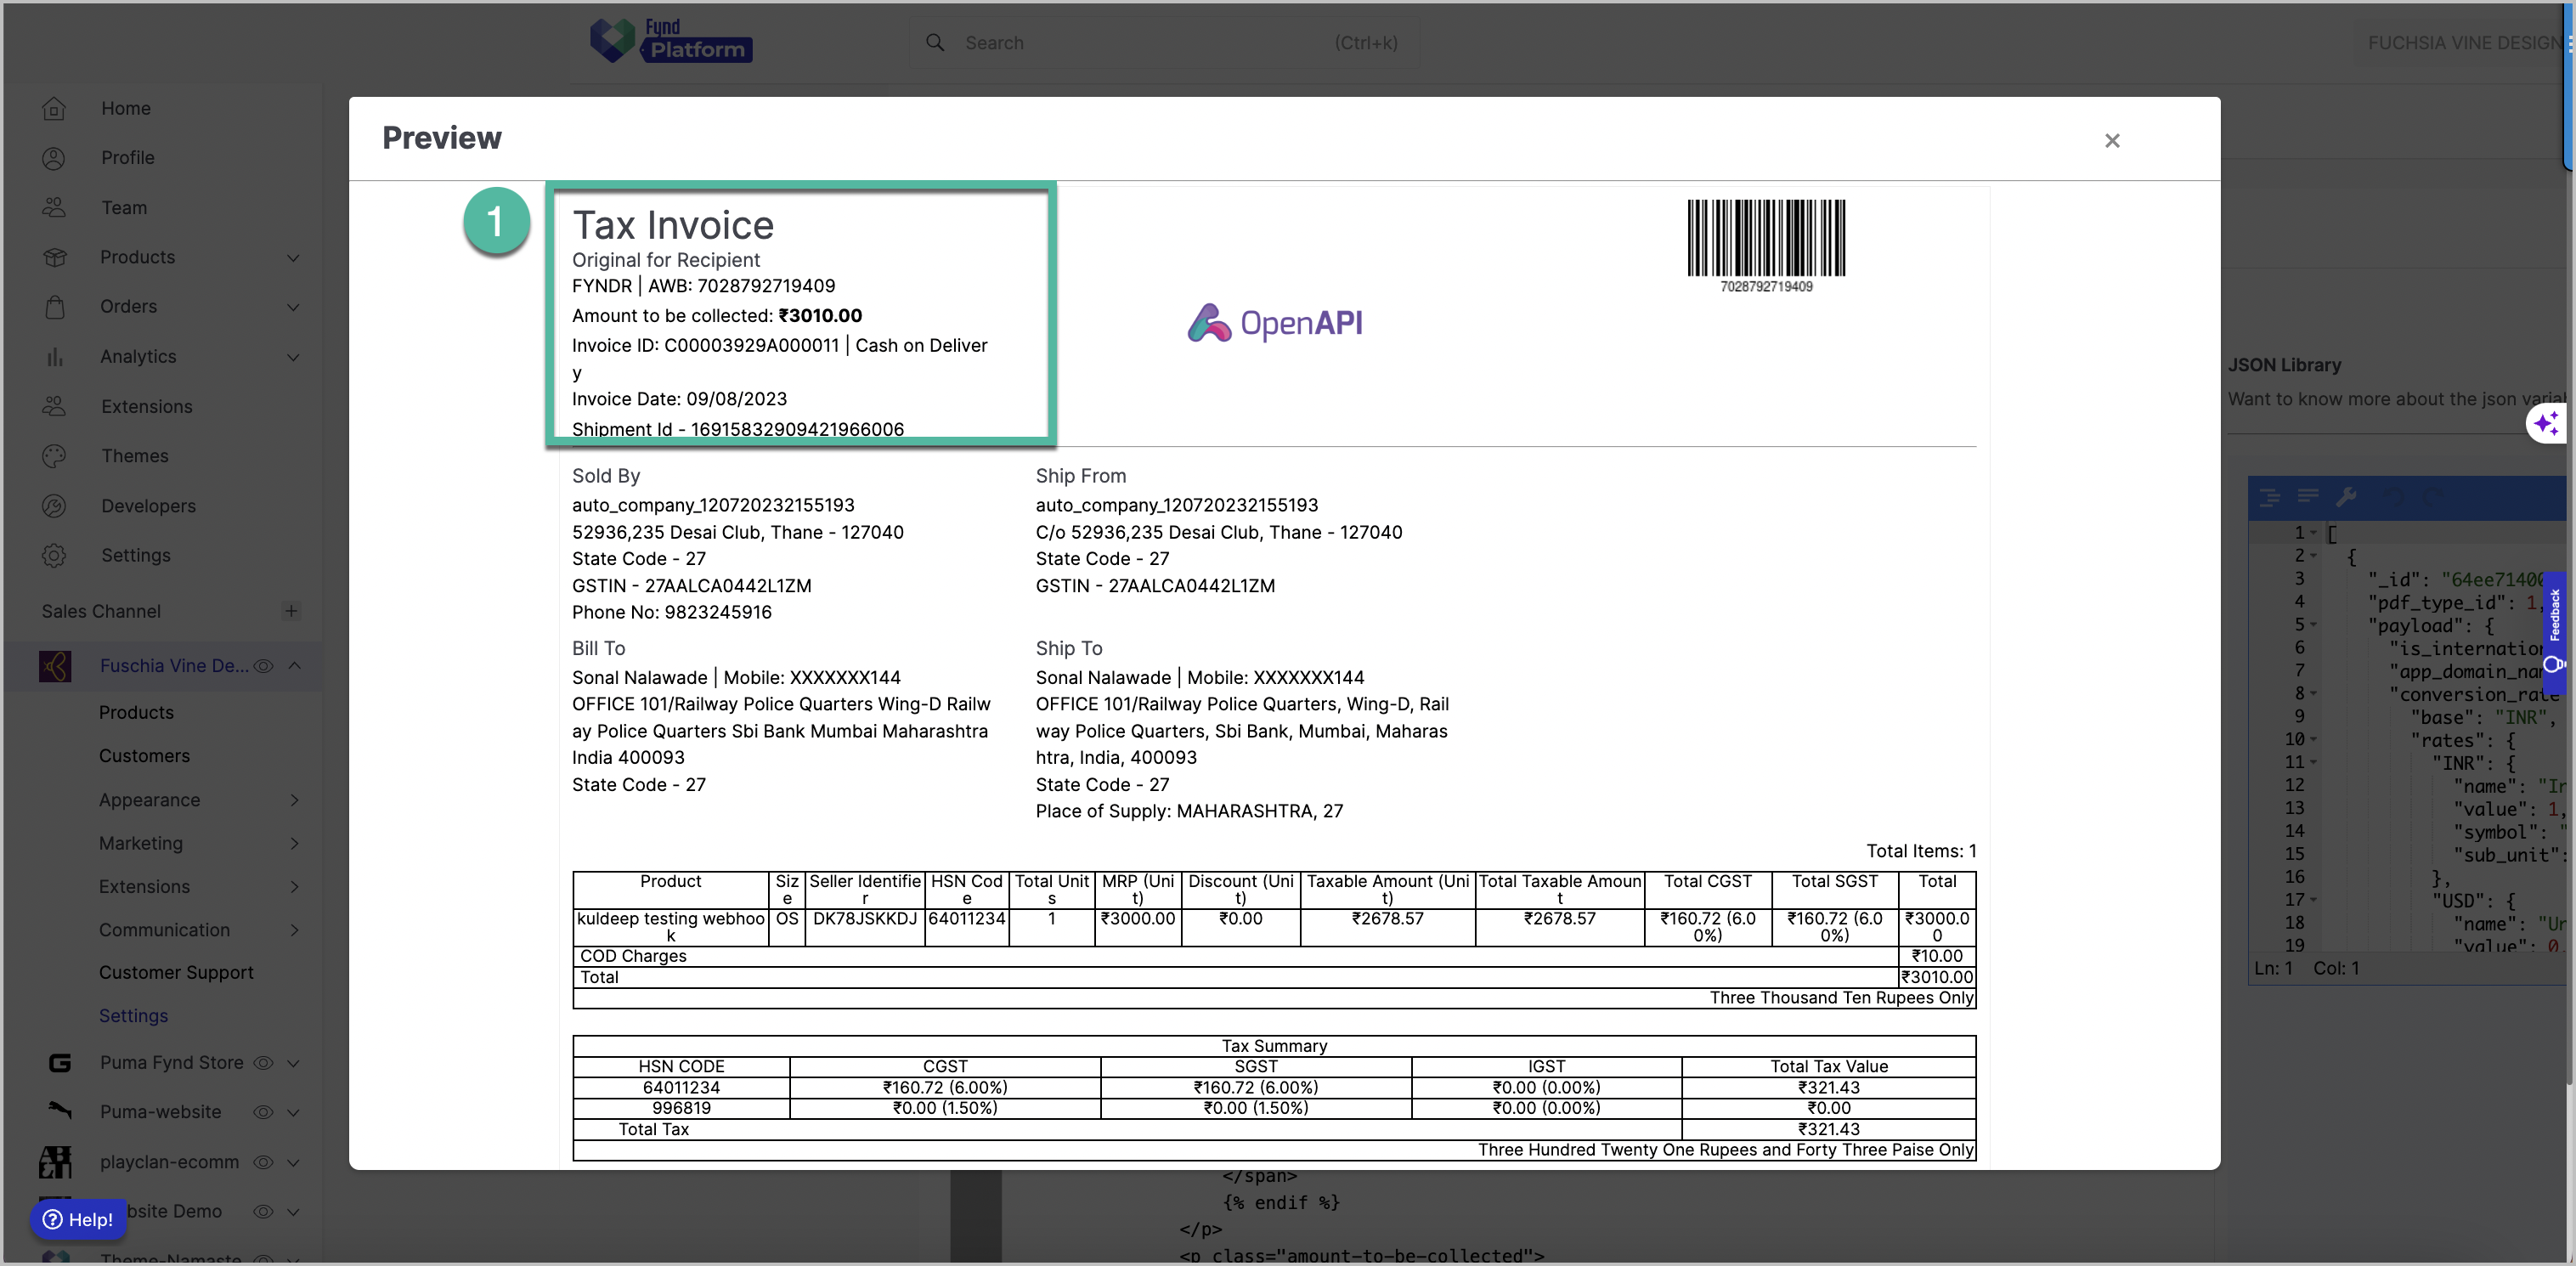
The header section contains important information like your company name, store address, invoice type, shipment ID, customer reference details, and more. Each part is controlled by small placeholder tags, usually written as {{ company_detail.name }} or {{ store_detail.address }}. To customize the header, look for these fields and replace the placeholder values with your actual business data. For example, changing the company name only requires updating the text inside a line such as:
{{ company_detail.name }} → Your Company Name
Similarly, you can update phone numbers, GST/VAT numbers, and address details. The invoice type also appears here in the same format as the main title, so feel free to adjust it to match your business terminology. If the template includes logistics-related details like AWB number, delivery partner, shipment ID, or IRN, these can also be modified, replaced, or removed depending on your operational needs.
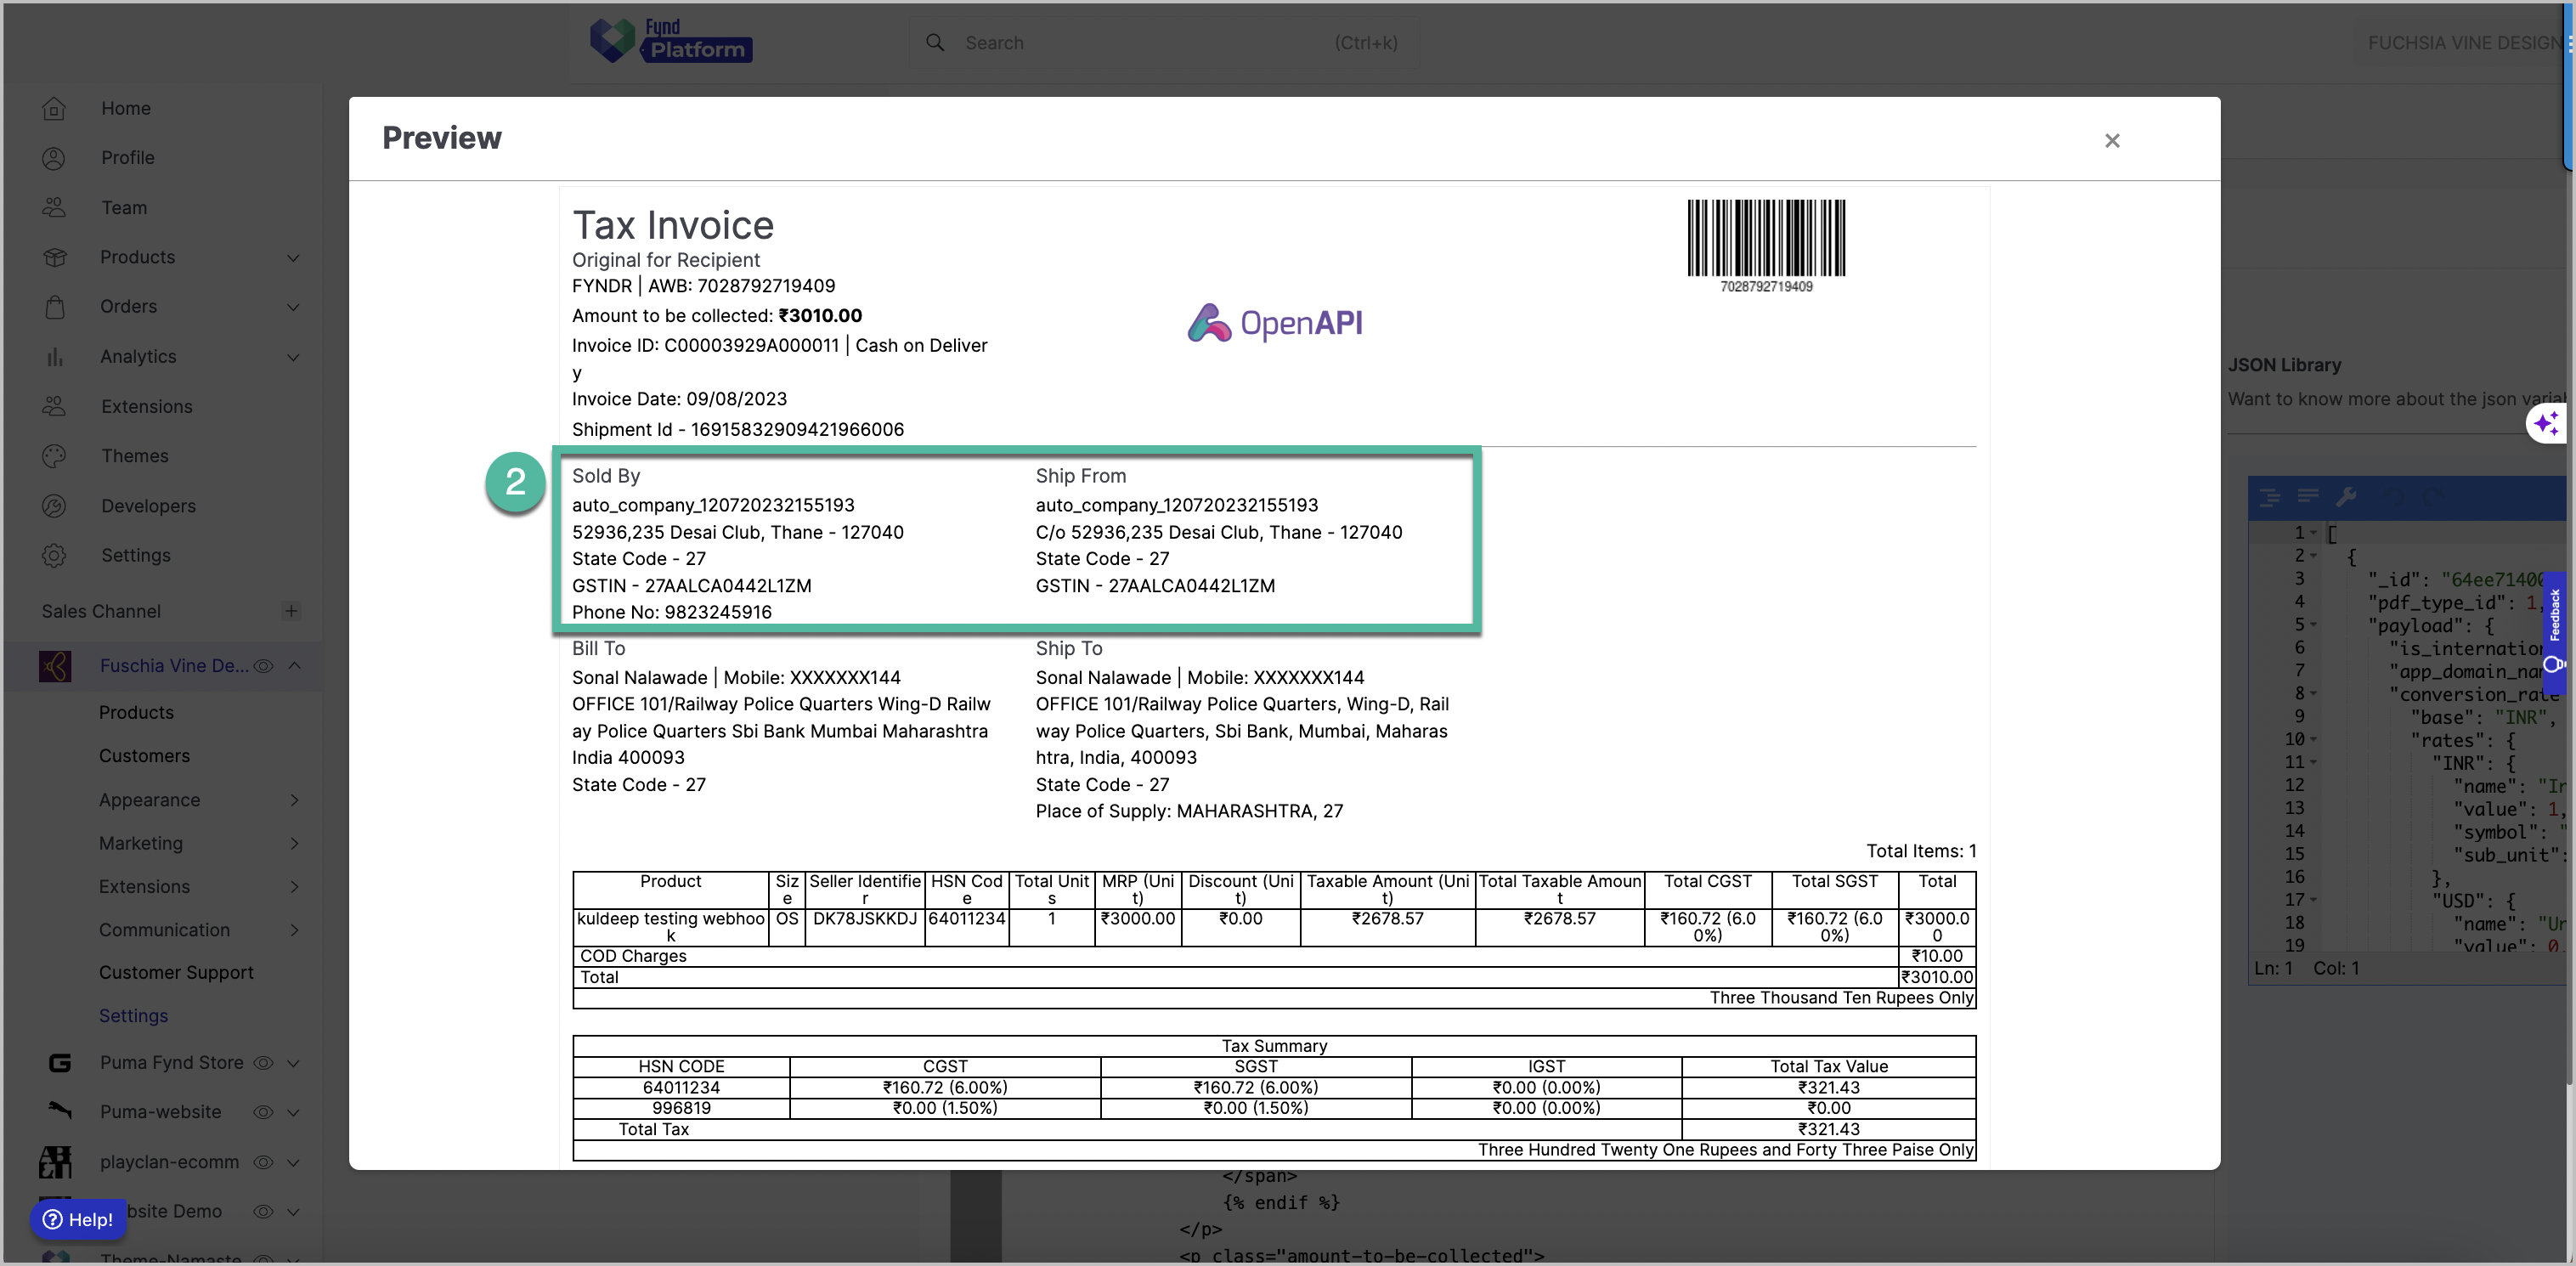
Your invoice can include visual elements like a brand logo and a QR code. These enhance professionalism and help customers quickly verify the invoice or access payment or compliance information.
Find the small image tag inside the right-side header block. It usually appears like:
<img src="your-logo-source" alt="Logo" />
Replace the src value with the path or URL of your own logo image. The alt text can also be updated to improve clarity, such as “Your Company Logo.” Ensure the image is properly sized; otherwise, the layout may change. Most logos display well at 80–120 px width.
The QR code section is easy to identify—it is usually wrapped inside an element like <div id="qrcode">. Inside it, you’ll see an image tag that looks like:
<img src="qr-code-source" alt="IRN QR Code" />
Replace the src value with your new QR code image. This can be a payment QR, an IRN QR, or any other code your business requires. A caption such as “IRN QR” or “Payment QR” is displayed below it and can also be edited.
The Seller and Customer sections are typically presented side-by-side. These blocks use placeholder tags to fetch dynamic business information. You can replace these placeholders with static text or updated variables based on your setup.
You will find entries like:
{{ company_detail.name }}{{ store_detail.address }}{{ company_detail.phone_no }}
Replacing these values allows you to define the correct business name, store address, customer support numbers, GST/VAT numbers, or any additional compliance information. You may also add new lines, such as warehouse codes or branch identifiers, if relevant.
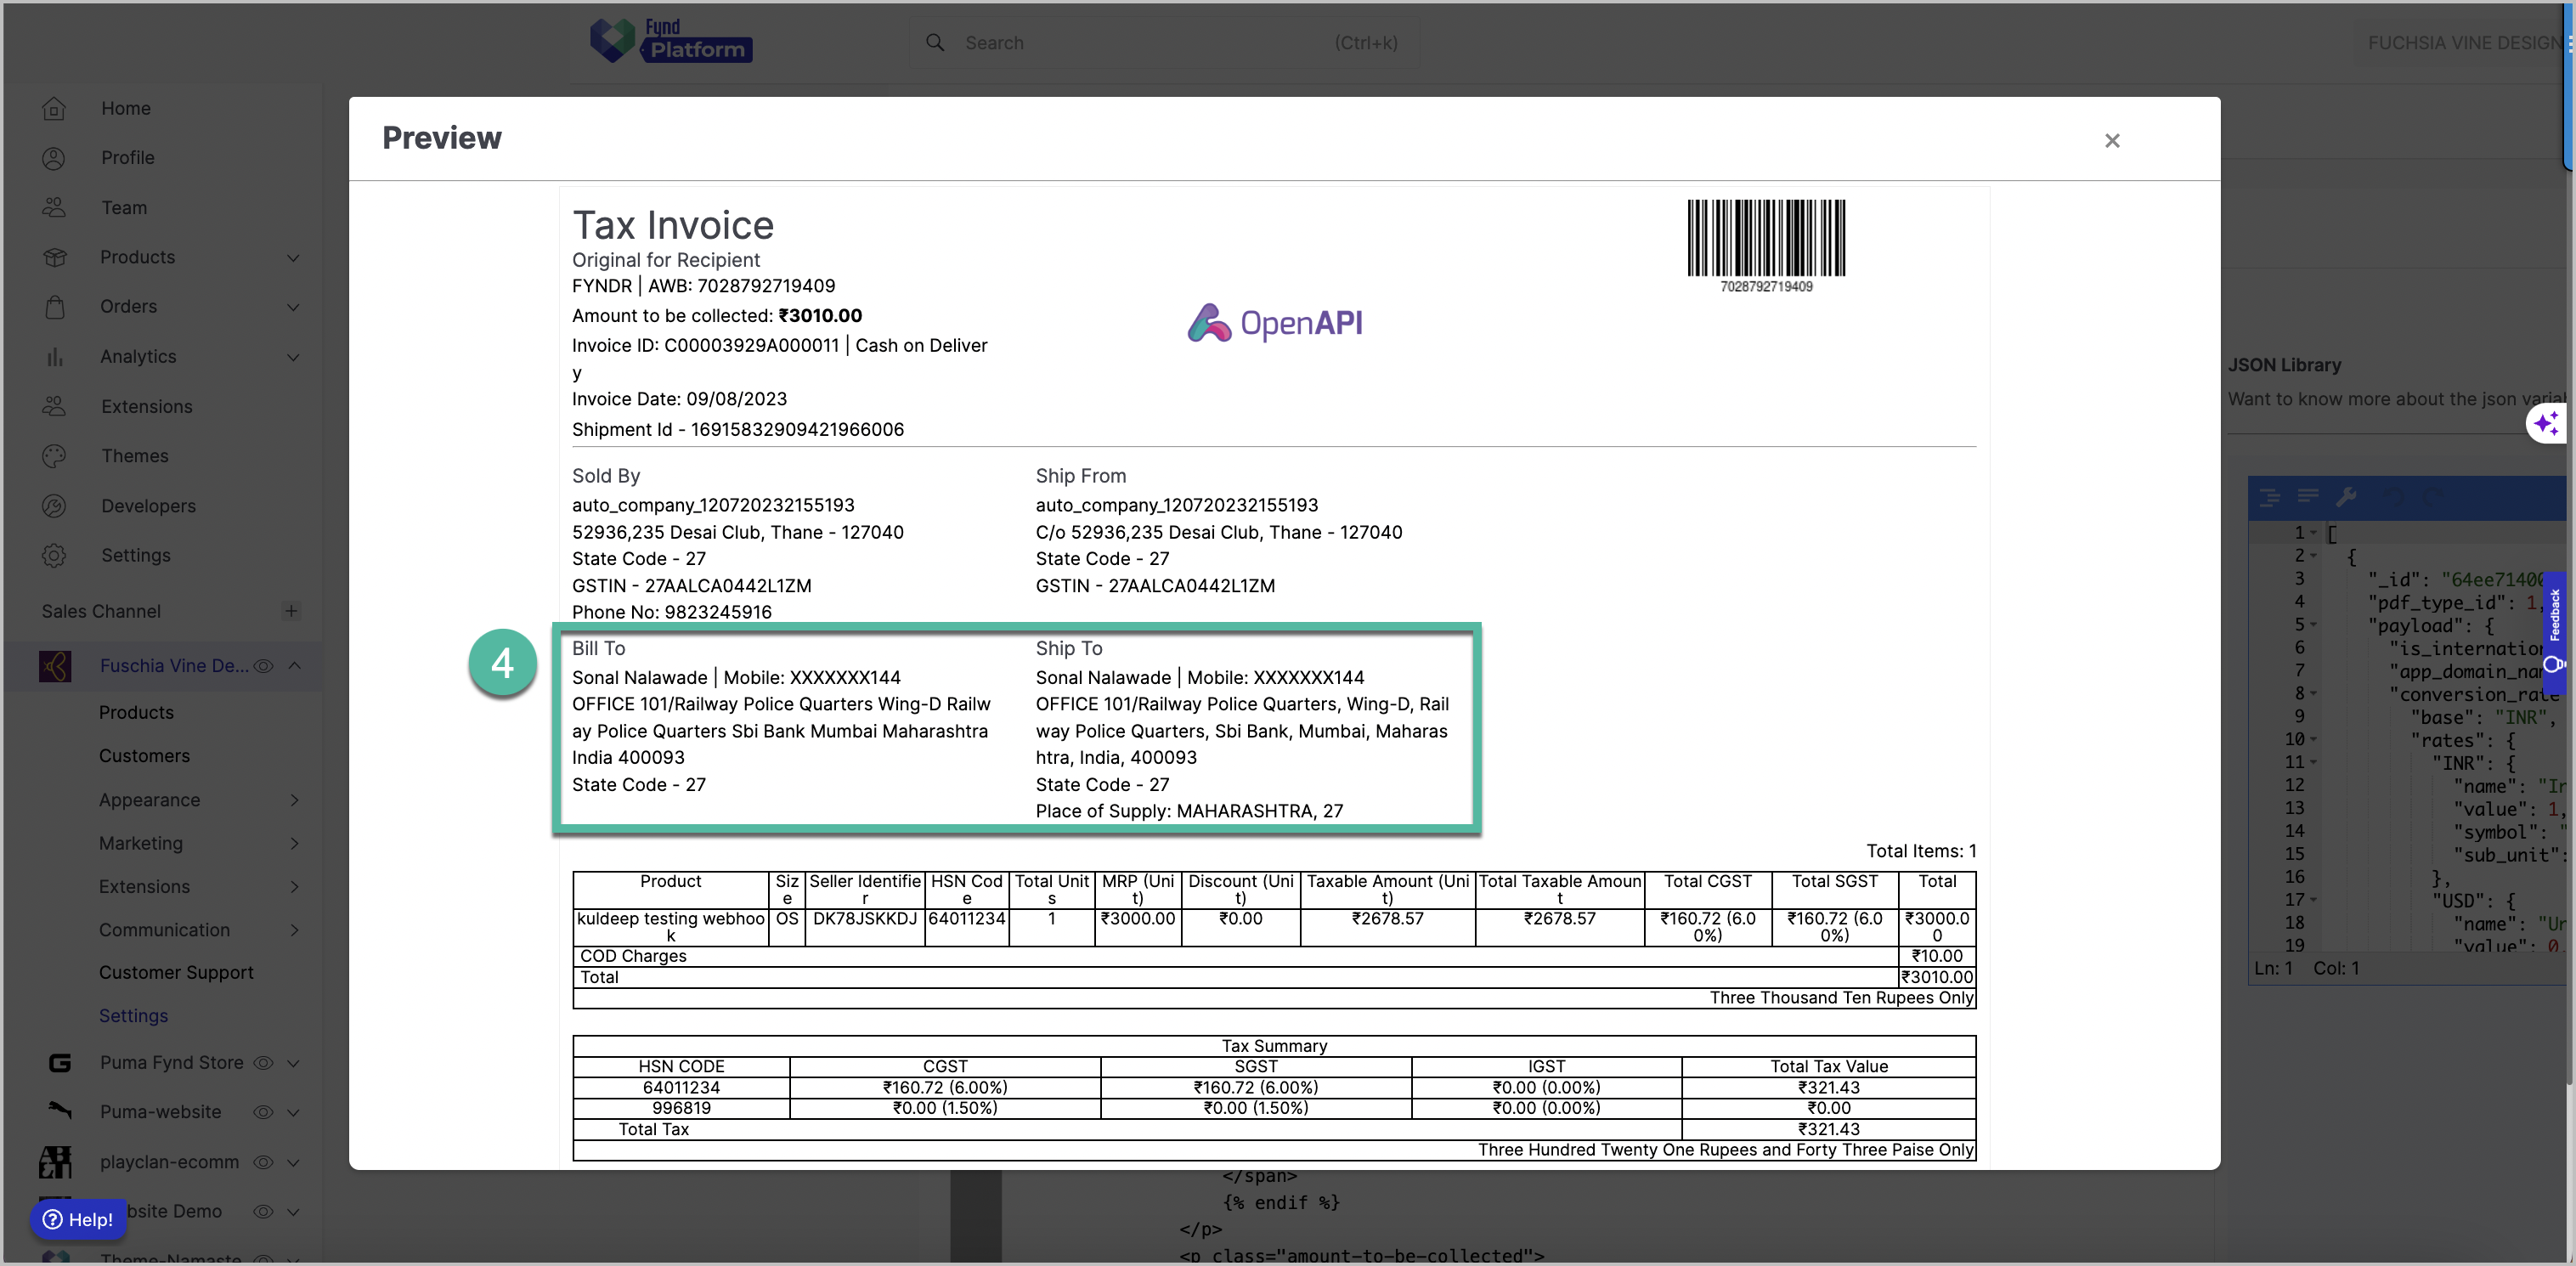
Customer information appears under headings like “Bill To” and “Ship To.” Similar placeholders are used:
{{ customer_billing_detail.name }}{{ customer_billing_detail.phone_no }}{{ customer_billing_detail.address }}
Replace these placeholders with formatted information as required, or keep them dynamic if your platform auto-fills them. You can also customize headings such as “Bill To” or “Ship To” to match your format preferences.
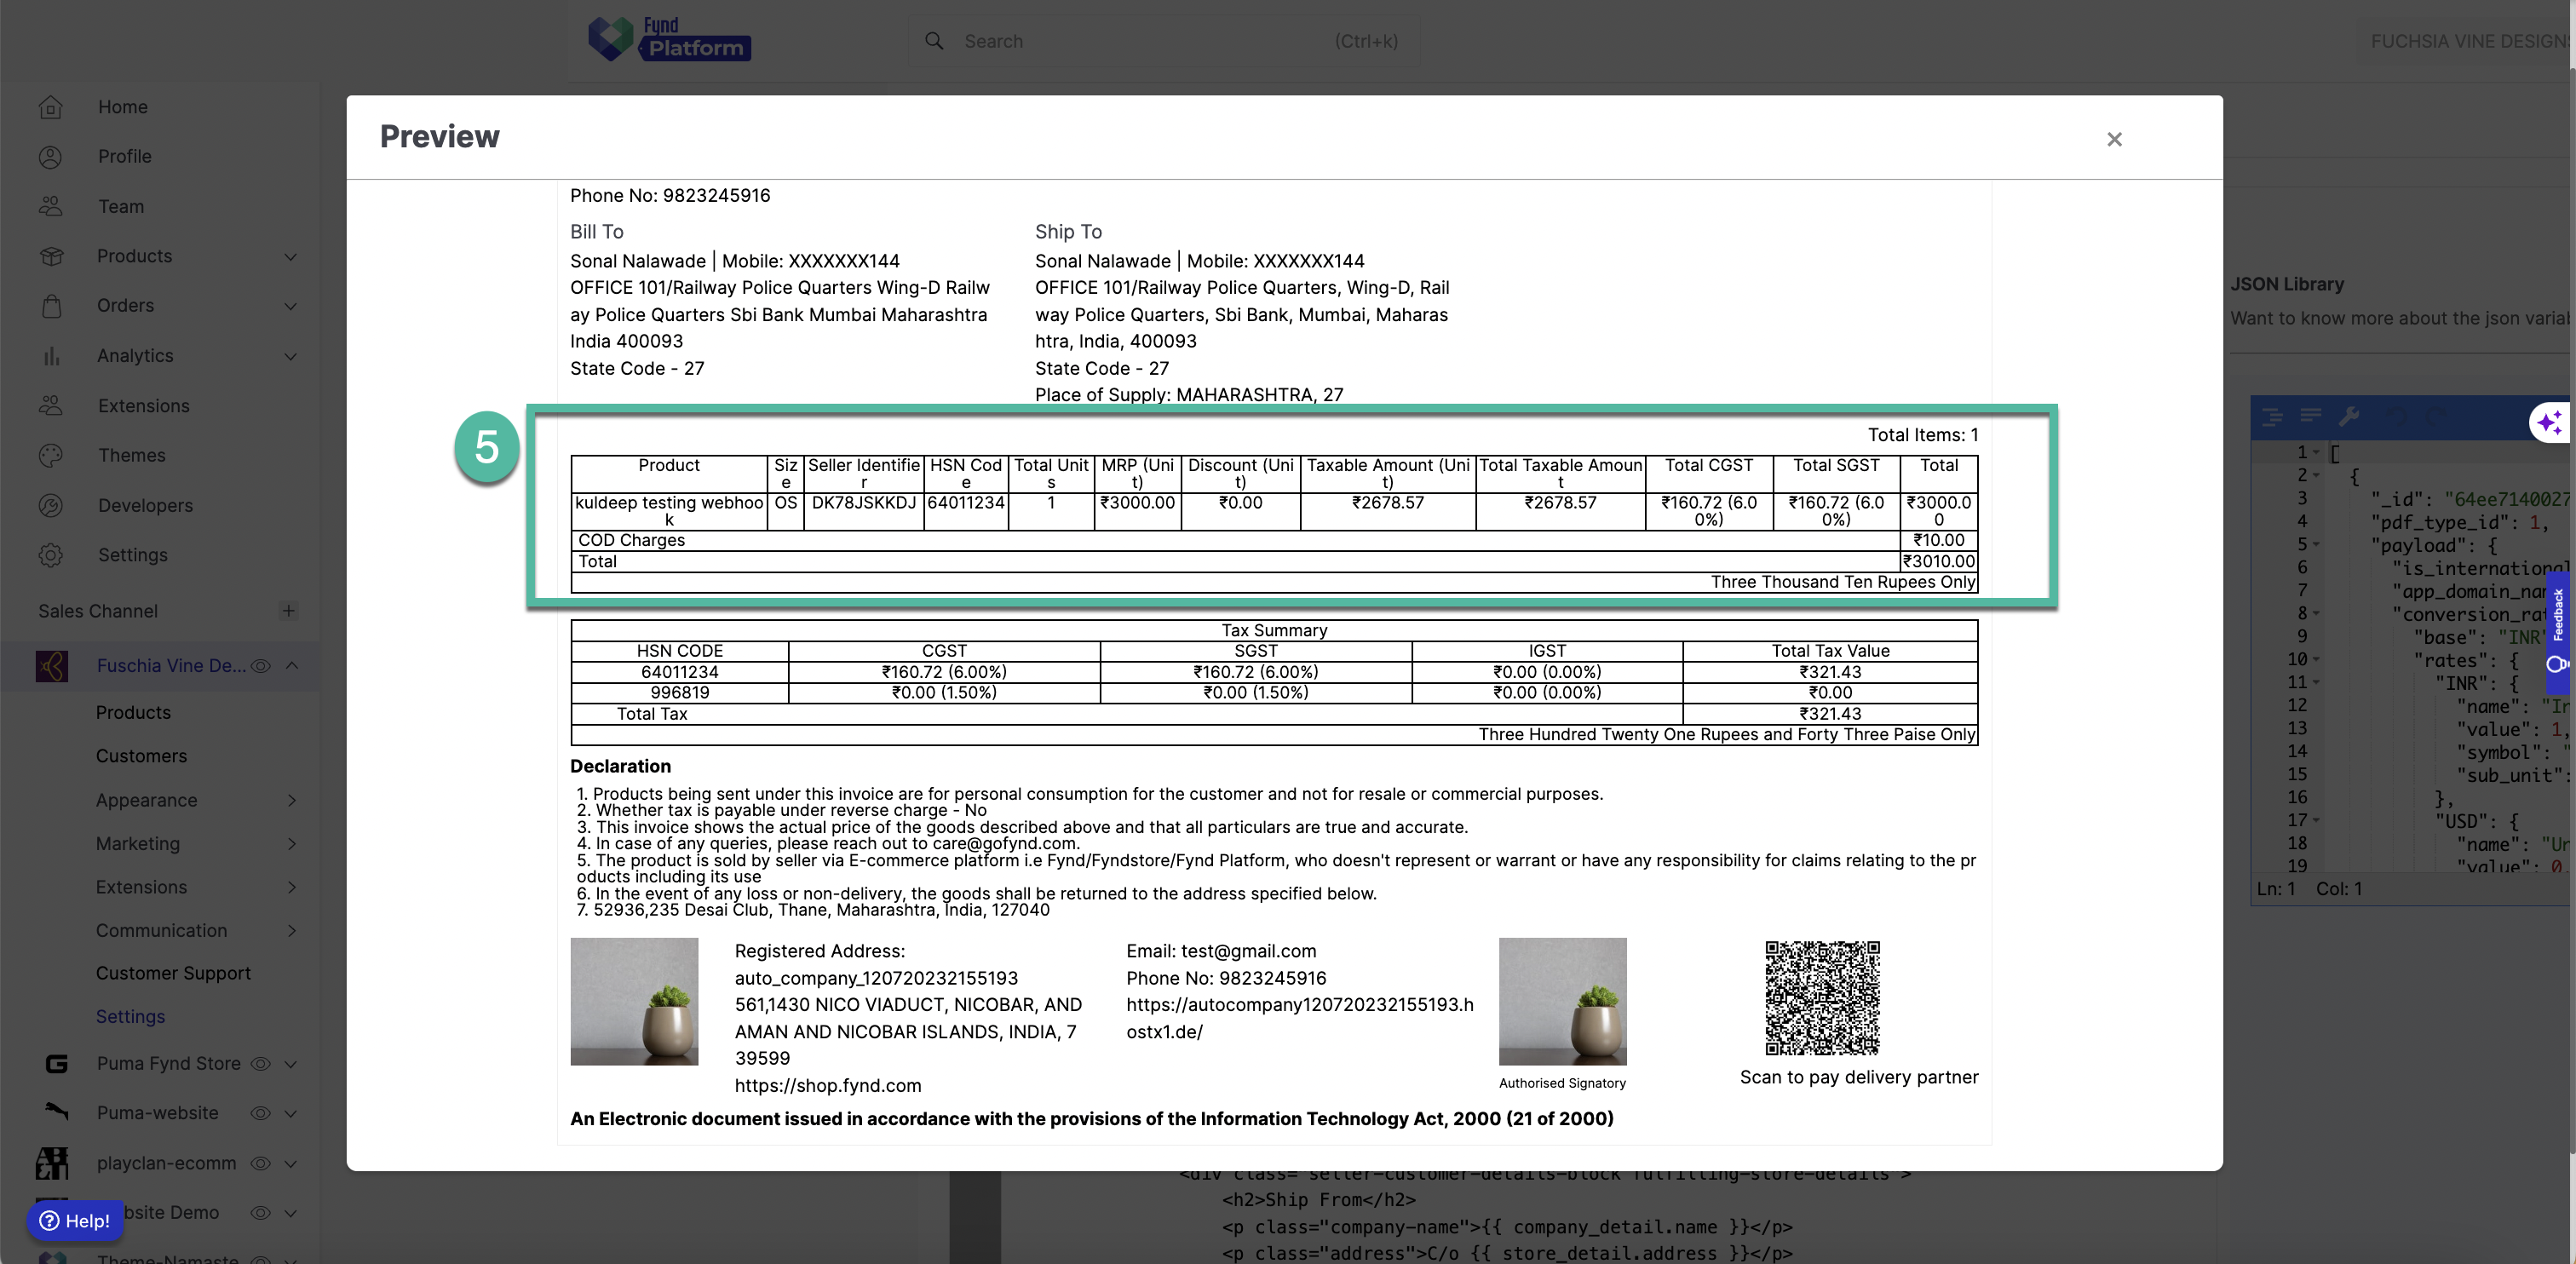
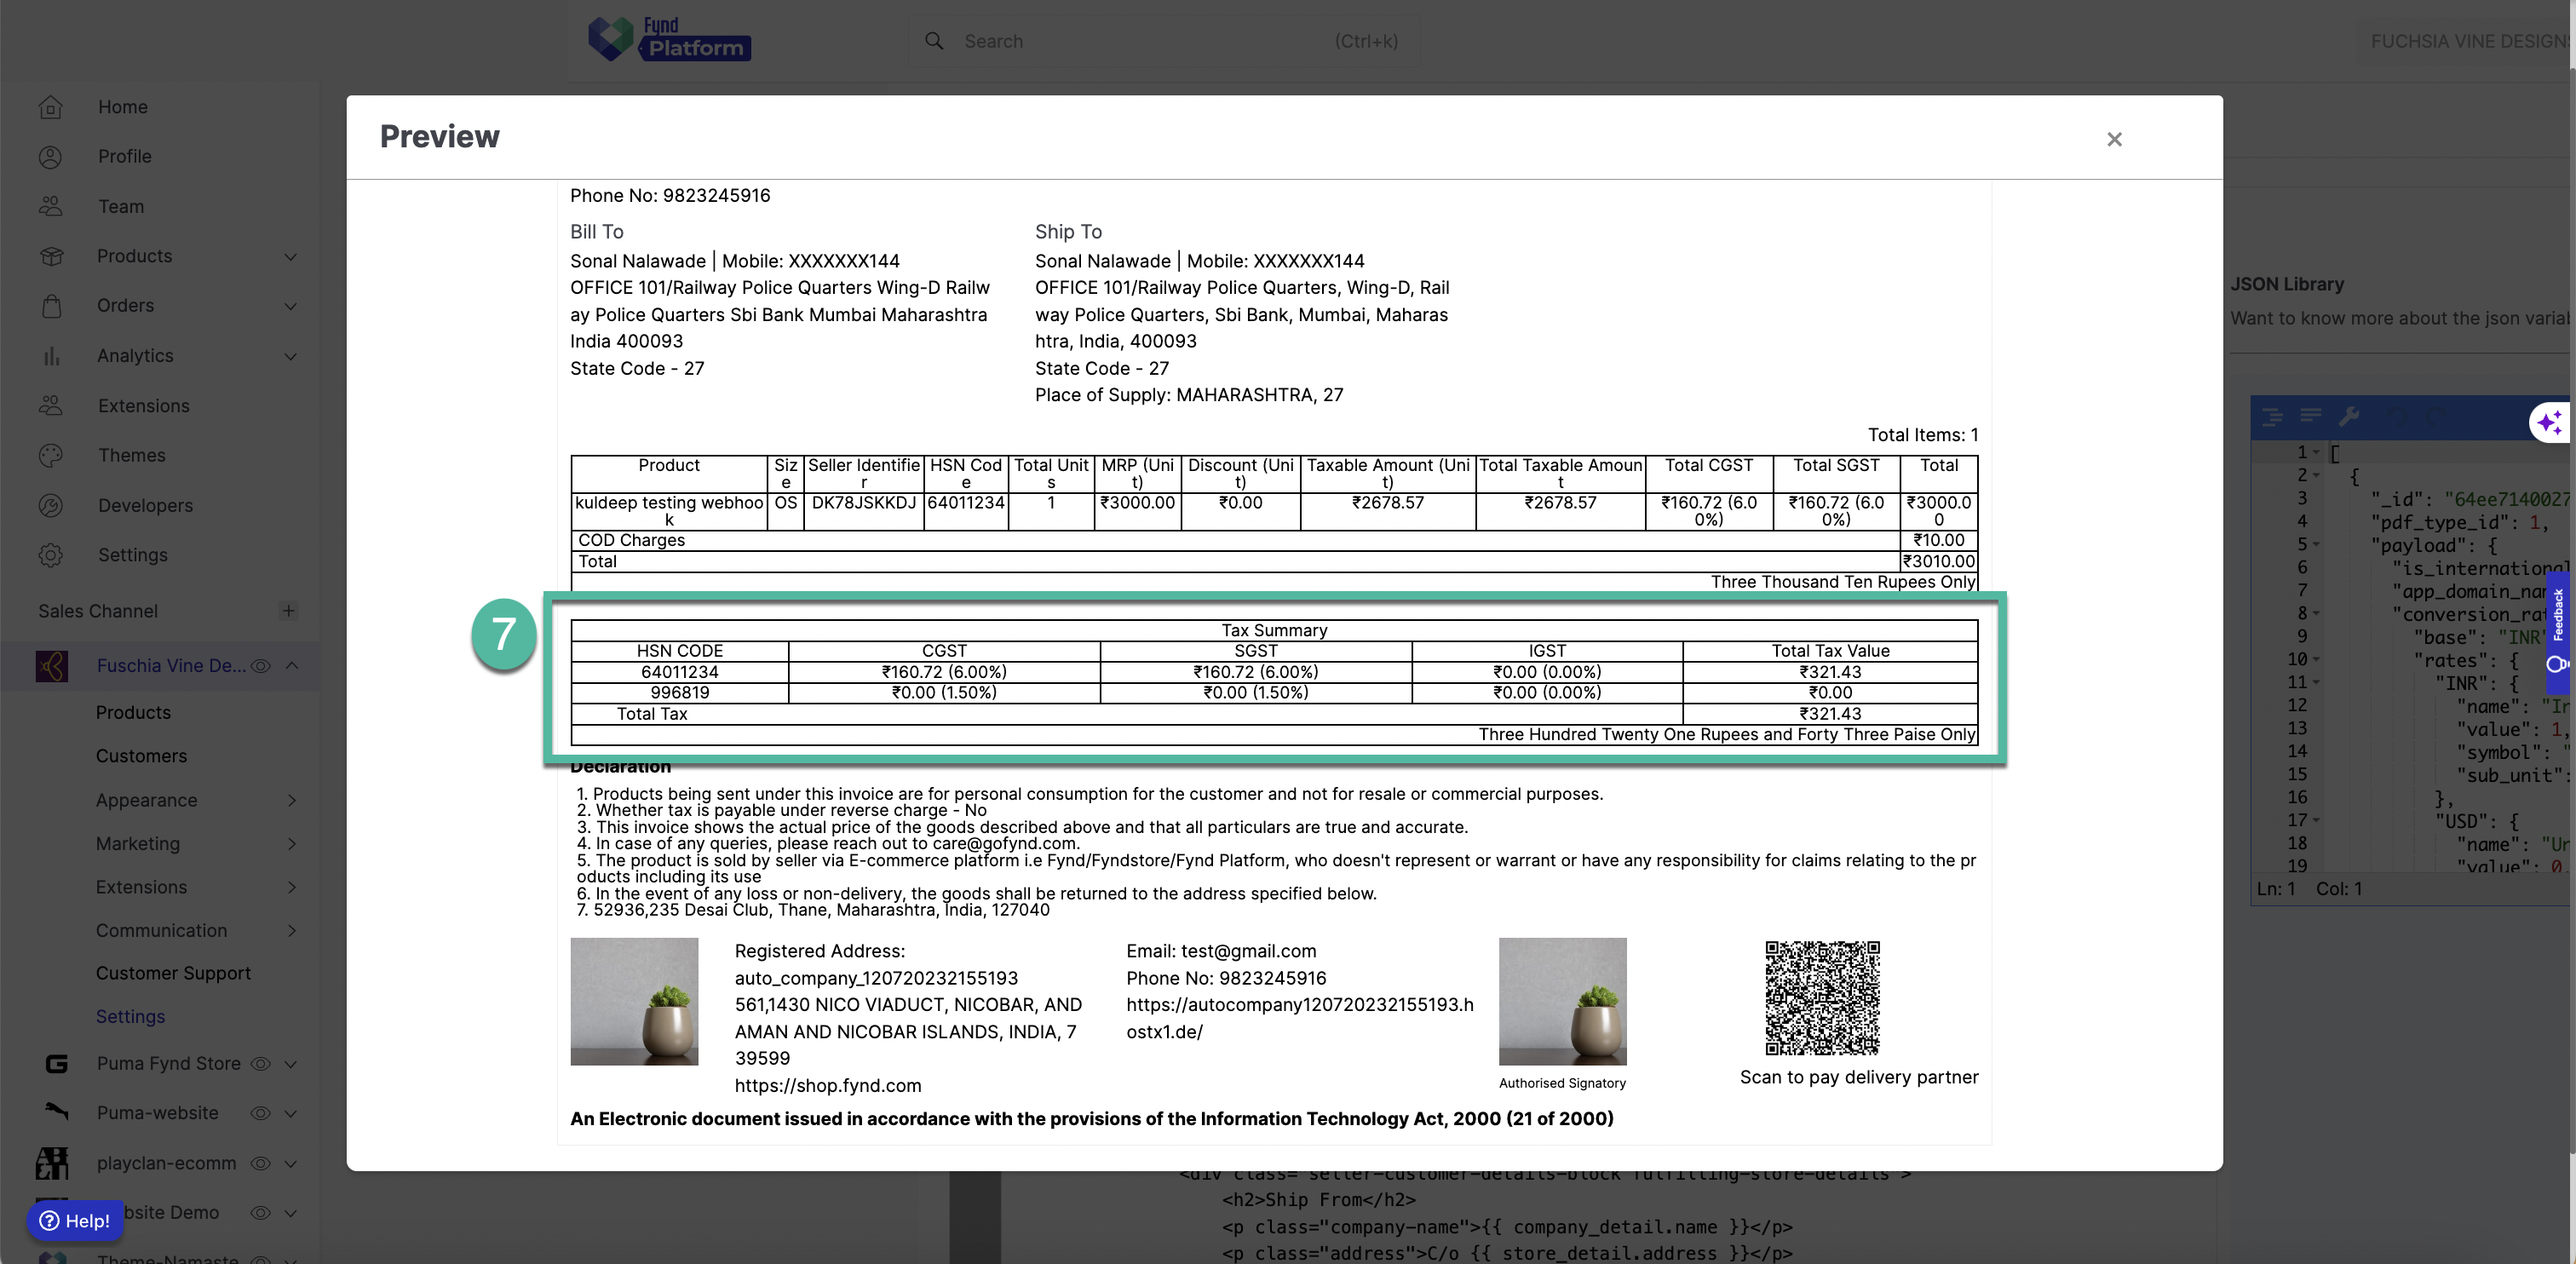
This section contains a table that lists all items purchased in the order. Although the table contains many columns, each one is straightforward to update. The labels—such as Product, Size, Seller Identifier, Quantity, Discount, Taxable Amount, VAT, and Total—can all be renamed or rearranged.
Inside the table, each product field is represented using placeholders such as:
{{ product.name }}{{ product.total_units }}{{ product.total }}
To modify the product details layout, adjust the column names, formatting, or remove columns you don’t use. For example, if your business does not use “Seller Identifier,” you may remove that column header and its corresponding data cell. Currency symbols (₹, $, AED, etc.) also appear inside these placeholders and can be changed as needed.
The table automatically repeats for each product in an order, so you don’t need to modify the structure for multiple items.
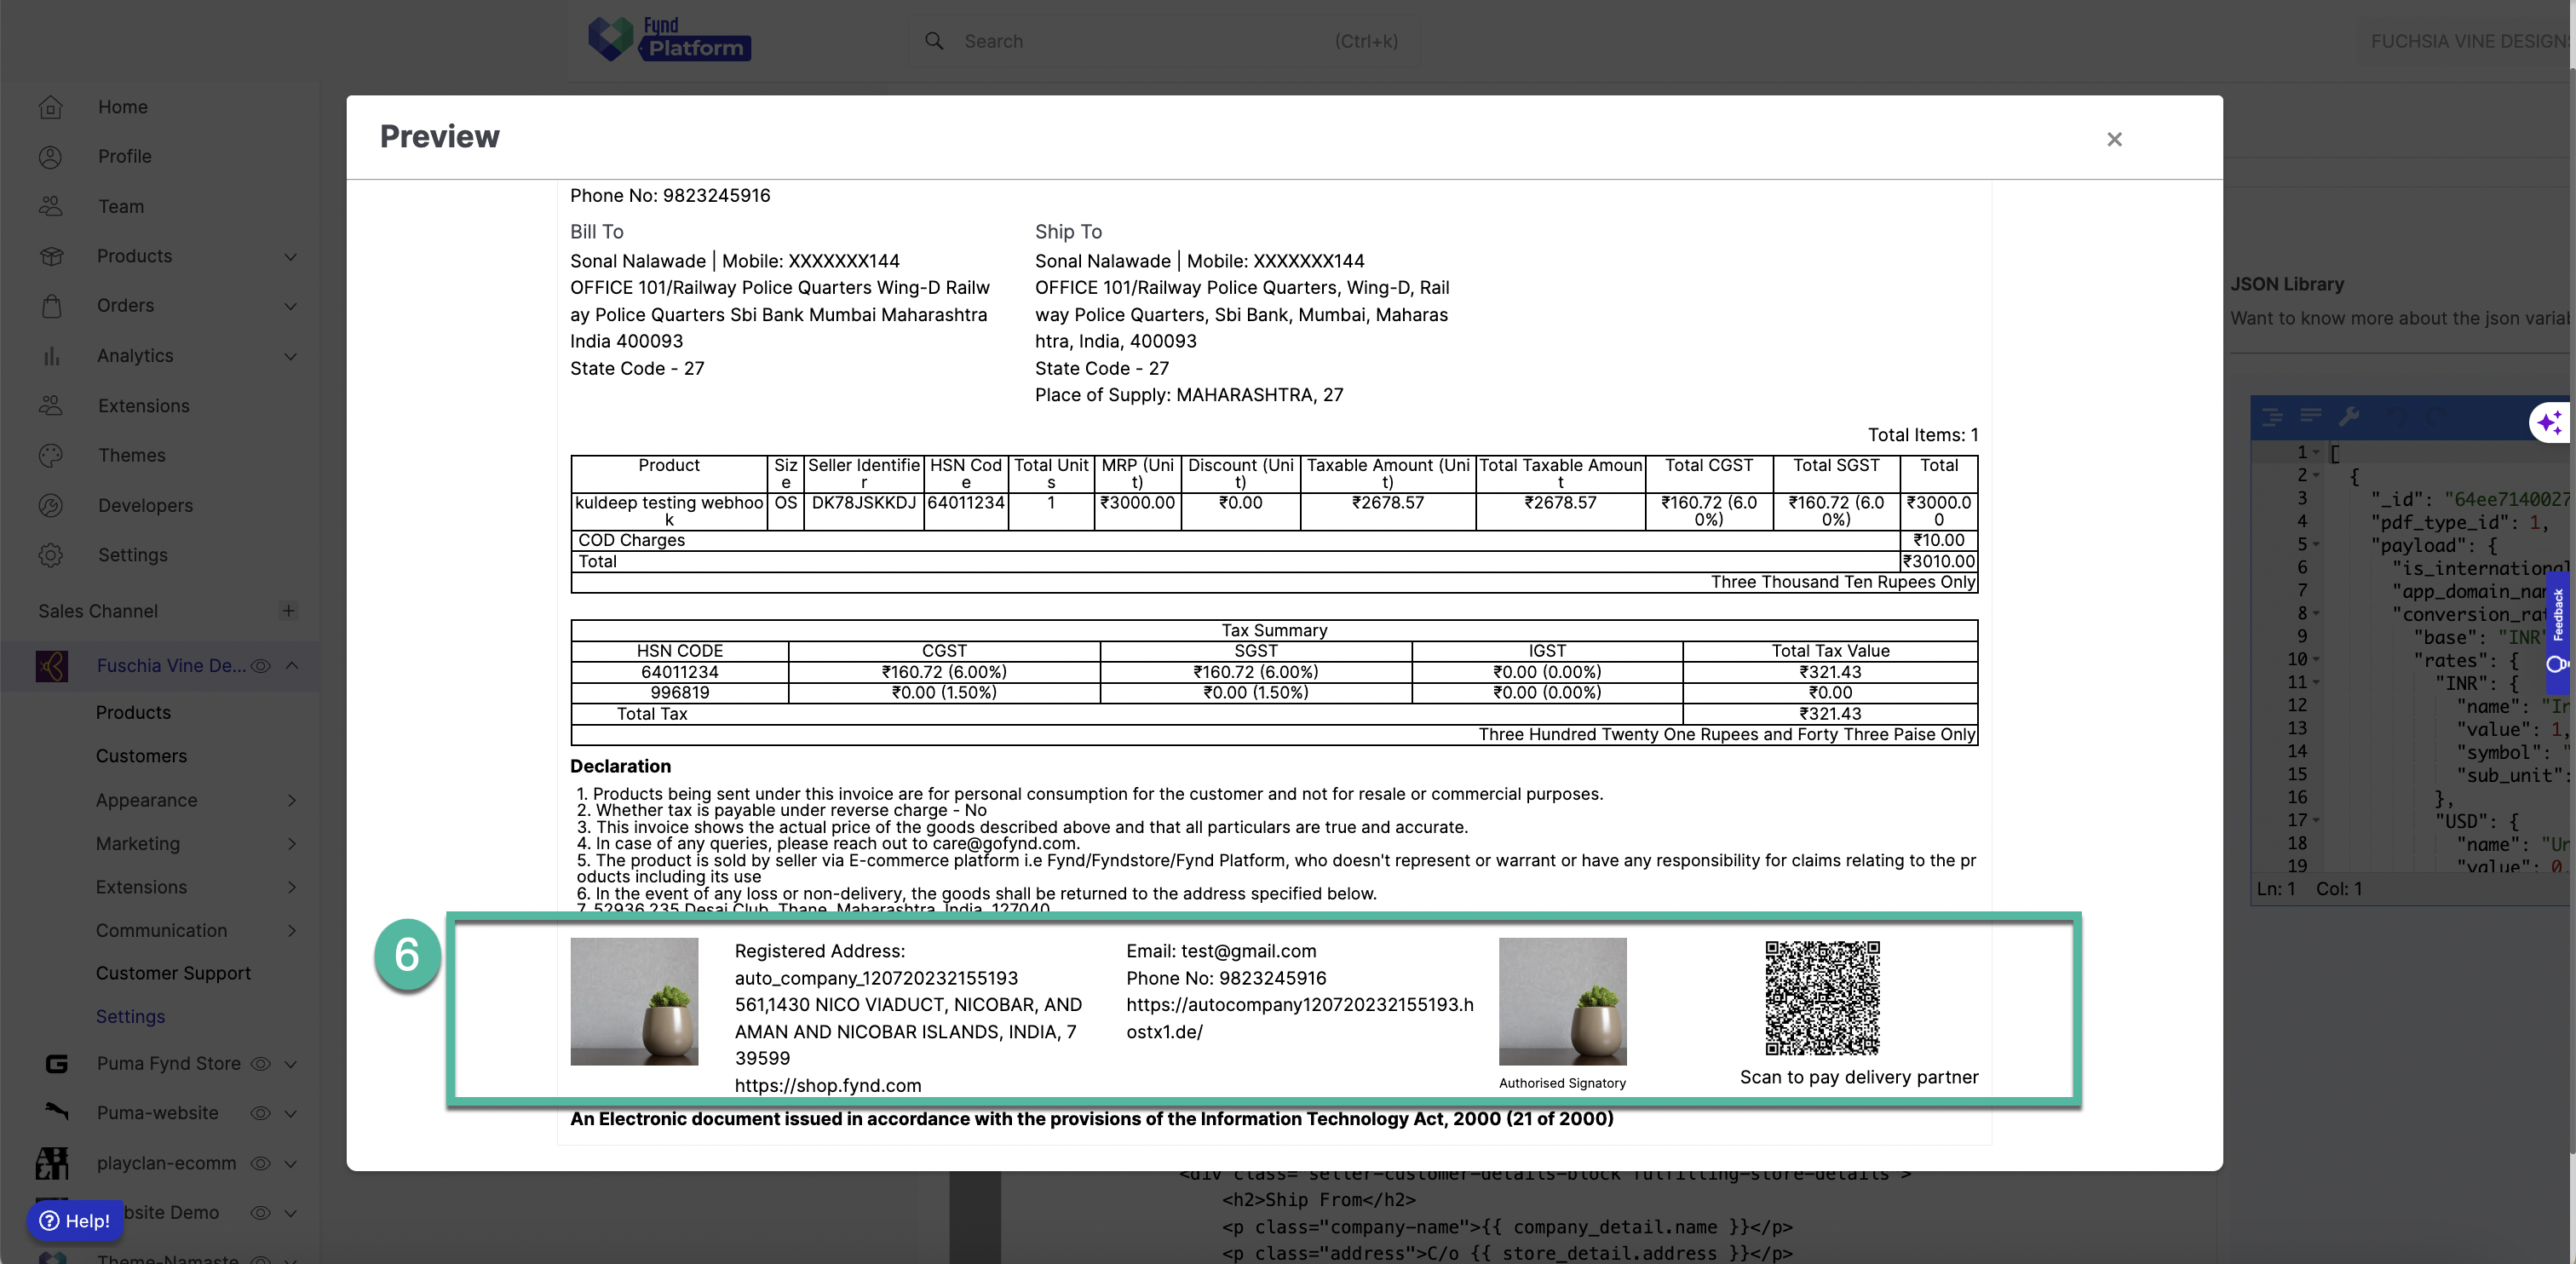
The footer is the closing section of your invoice and typically includes your brand logo, registered company address, contact details, website link, and sometimes a digital signature. These fields appear as placeholders like:
{{ registered_company_detail.address }}{{ company_detail.email }}{{ company_detail.phone_no }}{{ company_detail.website_url }}
You can simply replace the placeholder values with your actual information. This ensures your invoice complies with business registration standards and keeps customers informed. If your template includes a brand logo here, update its image source using the same approach described in the header section.
If a digital signature is required, you’ll find a small image tag representing the signature. Replace its src value with your signature image. The “Authorized Signatory” label can also be customized.
The payment section explains how the order was paid—whether online, via COD, through a wallet, by card, or using any other method. This block includes placeholders such as:
{{ payments[0].date }}{{ payments[0].transaction_id }}{{ amount_paid }}{{ payment_type }}
You can edit the labels, modify the displayed payment method name, show or hide the transaction ID, or rewrite the structure to make this section clearer. For example, if you prefer “Payment Mode” instead of “Mode of Payment,” you can change the label directly. If multiple payment methods were used (such as split payments), the template may loop through each method—this can be simplified or expanded based on your needs.
Some templates hide payment details for COD orders. If you want to always show or always hide them, simply adjust the conditional text around that section.
This invoice template is designed to be flexible and can be adapted to suit most business formats. Every field is editable by changing the text inside small placeholder tags or modifying the labels around them. Whether you're altering branding, adjusting compliance fields, reorganizing product details, or personalizing the footer, the process requires only simple text and label updates—no deep coding knowledge is necessary.
When customizing, always preview the output to ensure your changes appear clean and properly aligned. Once finalized, your updated invoice template will reflect your brand identity and present information clearly to your customers.