Fynd Migrate helps sellers move their existing store data onto Fynd Commerce. Whether you are switching from another platform, need to bulk import or export records, or prefer describing what you want done in plain English to an AI agent, Fynd Migrate gives you a dedicated way to do it.
Once you have installed this extension, it will be available in the Extensions section on Fynd Commerce. Refer to the Install Extensions for the installation steps.
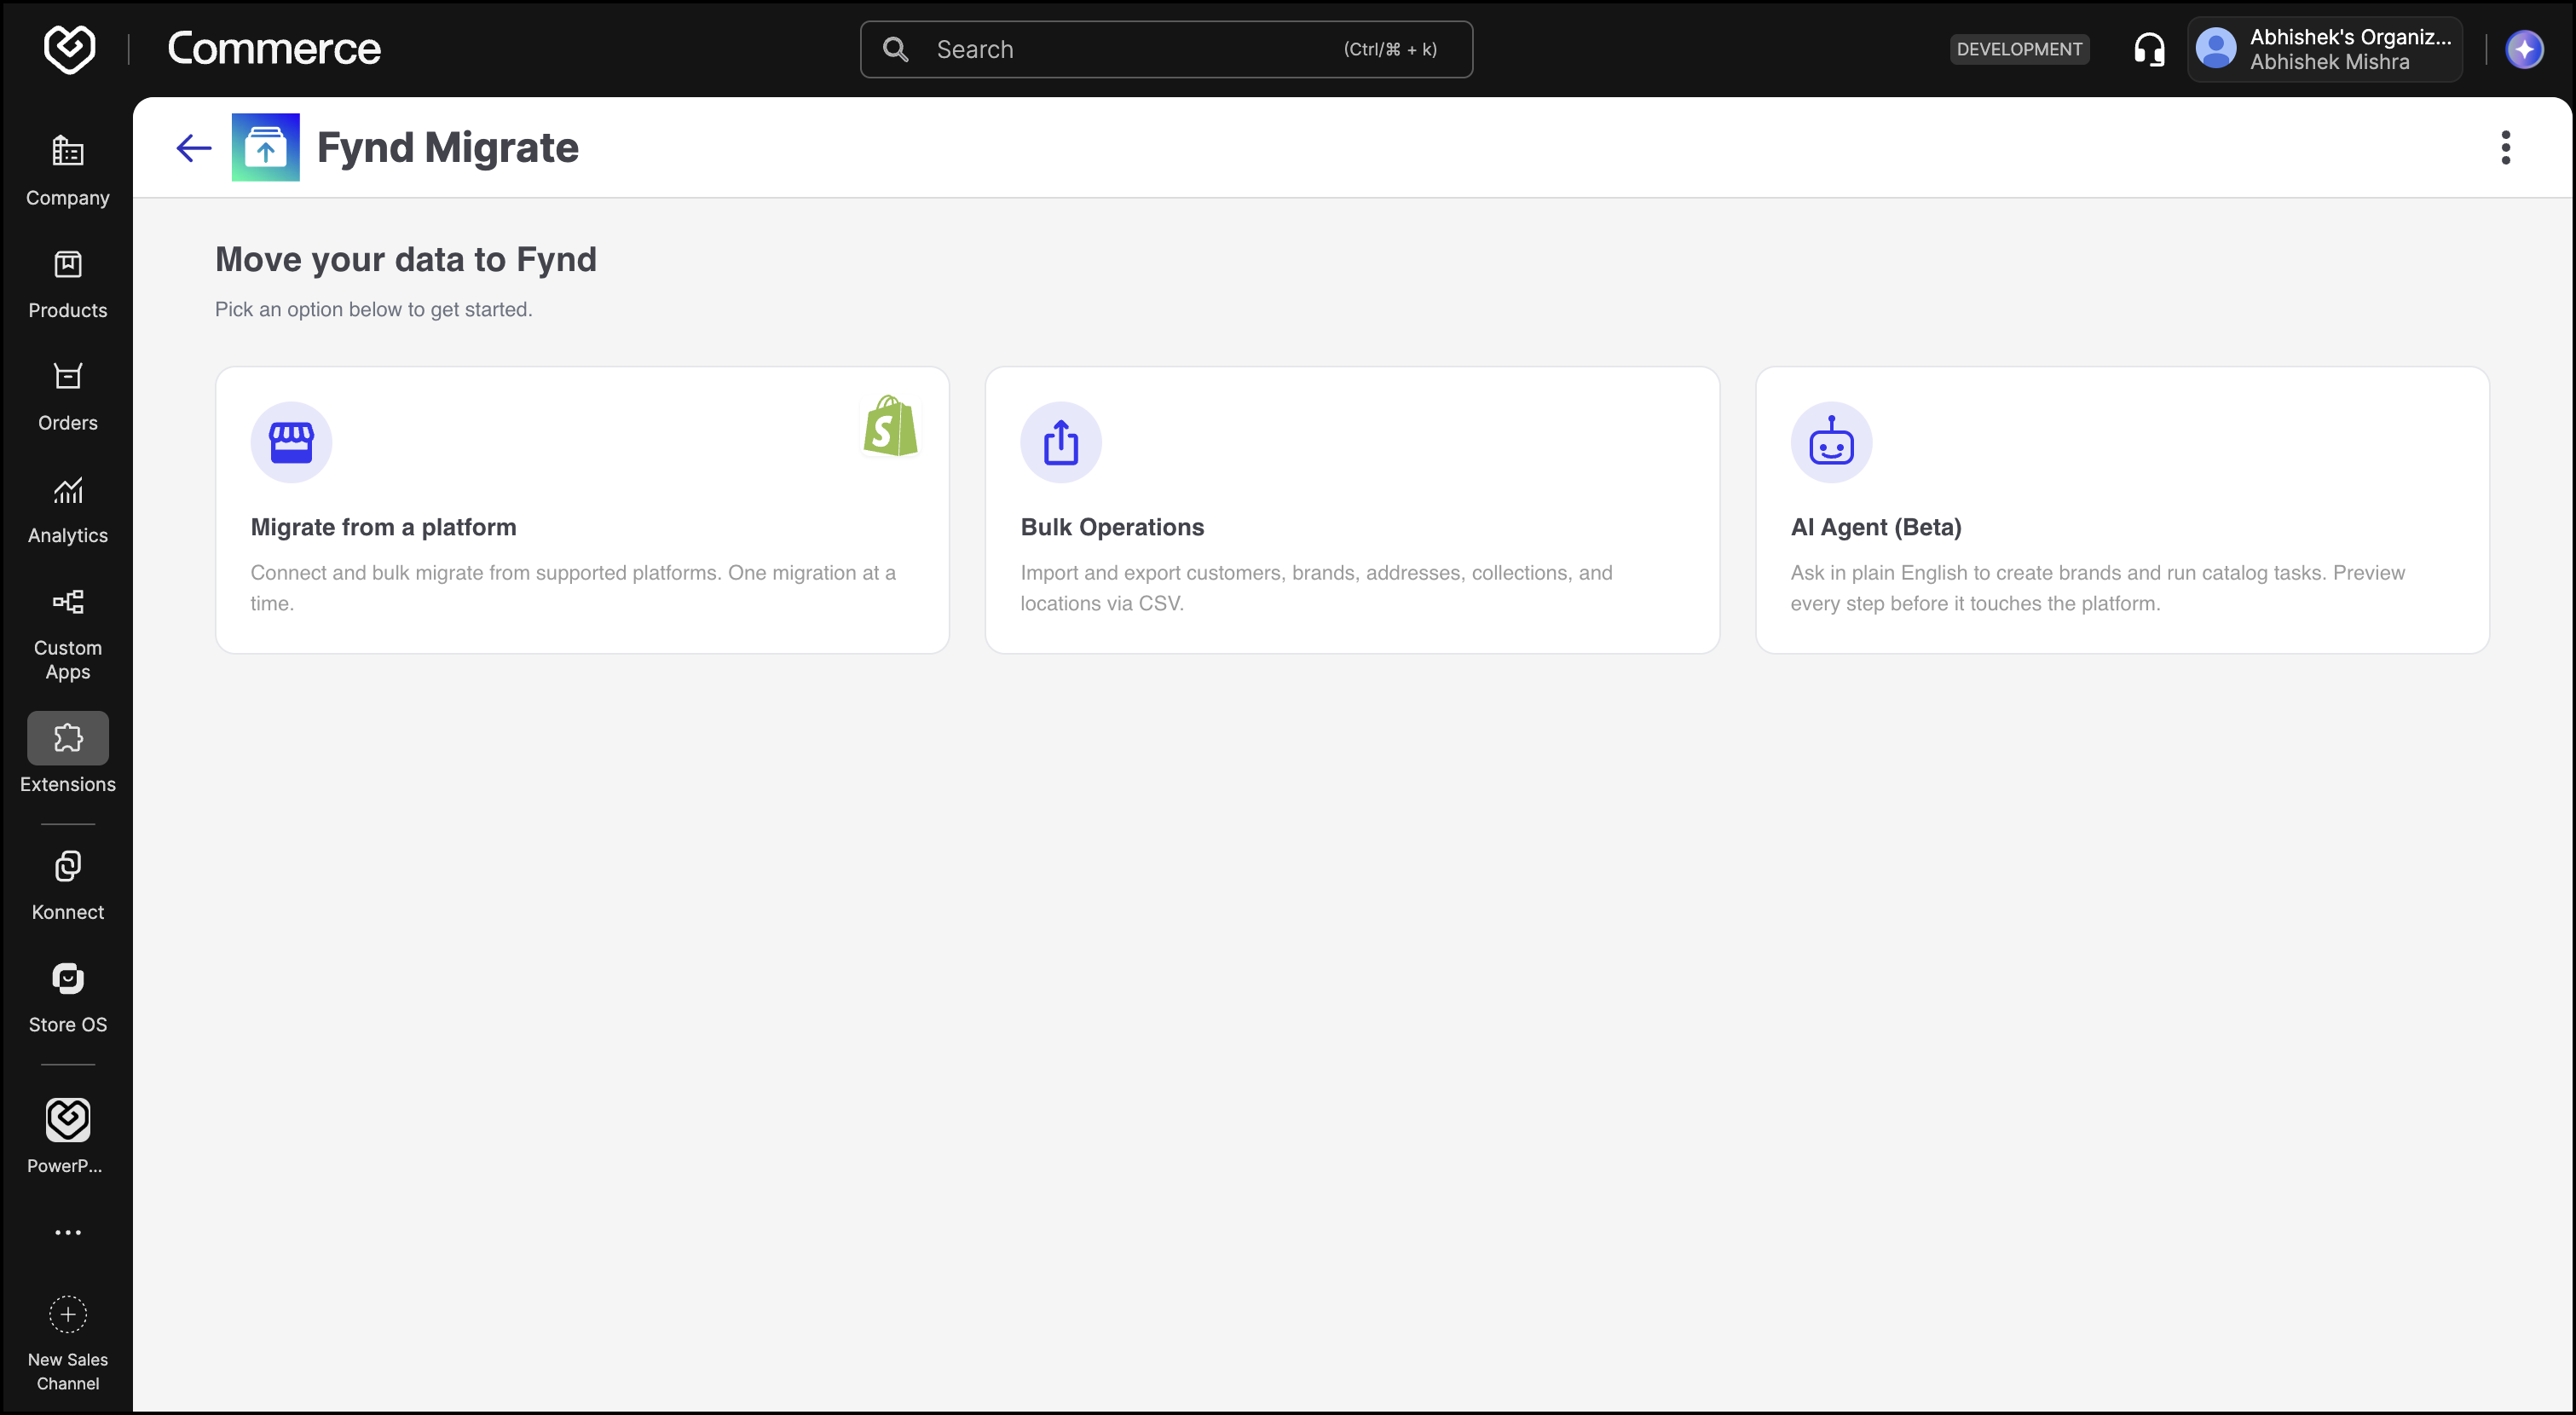
On the Fynd Migrate home screen, you can pick one of three ways to get started:
- Migrate from a Platform: for one-time migrations from another platform
- Bulk Operations: for day-to-day catalogue and customer updates. It does not require reconnecting to a source platform.
- AI Agent
Use this option to connect an existing store and migrate its data to Fynd Commerce in a single, guided run across six steps: Configure, Select Entity, Stage, Map Destination, Transform, and Migrate.
Here are the six steps involved in a typical migration:
Follow these steps for a smooth migration experience, minimizing effort and ensuring your store data transitions accurately.
Only one migration can run at a time. Cancel Migration removes all staged data, mapping, rules, progress and logs. To stop a running migration and keep your staged data, use Cancel on the Migration history page instead. The work stops at the next safe point.
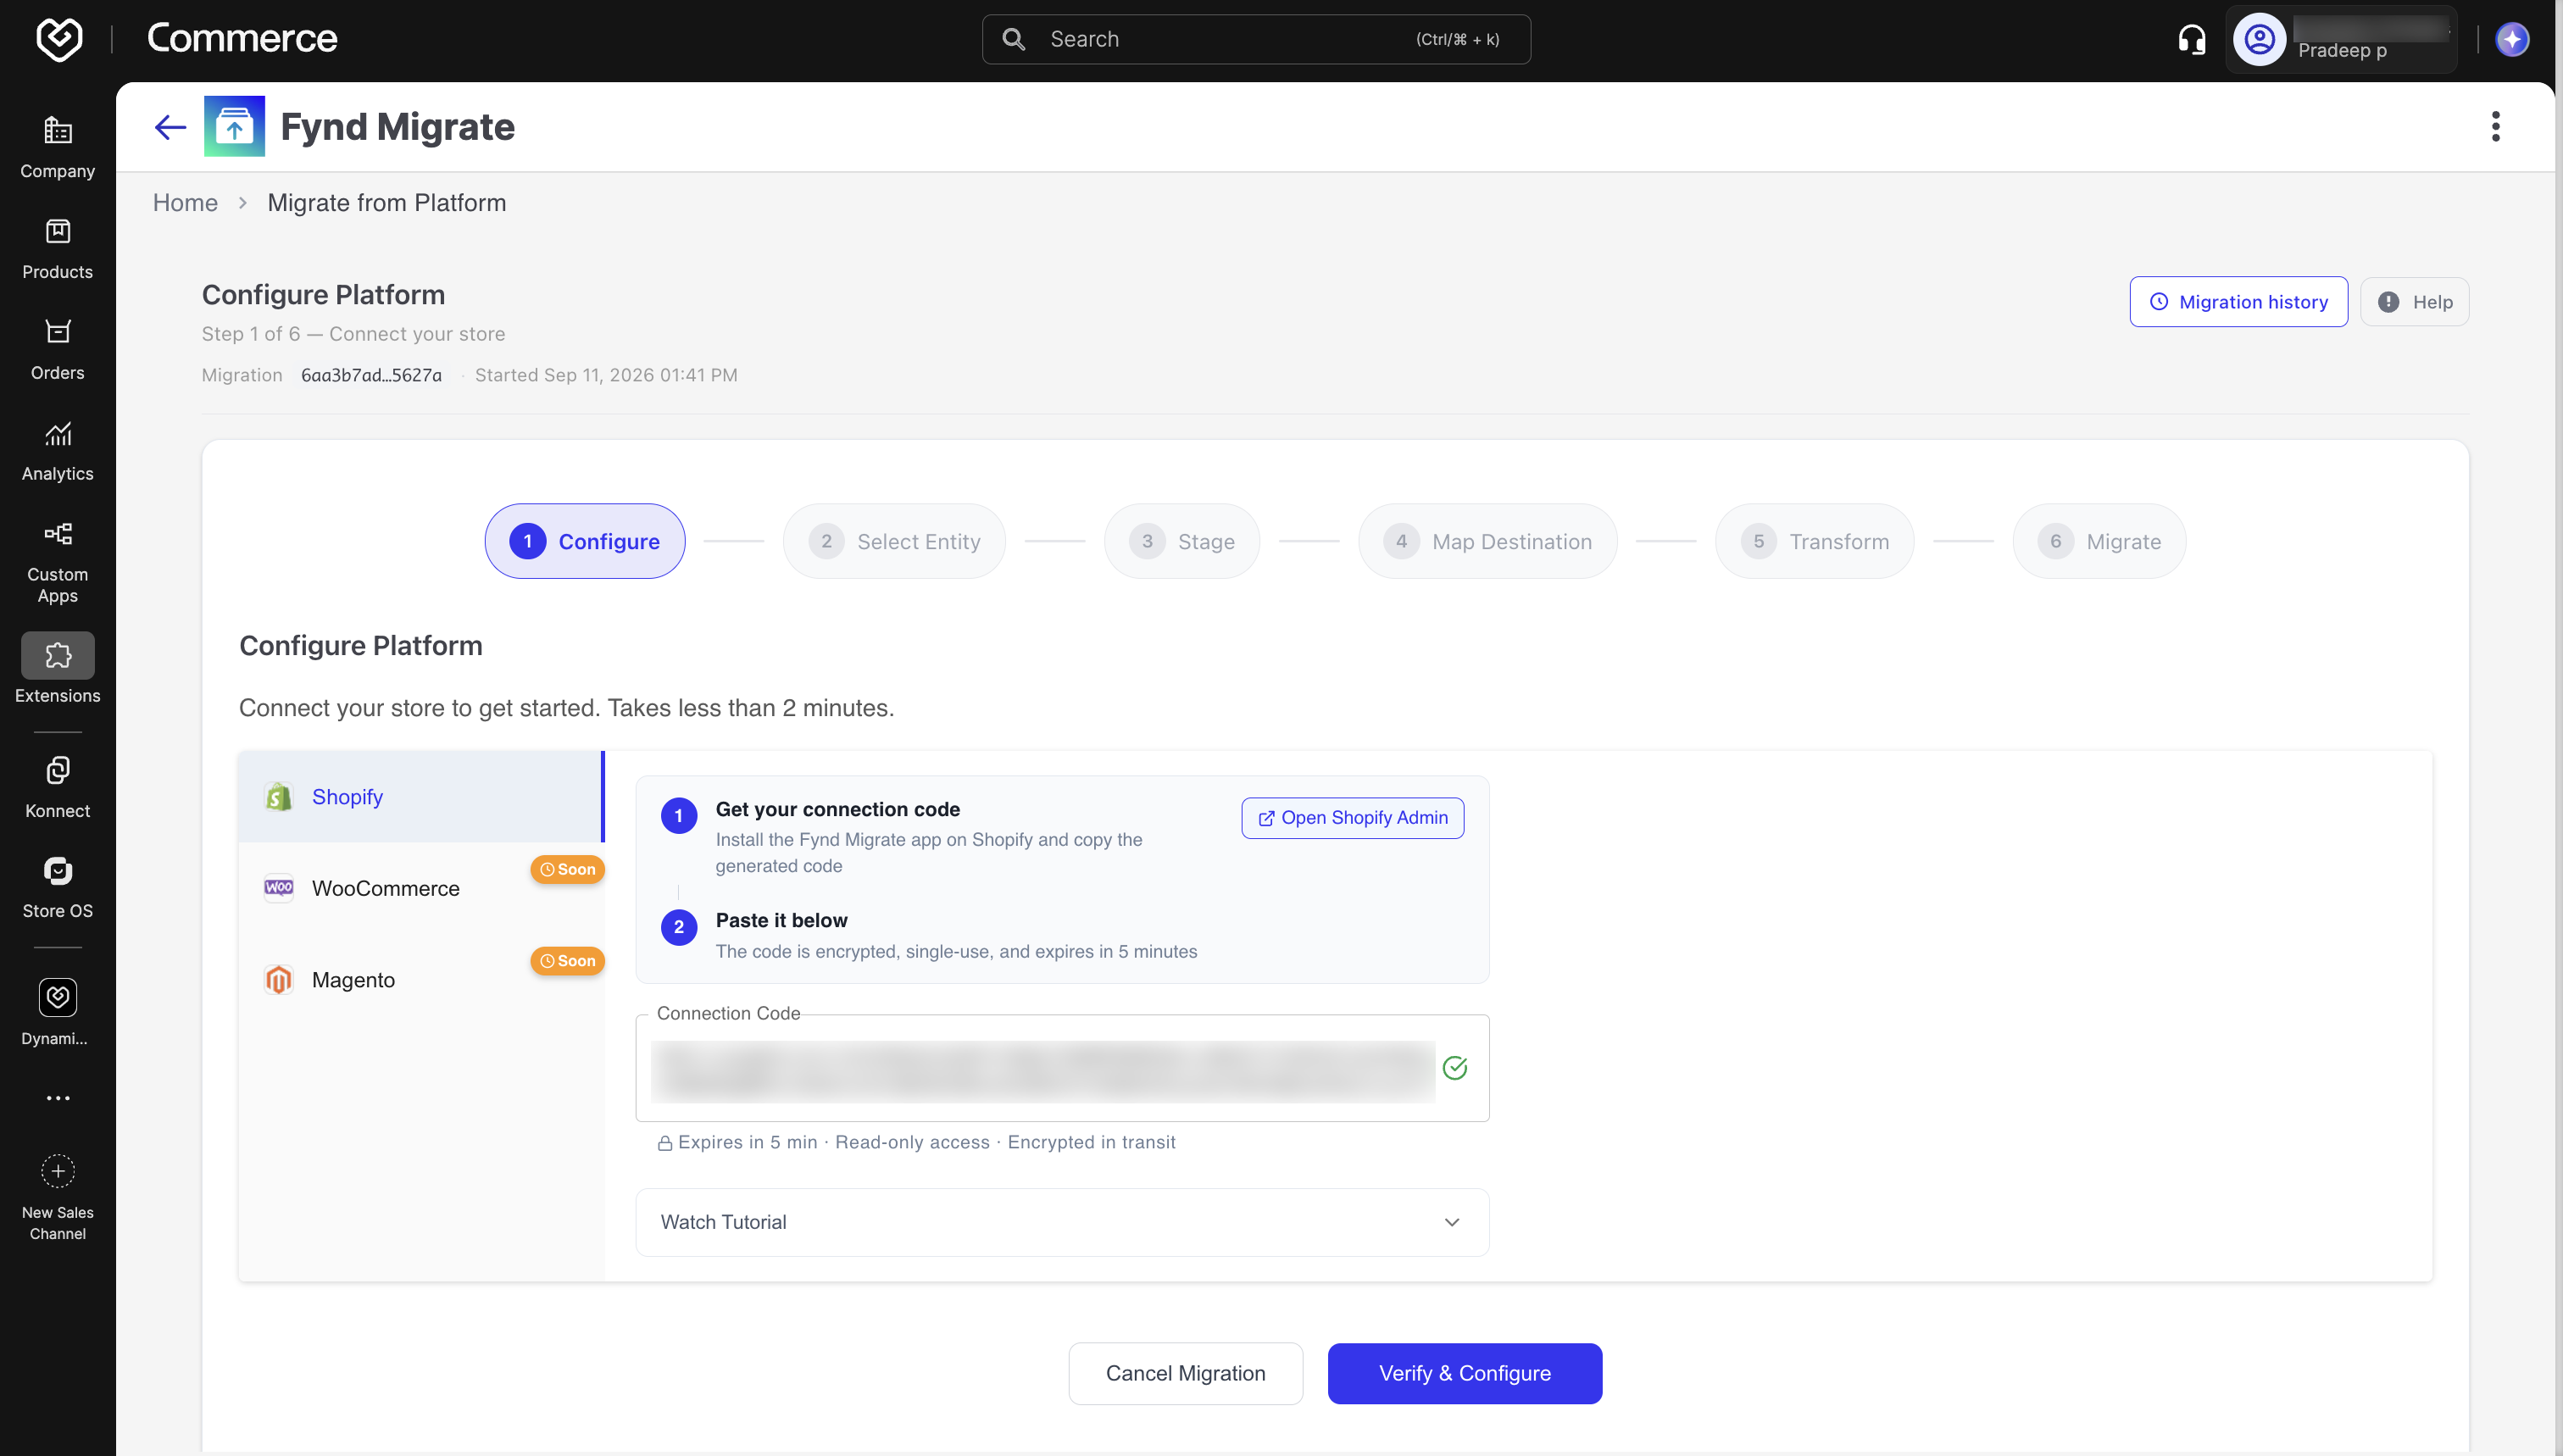
- Select your source platform from the list. We have selected Shopify for now.
- Click Open Shopify Admin and then copy the connection code it generates.
- In the Fynd Migrate extension, paste the code in the Connection Code field.
- Click Verify & Configure to proceed.
Select the checkbox next to an entity to include it in the migration. Entities are grouped by category, e.g., Customer Data and Product Catalog. Each entity shows how many records were found on the source store, e.g., 10 customers. You can use Refine selection to filter what gets migrated, e.g., only customers created after a specific date.
When importing orders into Fynd, disable order-related emails in Fynd OMS and temporarily pause any apps or delivery partners that automatically respond to new orders. Otherwise, customers may receive duplicate "order placed" and "order confirmed" emails, and connected delivery partners could process the same order twice, resulting in duplicate shipments.
Fynd Migrate fetches your selected entity records from the source platform and stores them as raw staged data. The Staging Results table tracks, per entity, the number of records Detected, Staged, Duplicates, and Failed, along with Progress and Status.
Once staging finishes, click Map Entities to continue.
Set default values under Default Field Configuration for fields that might be missing from your source data, e.g., Fynd Sales Channel, Company ID, Currency, Country of Origin, Tax Rule, and HS Code. These defaults are applied to any record that doesn't already have that field set.
Click Transform Entities to continue.
Fynd Migrate validates and transforms the staged records into Fynd-ready data. The Transformation Results table shows, per entity, the number Staged, Transformed, and Failed, along with Progress and Status, e.g., Completed with Errors.
The Download button on this step gives you all the records for that entity, both the ones that worked and the ones that failed. It is not a failures-only report. For a failures-only file, open the run in Migration history.
To fix records: download the file, correct the values, and do not change the ID column (_id, sourceDumpId or staticSourceId). Then click Upload edited data. This writes your changes onto the records. It does not check or transform them again.
Limits: 50,000 rows and 25 MB. This only works while you are on the Transform step. Once you start the migration, uploads are refused.
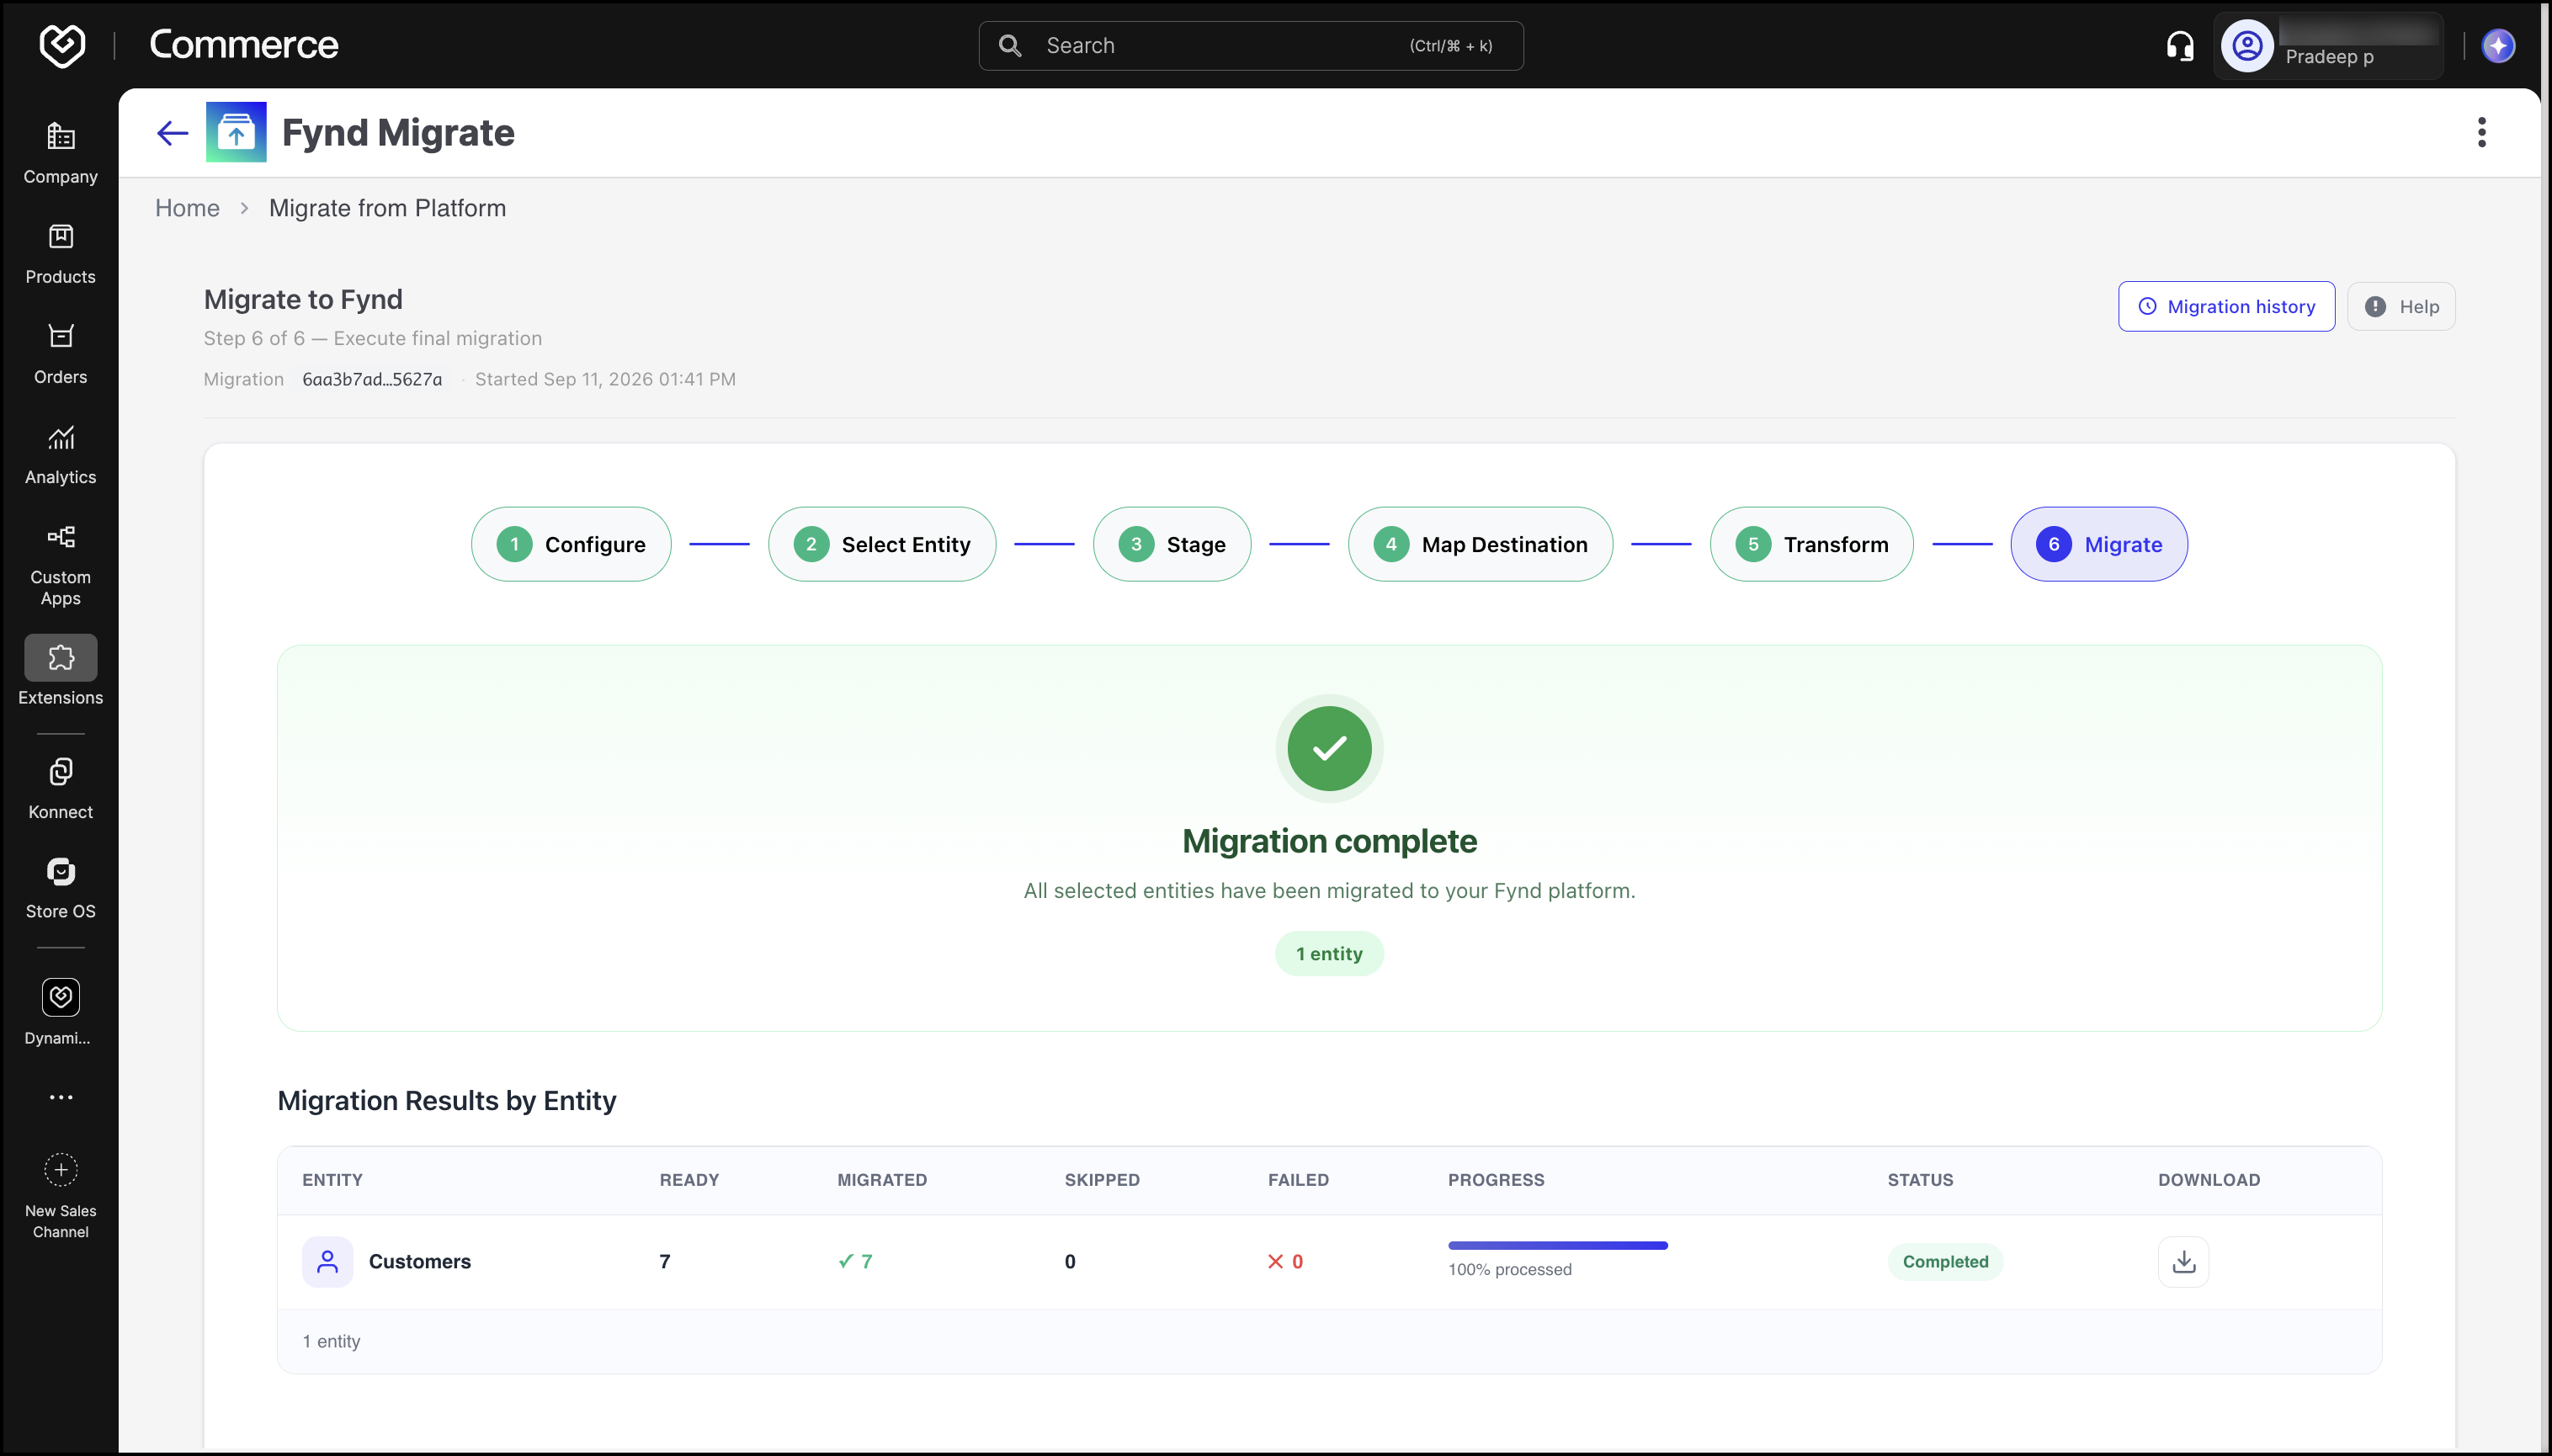
This final step writes the transformed records to your Fynd Commerce platform. The Migration Results by Entity table shows, per entity, the number Ready, Migrated, Skipped, and Failed, along with Progress, Status, and a download link for the results.
Your migration is finished when every entity you picked shows one of these:
- Completed: everything went through, nothing failed.
- Completed with Errors: everything was processed, but some rows failed. This is still a normal result. Download the report to see which rows failed and why.
- Failed: the entity could not be processed.
- Cancelled: you stopped the run.
Then click Complete Migration to close the run. This button only appears once the migration reaches the migrated state. If a run ended in failure, delete it from Migration history instead.
- Click Migration history in the header to see every migration for your company. From here you can:
- Cancel a run that is still going. The work stops at the next safe point and your staged data is kept.
- Delete an old run to free the slot for your next migration.
- Download a failures-only file for any item, to see just the records that did not go through.
A short guided tour runs the first time you open Fynd Migrate. To see it again, click Help in the header.
This is the most frequently used option for day-to-day work. Use it to import and export catalogue and customer data using CSV files, without connecting an external platform. This is useful when you only need to move specific data types instead of an entire source. Fynd Migrate does not directly connect to source.
Import and export do not cover the same list.
| What | Import | Export |
|---|---|---|
| Address | Yes | No |
| Brands | Yes | Yes |
| Collection Products | Yes | No |
| Collections | Yes | Yes |
| Coupons | No | Yes |
| Customers | Yes | Yes |
| Locations | Yes | Yes |
| Orders | Yes | Yes |
| Path Redirection | Yes | Yes |
| Product Details (MOQ / COD / Gift Wrap) | Yes | Yes |
| Products | Yes | Yes |
| SEO | Yes | Yes |
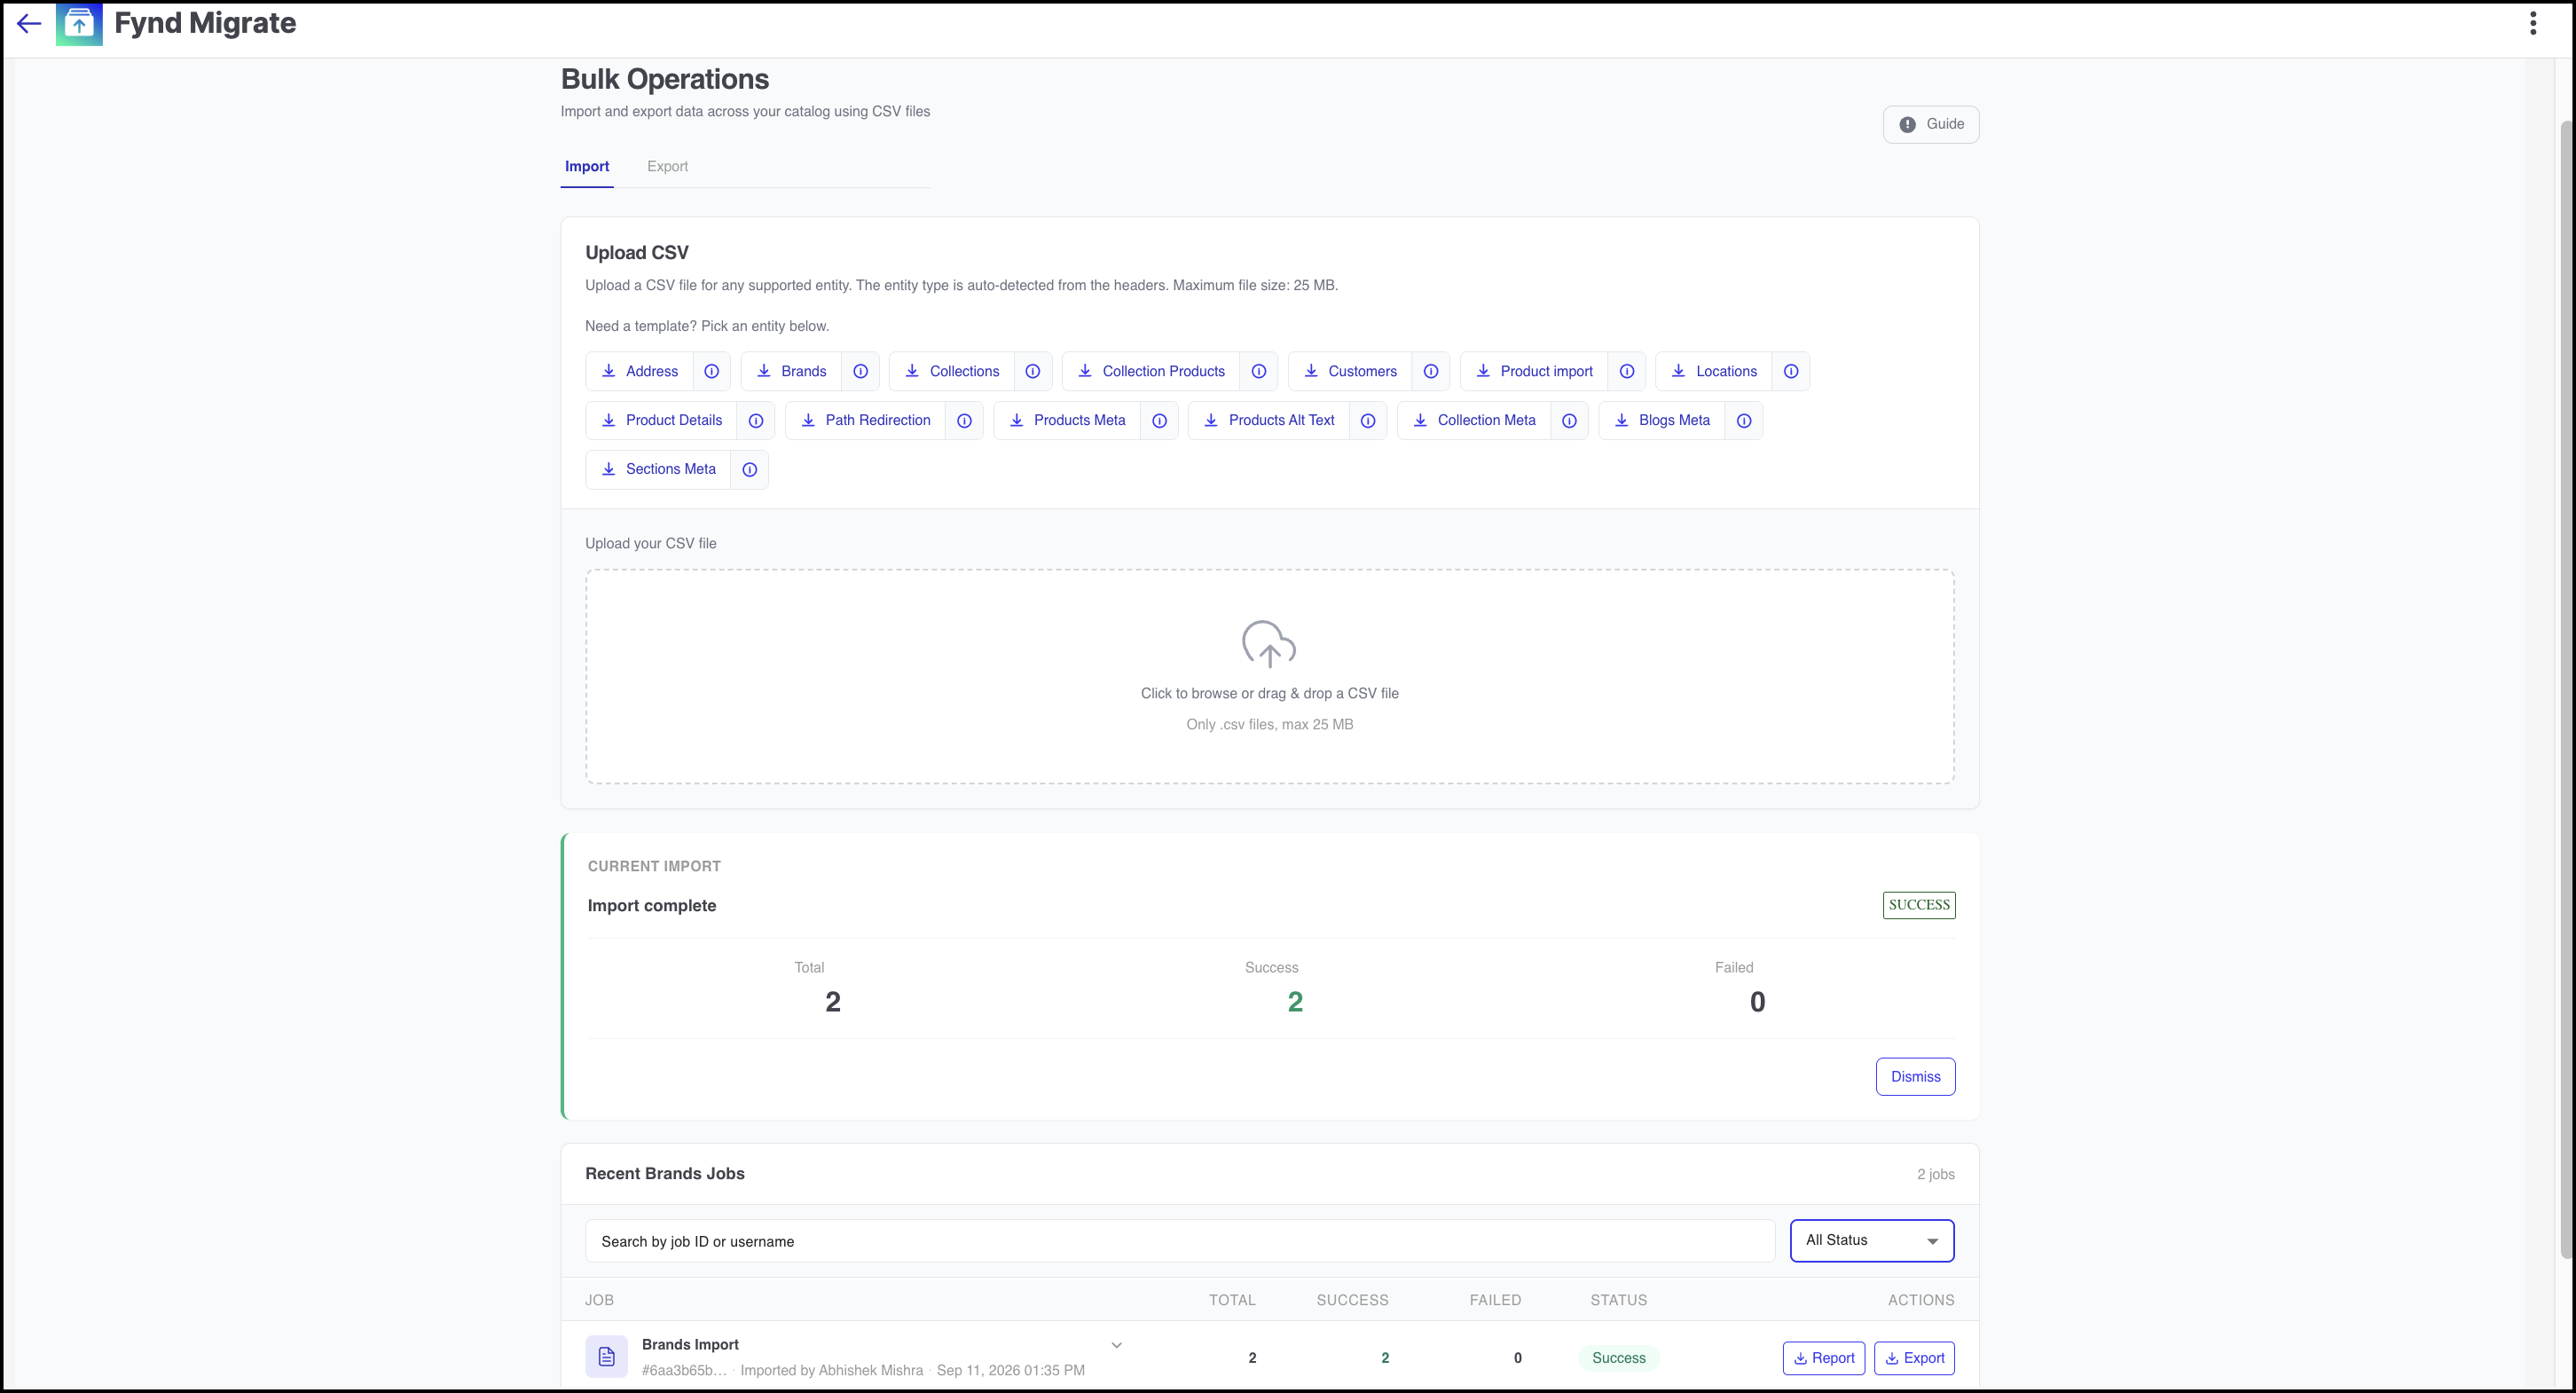
The Import tab is selected by default.
- Drop your CSV file in the upload area, or click to browse and select it. Fynd Migrate automatically detects the entity type from your file's column headers.
Only .csv files are supported, with a maximum file size of 25 MB or 50,000 rows.
- If you need a template, click an entity to download its sample CSV.
- Once the file uploads, confirm the detected entity, configure any required options, then start the import.
- Watch your import under All Recent Import Jobs. The heading changes to Recent {Entity} Jobs when you pick an item. You can search by job ID, file name or username, and filter by item or status. The list updates by itself while jobs run.
Each job has a Report download. It is called Error report when the job failed. The file holds every row you imported, with a Comments column explaining what happened to each one. It is not a failures-only file. If a job fails before it starts, for example because the file could not be read, there is no report — only a reason.
When importing orders into Fynd, disable order-related emails in Fynd OMS and temporarily pause any apps or delivery partners that automatically respond to new orders. Otherwise, customers may receive duplicate "order placed" and "order confirmed" emails, and connected delivery partners could process the same order twice, resulting in duplicate shipments.
You can only run one import at a time for the same item. Jobs are queued and run in the background, so a job may say Scheduled for a while before it starts.
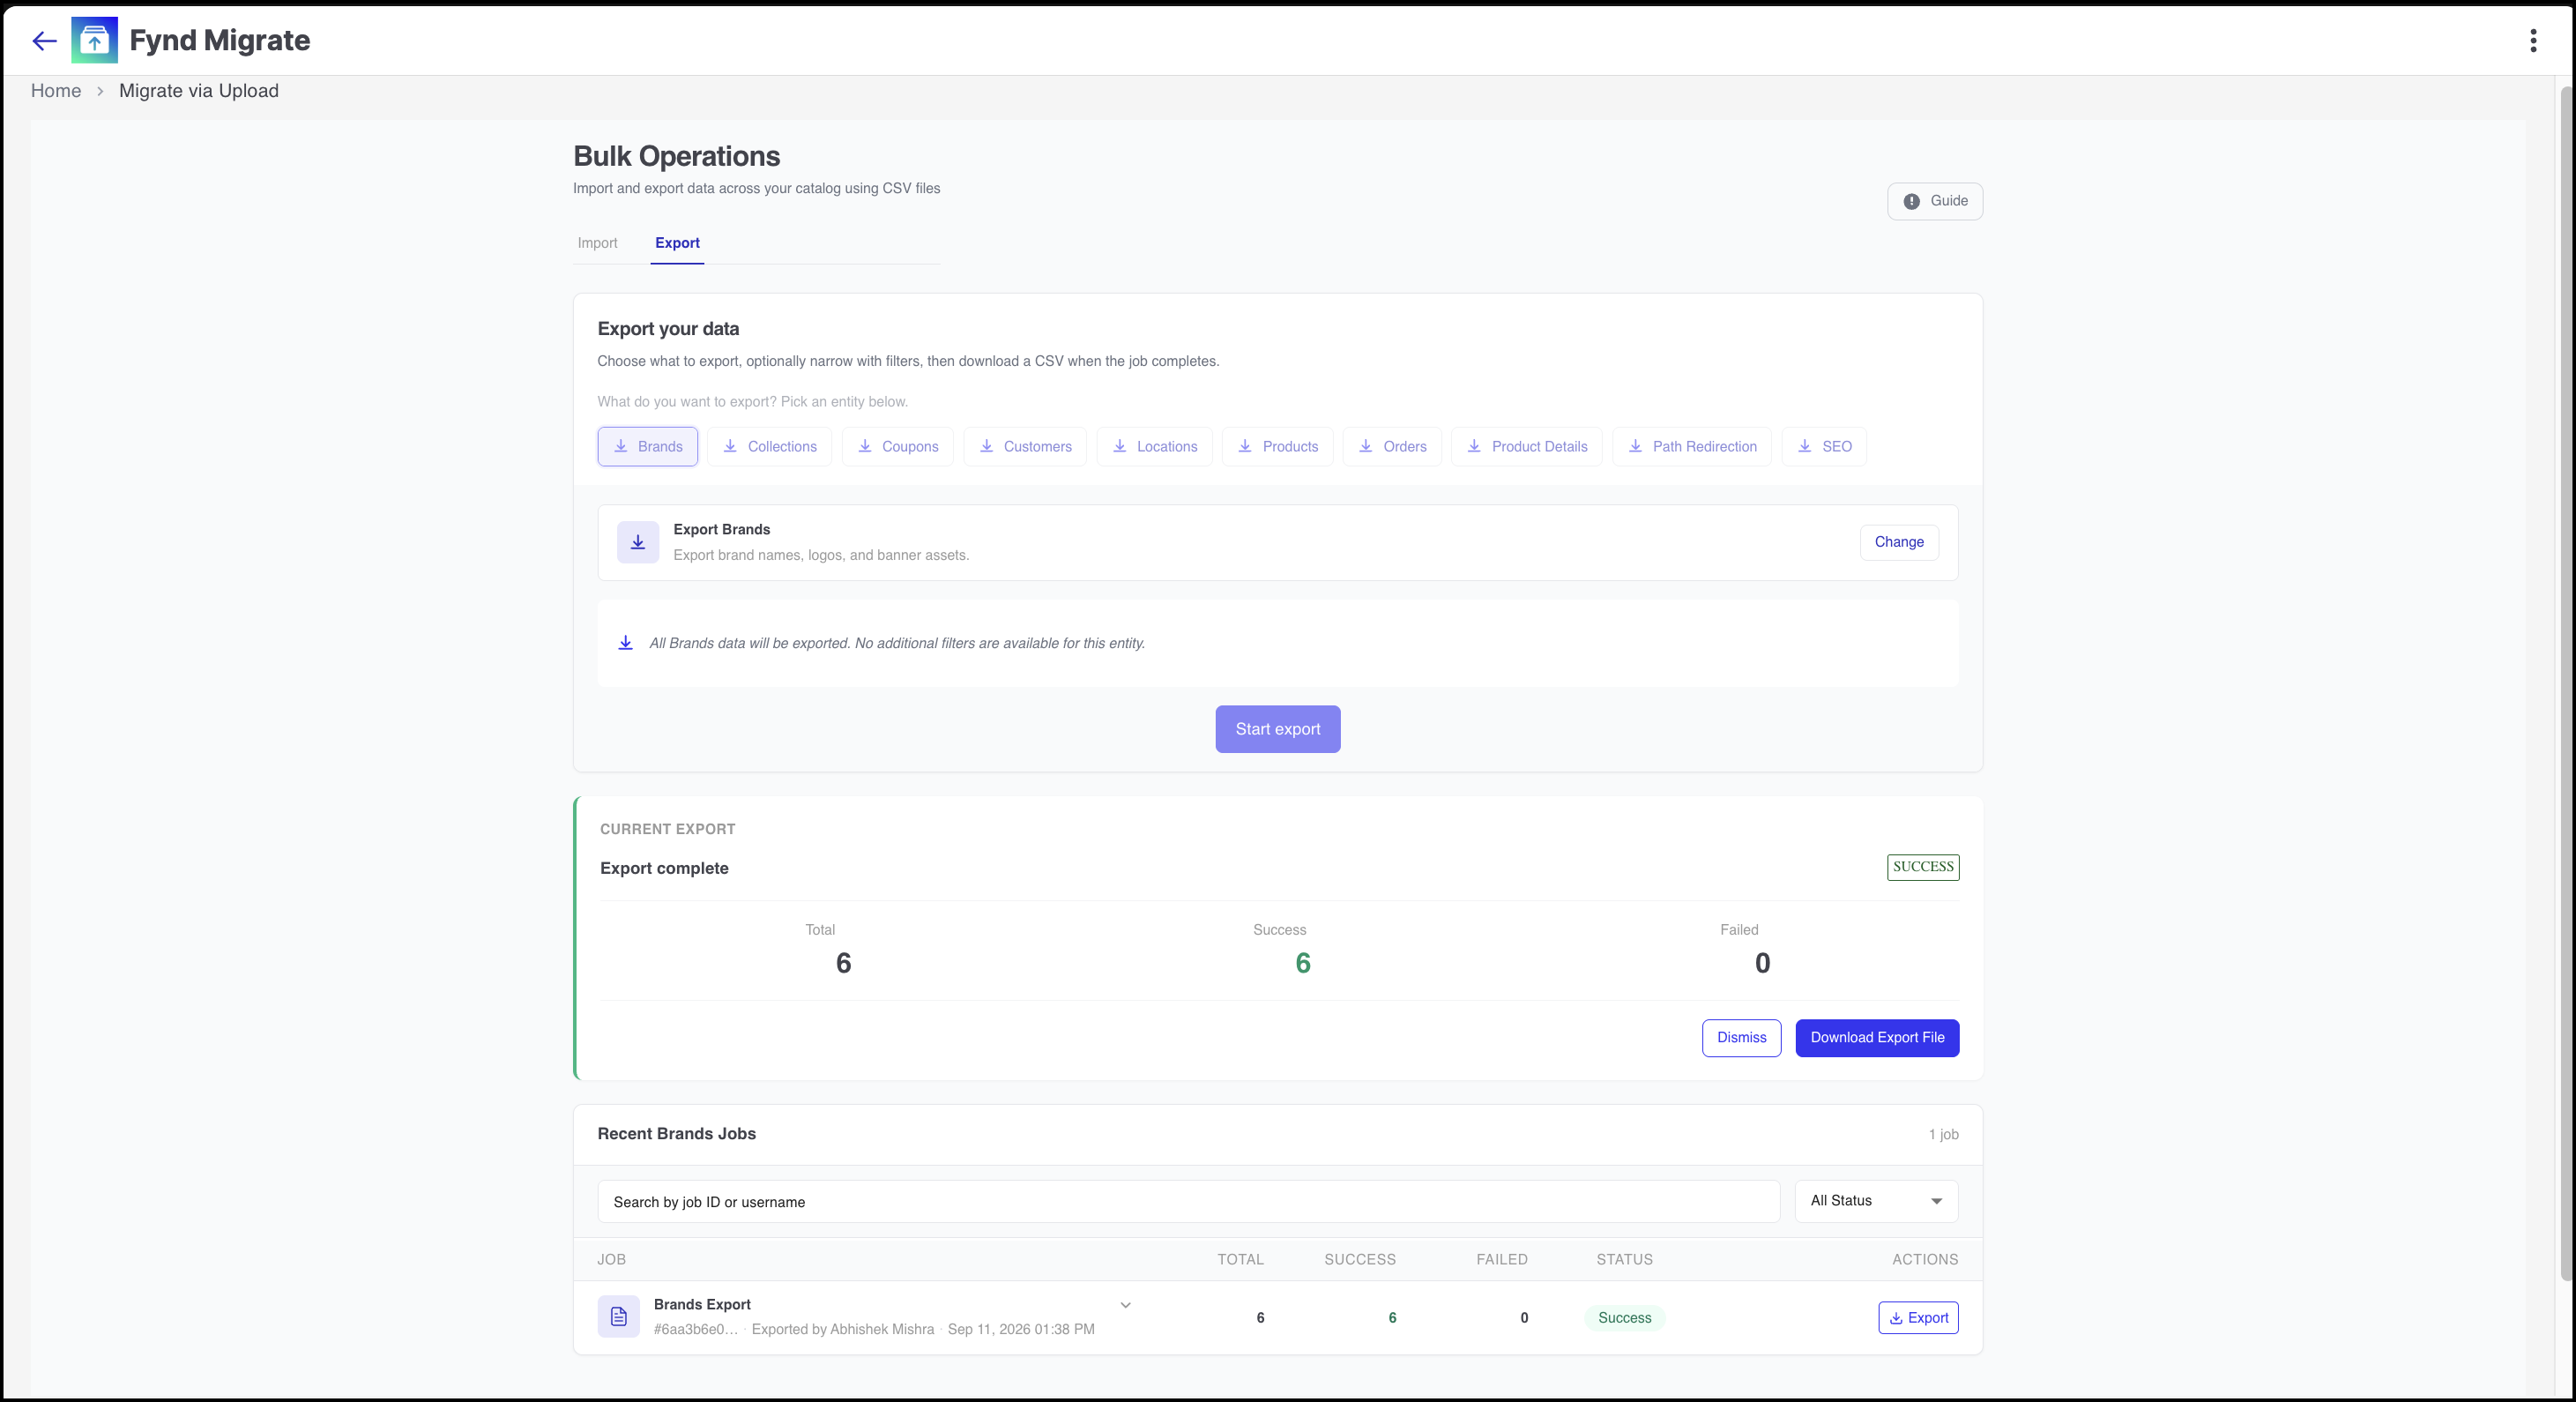
Switch to the Export tab to download your data as a CSV.
- Switch to the Export tab, then pick an entity to choose what to export. Once you select an entity, its filters and a Start Export option appear below.
- Each entity is exportable, such as products, orders, customers, and more. Use the optional filters to narrow down what gets included in the CSV output.
- Click Start Export. Once ready, your export file appears in the list. Click it to download the CSV. You can also re-download past exports from this list.
Use this option to migrate a full store from another platform, or run quick CSV imports and exports, by describing what you need in plain English. The agent orchestrates the pipeline for you, but every write is approval-gated, so nothing is applied to Fynd Commerce until you confirm it.
AI Agent is in Beta. Review each staged step carefully before confirming, as behavior may change in future releases.
Before you start, use the options at the top of the agent screen:
- Channel: Pick the sales channel the agent should act on.
- Model: Shows the AI model currently powering the agent, e.g., gpt-4o.
- Reset: Clear the current conversation and start over.
- Status: What the agent is doing right now: Idle, Working, Awaiting approval, Watching job, or Error.
Watch the walkthrough below to see the guided flow in action, from Configure through Migrate.
- Type what you want to do directly in the message box, e.g., "Add two new brands."
- Attach a CSV file that contains the brand details.
- Press Enter to send your message.
- The agent responds with a preview of the changes it's about to make.
- Validate the details and approve the migration.