This guide walks you through the Amazon seller registration process - from account creation to final verification. Follow each step to set up your seller account and start listing products.
To sell on Amazon, you must first register as a seller. Follow the steps below:
- First, go to the Amazon website and click Register to register as a user on Amazon and log in to your account
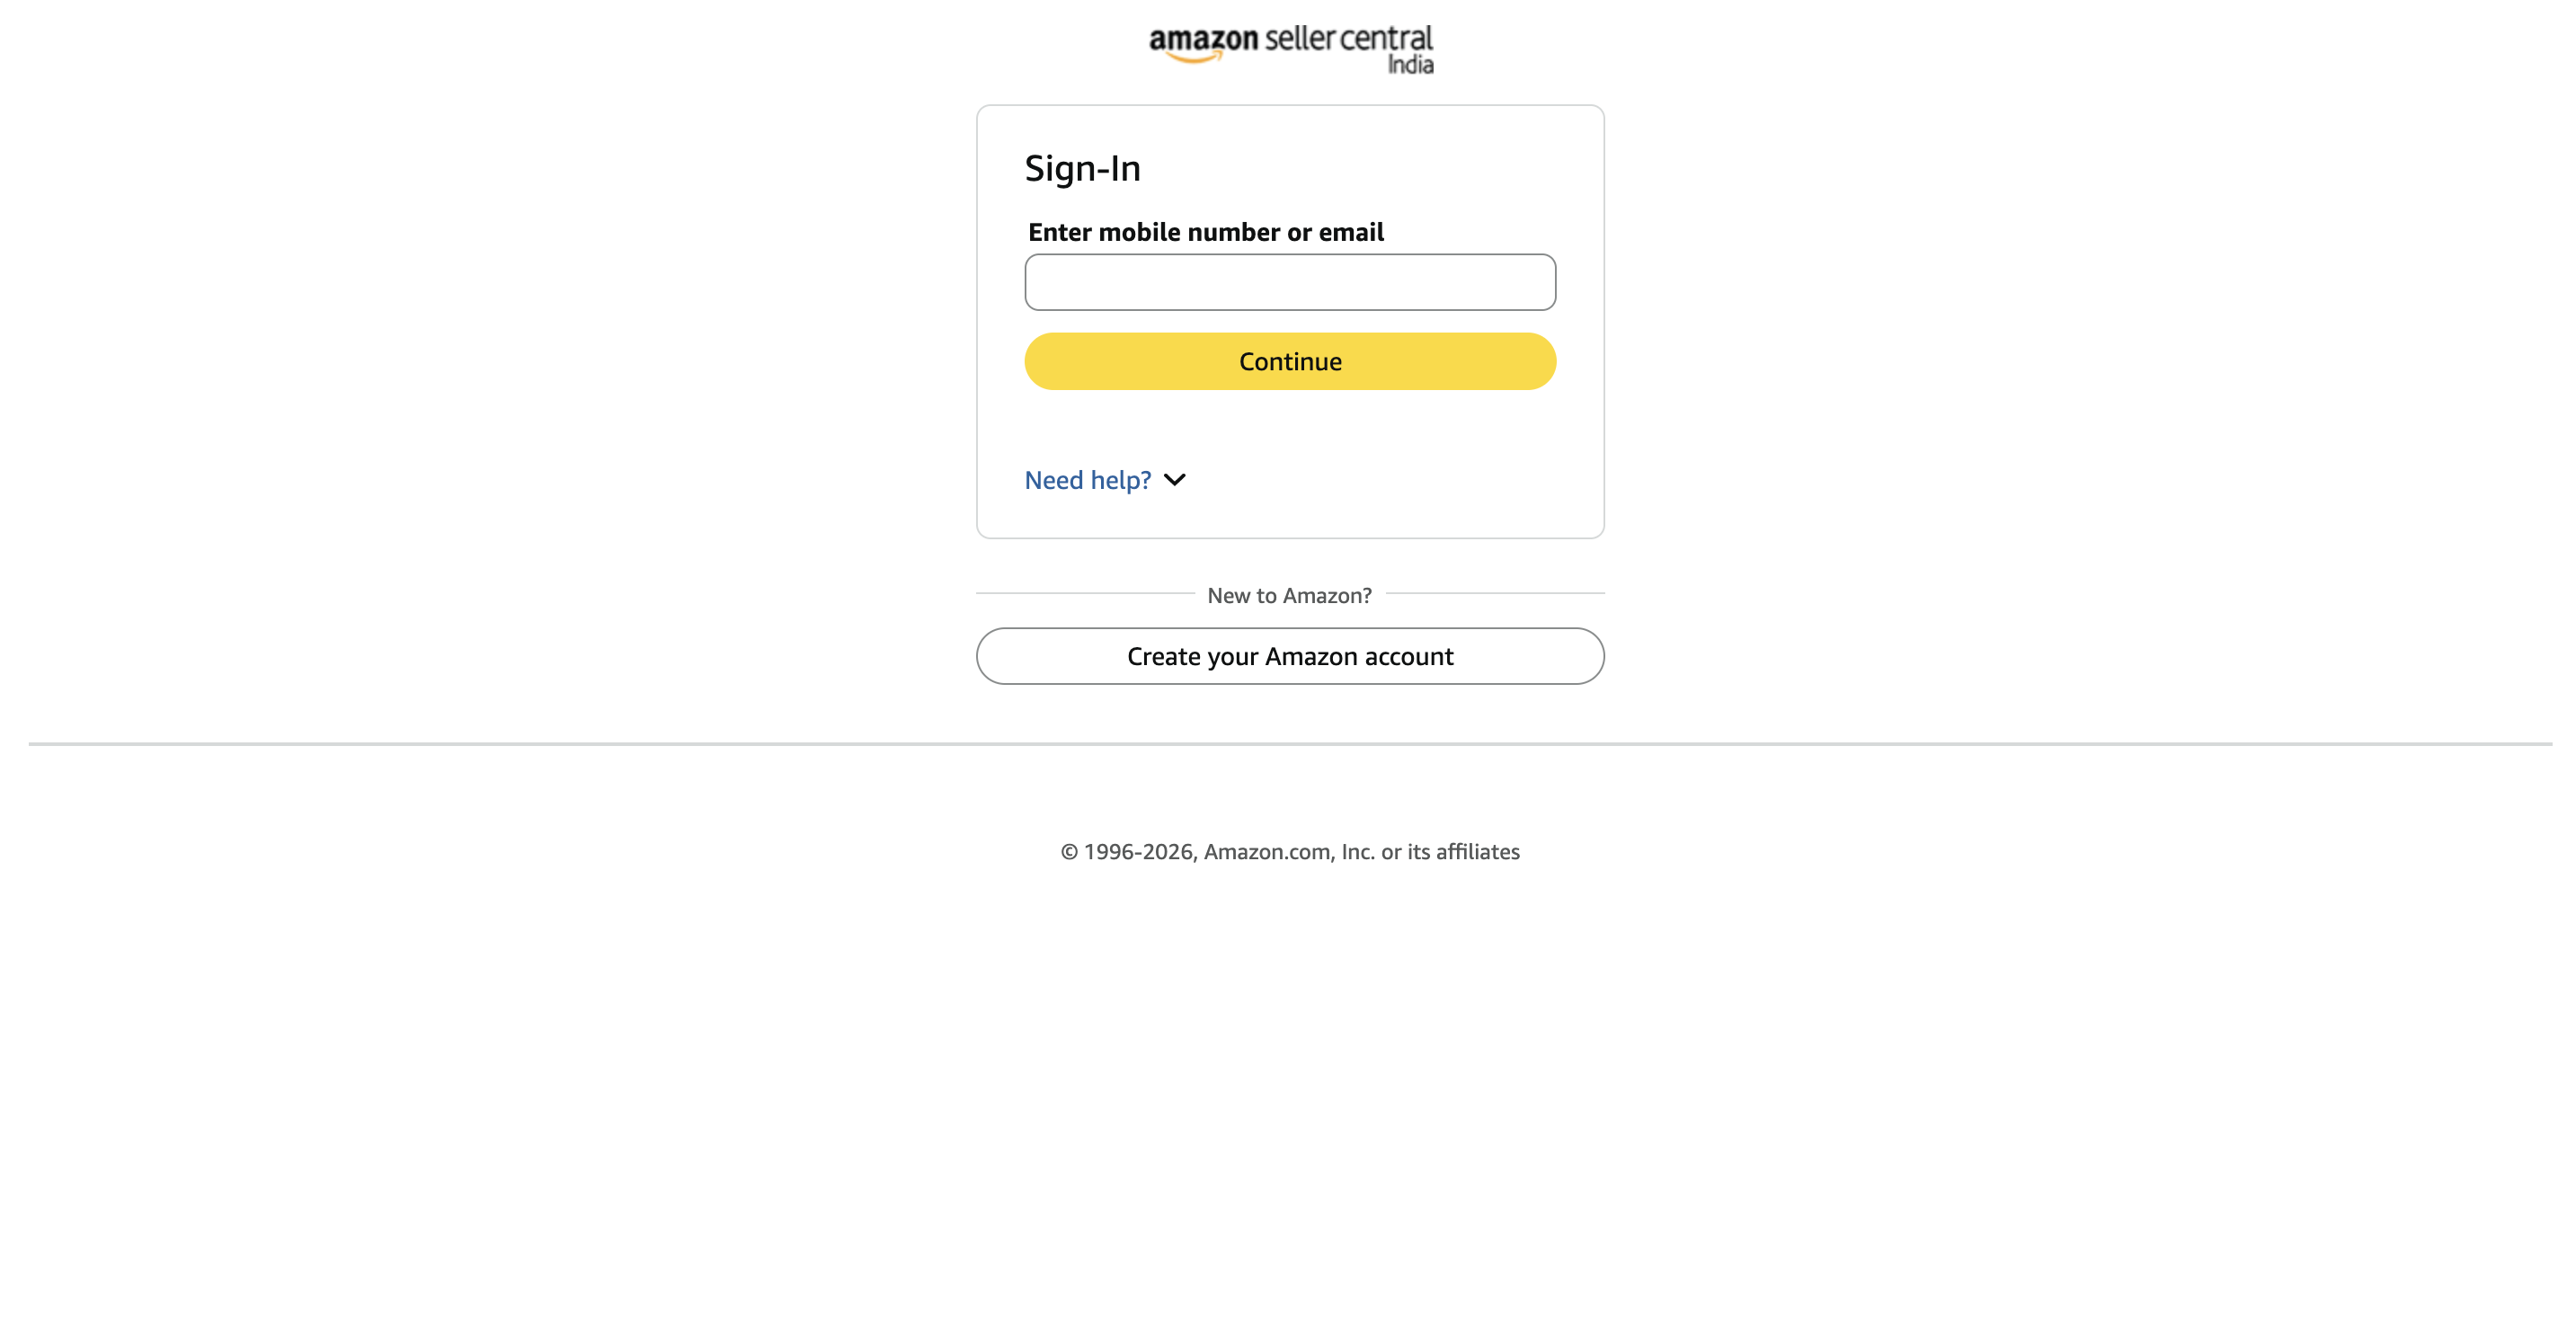
- Sign in or create an Amazon account: Enter your email address or mobile number on the Amazon sign-in page
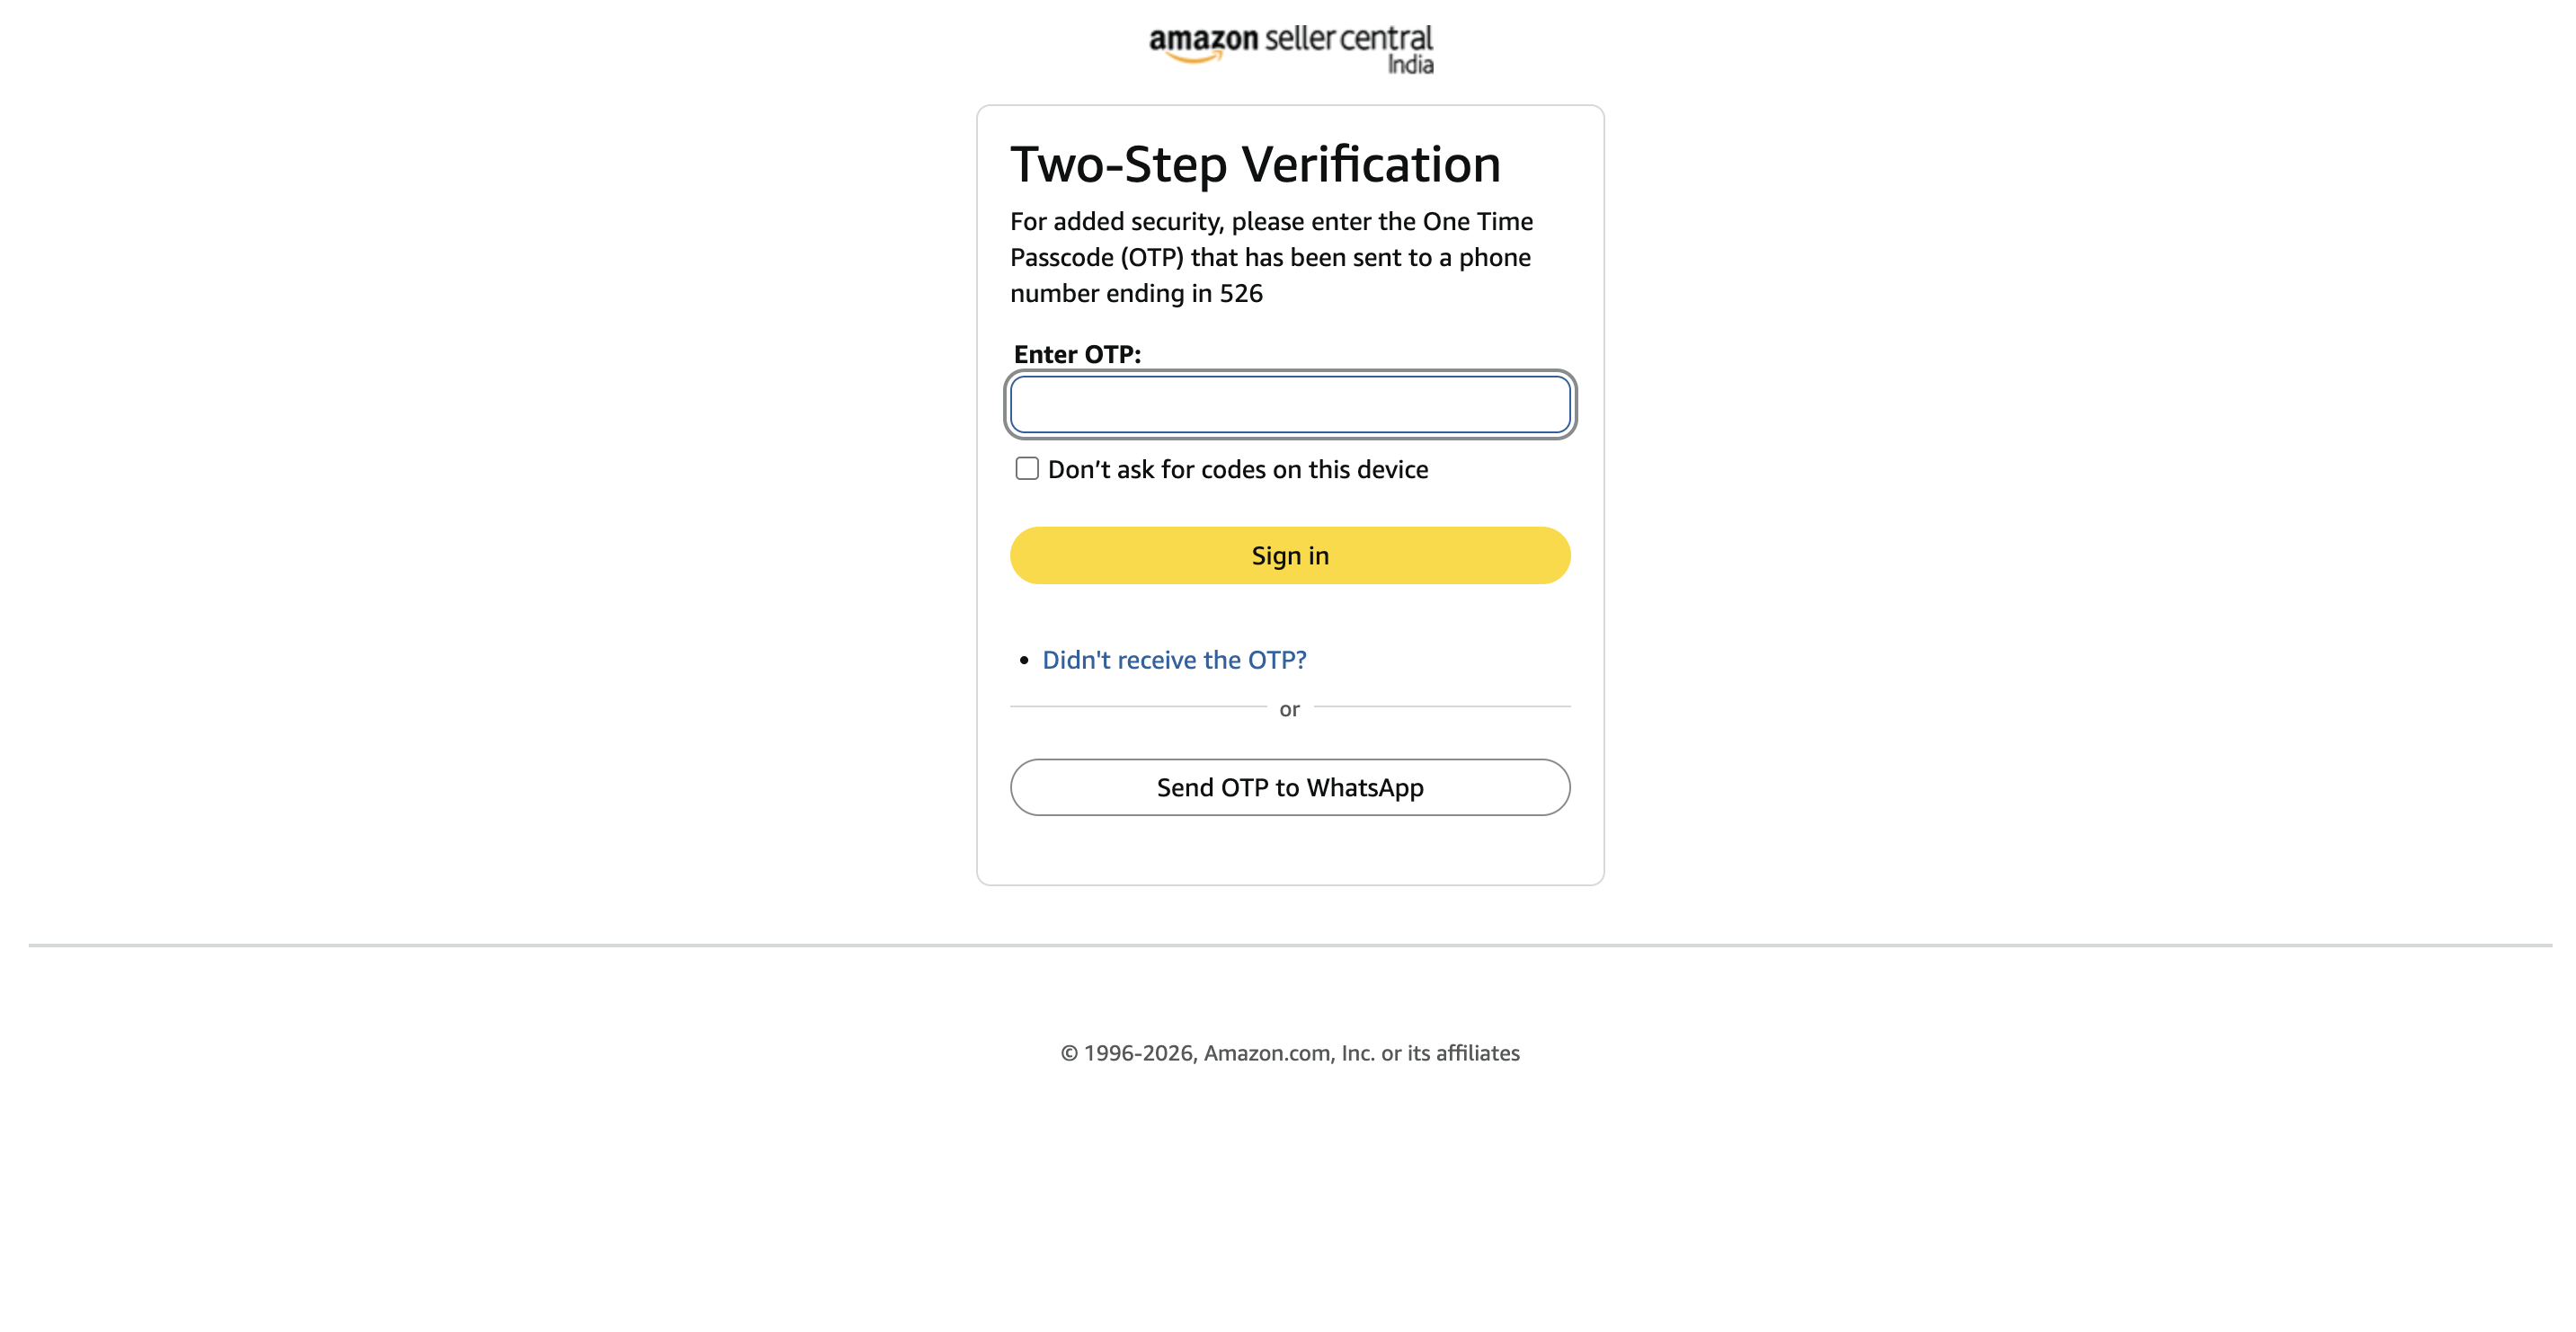
- Select the phone number where you want to receive the SMS verification code
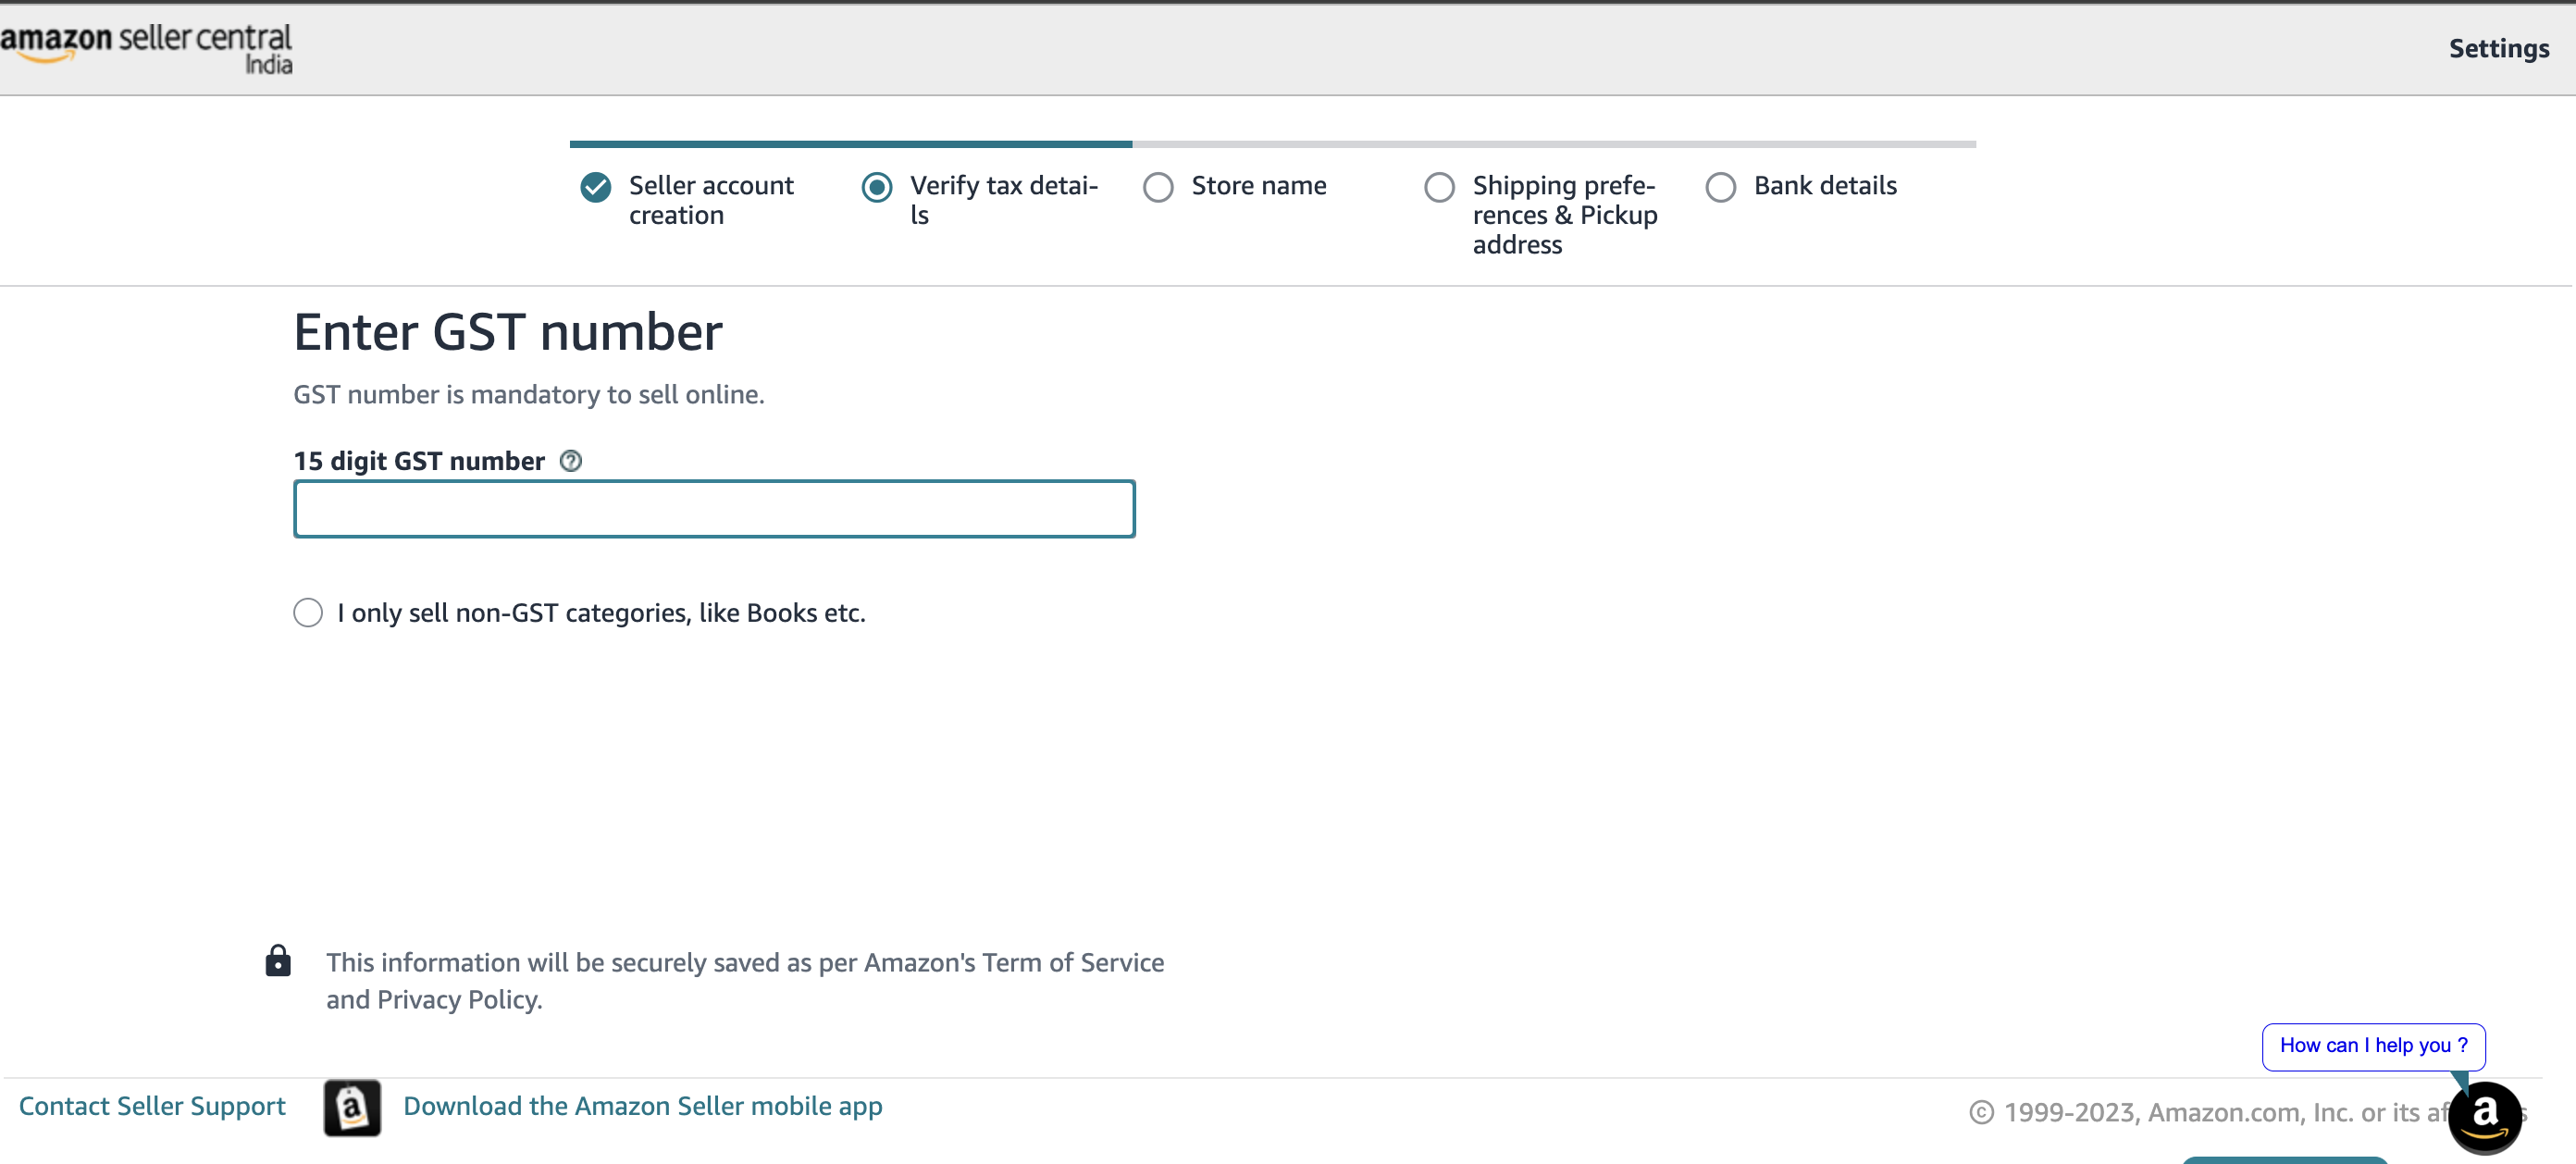
- In this step, you must enter your 15-digit GST number to proceed. If you sell only GST-exempt categories like books, you can select the checkbox stating that you only sell non-GST categories. This allows you to continue without a GST number
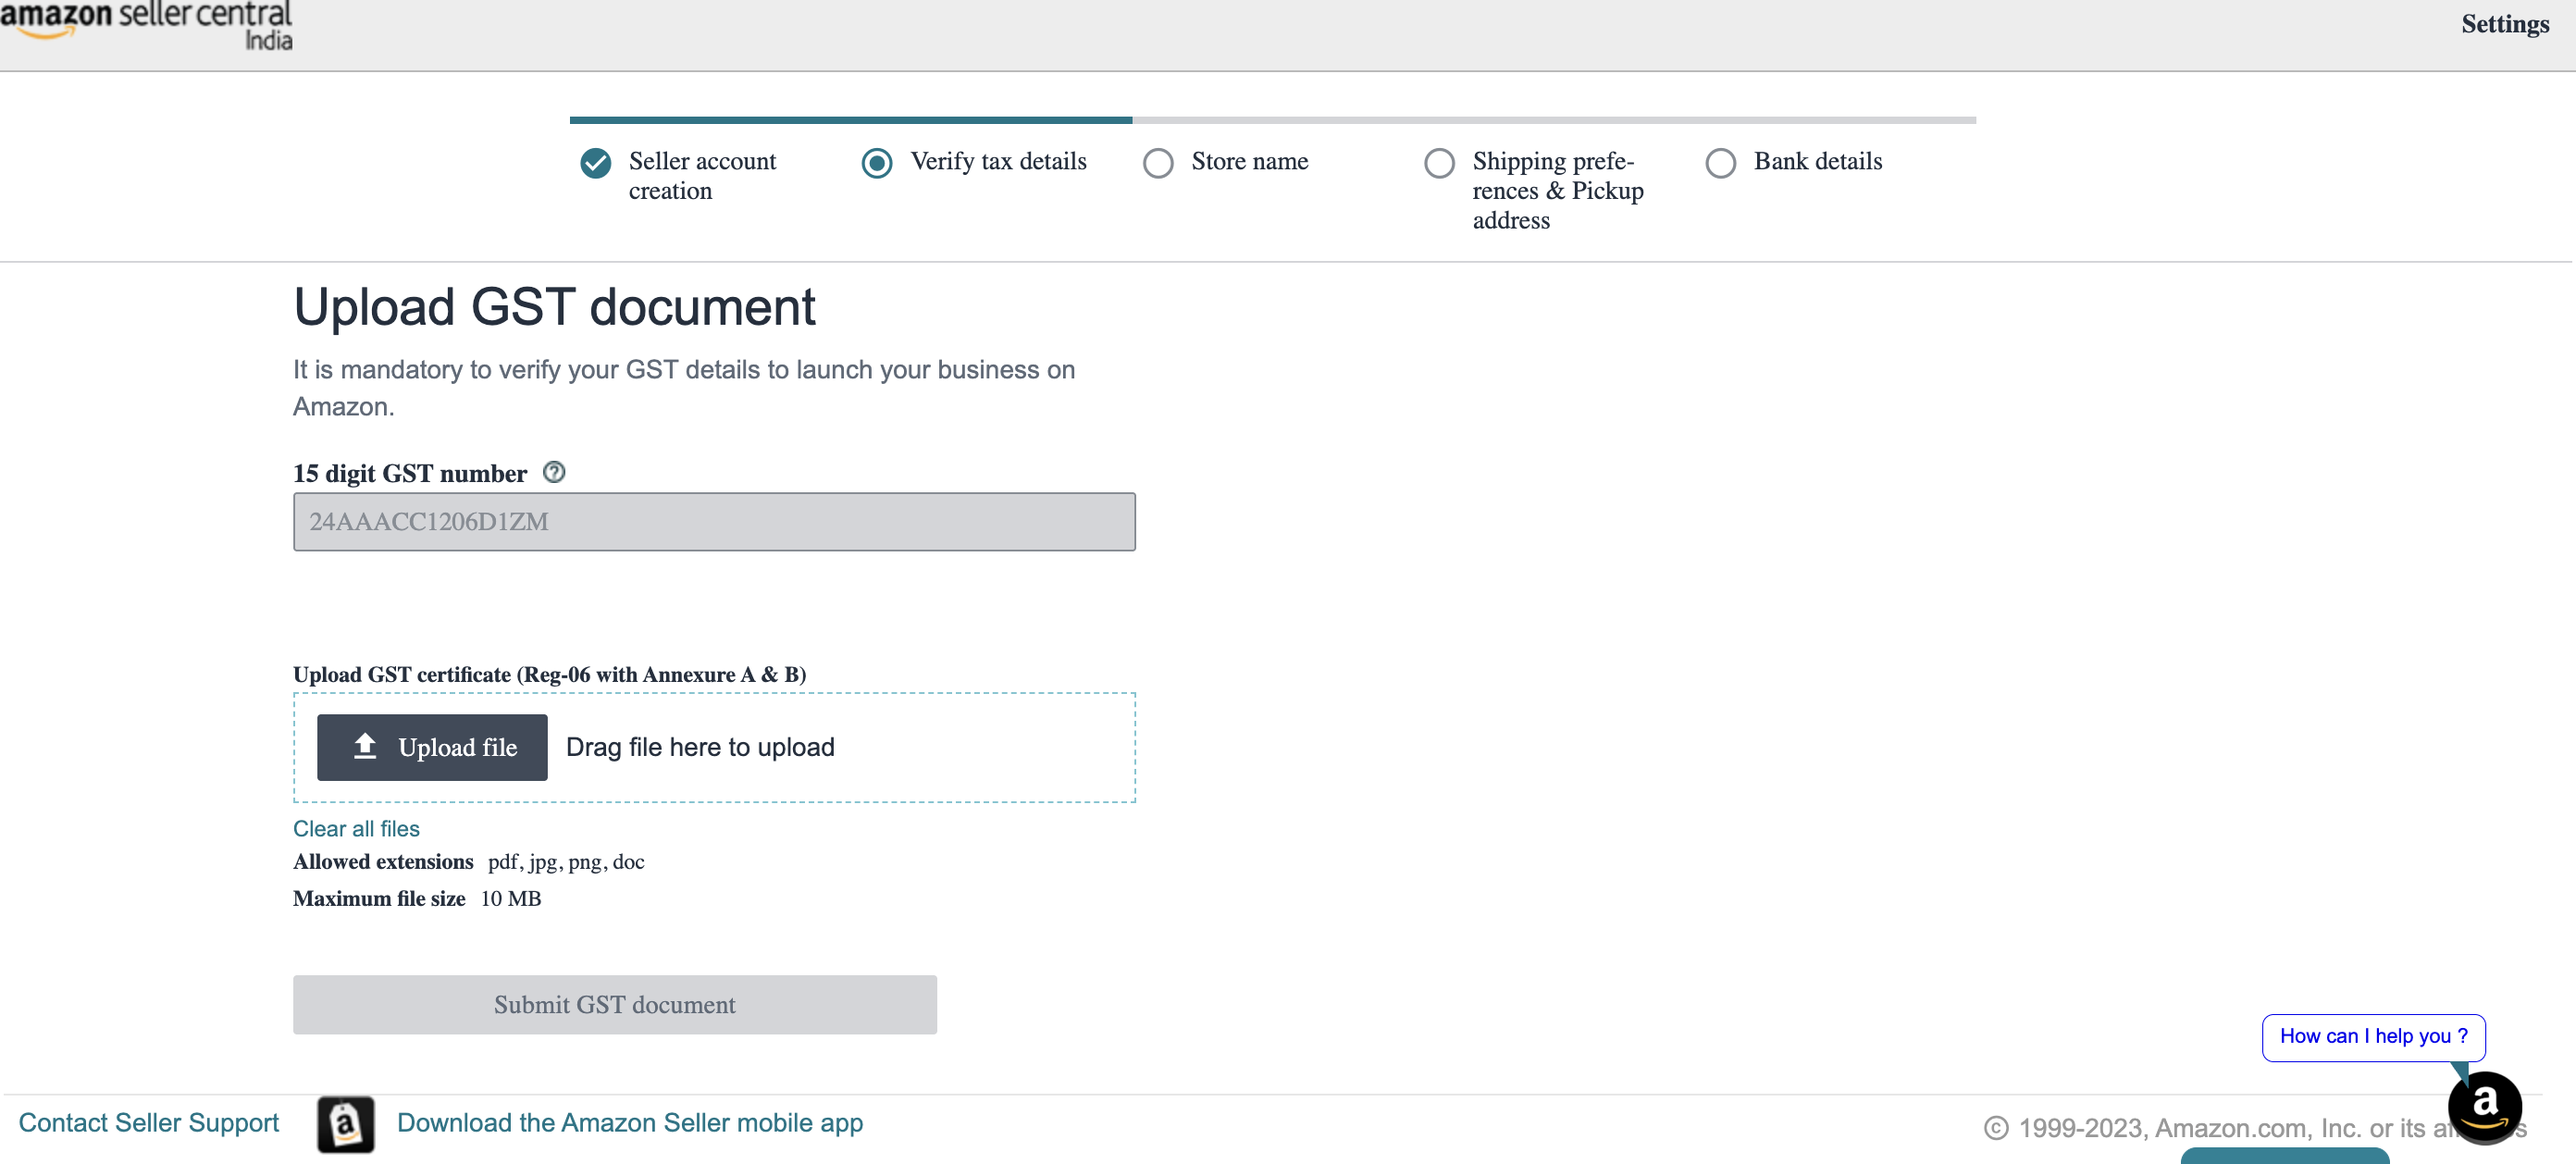
- Upload GST Document: If you are selling GST-based products, enter your 15-digit GST number and upload your GST certificate (Reg-06). Supported file formats include PDF, JPG, PNG, and DOC, with a maximum size of 10 MB. After uploading, click Submit GST document to verify
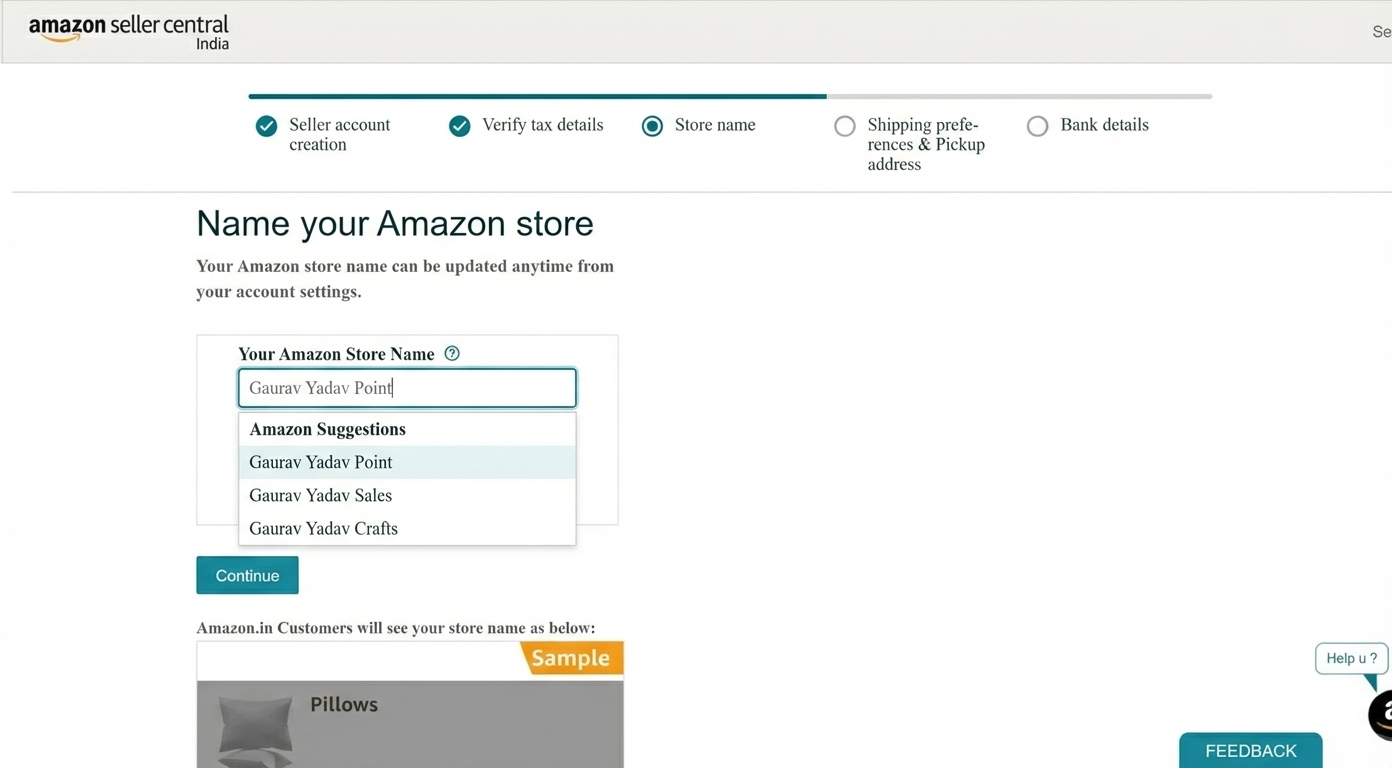
- Enter Store Name: You need to provide a unique name for your Amazon store. Enter your preferred store name in the given field. This is the name customers will see when they browse your products. You can change it later anytime from your account settings
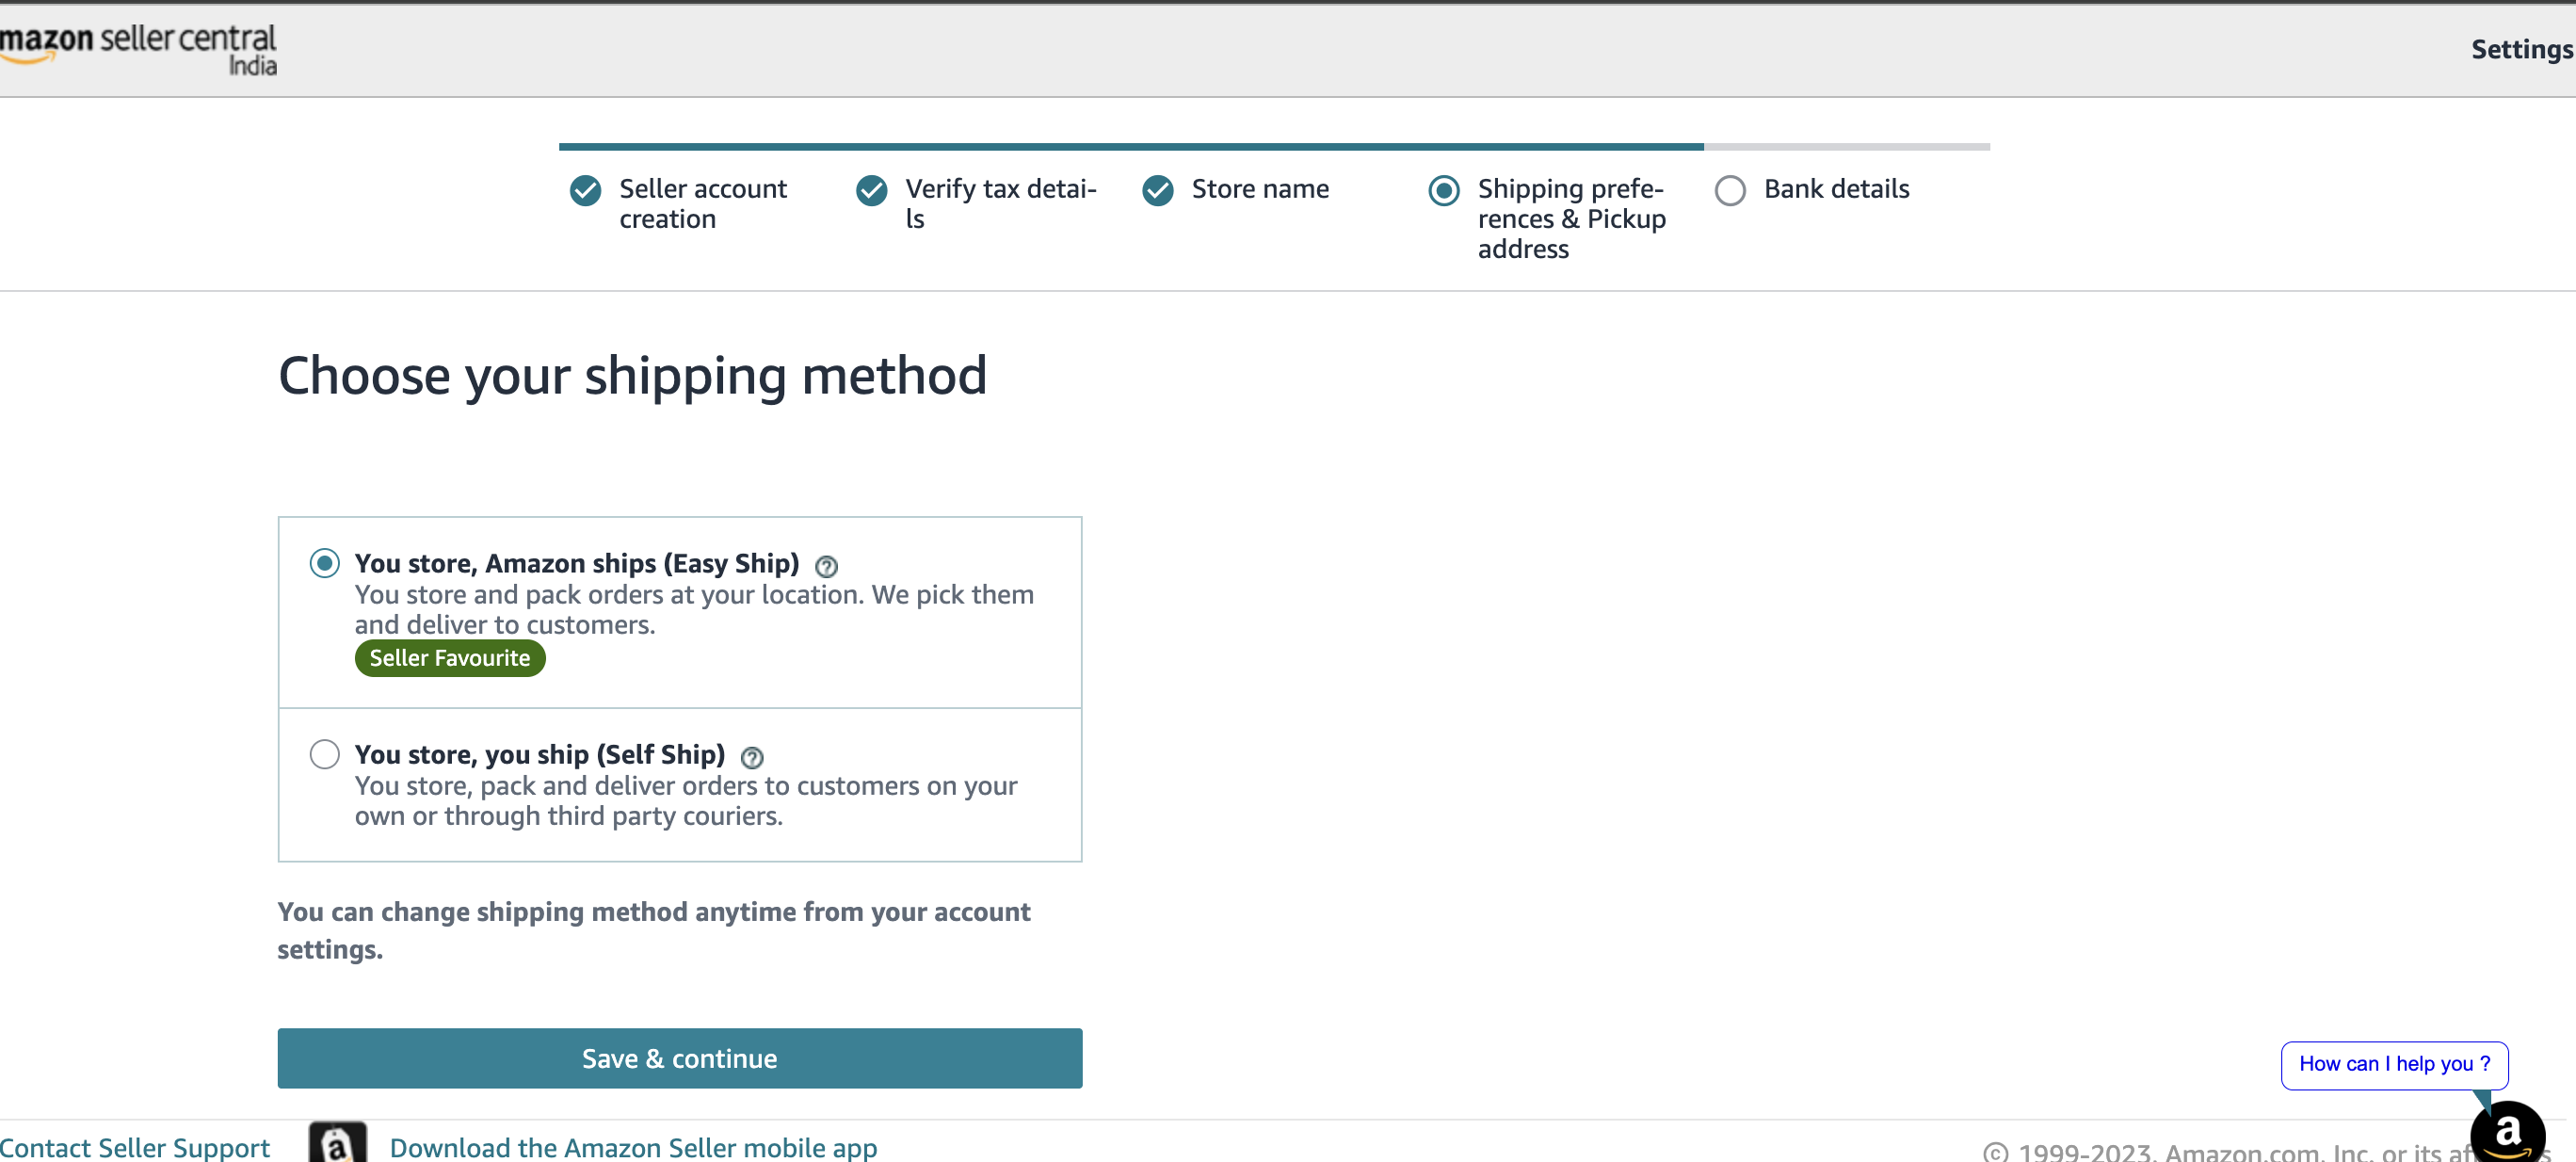
- Choose Your Shipping Method: Select your preferred shipping method. You can choose Easy Ship, where Amazon picks up and delivers your orders, or Self Ship, where you handle delivery through your own or third-party couriers. Choose the method that suits your business and continue
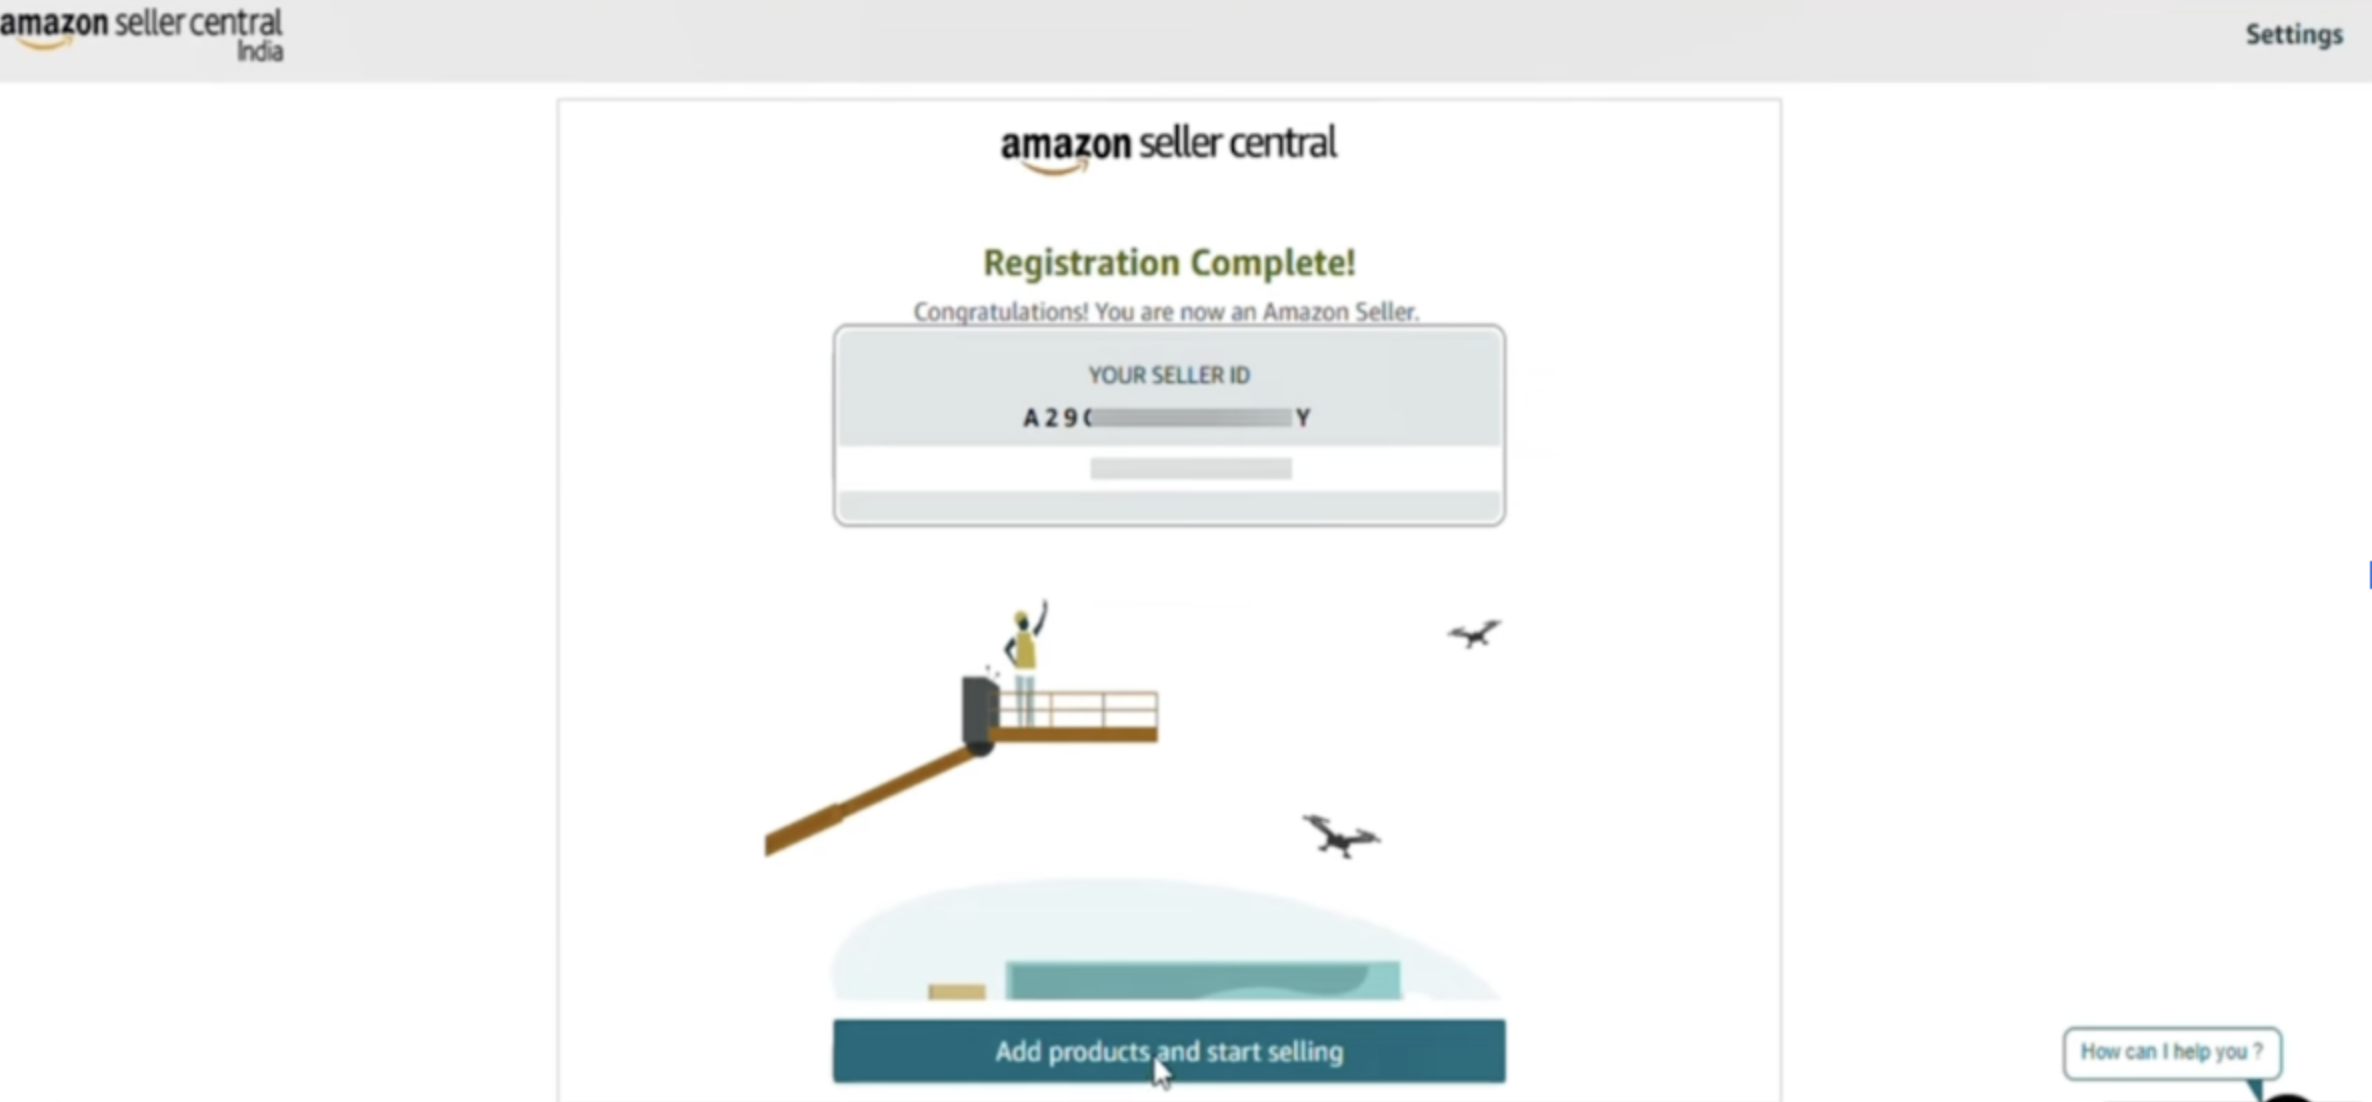
- Registration Complete: Once all steps are completed, your Amazon Seller account is successfully created. Your Seller ID is displayed on the screen. You can now click Add products and start selling to begin listing items and launch your Amazon business