Navigation Customization in Store OS allows merchants to control and personalize the side menu of their Store OS panel. You can decide which items appear, change their order, and add helpful custom links (such as internal tools) to match your daily workflows. This configuration is done at the store level and applies to the selected sales channel. Only users with Admin access can modify navigation settings.
Store OS > Configuration > Navigation
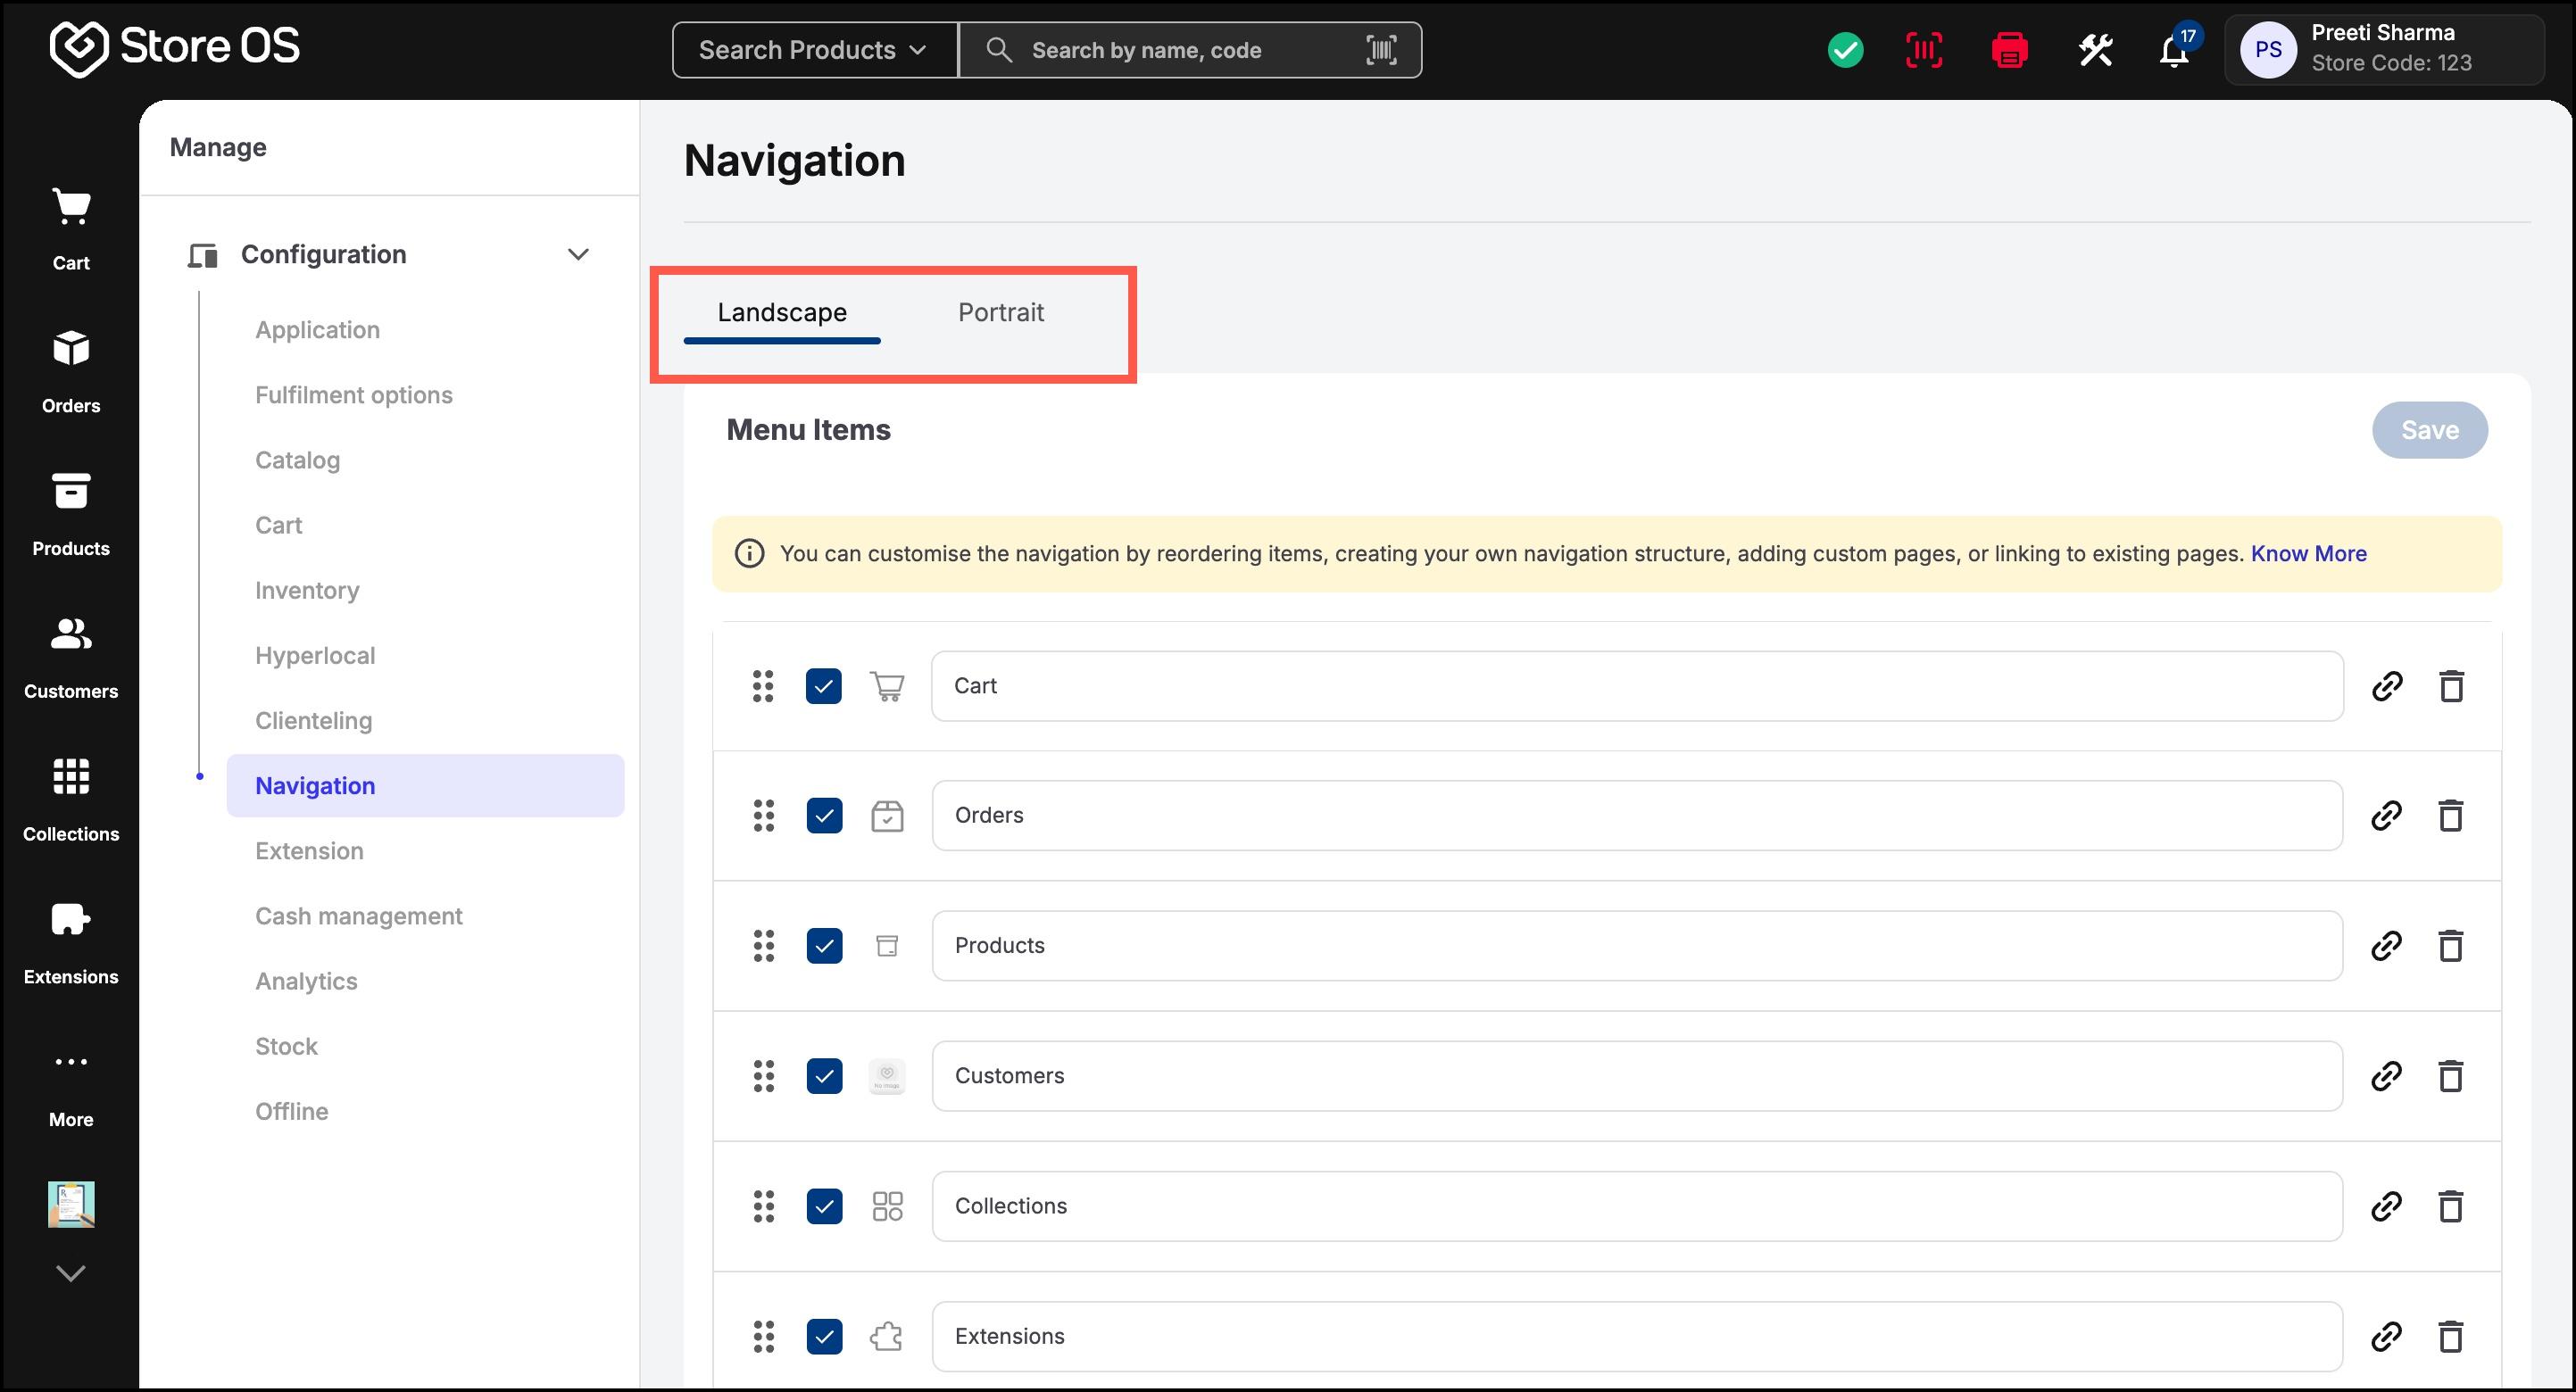
Navigation can be configured separately for different device layouts:
- Side menu is scrollable
- No restriction on the number of active items
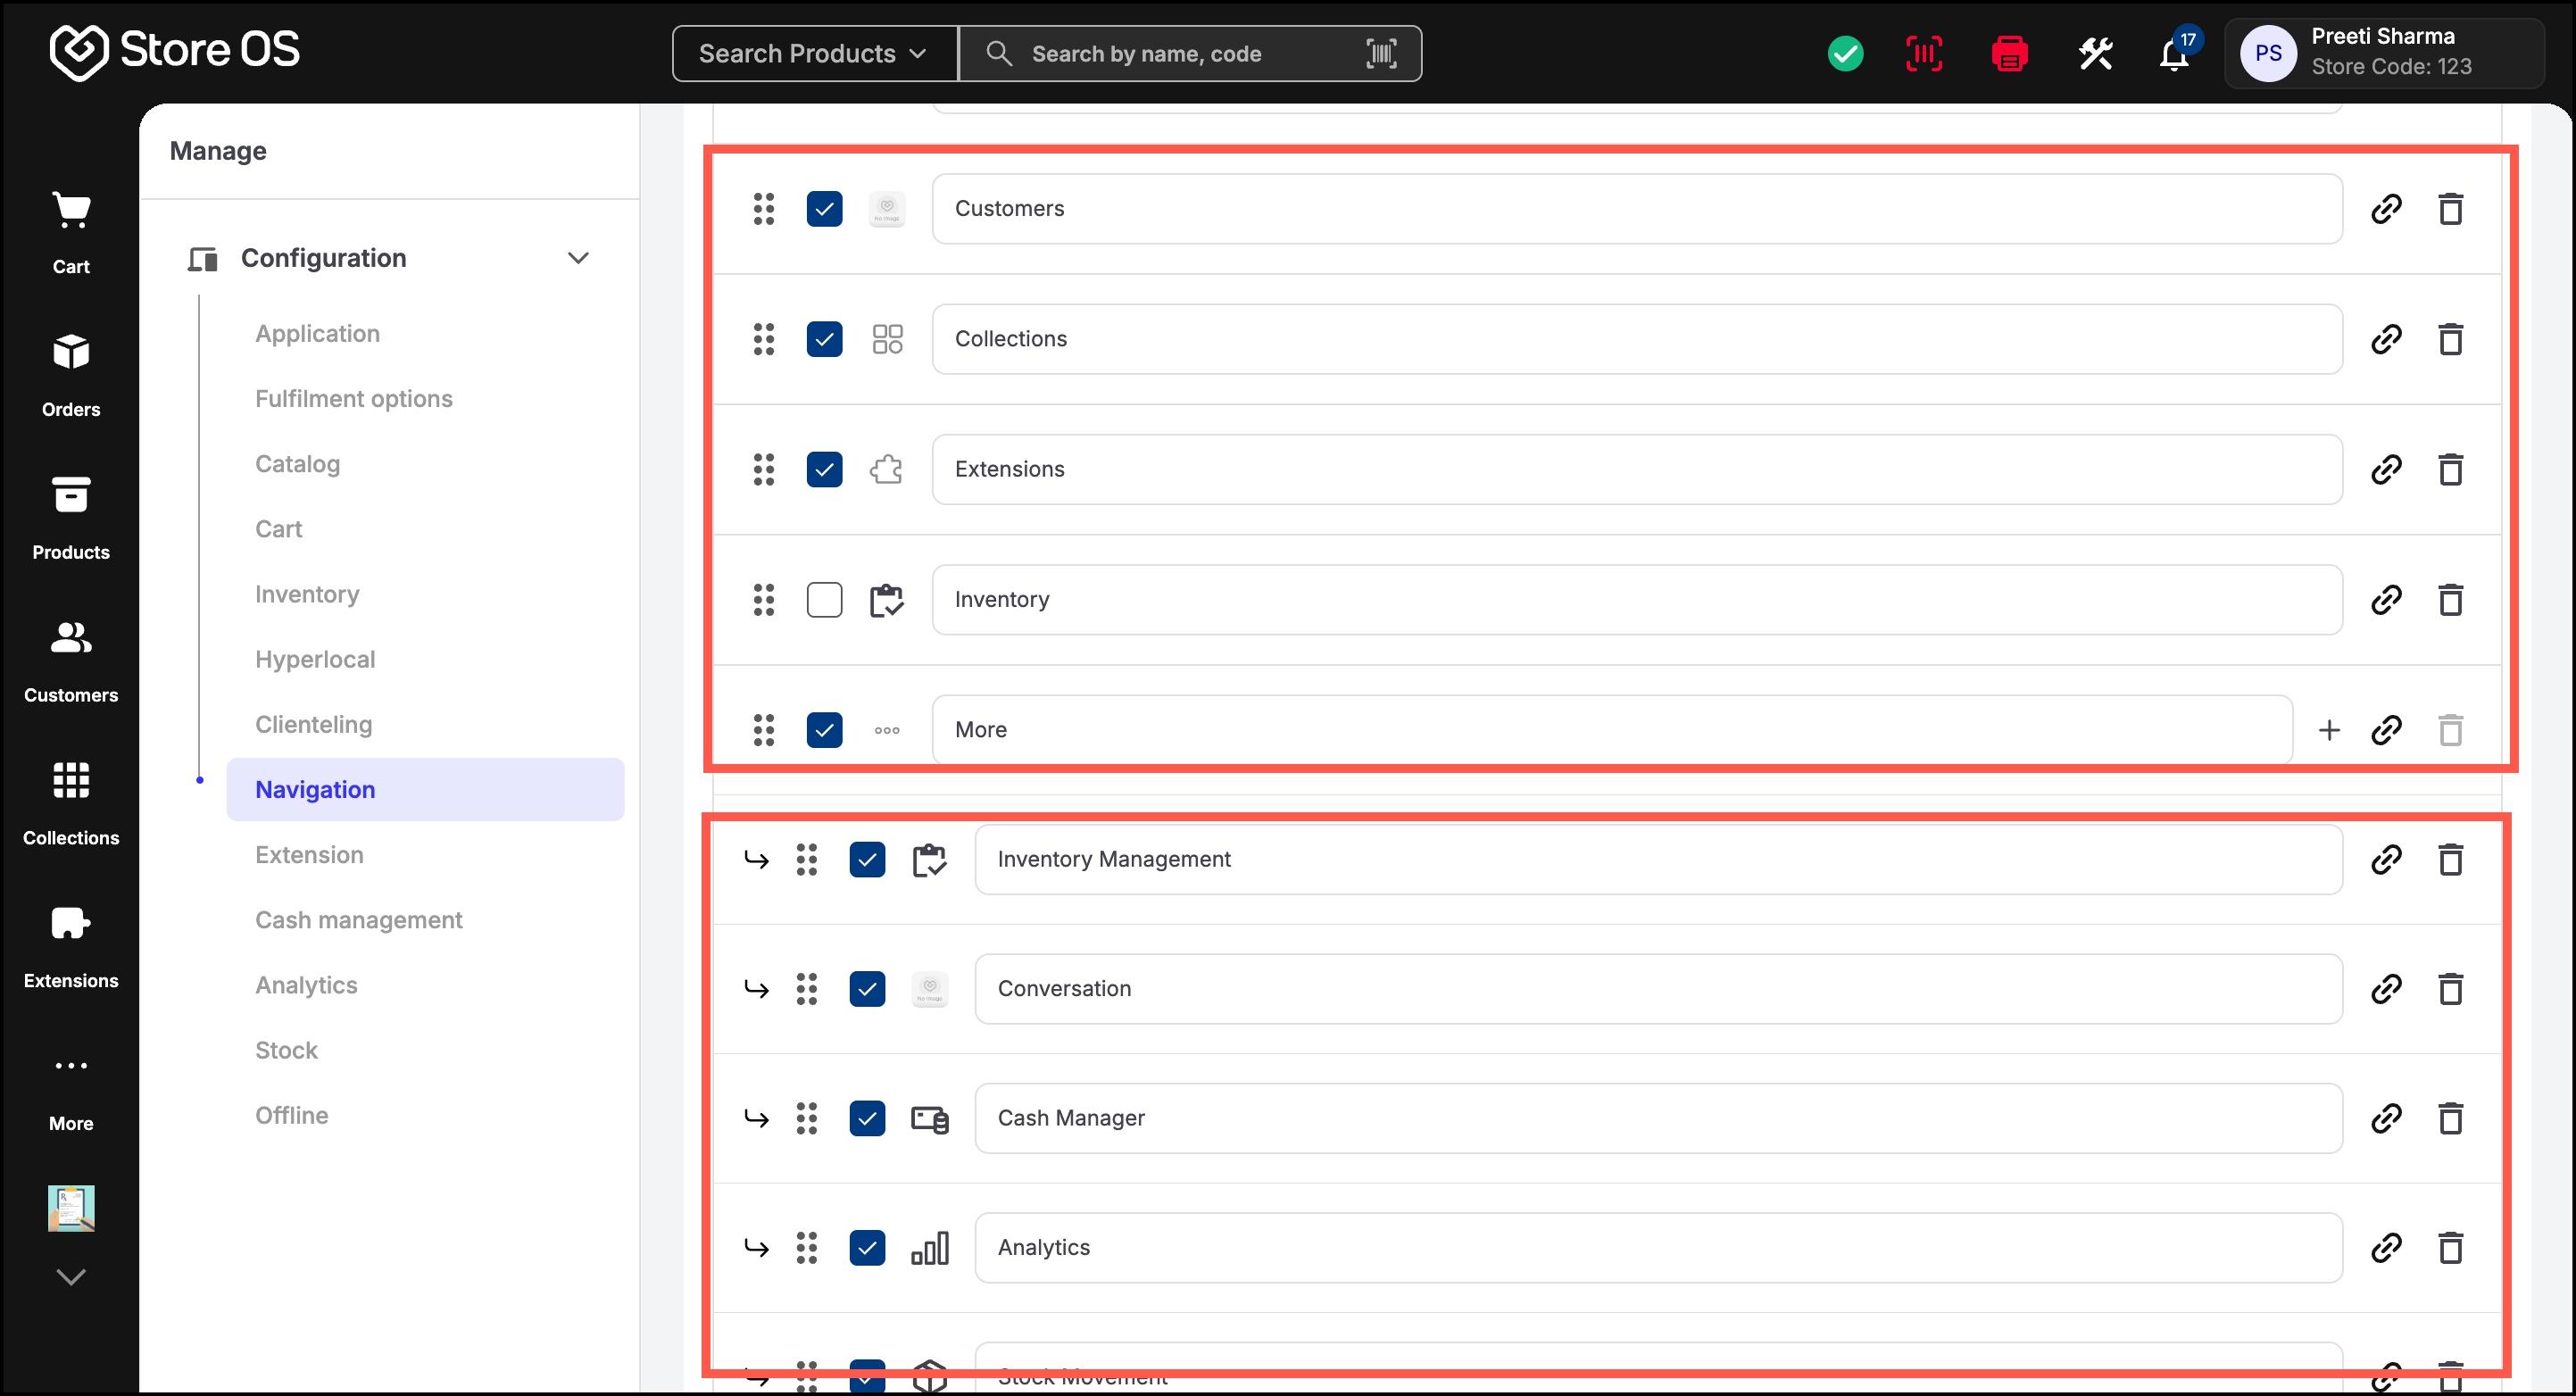
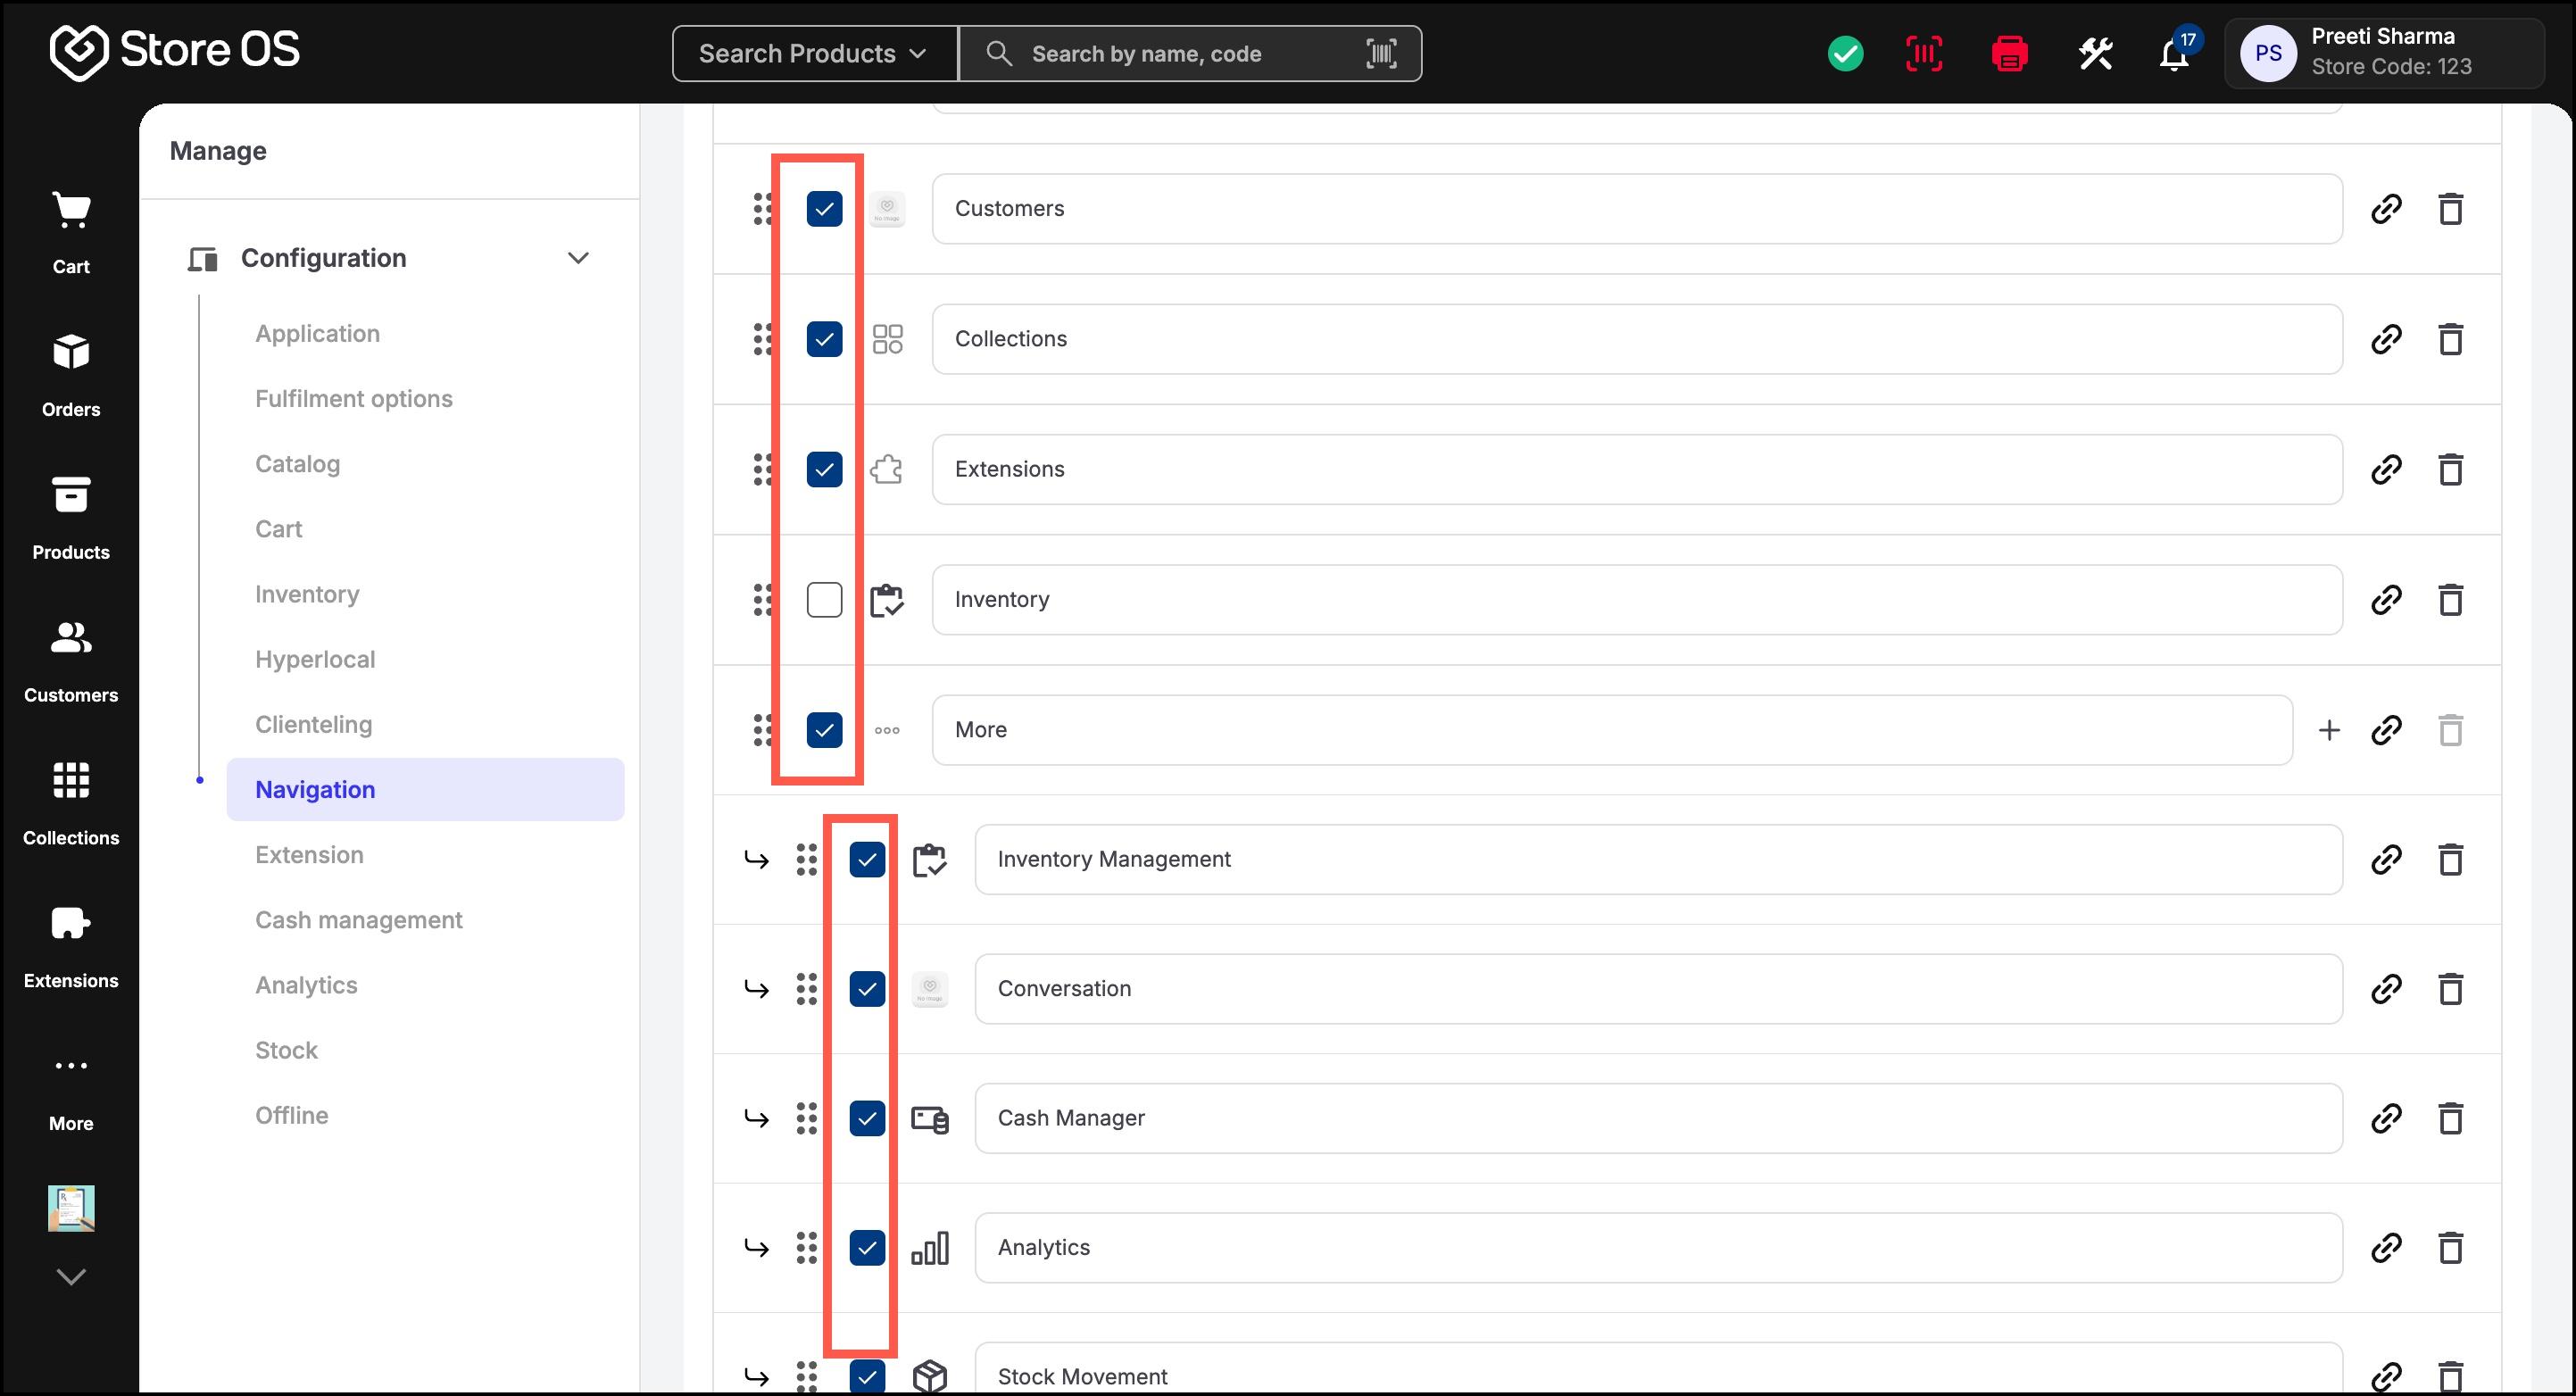
- Maximum 5 active menu items allowed
- Extra items must be moved under More
Store OS uses a two-level menu system:
- Level 1 (Primary Menu): Main items visible in the sidebar
- Level 2 (More Menu): Sub-items grouped under the More option
All new stores come with a default navigation structure to help you get started quickly. These are built-in Store OS pages:
- Cart
- Products
- Customers
- Orders
- Collections
- Extensions
- Analytics
- Inventory
- Cash Management
- Support
Navigation customization helps you to:
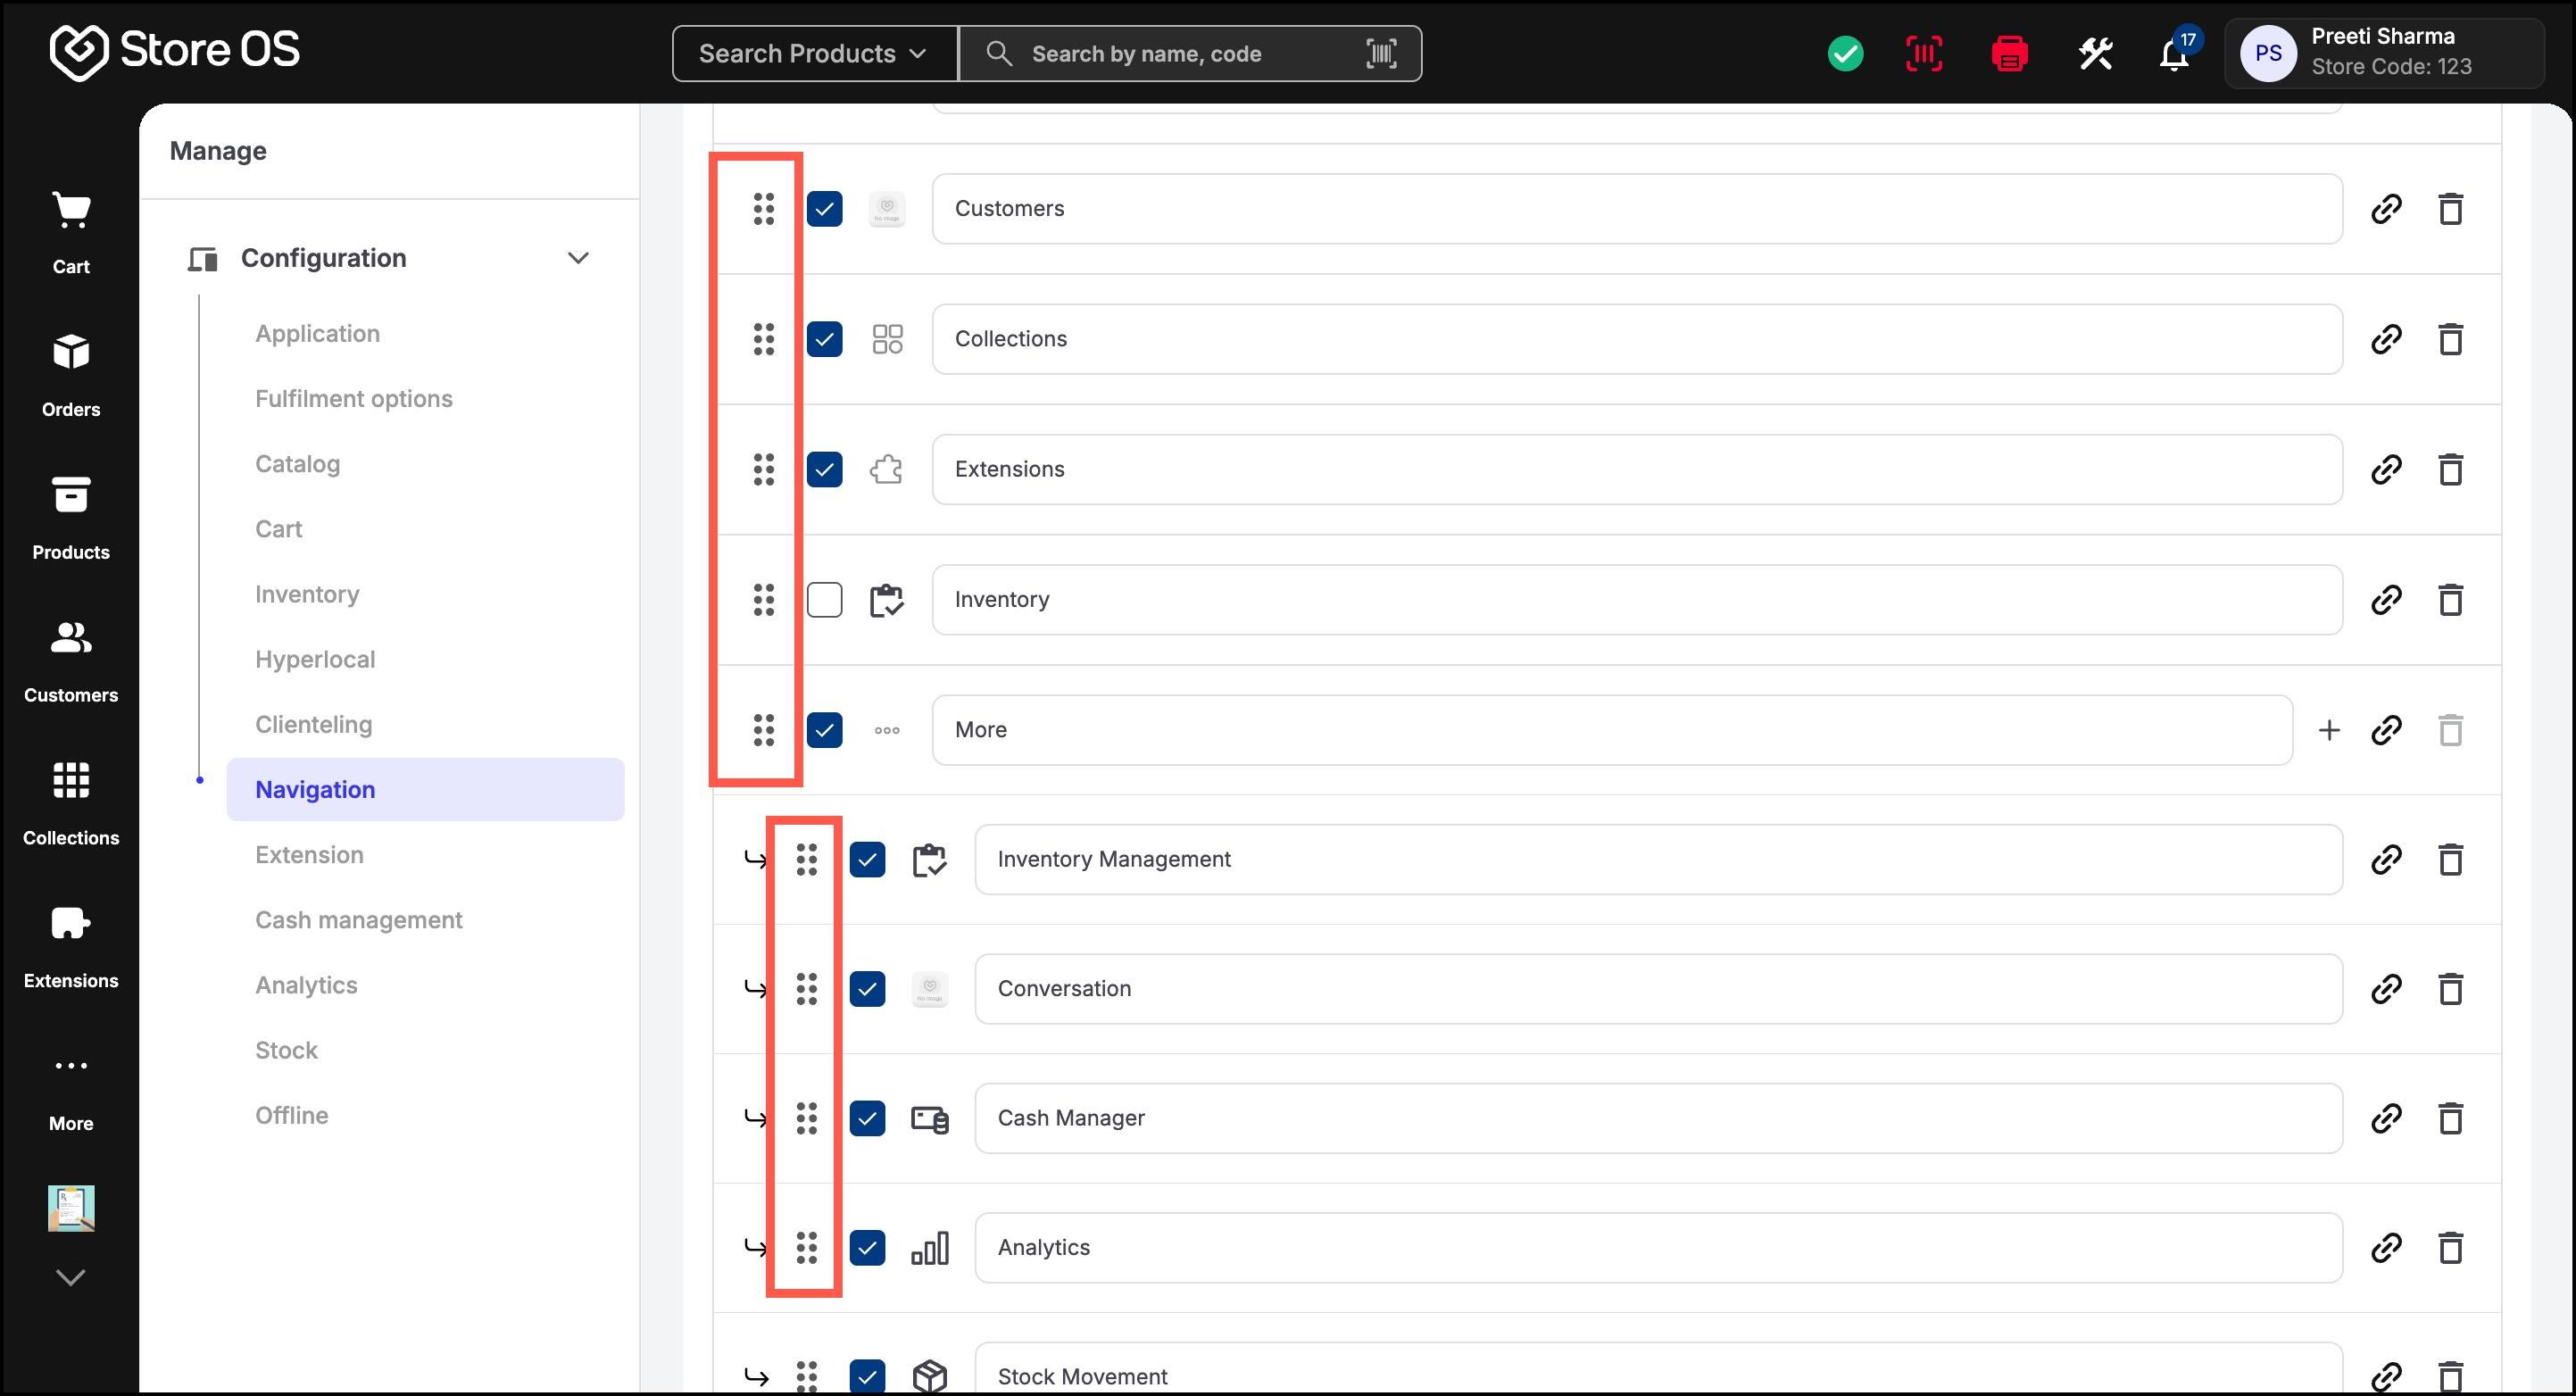
- Reorder Menu Items
- Drag and drop menu items using the drag handle
- Reordering works for both primary and sub-menu items
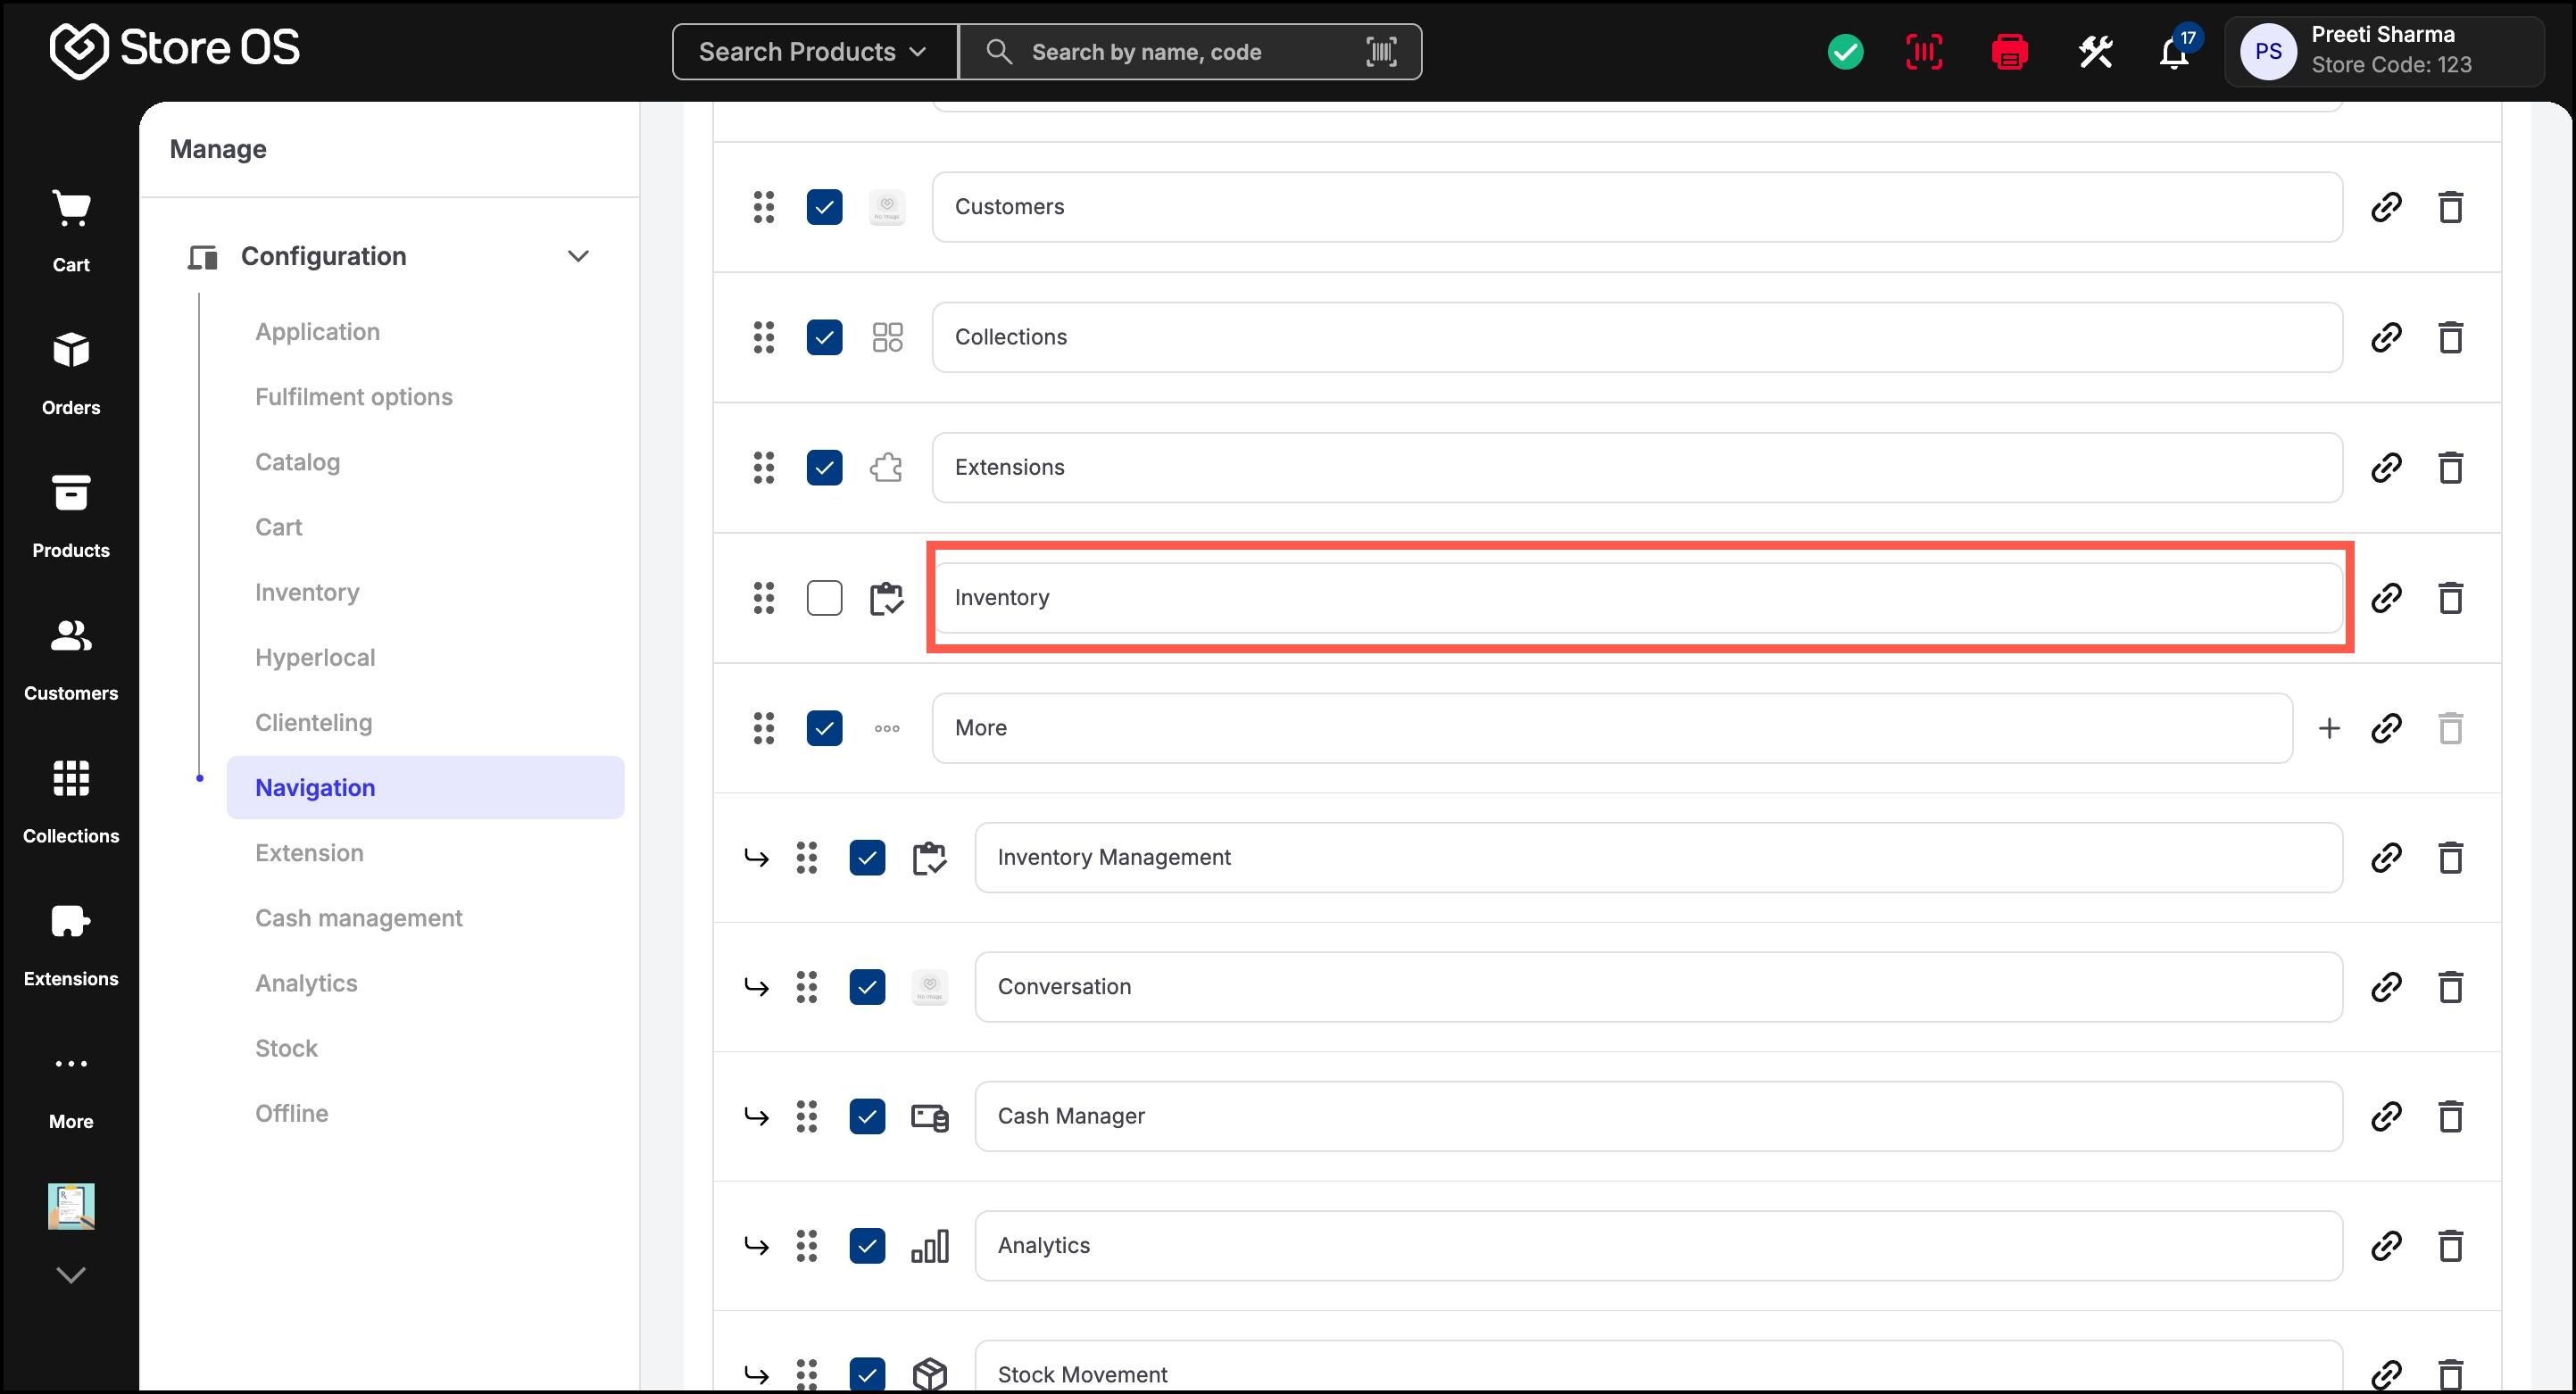
- Show or Hide Menu Items
- Use the checkbox next to a menu item to activate or deactivate it
- Deactivated items will not appear in the sidebar
- Rename Menu Items
- System pages: Can be renamed, but their icons cannot be changed
- Custom links: They can be renamed, and their icons can be updated
- Connected Apps: They can be renamed, and their icons can be updated
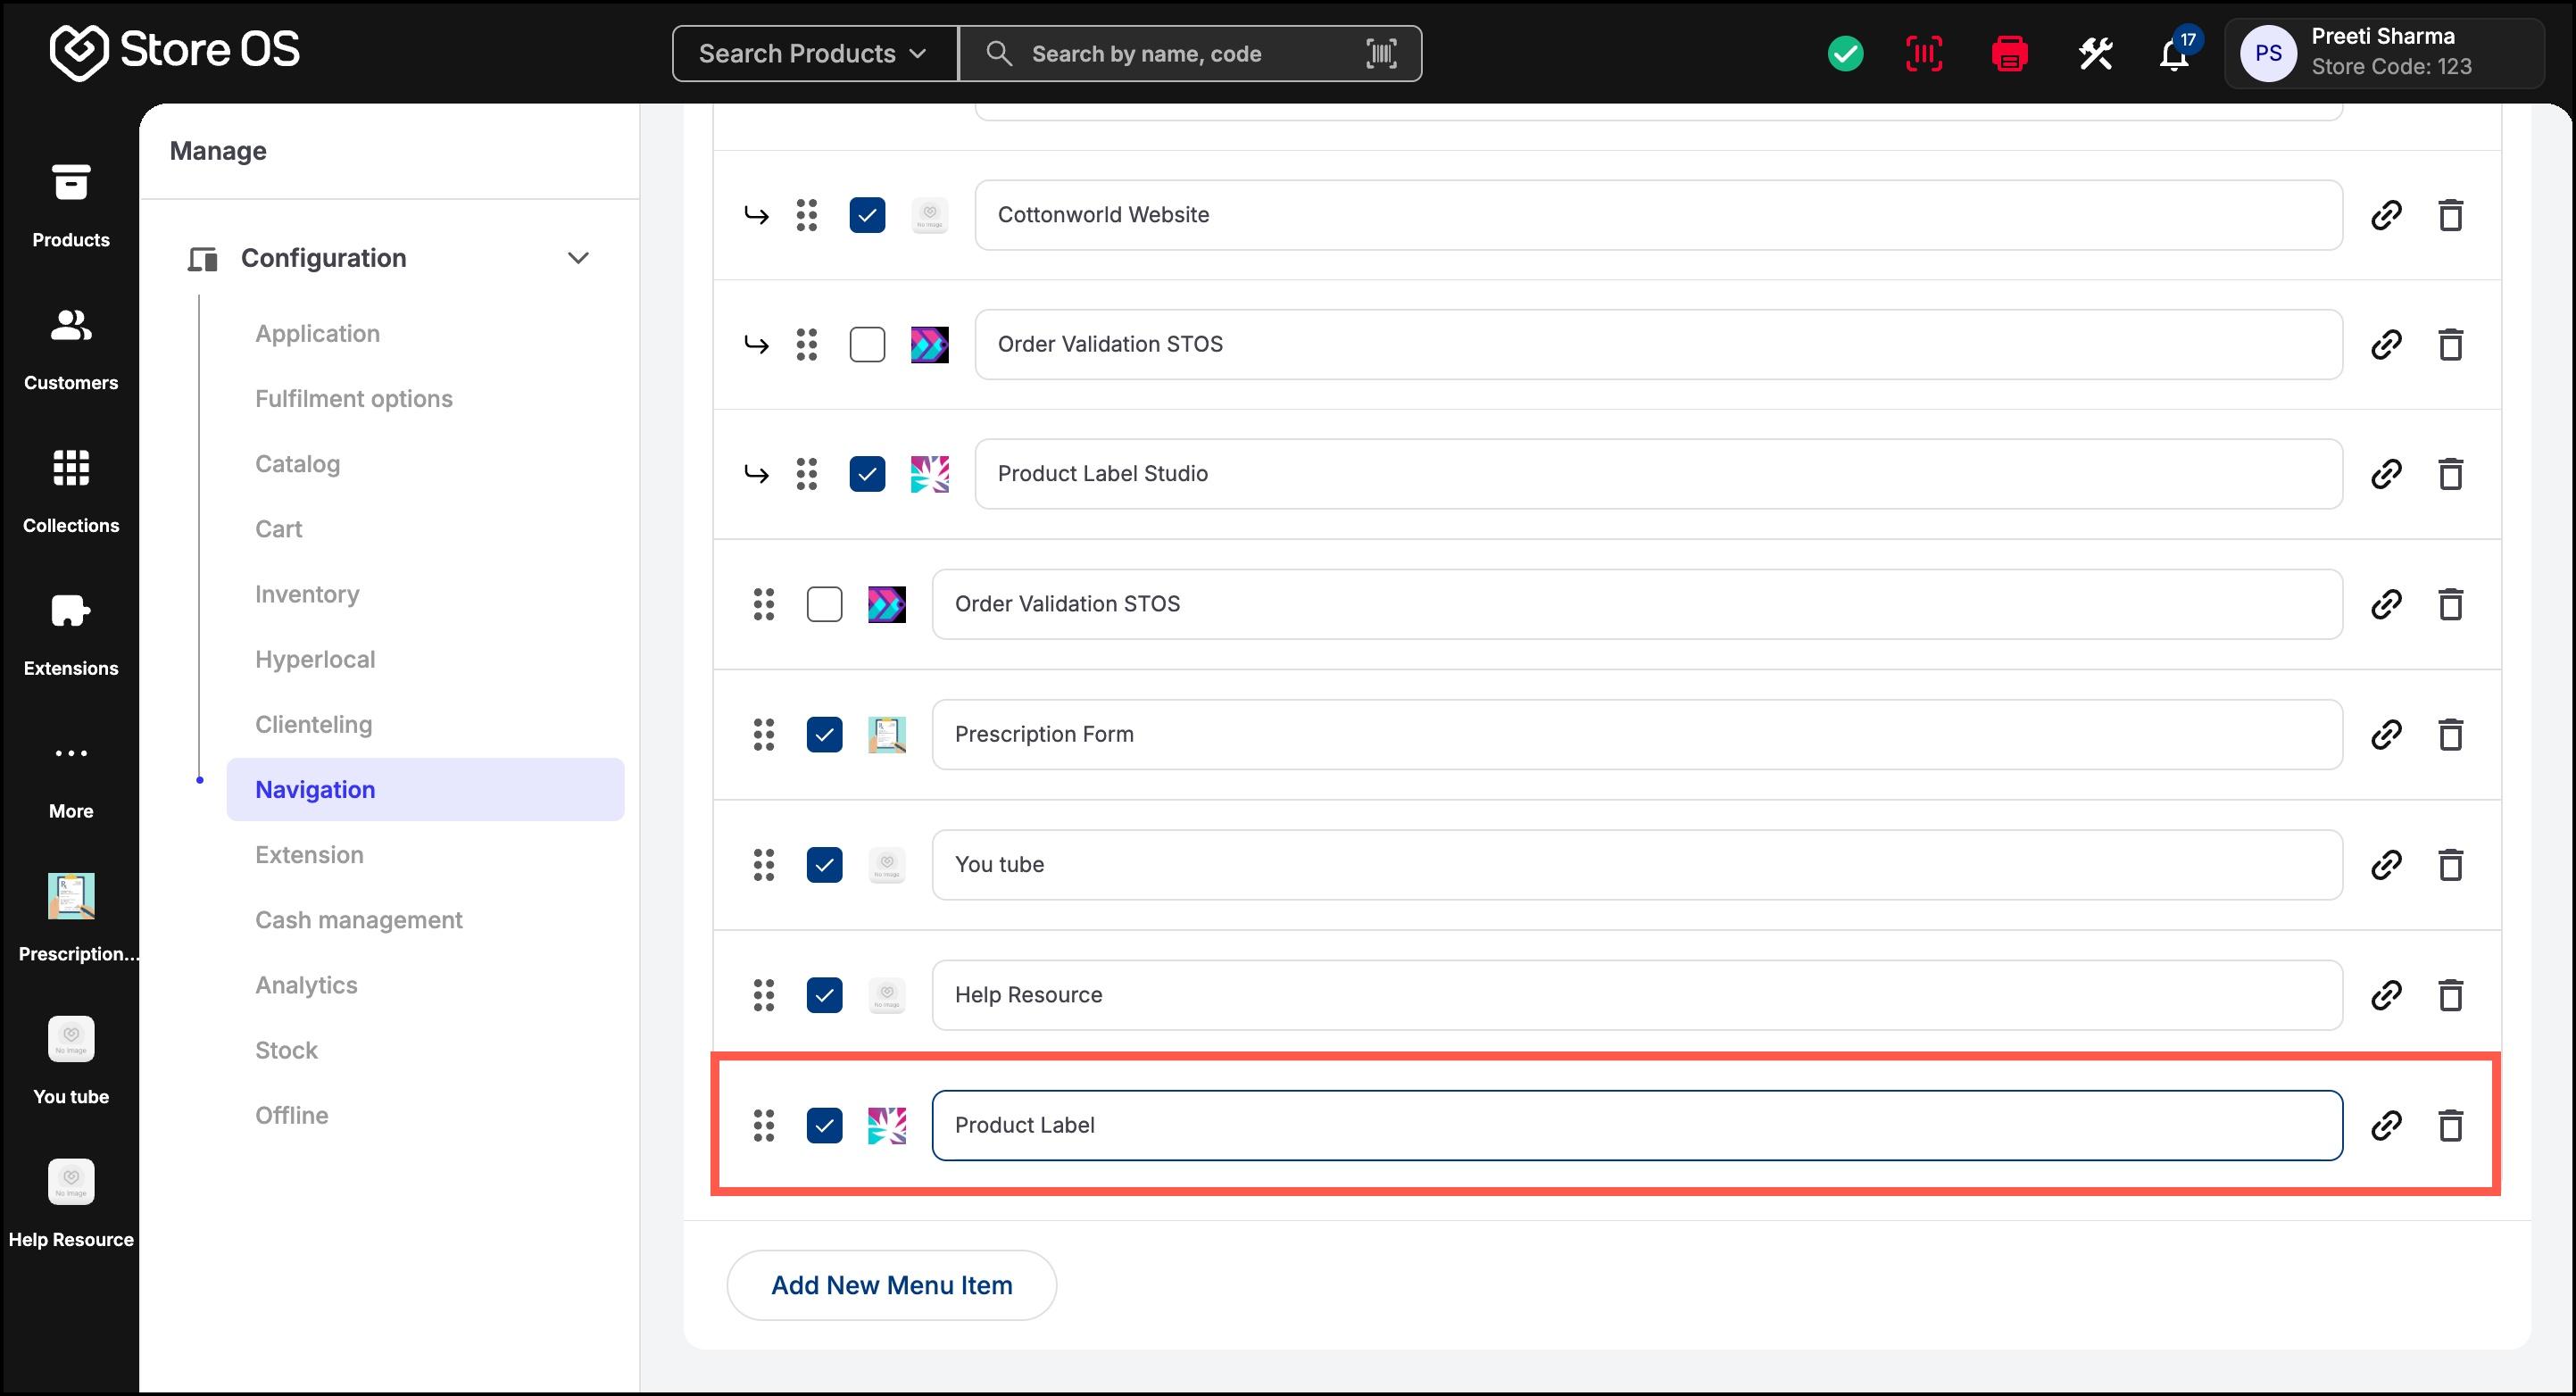
- Click Add New Menu Item at the bottom of the list
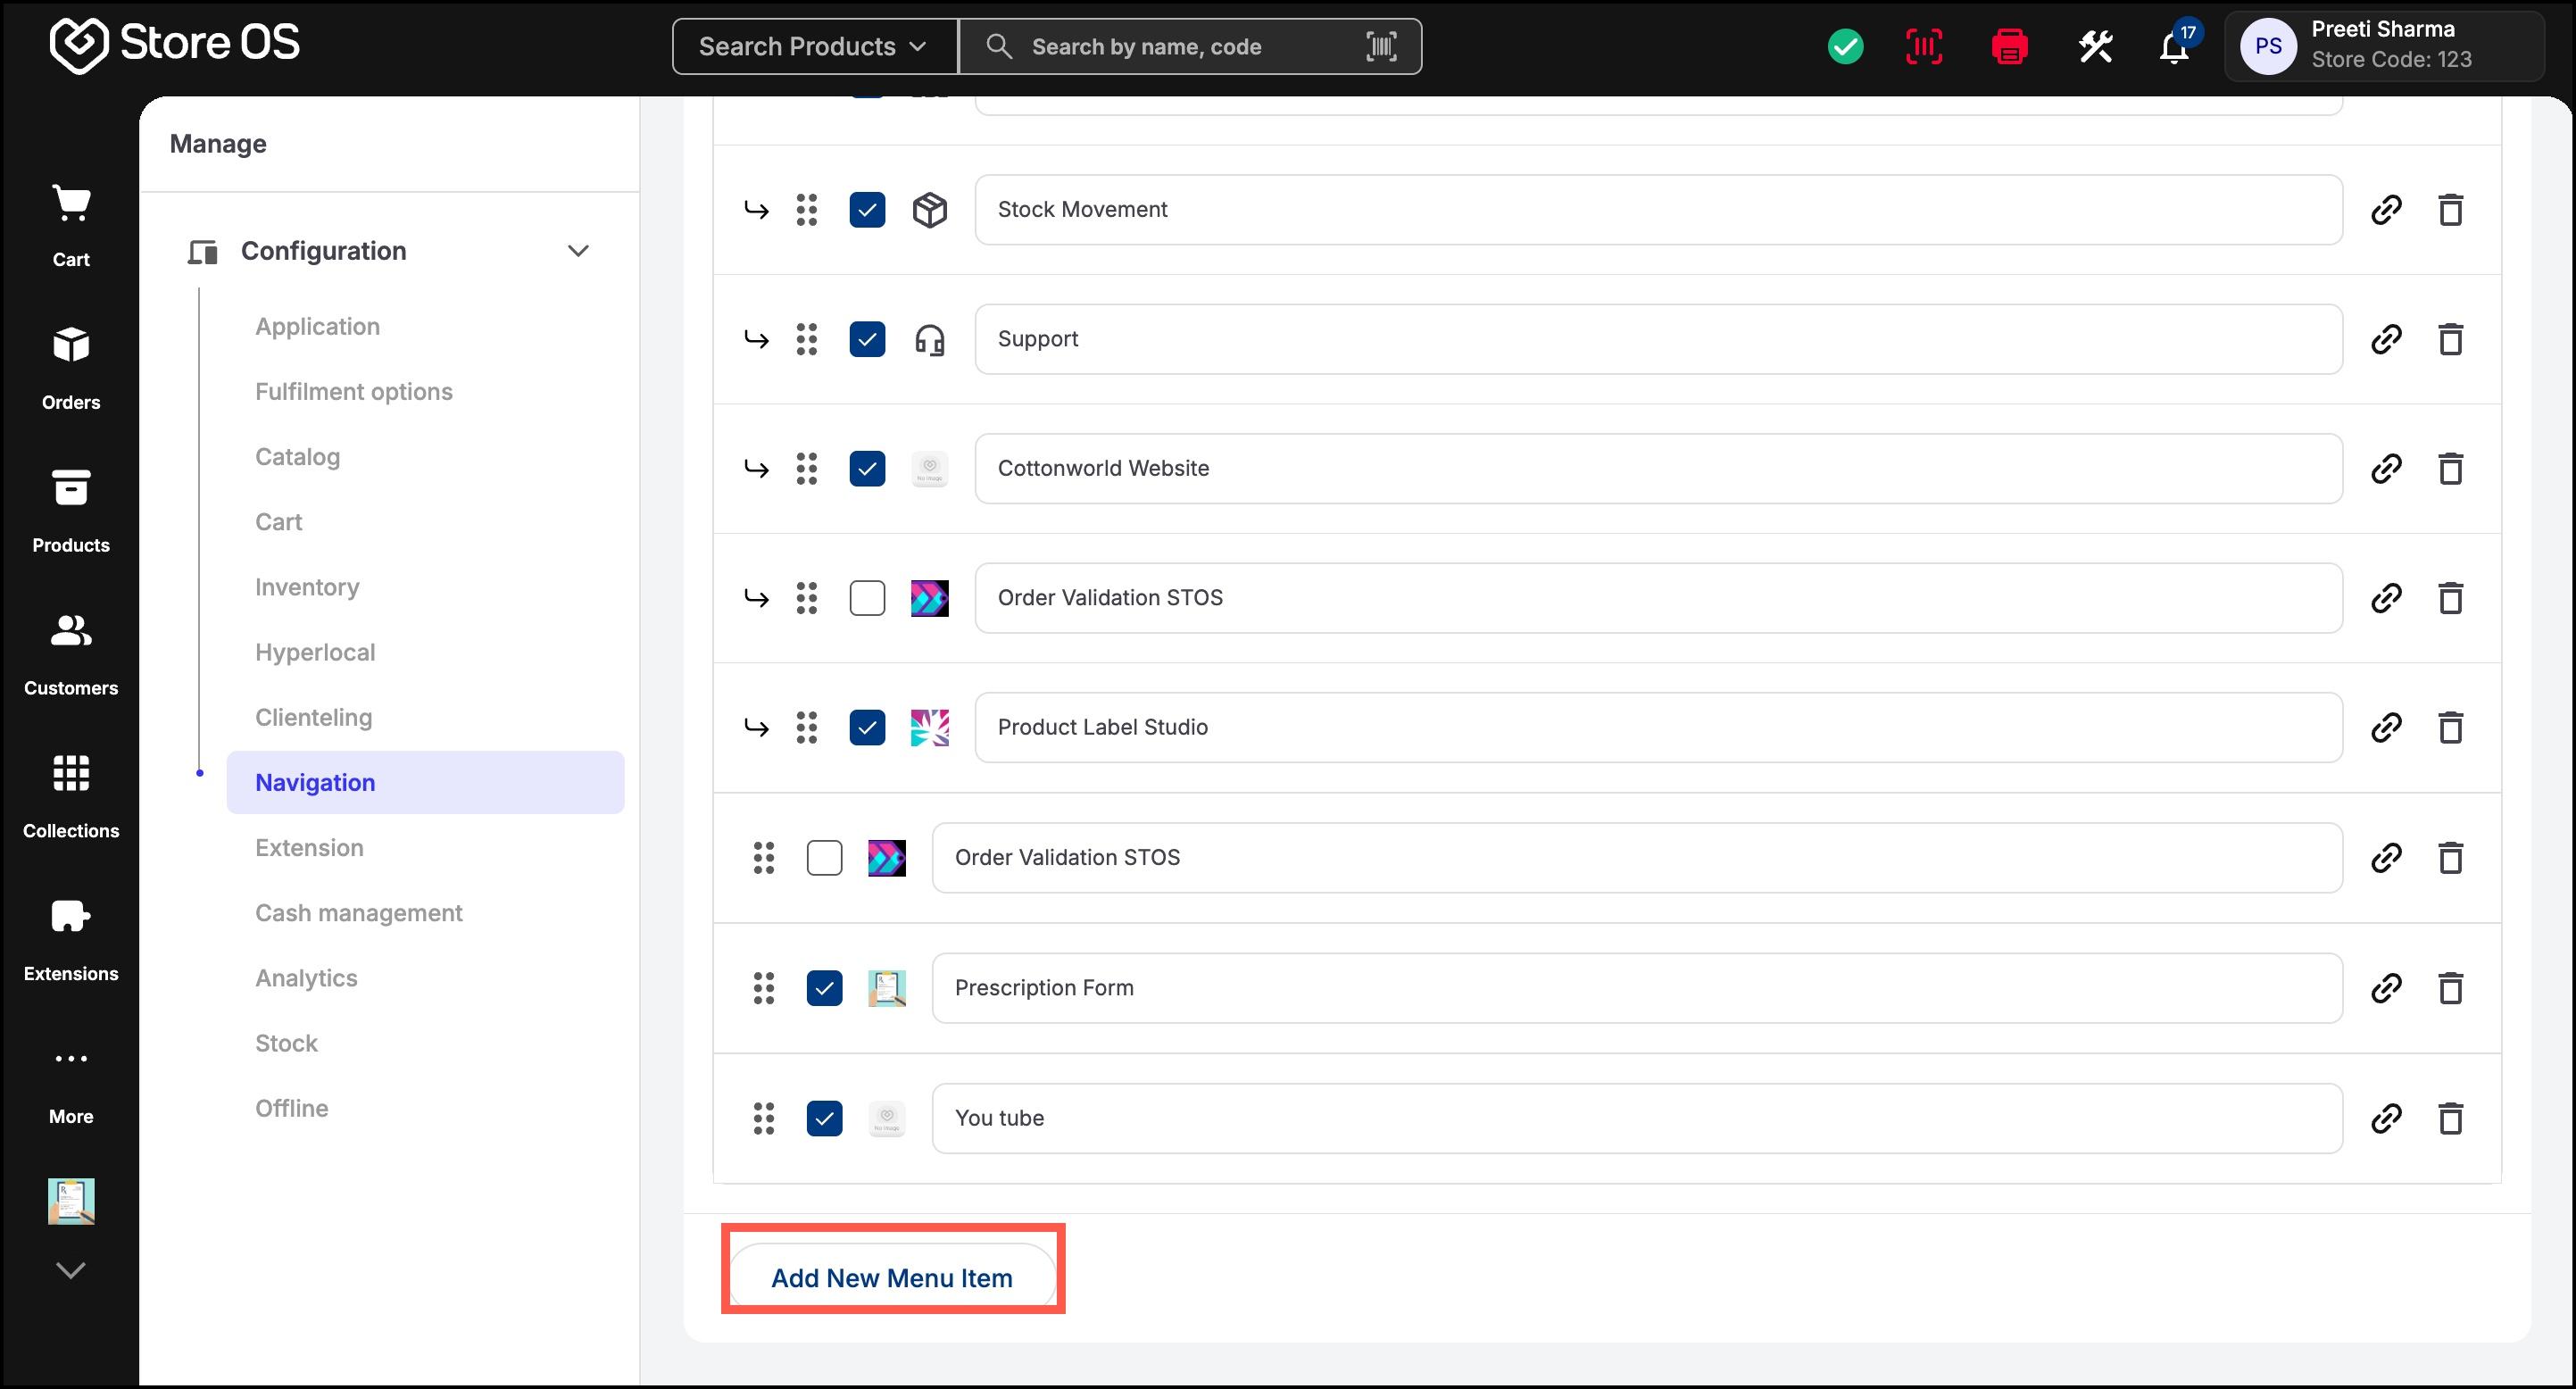
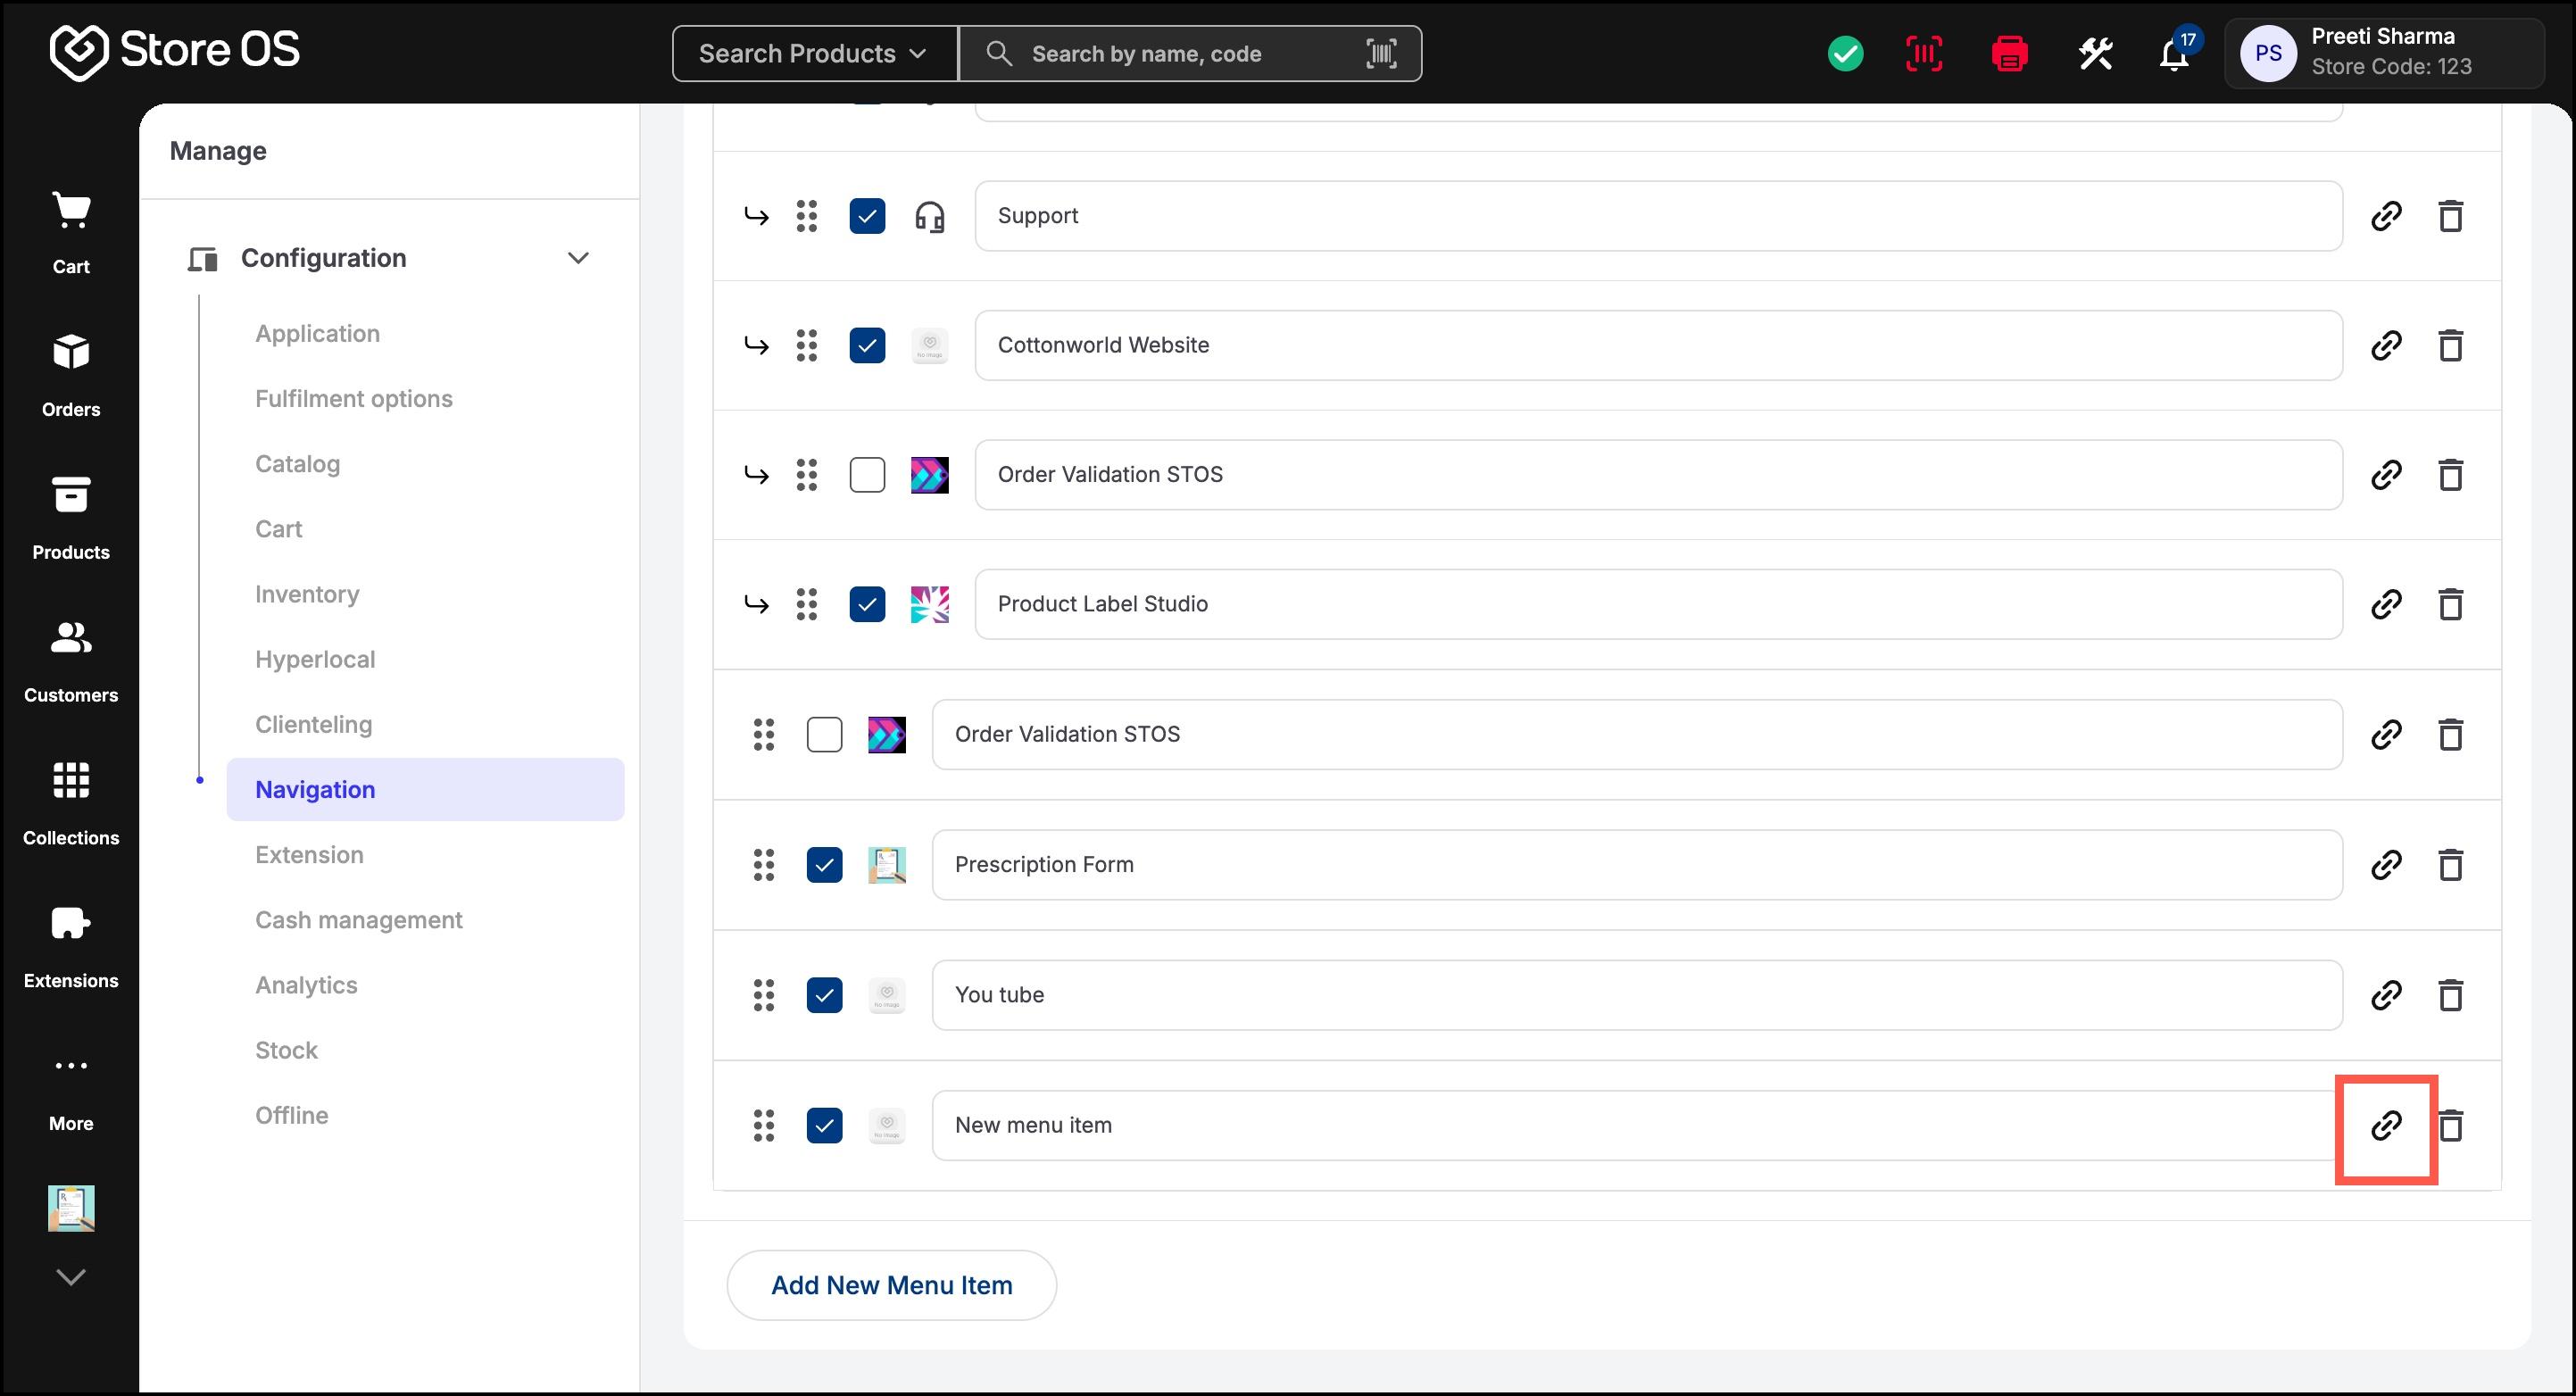
- A new menu item will be added

- Click the link icon to configure where it should redirect
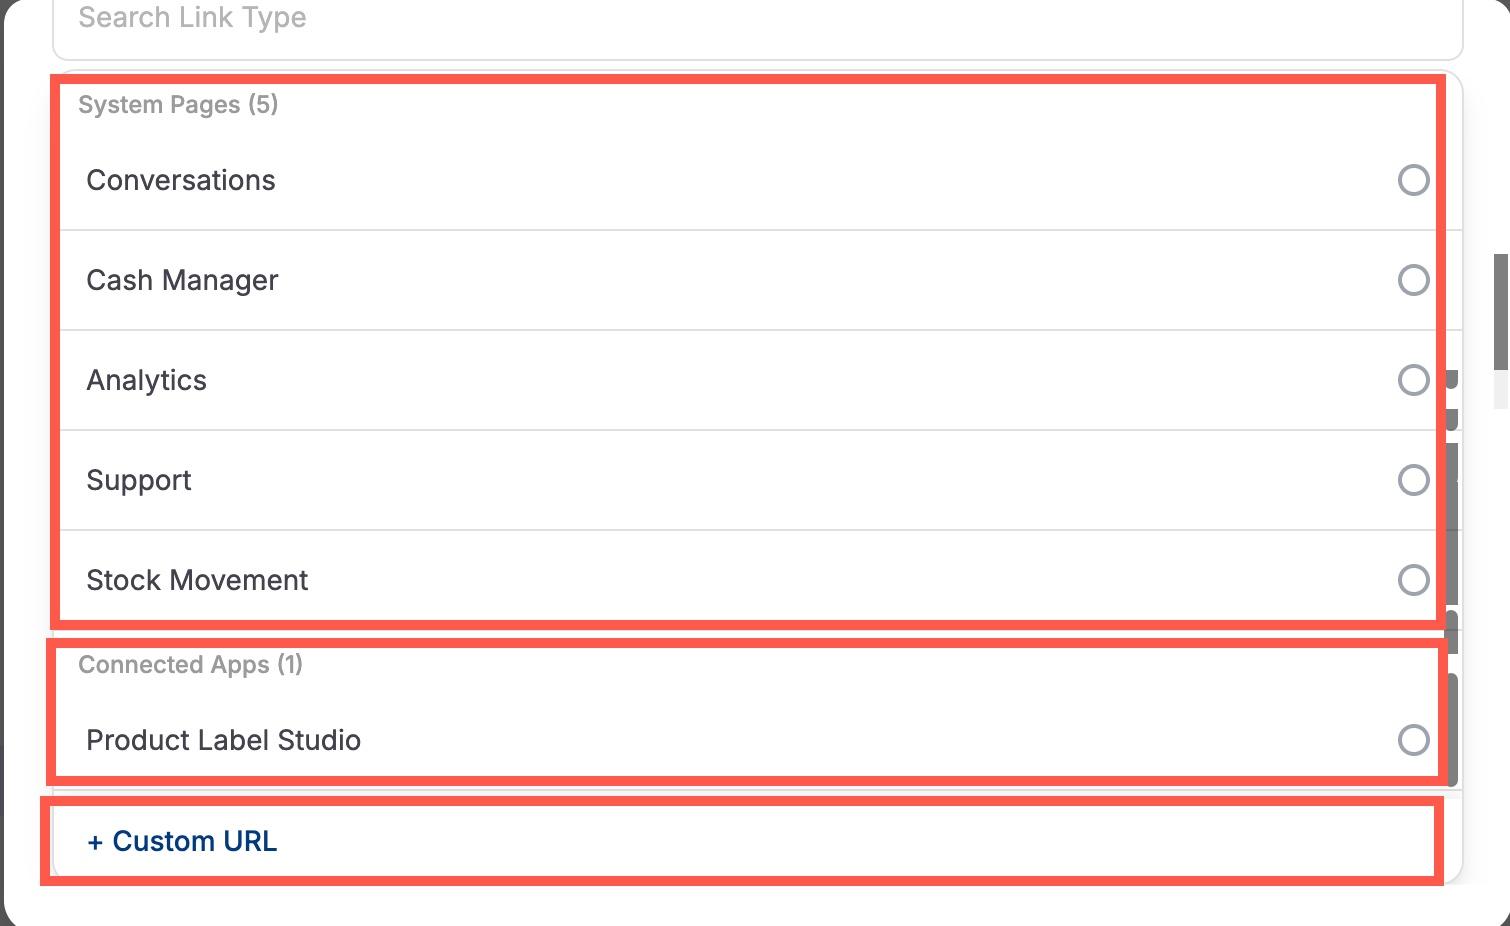
- There are three types of menu items
- System Pages: These are built-in Store OS pages like:
- Products
- Orders
- Customers
- Analytics
- Collections
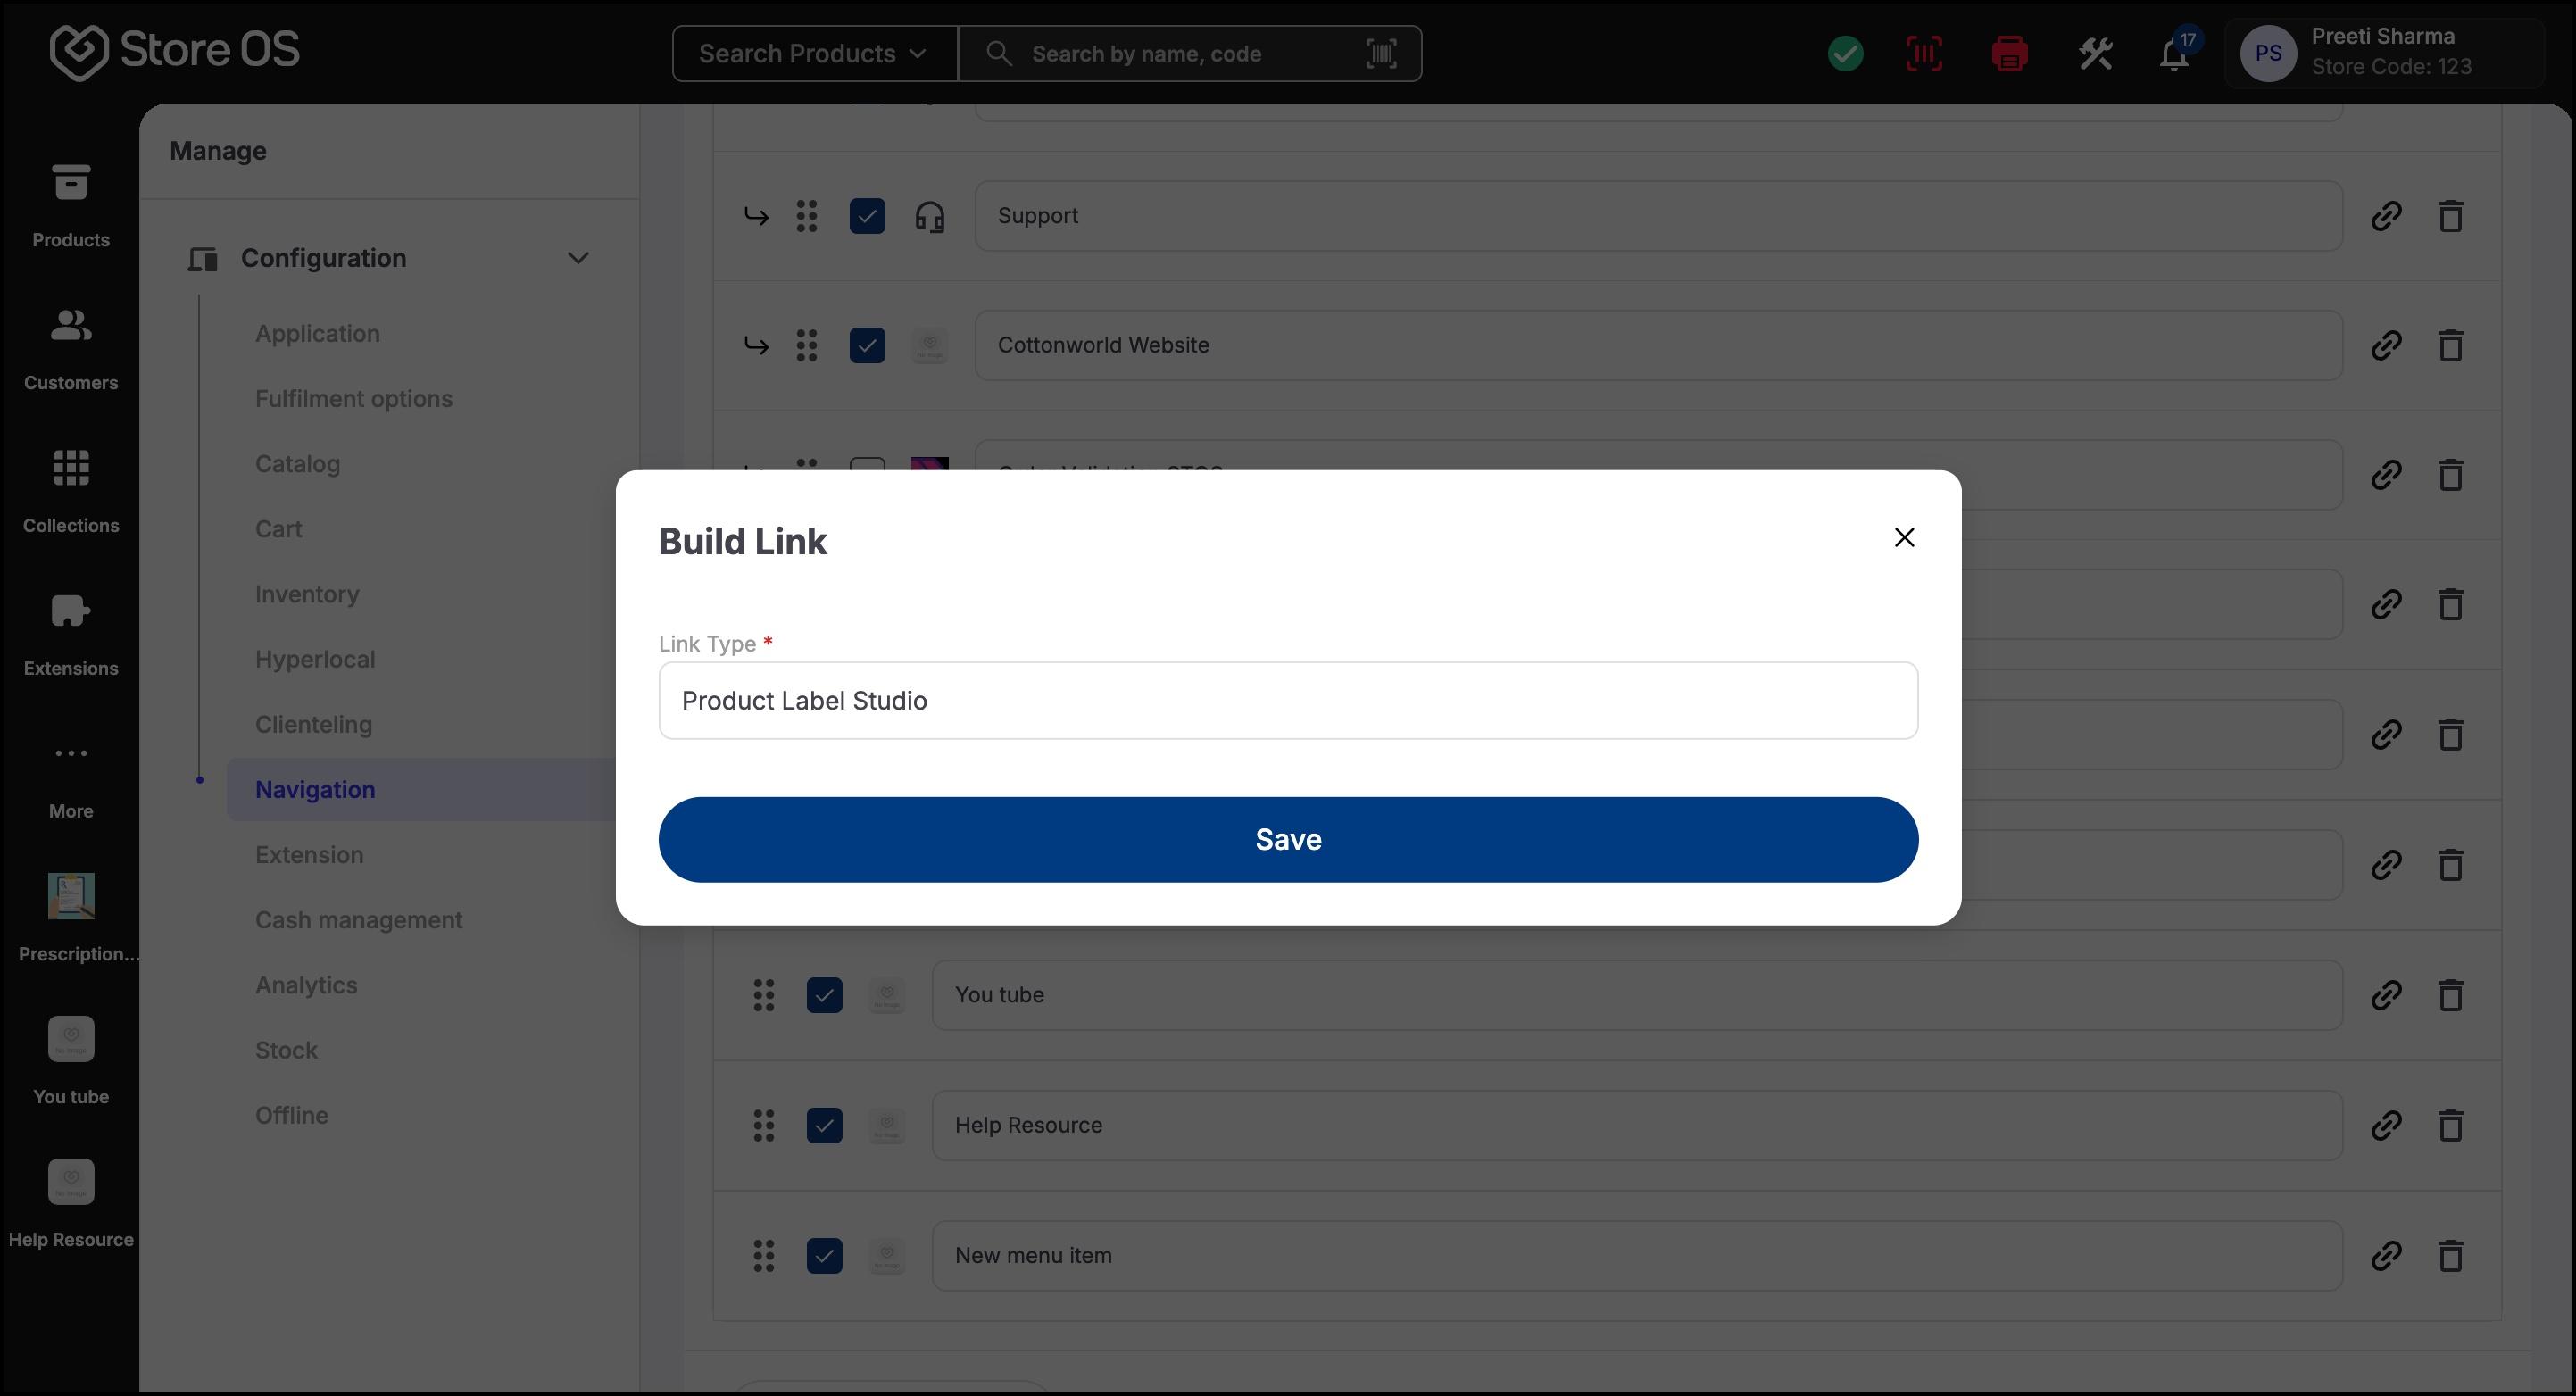
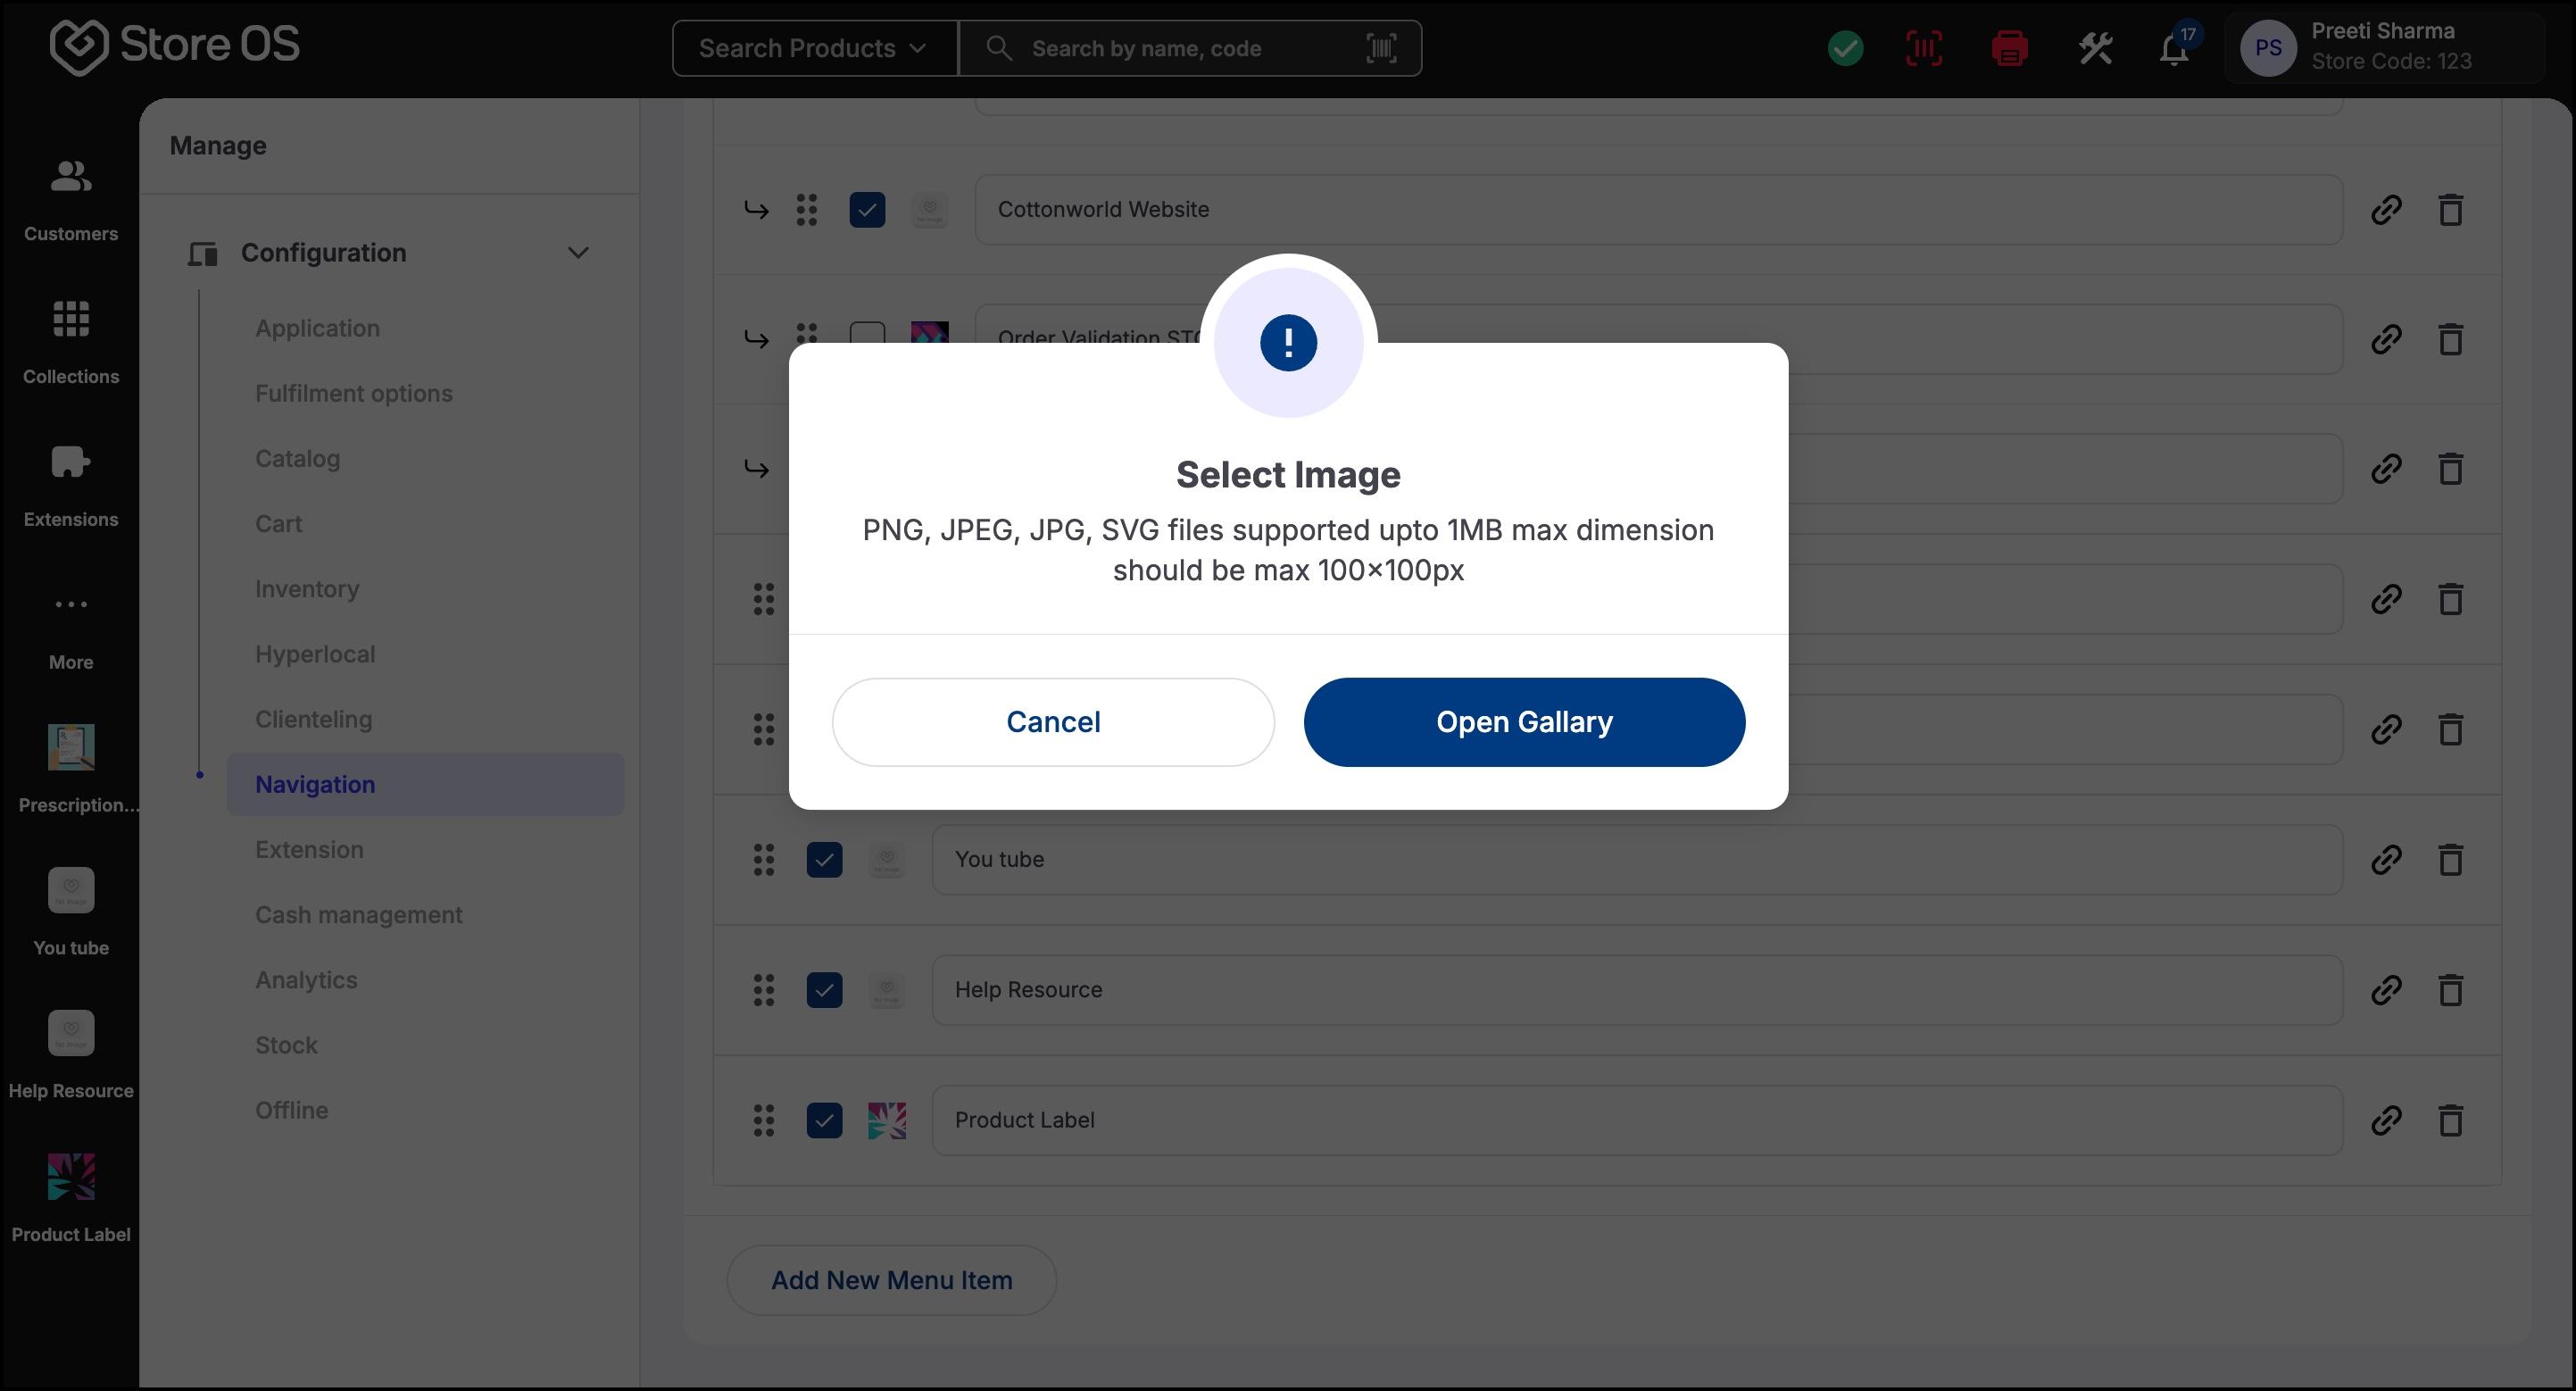
- Custom Links (URLs): Custom links let you add external or internal URLs to the navigation, such as training resources or internal dashboards.
- Connected Apps: Connected Apps are extensions integrated with Store OS that provide additional functionality. Once enabled from Configuration > Extension > Connected Apps, they can be added to the navigation menu.
- System Pages: These are built-in Store OS pages like:
System pages cannot be duplicated at the same level. Icons for system pages cannot be changed.
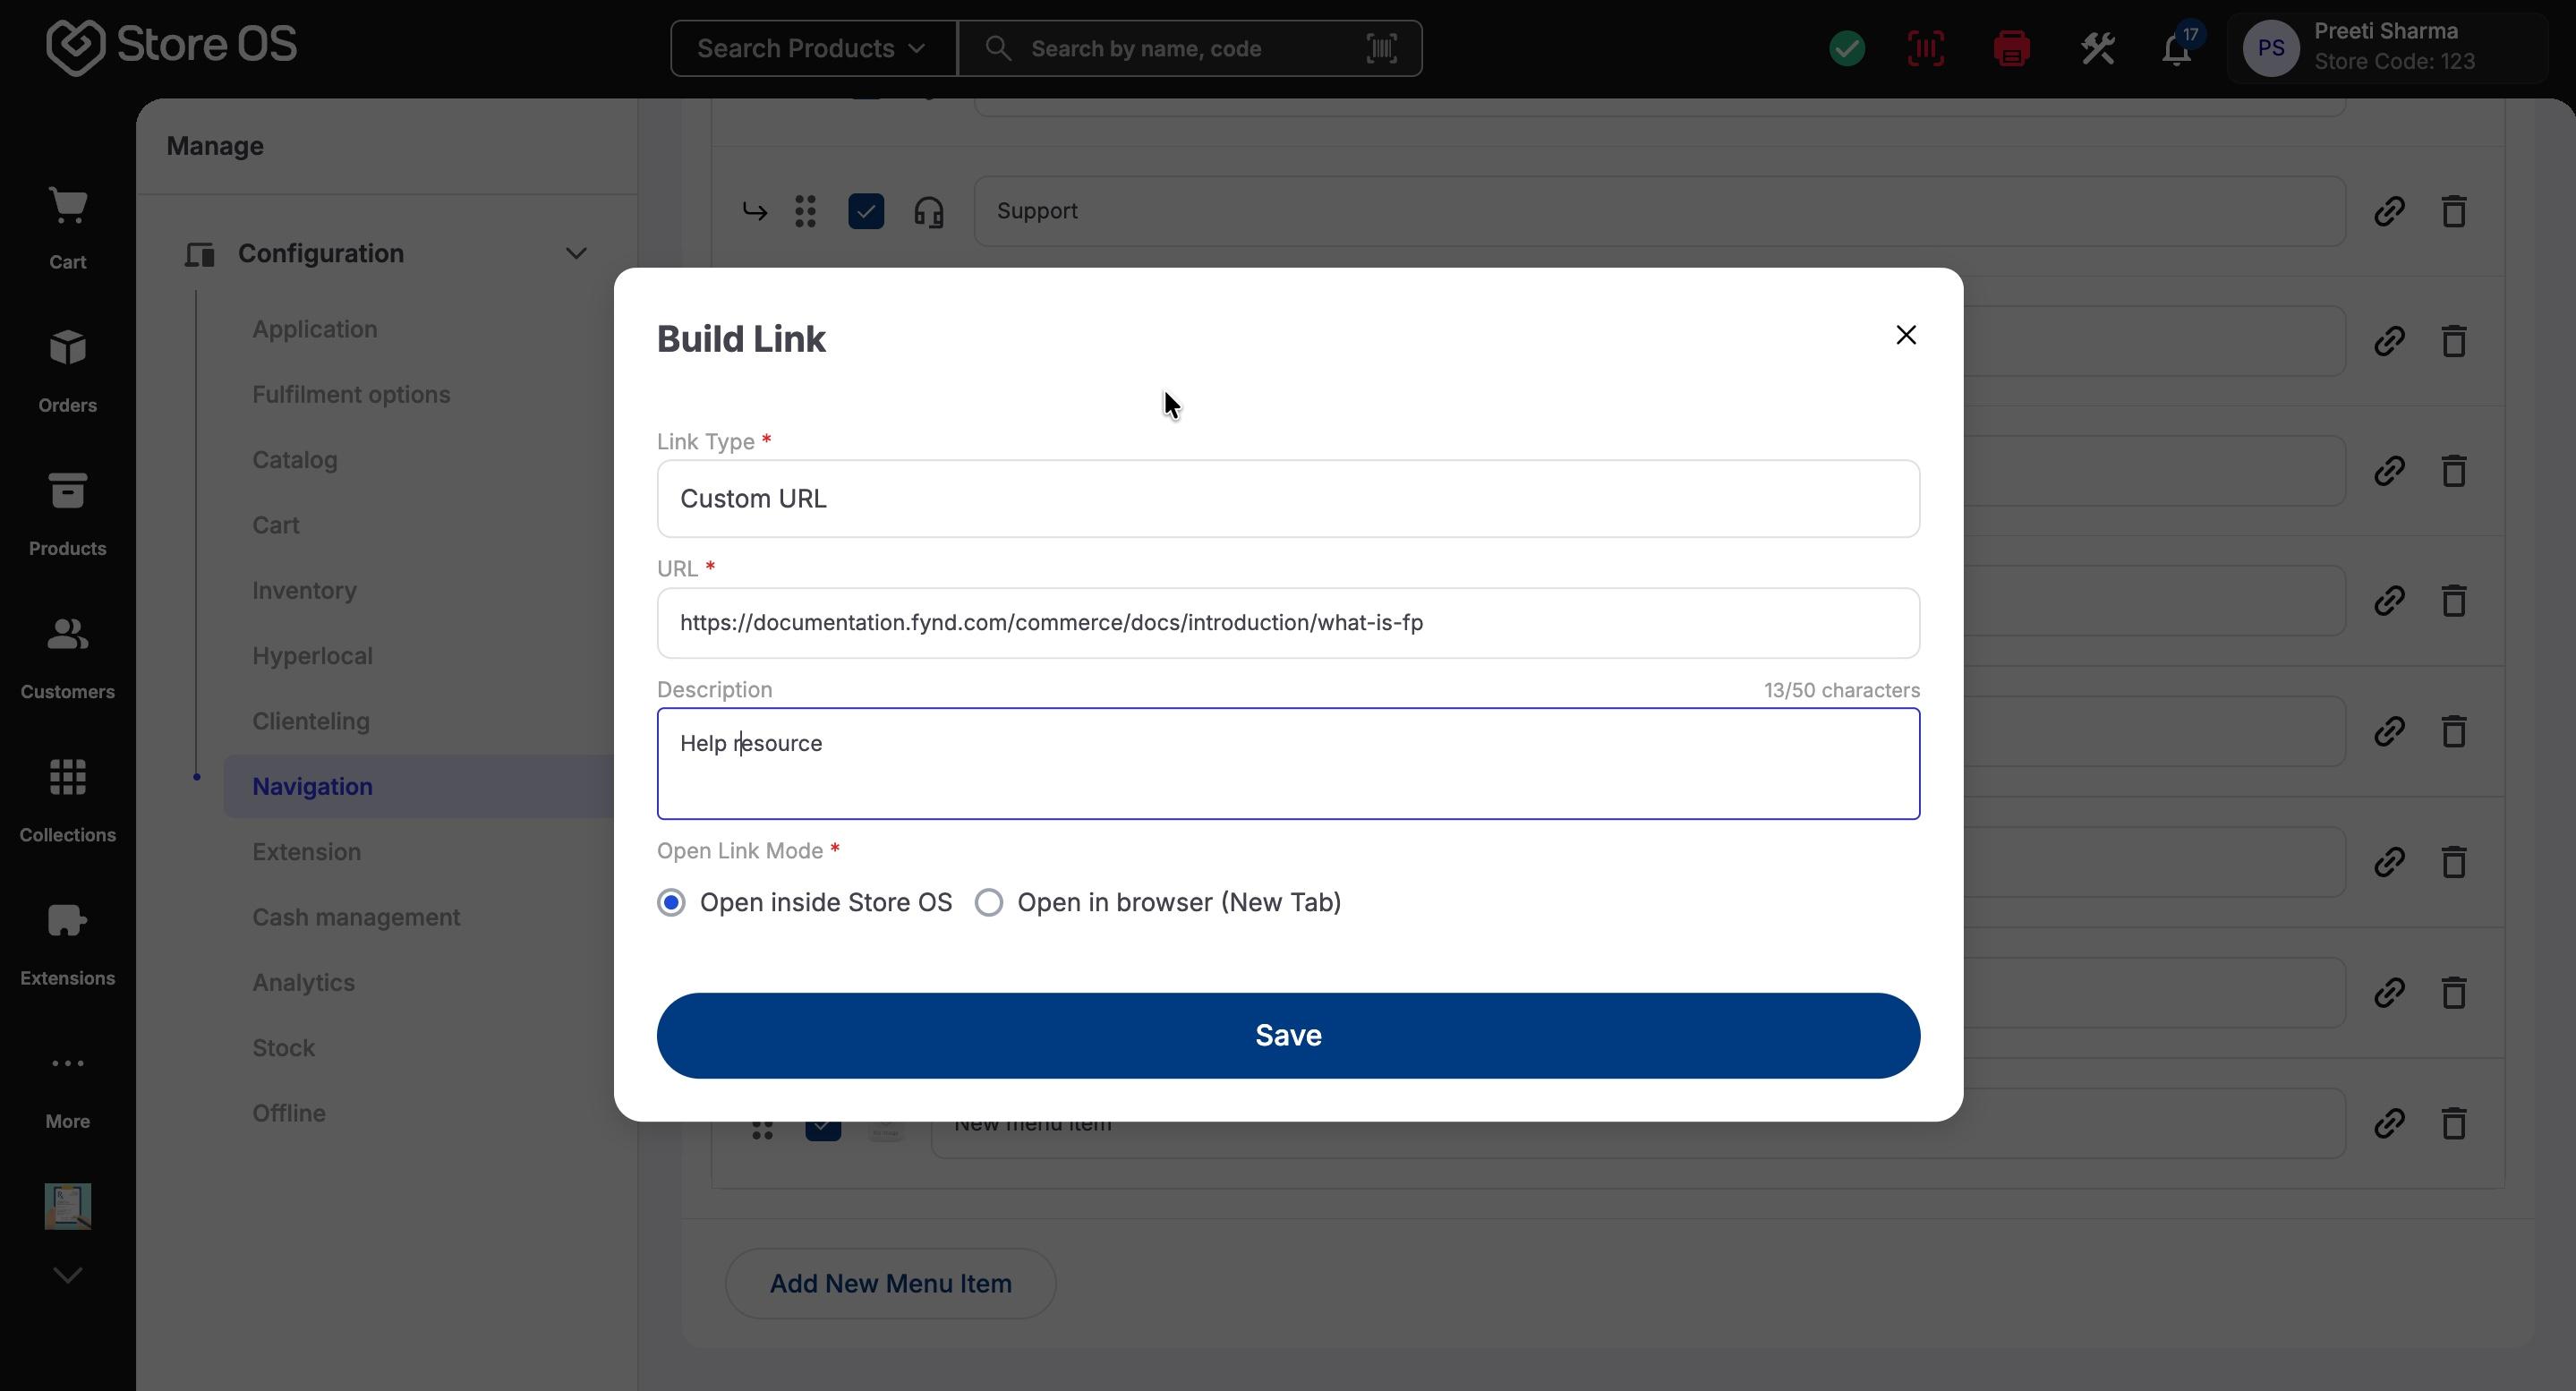
- For custom URLs, select Link Type as Custom URL and enter a valid https URL
- Add an optional description (up to 50 characters)
- You can control how the link opens:
- Open inside Store OS: The link opens within the Store OS interface.
- Open in browser (New Tab): The link opens in a separate browser tab.
Select the option based on your business requirement.
- Rename the newly added menu item
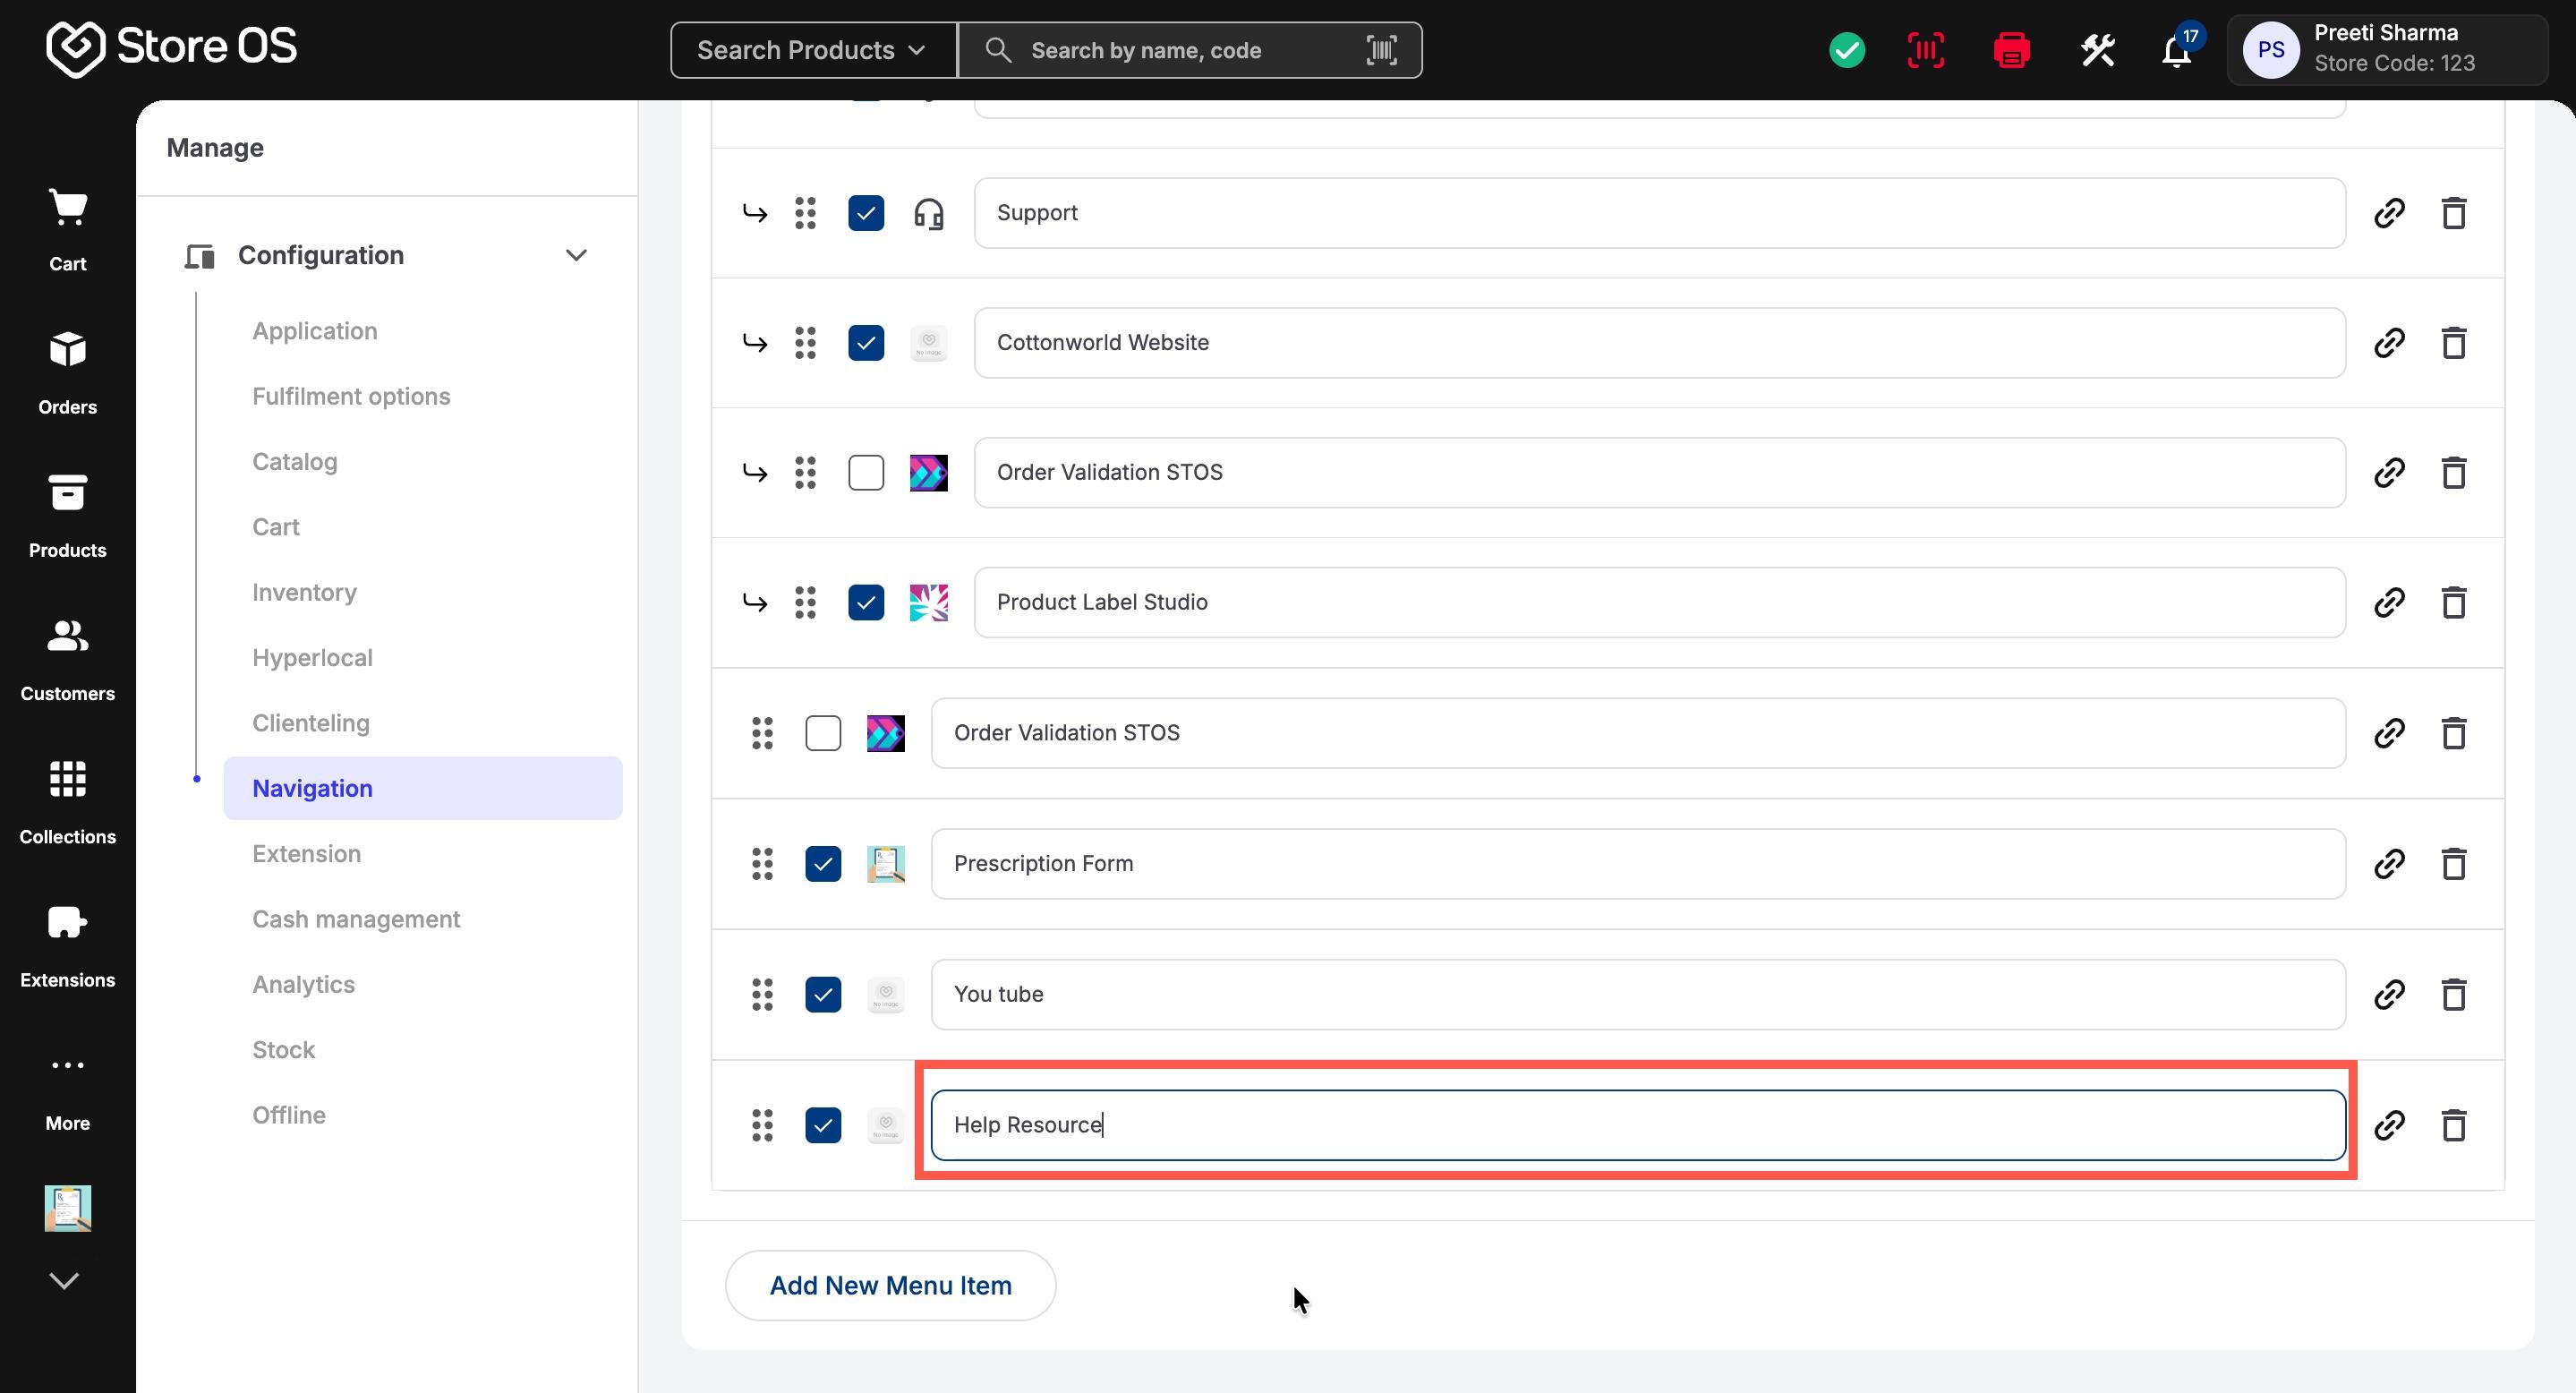
- Click Save at the top-right of the page
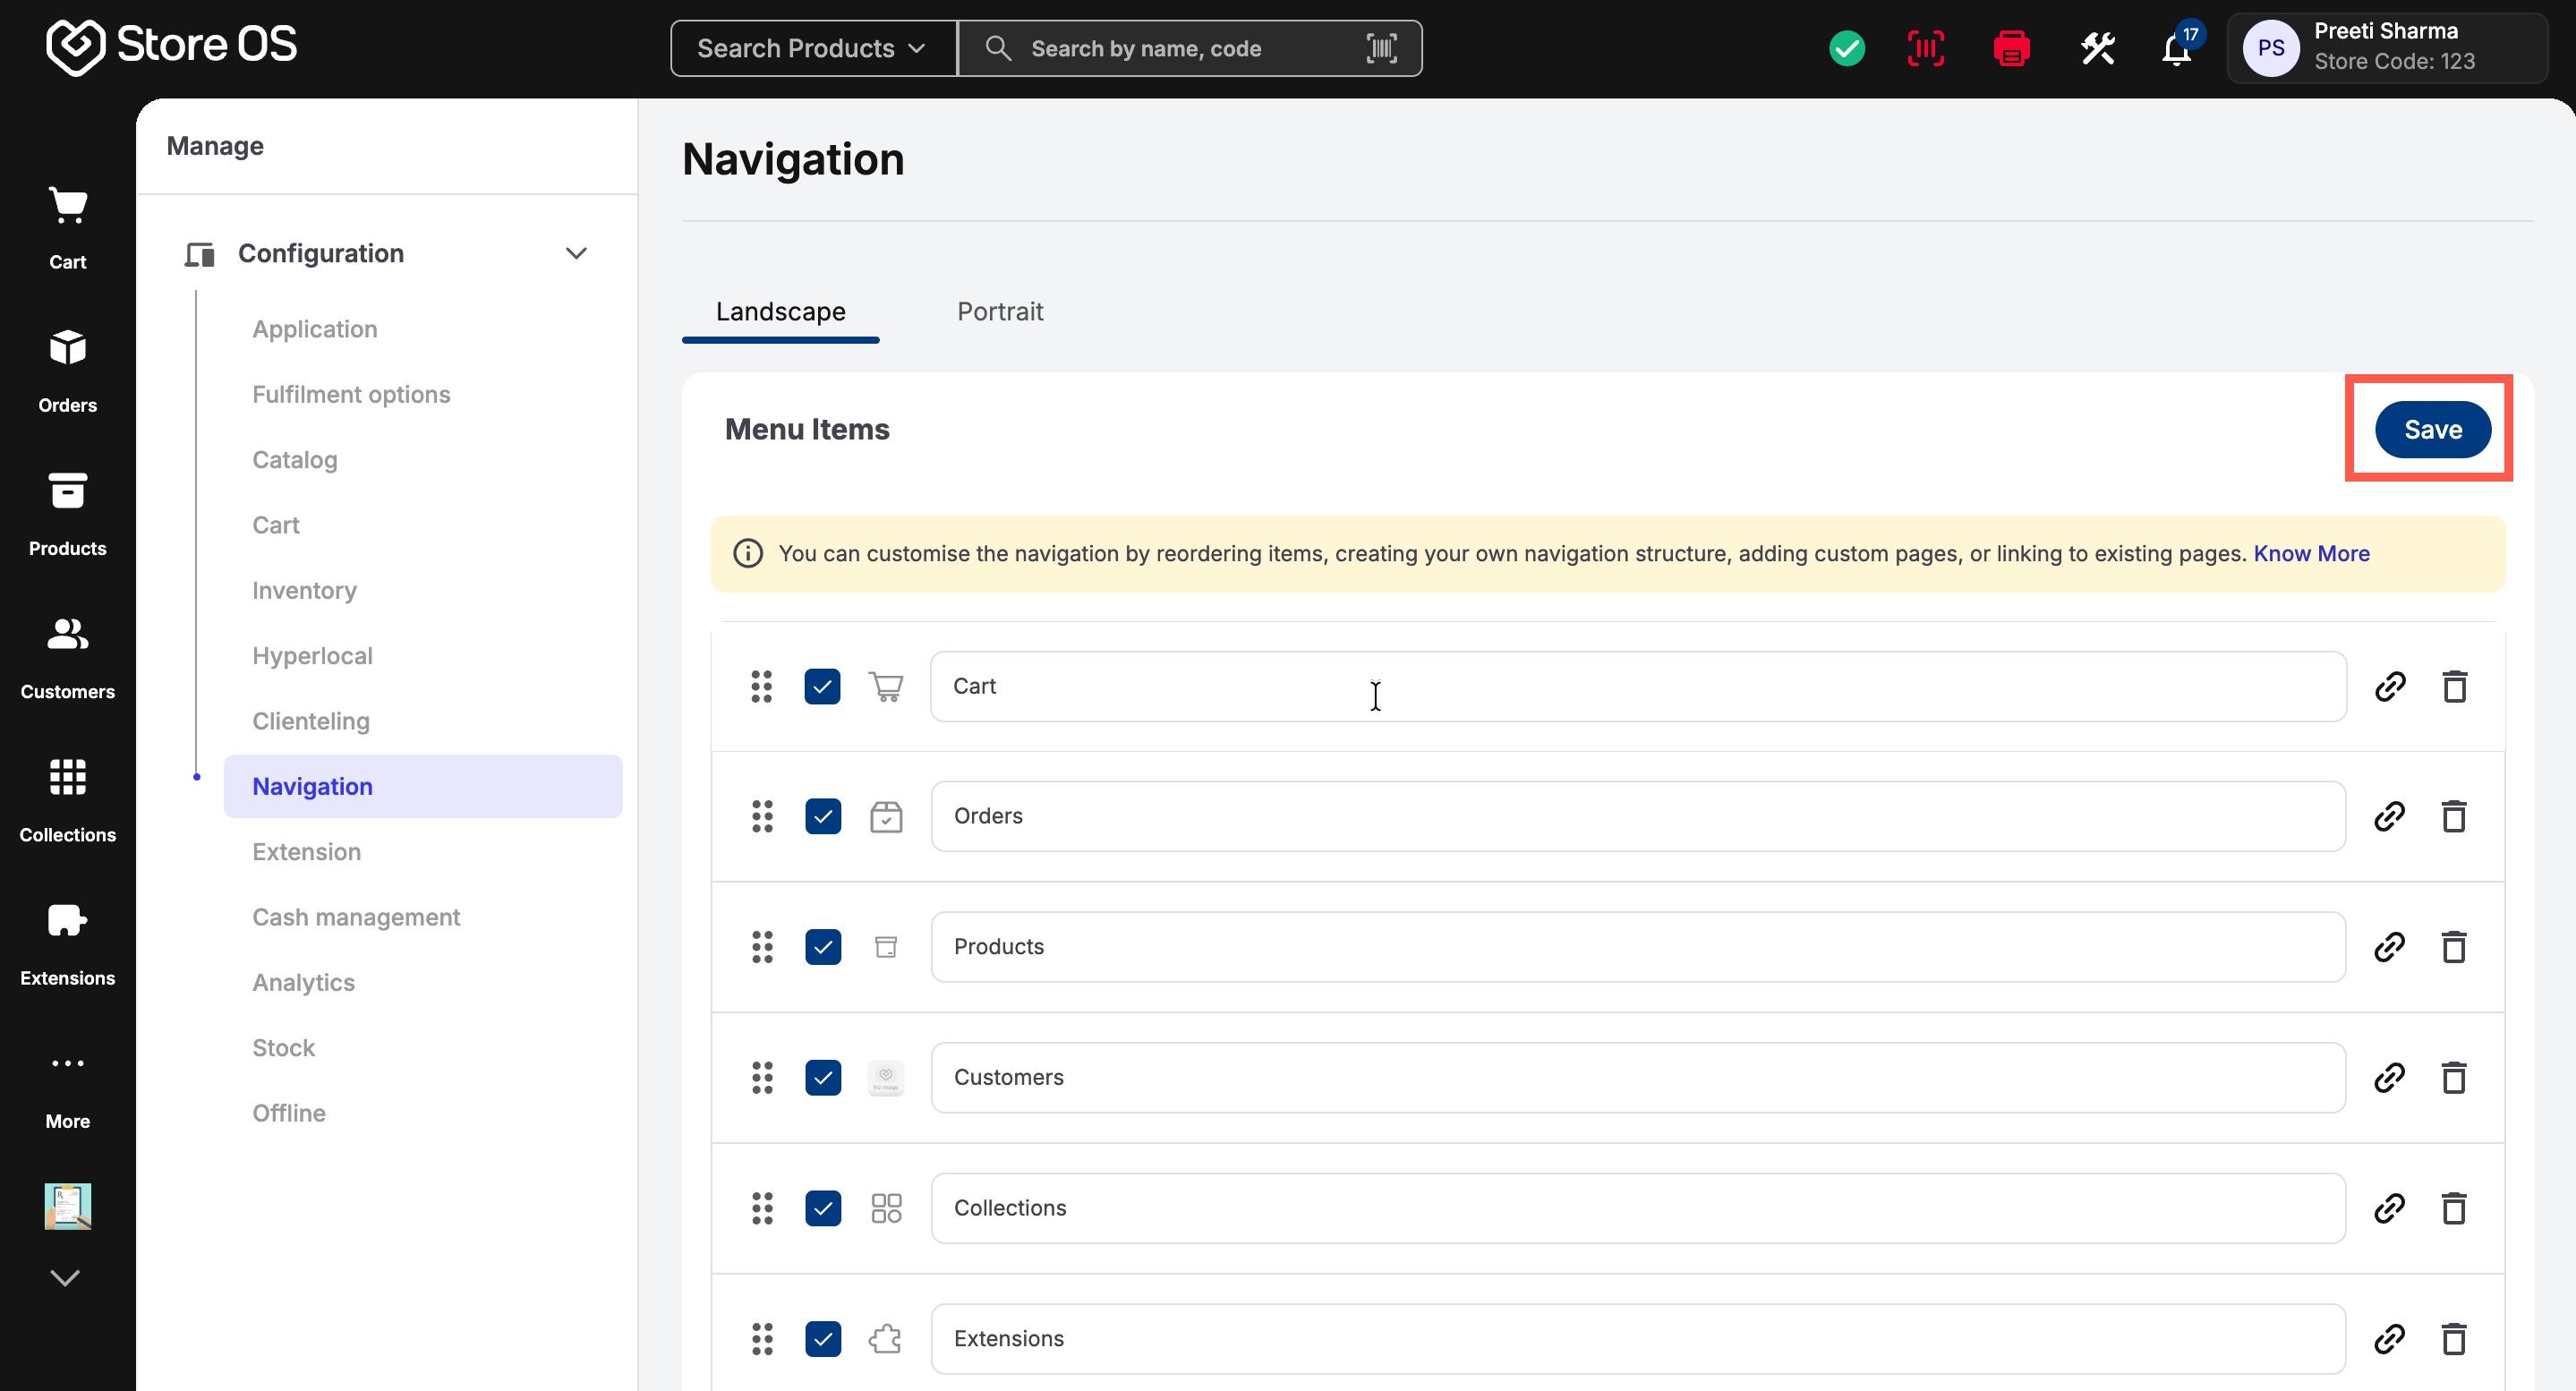
- Changes are applied instantly to your store navigation
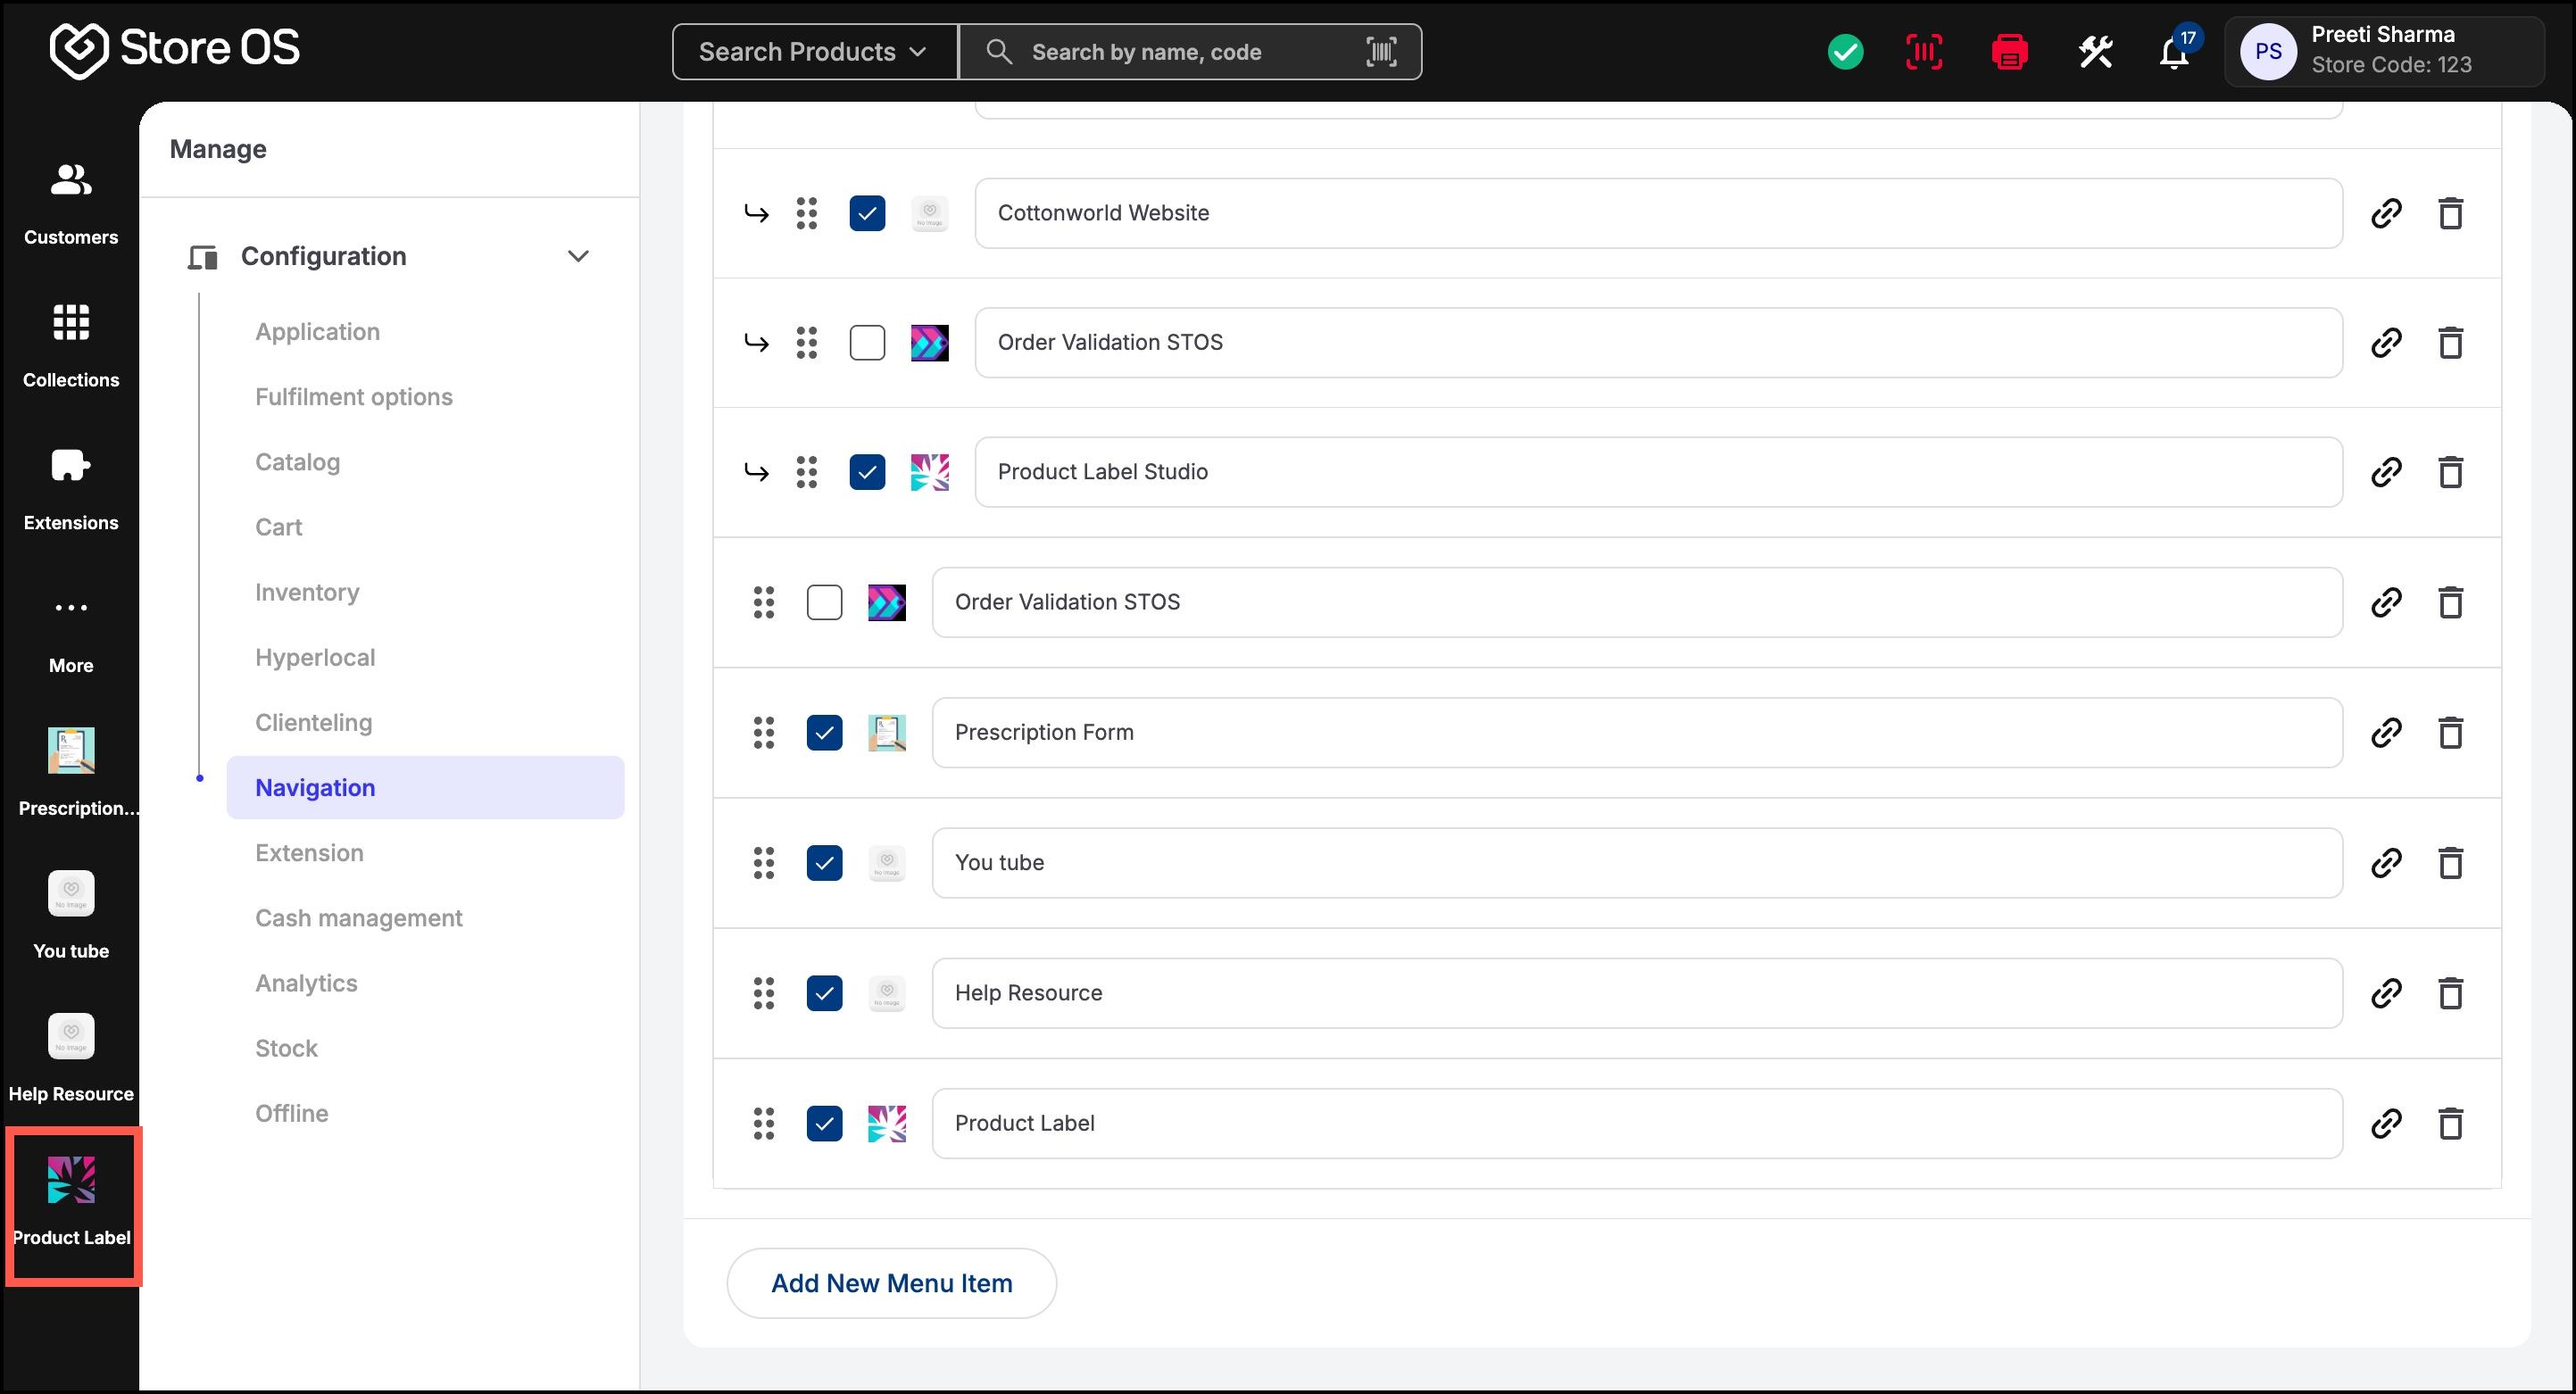
- In addition to system pages and custom URLs, you can also add Connected Apps directly to your navigation menu.
- Ensure the checkbox next to the item is enabled. You can also rename the app if required.
- Click Save. The connected app is now linked to the menu item.
- Custom icons can only be updated for:
- Custom links
- Connected Apps added to navigation
For system pages, only the name can be changed. The icon cannot be modified.
Extension Binding lets company admin or store manager decide if an extension should appears inside Store OS. There are two types of extensions based on where they are available in the system.
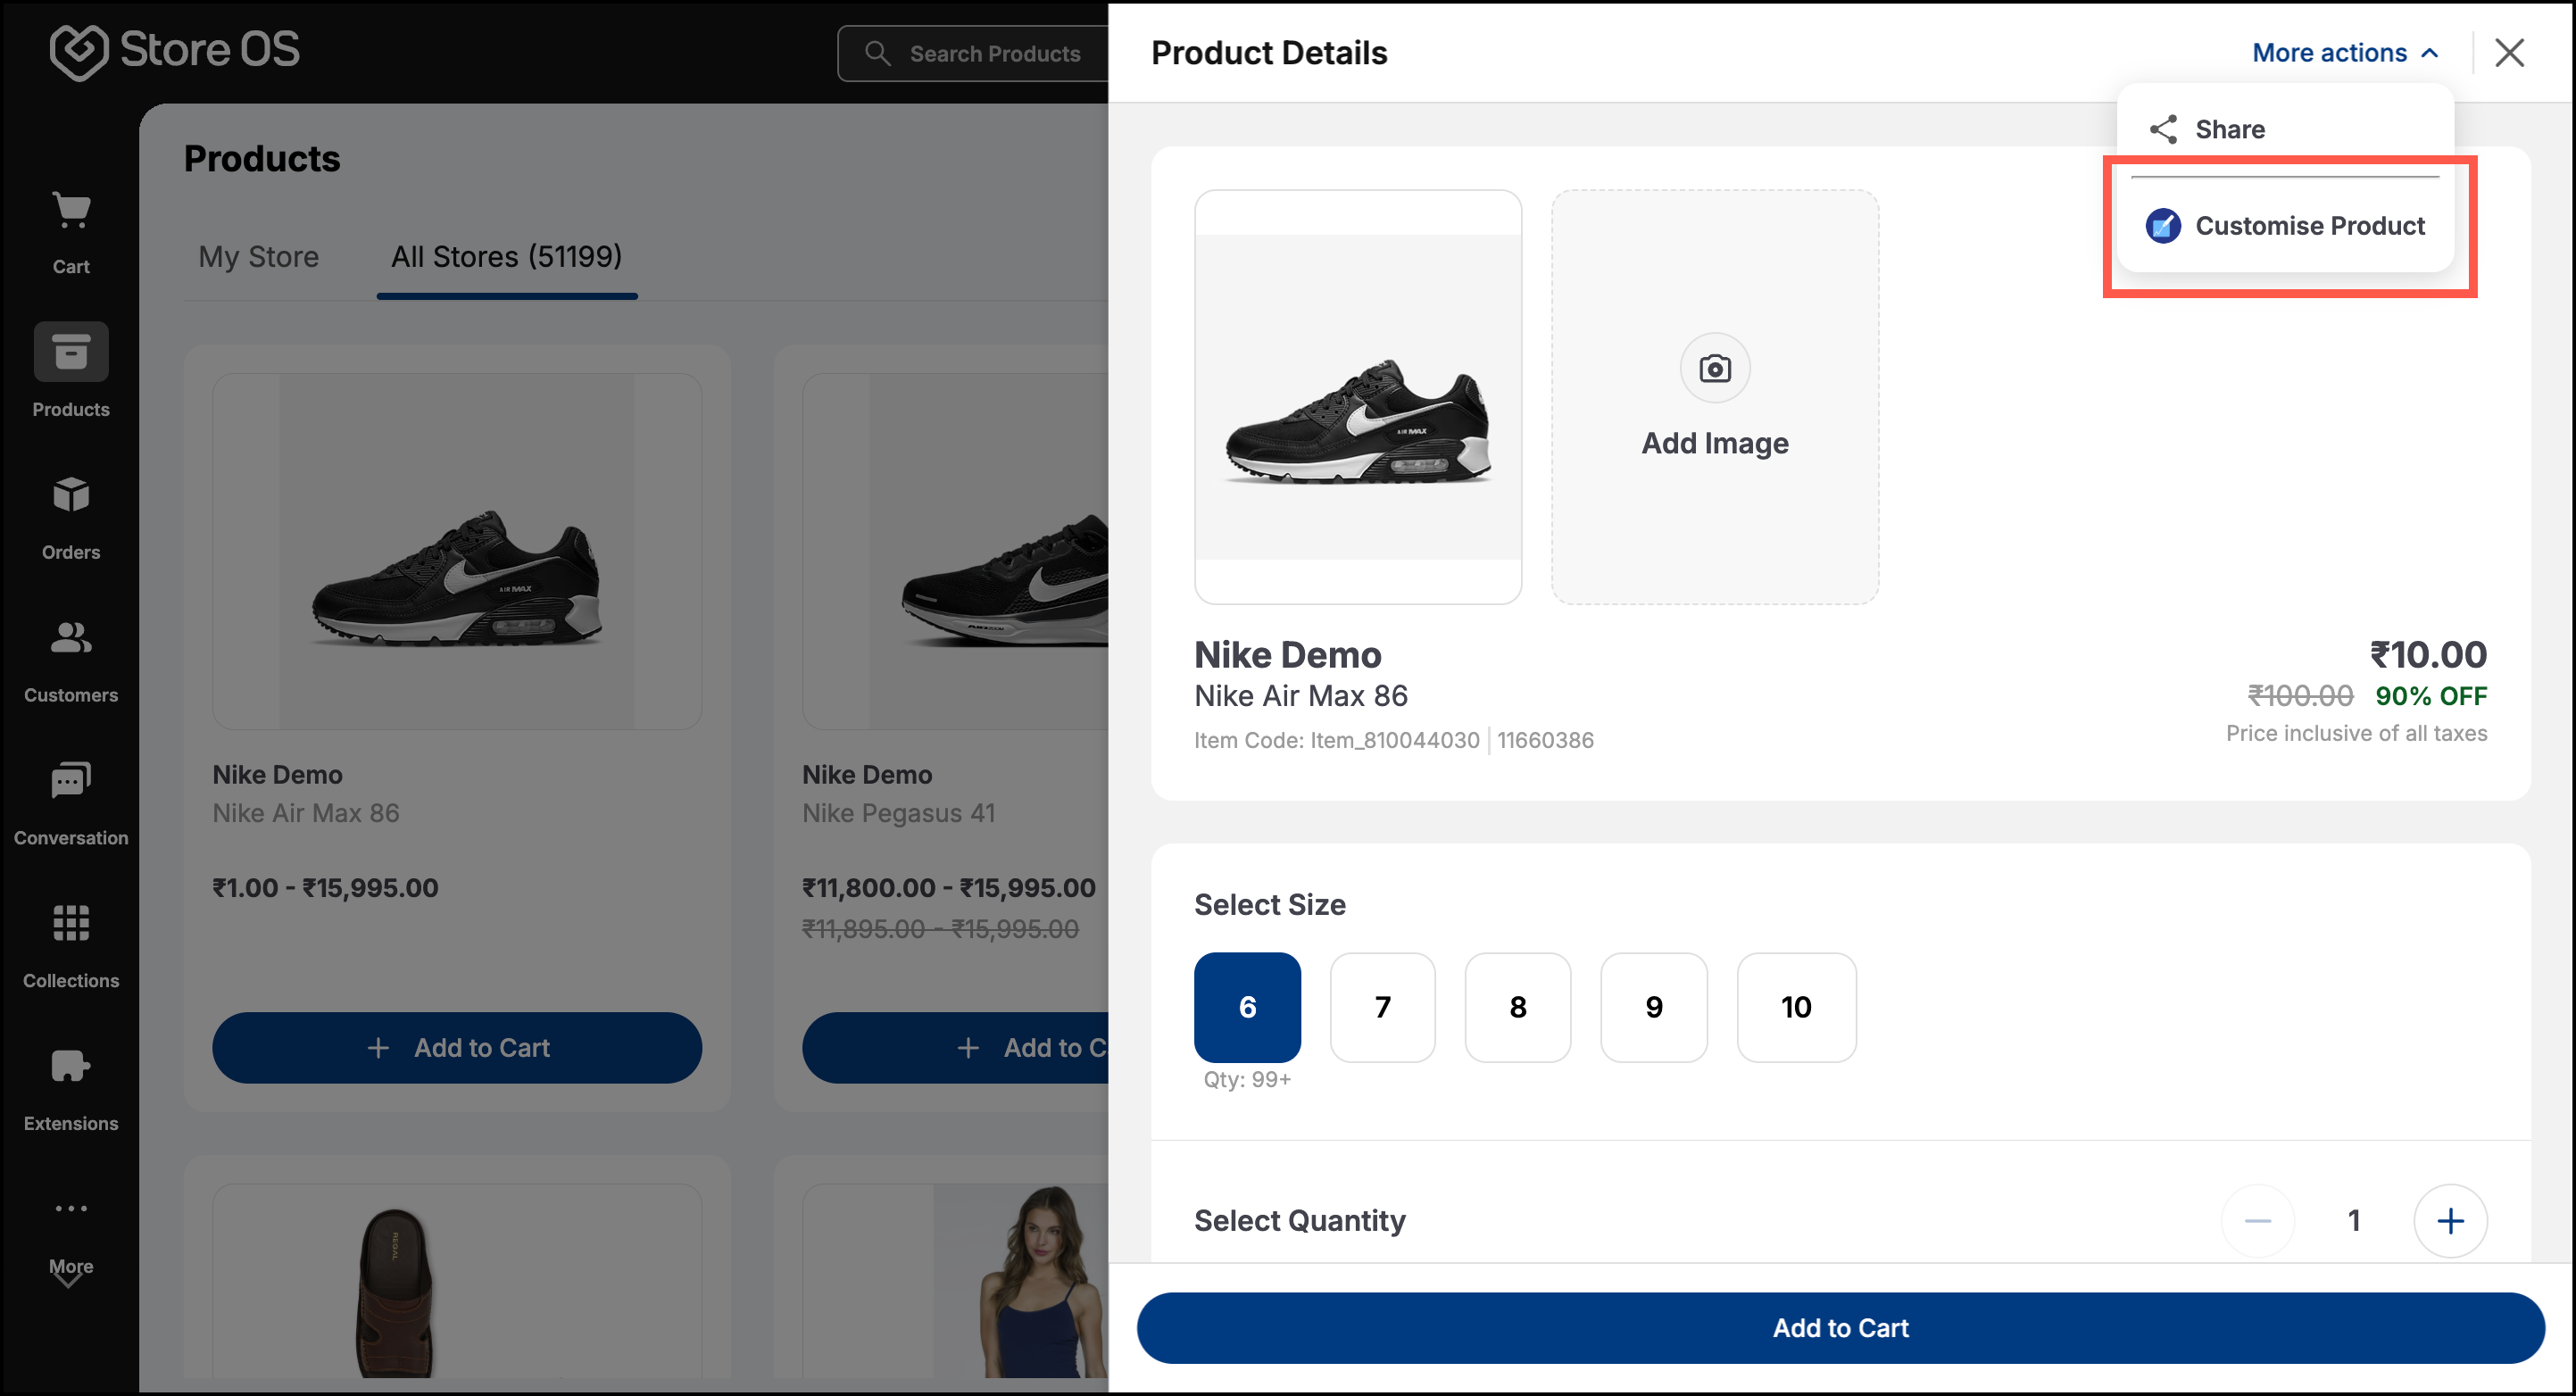
- Page-specific extensions: They are available only on specific pages or sections in Store OS. These extensions enhance a specific workflow. For examples, Customise Product appears on the Product Details page.
- Connected Apps: They are available across Store OS and are not tied to a specific page. They provide standalone functionality and appear under the Extensions section.
Extension binding controls where an extension appears, not whether it is installed.
Store OS > Configuration > Extensions
- The Extension settings have two tabs: Pages and Connected Apps.
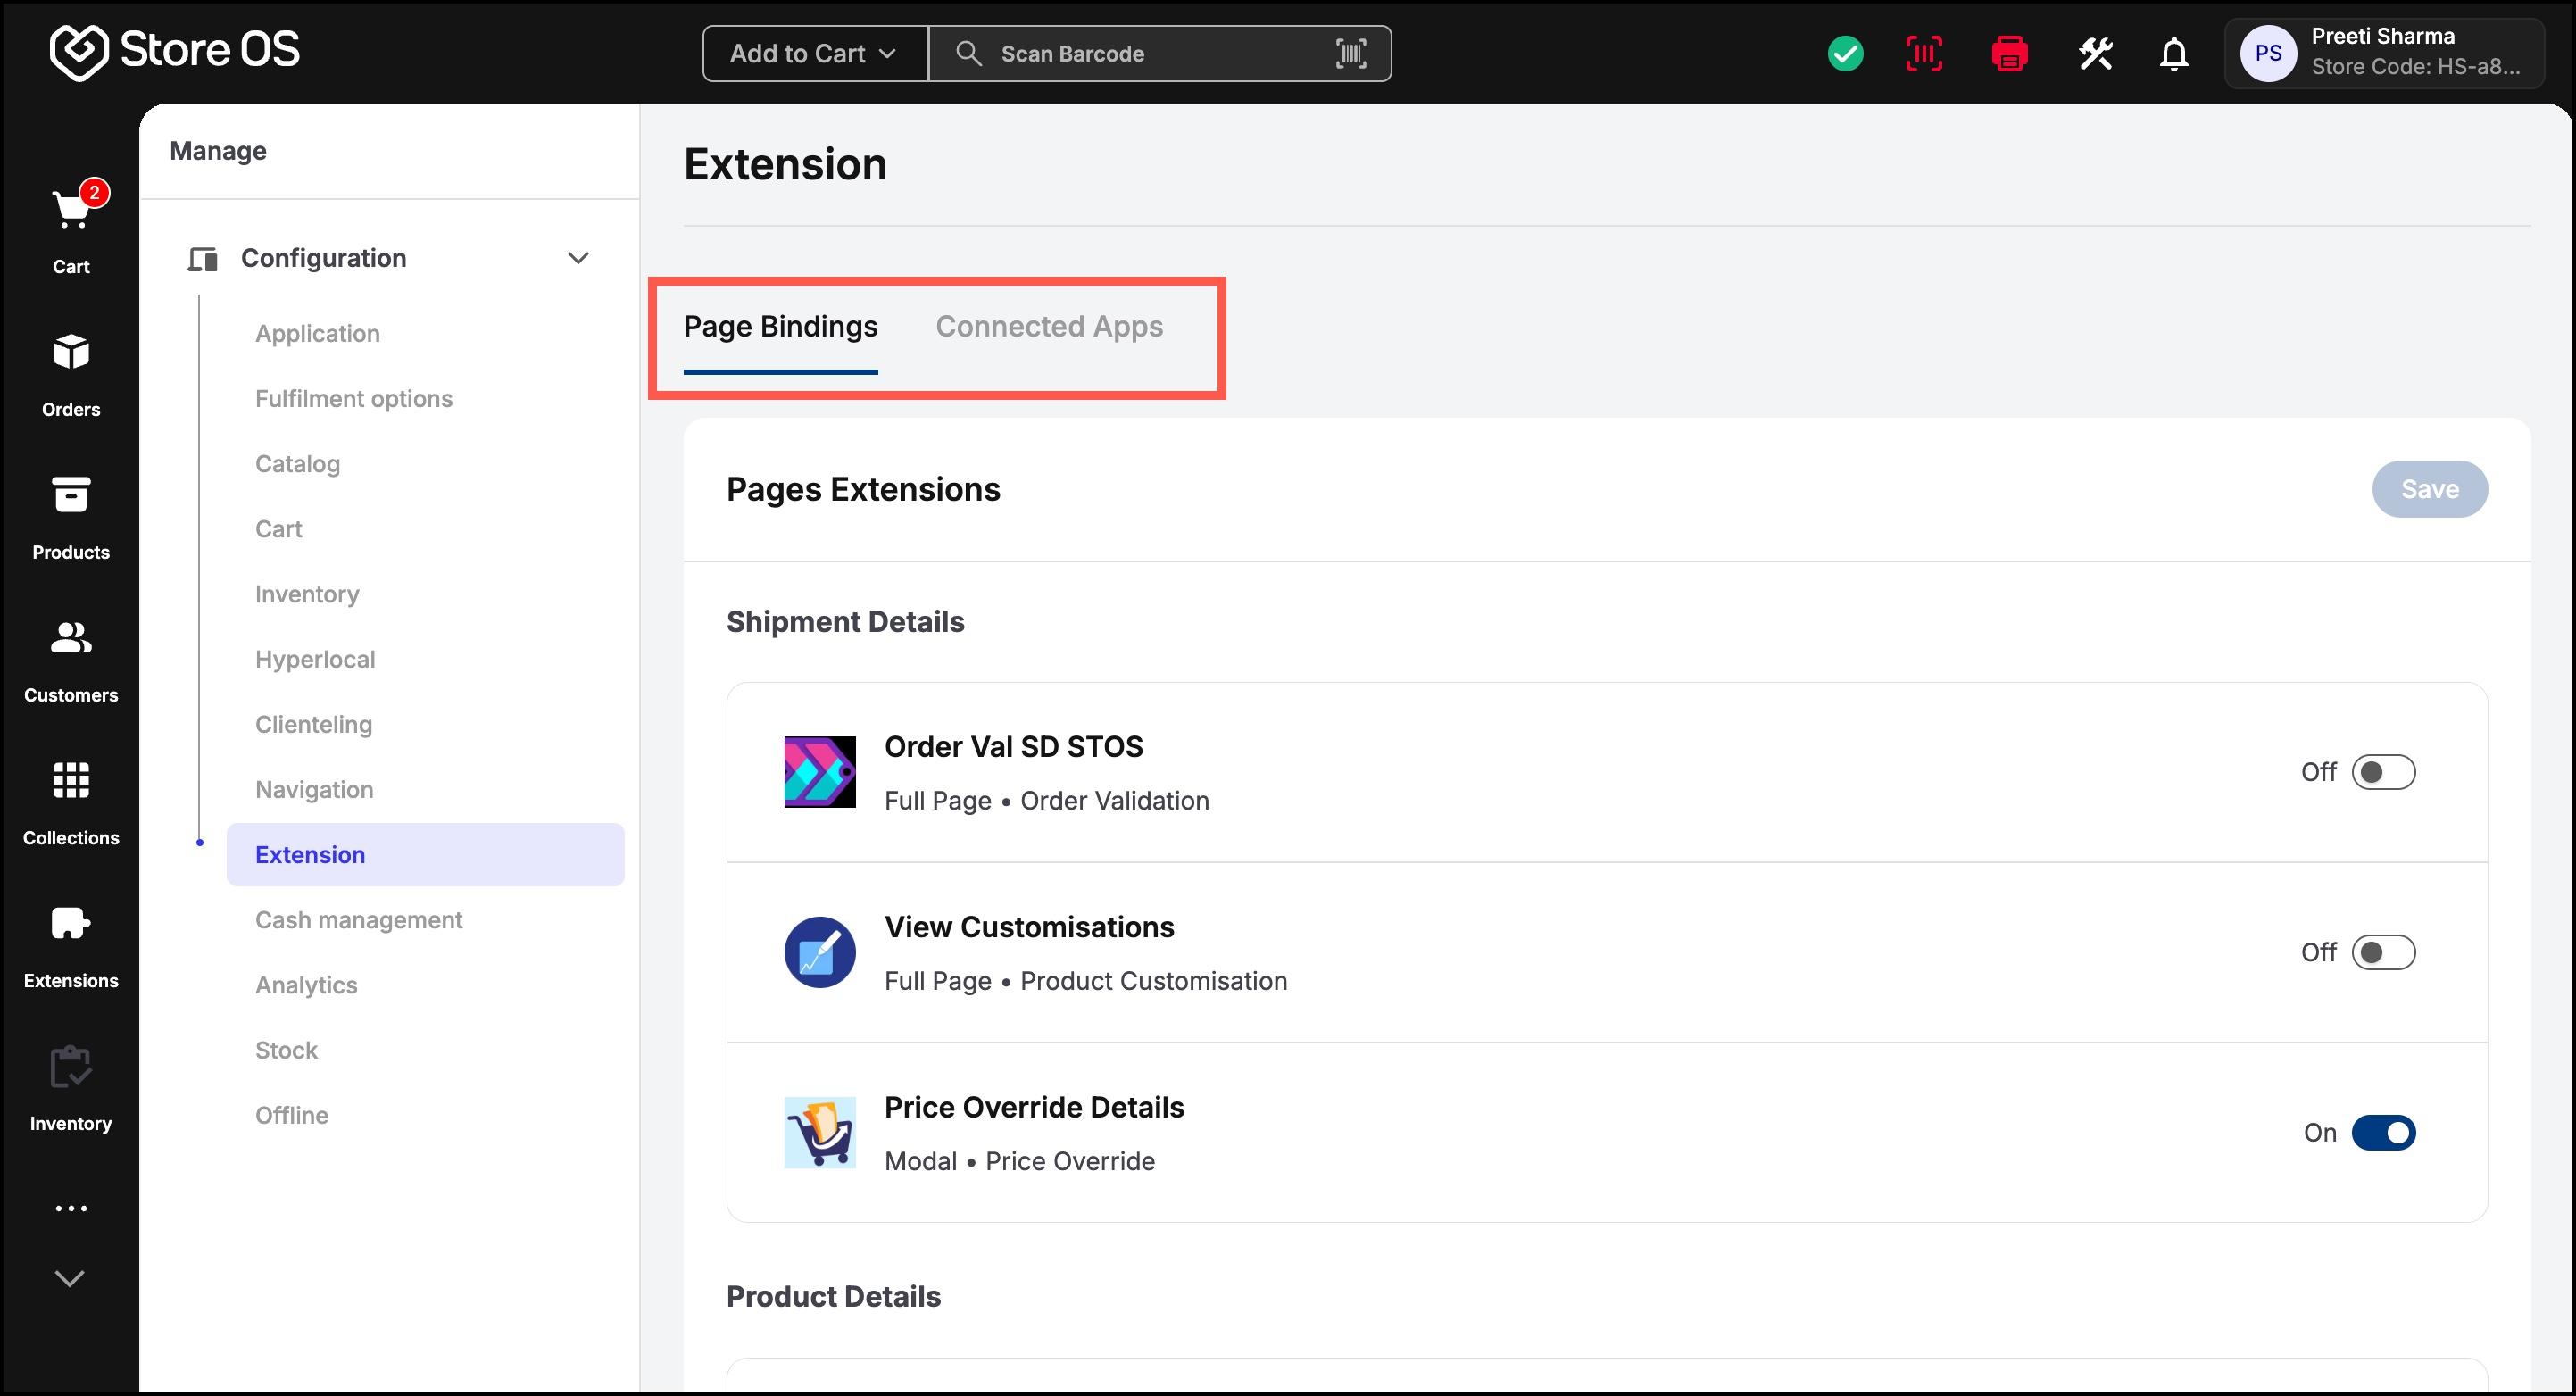
- In the Pages tab, extensions are grouped by specific pages such as Shipment Details and Product Details. Each page lists the apps that can be used in that context.
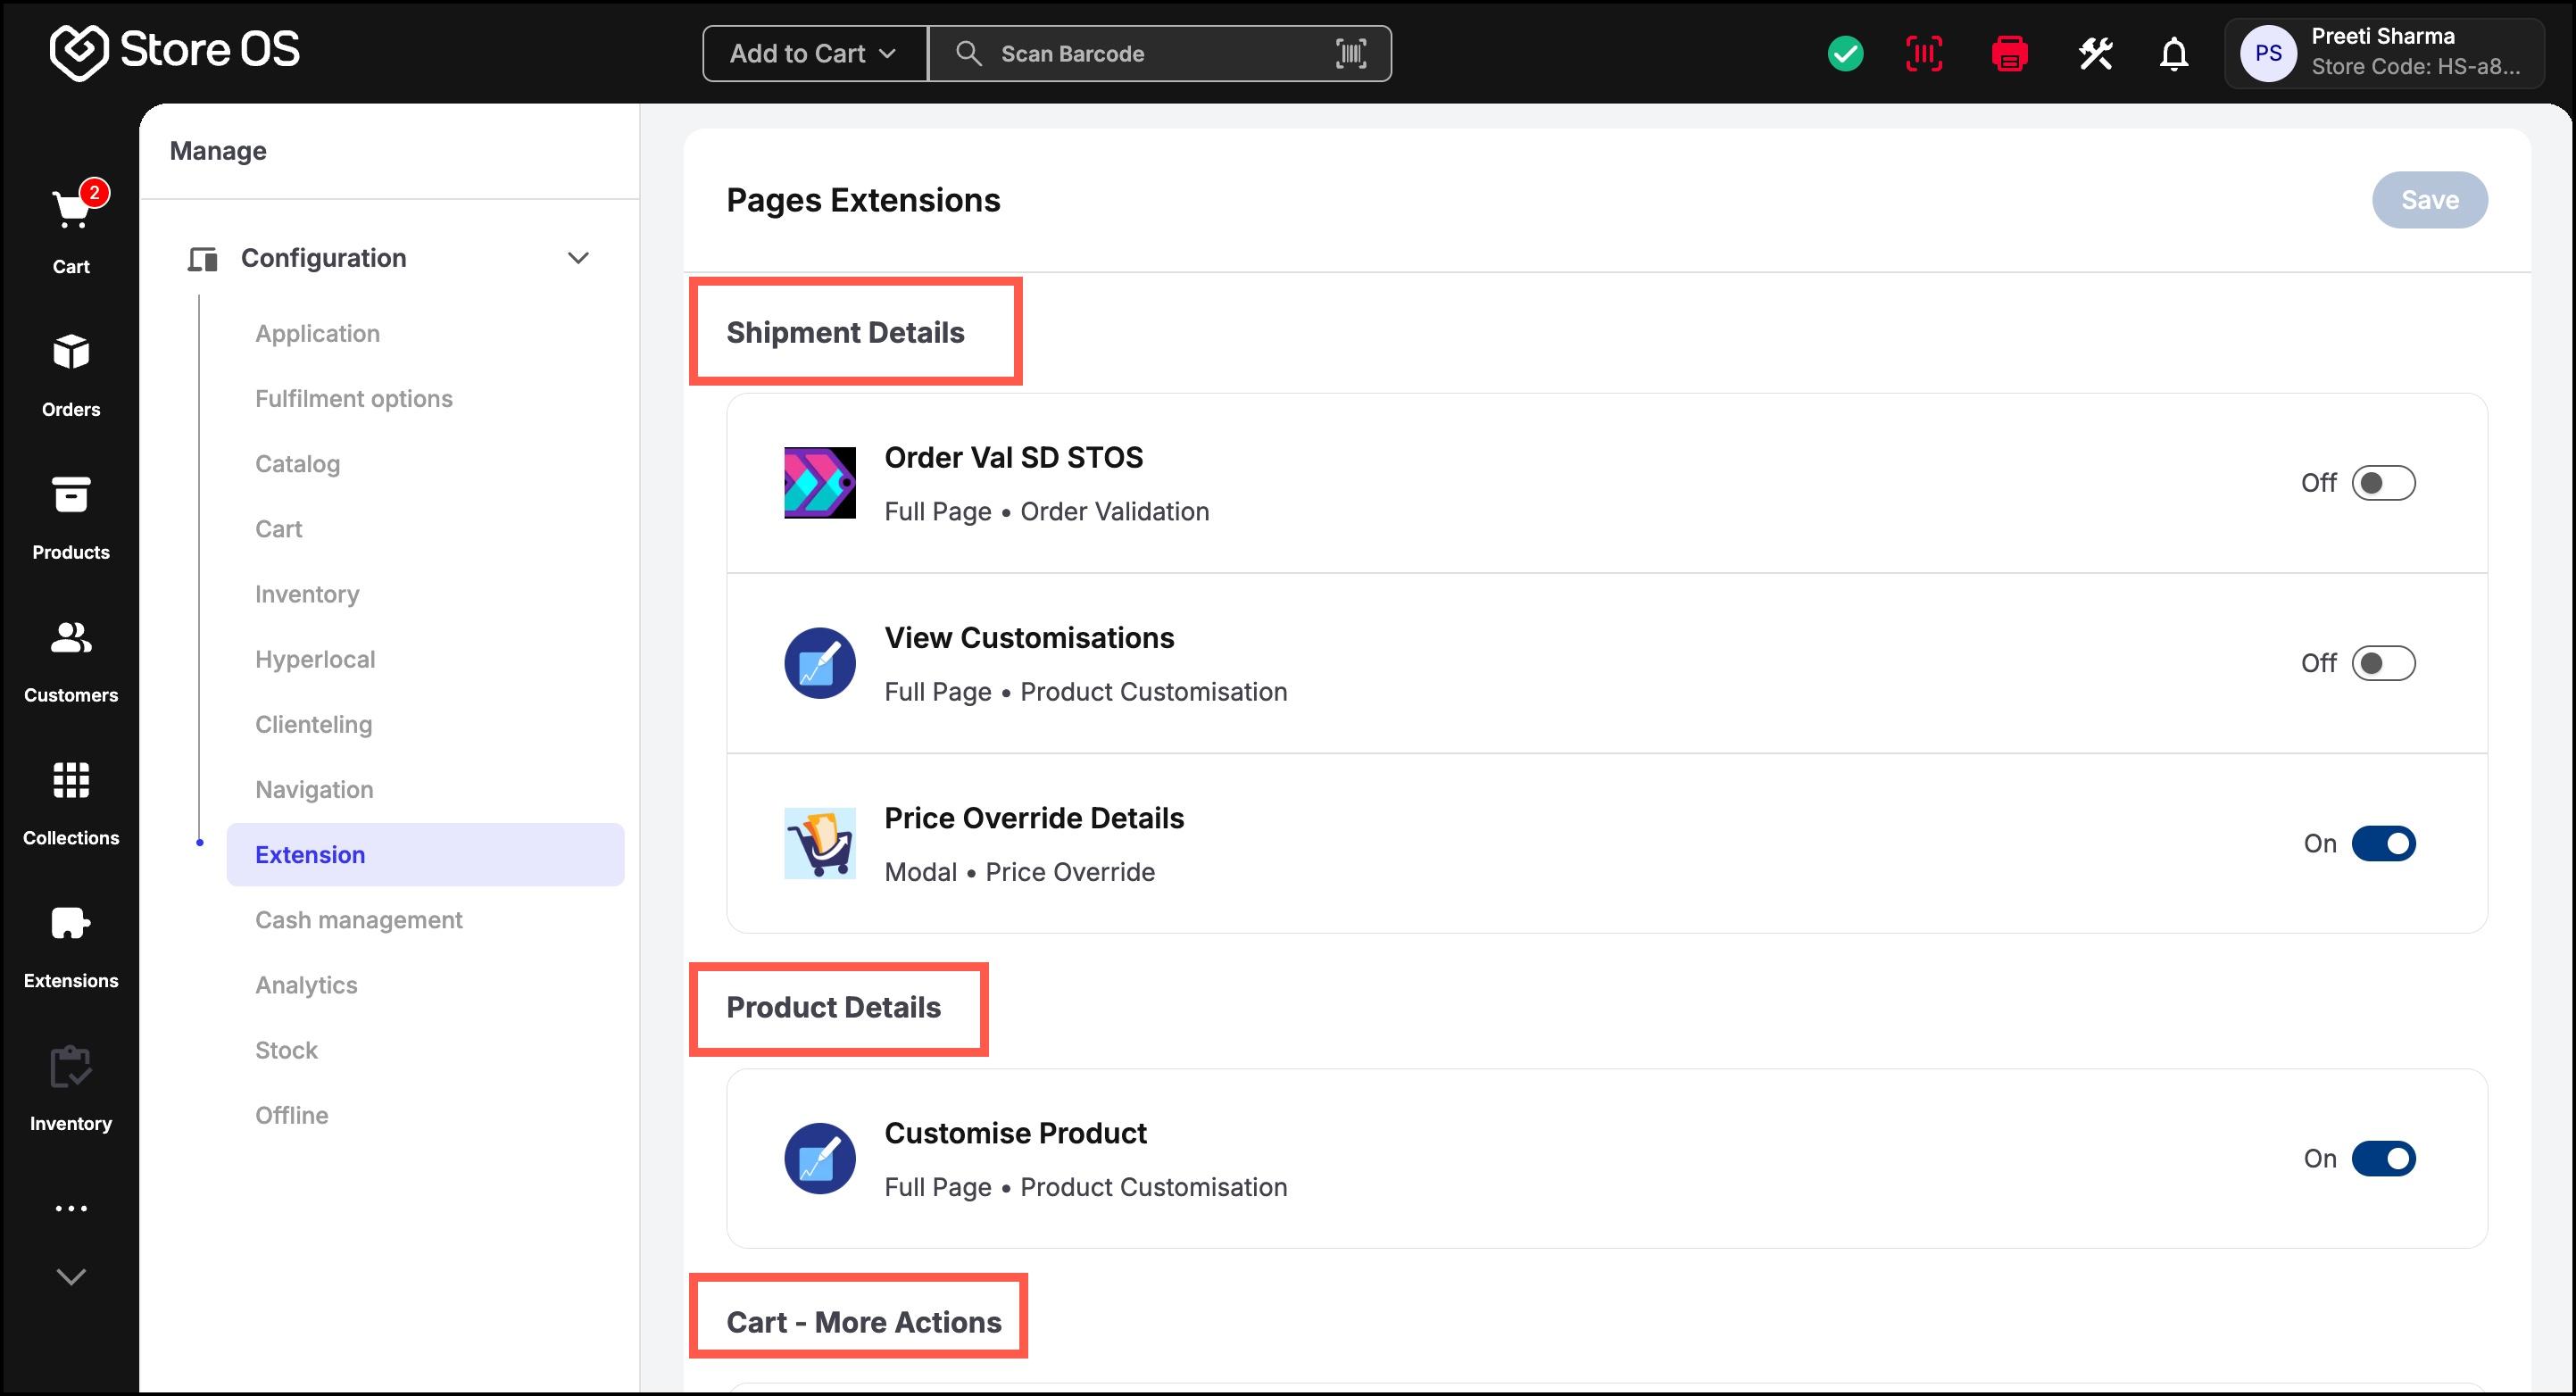
- You can enable or disable an app using the toggle to make it available on that specific page. For example, we enable View Customisations extension.
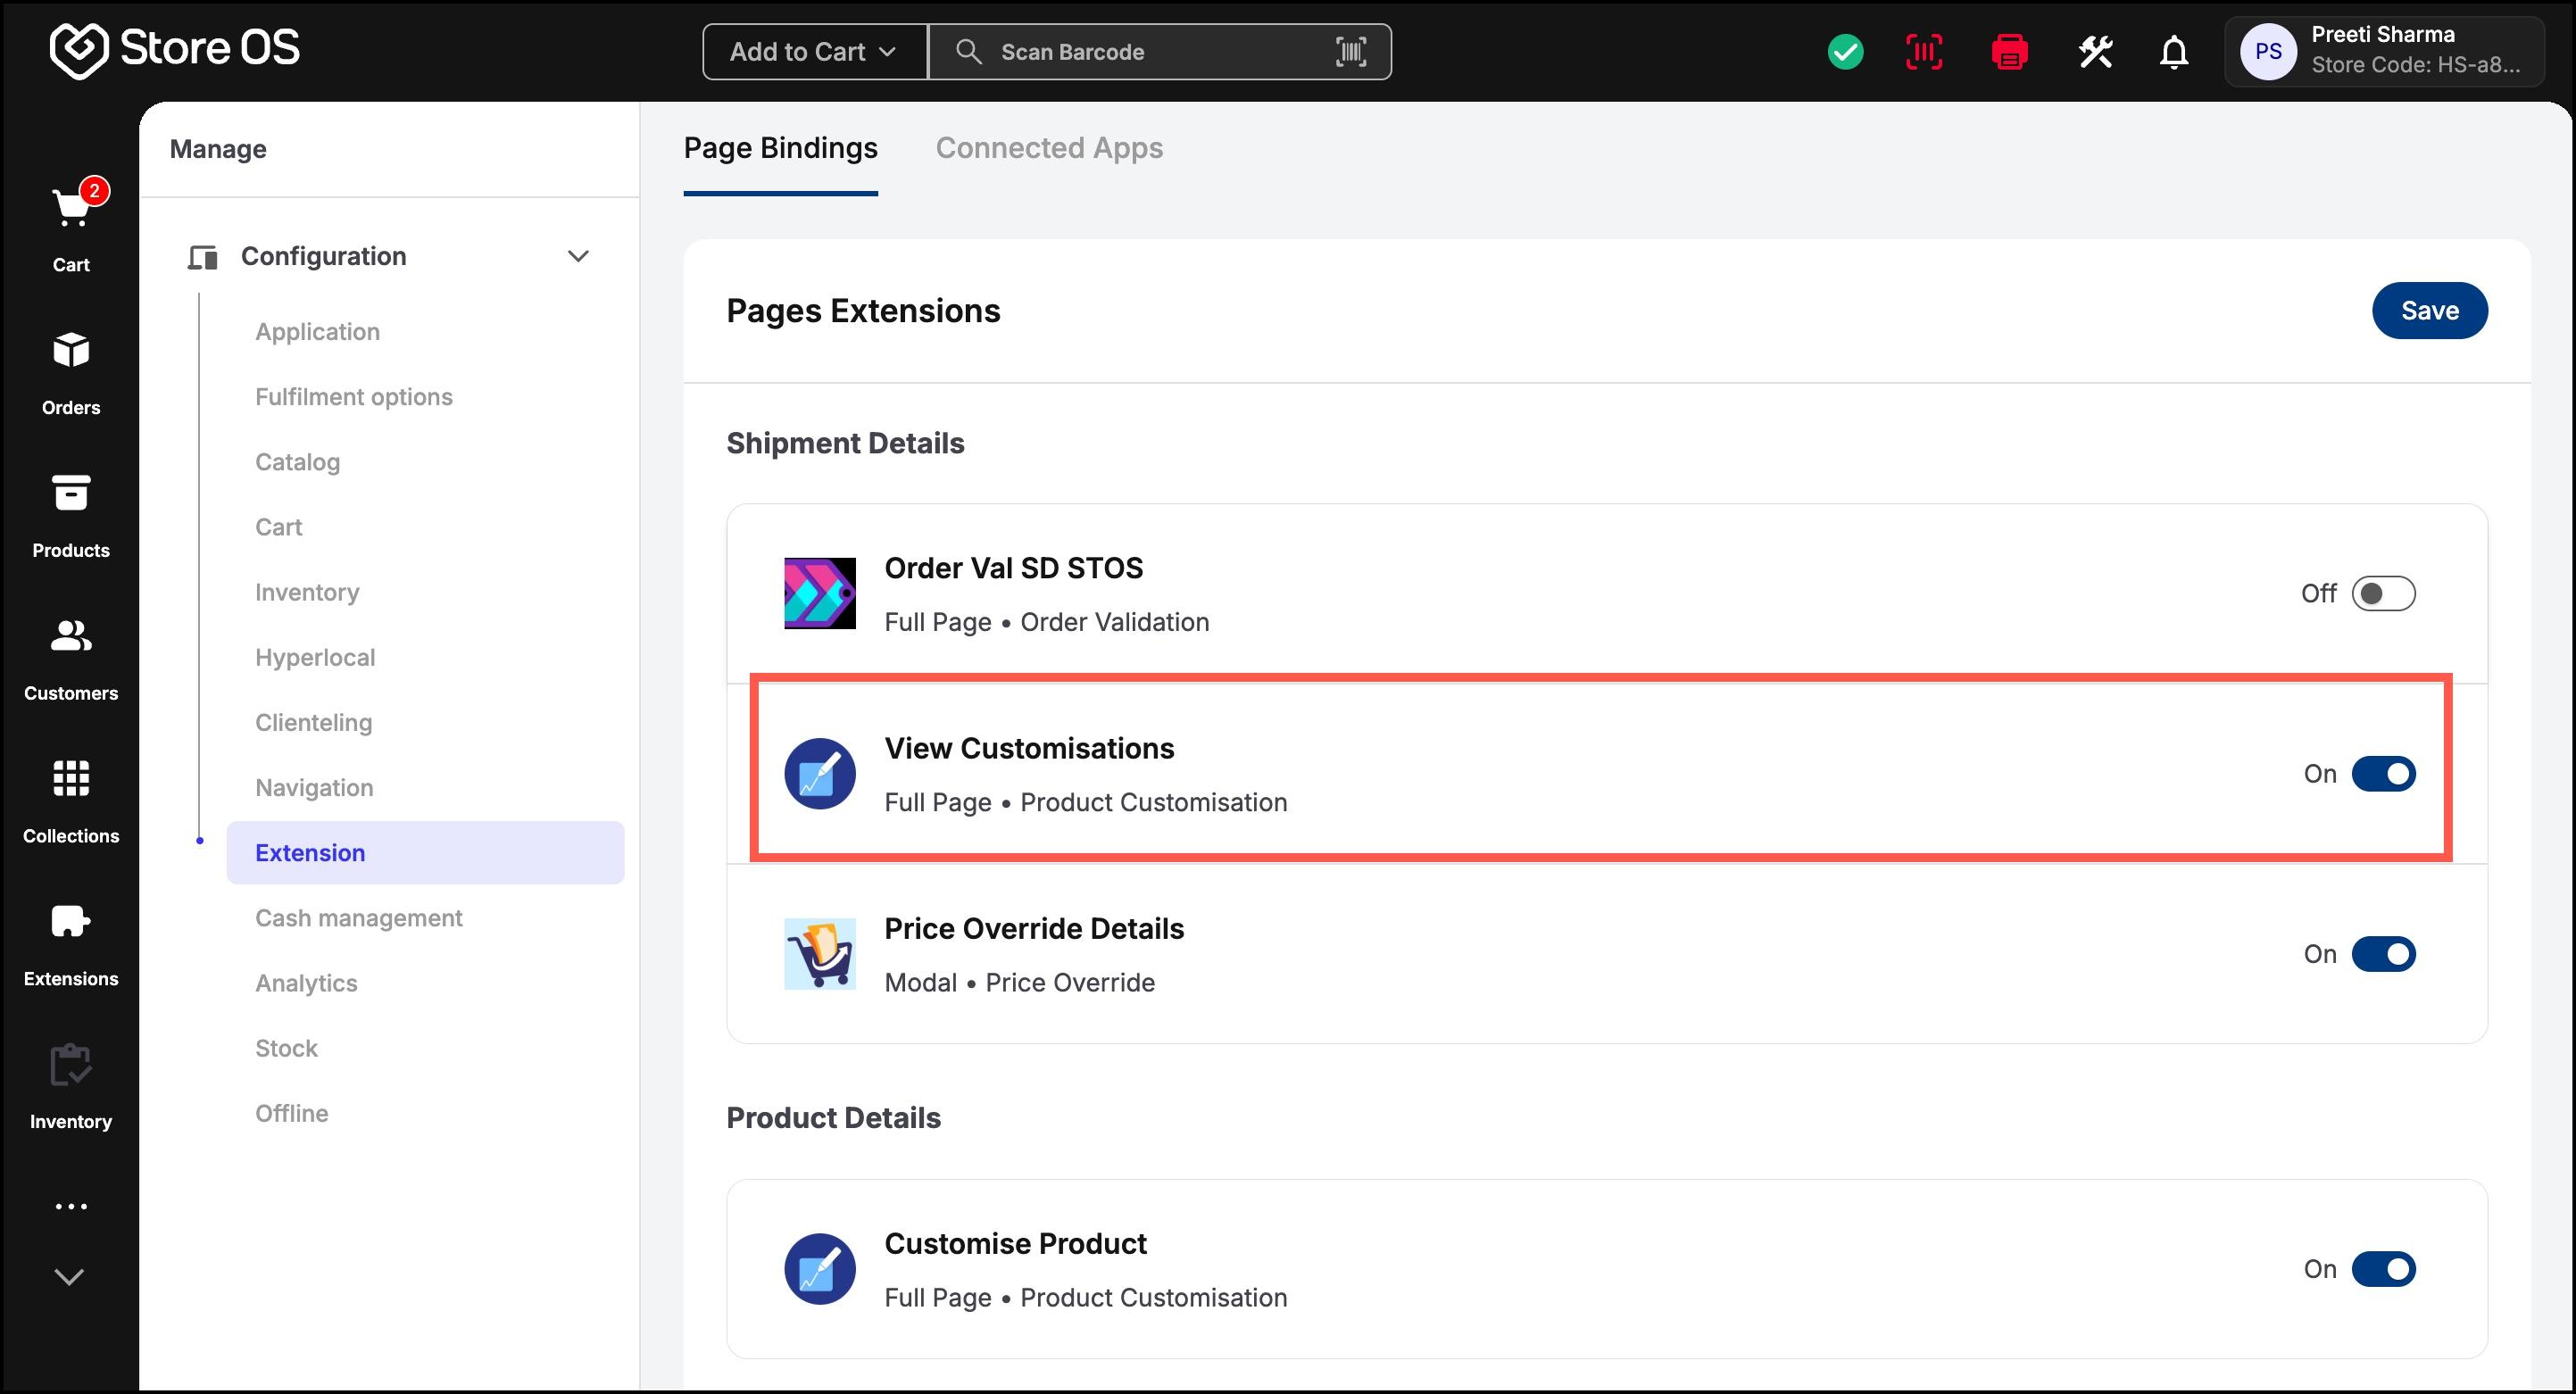
- Click Save to apply the changes. The enabled extension will then appear on the corresponding page .i.e. shipment details page in Store OS.
The same extension can be enabled in one page and disabled in another.
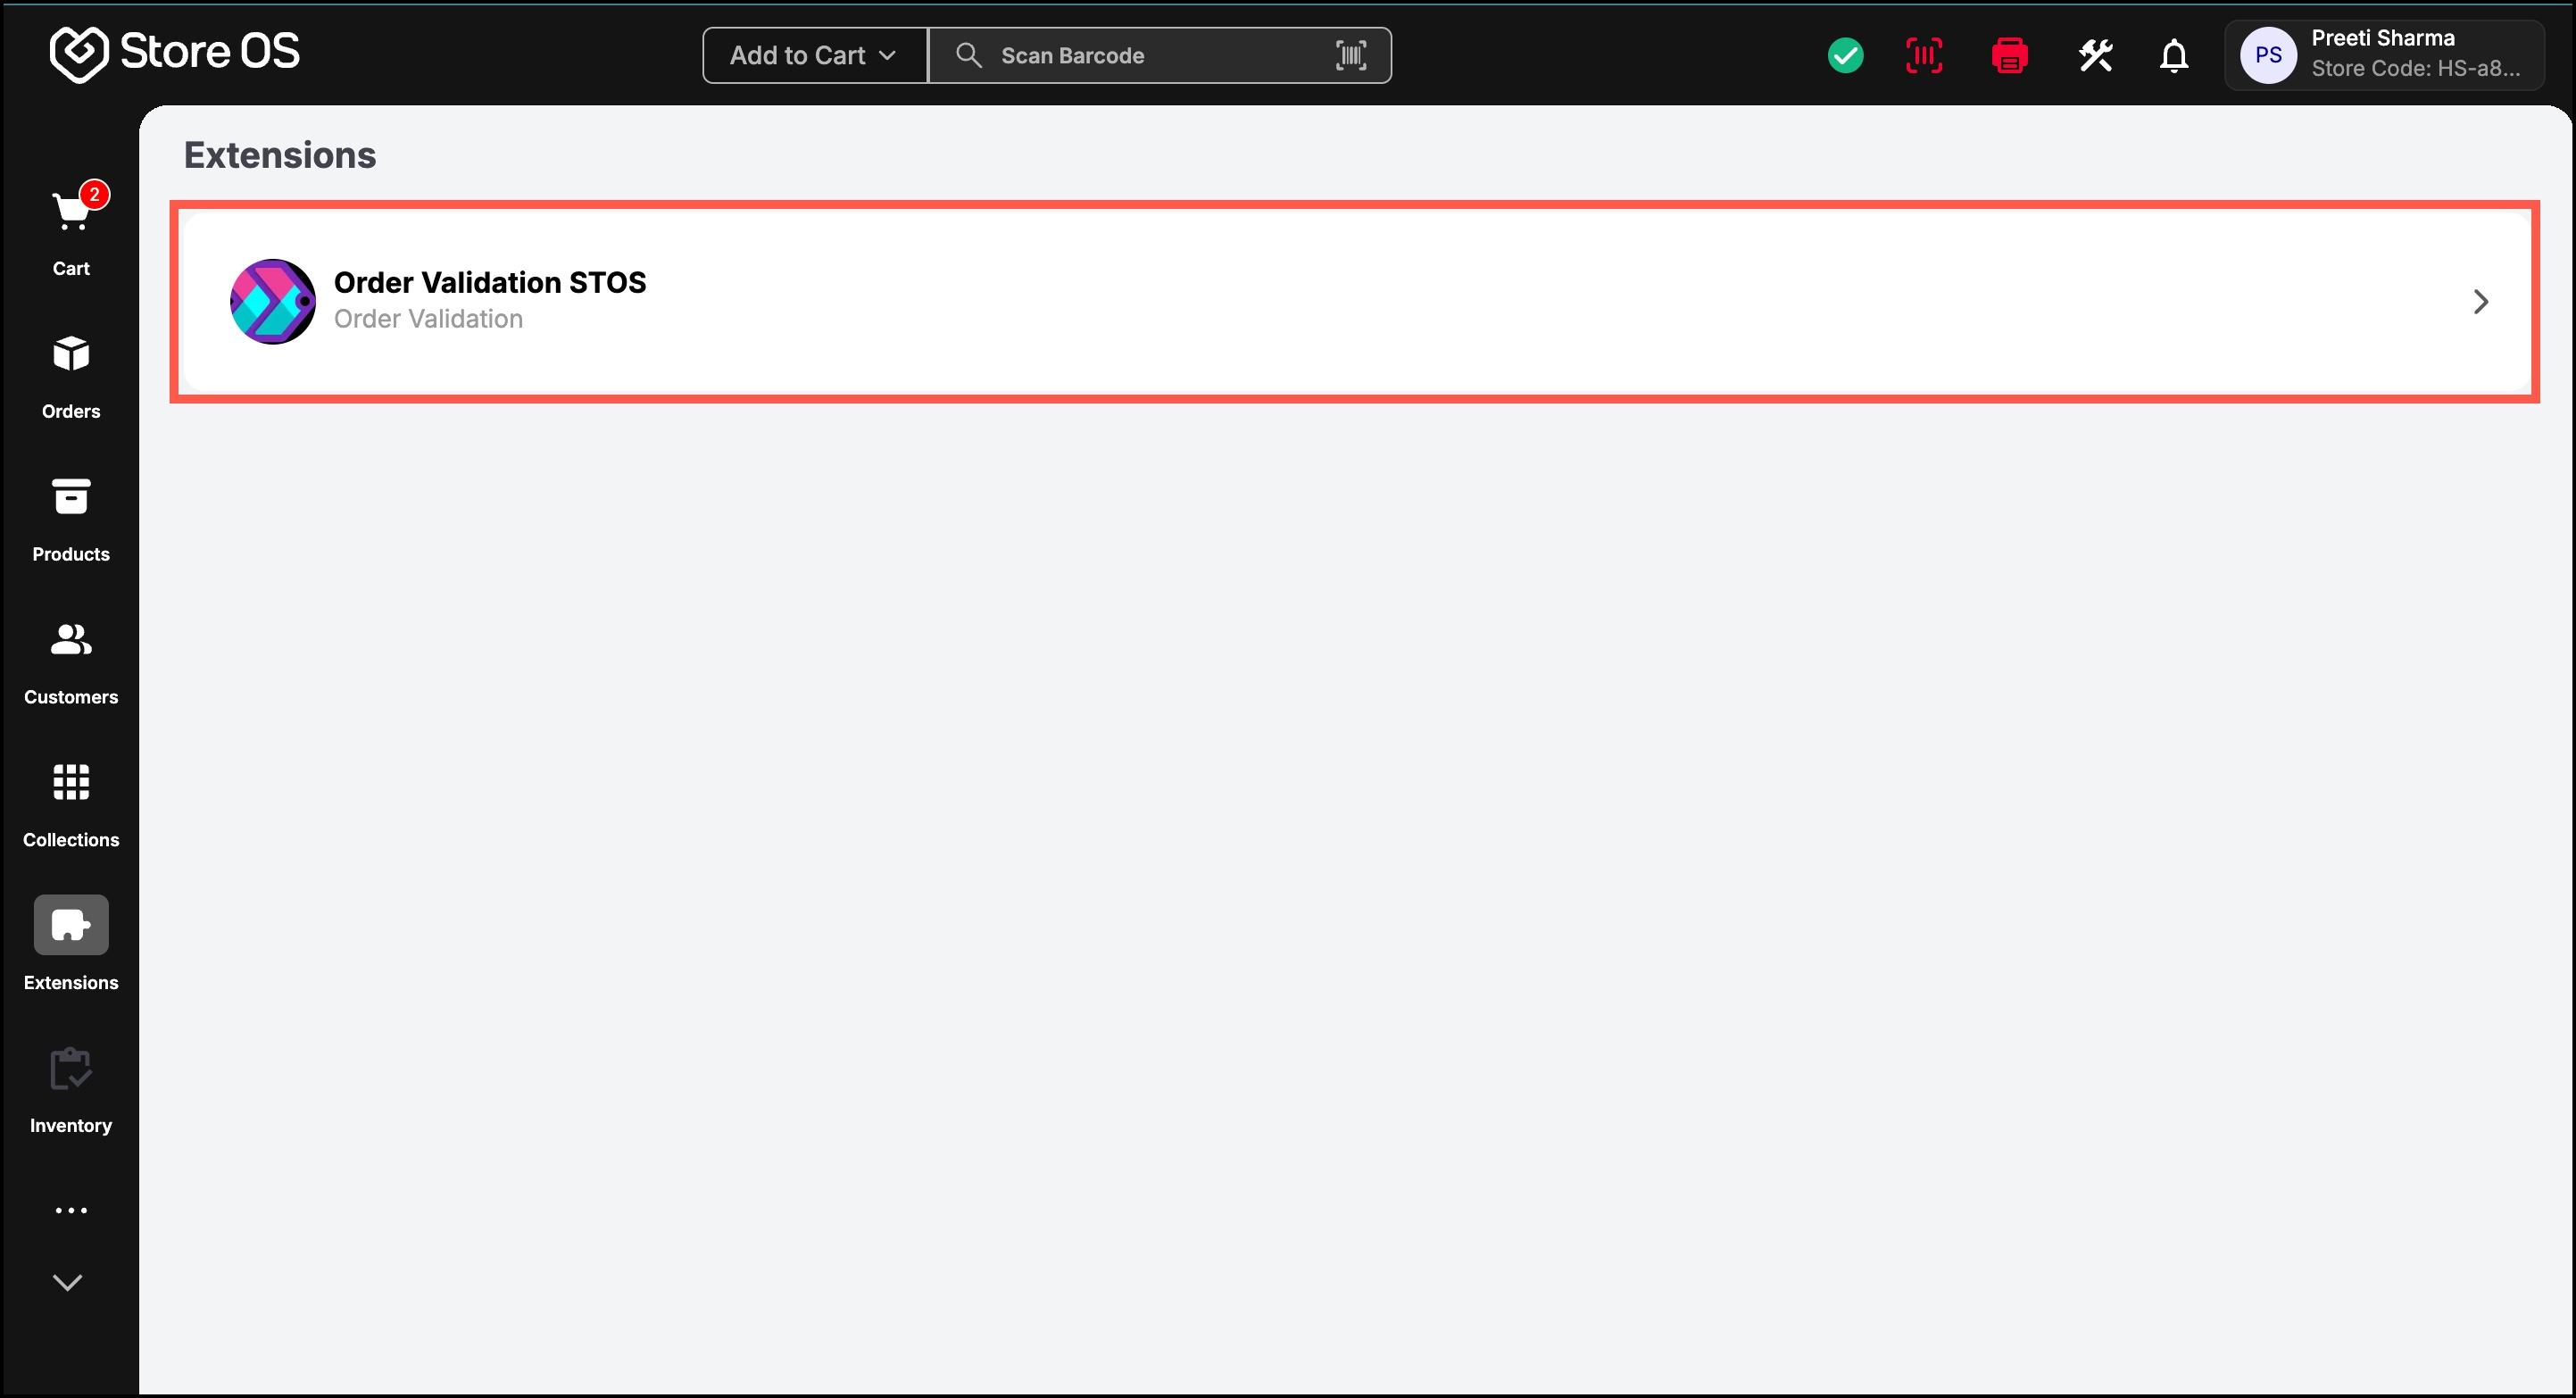
- Similarly, in the Connected Apps tab, you can enable or disable extensions based on your business requirements. For example, we enable Order Validation STOS extension.
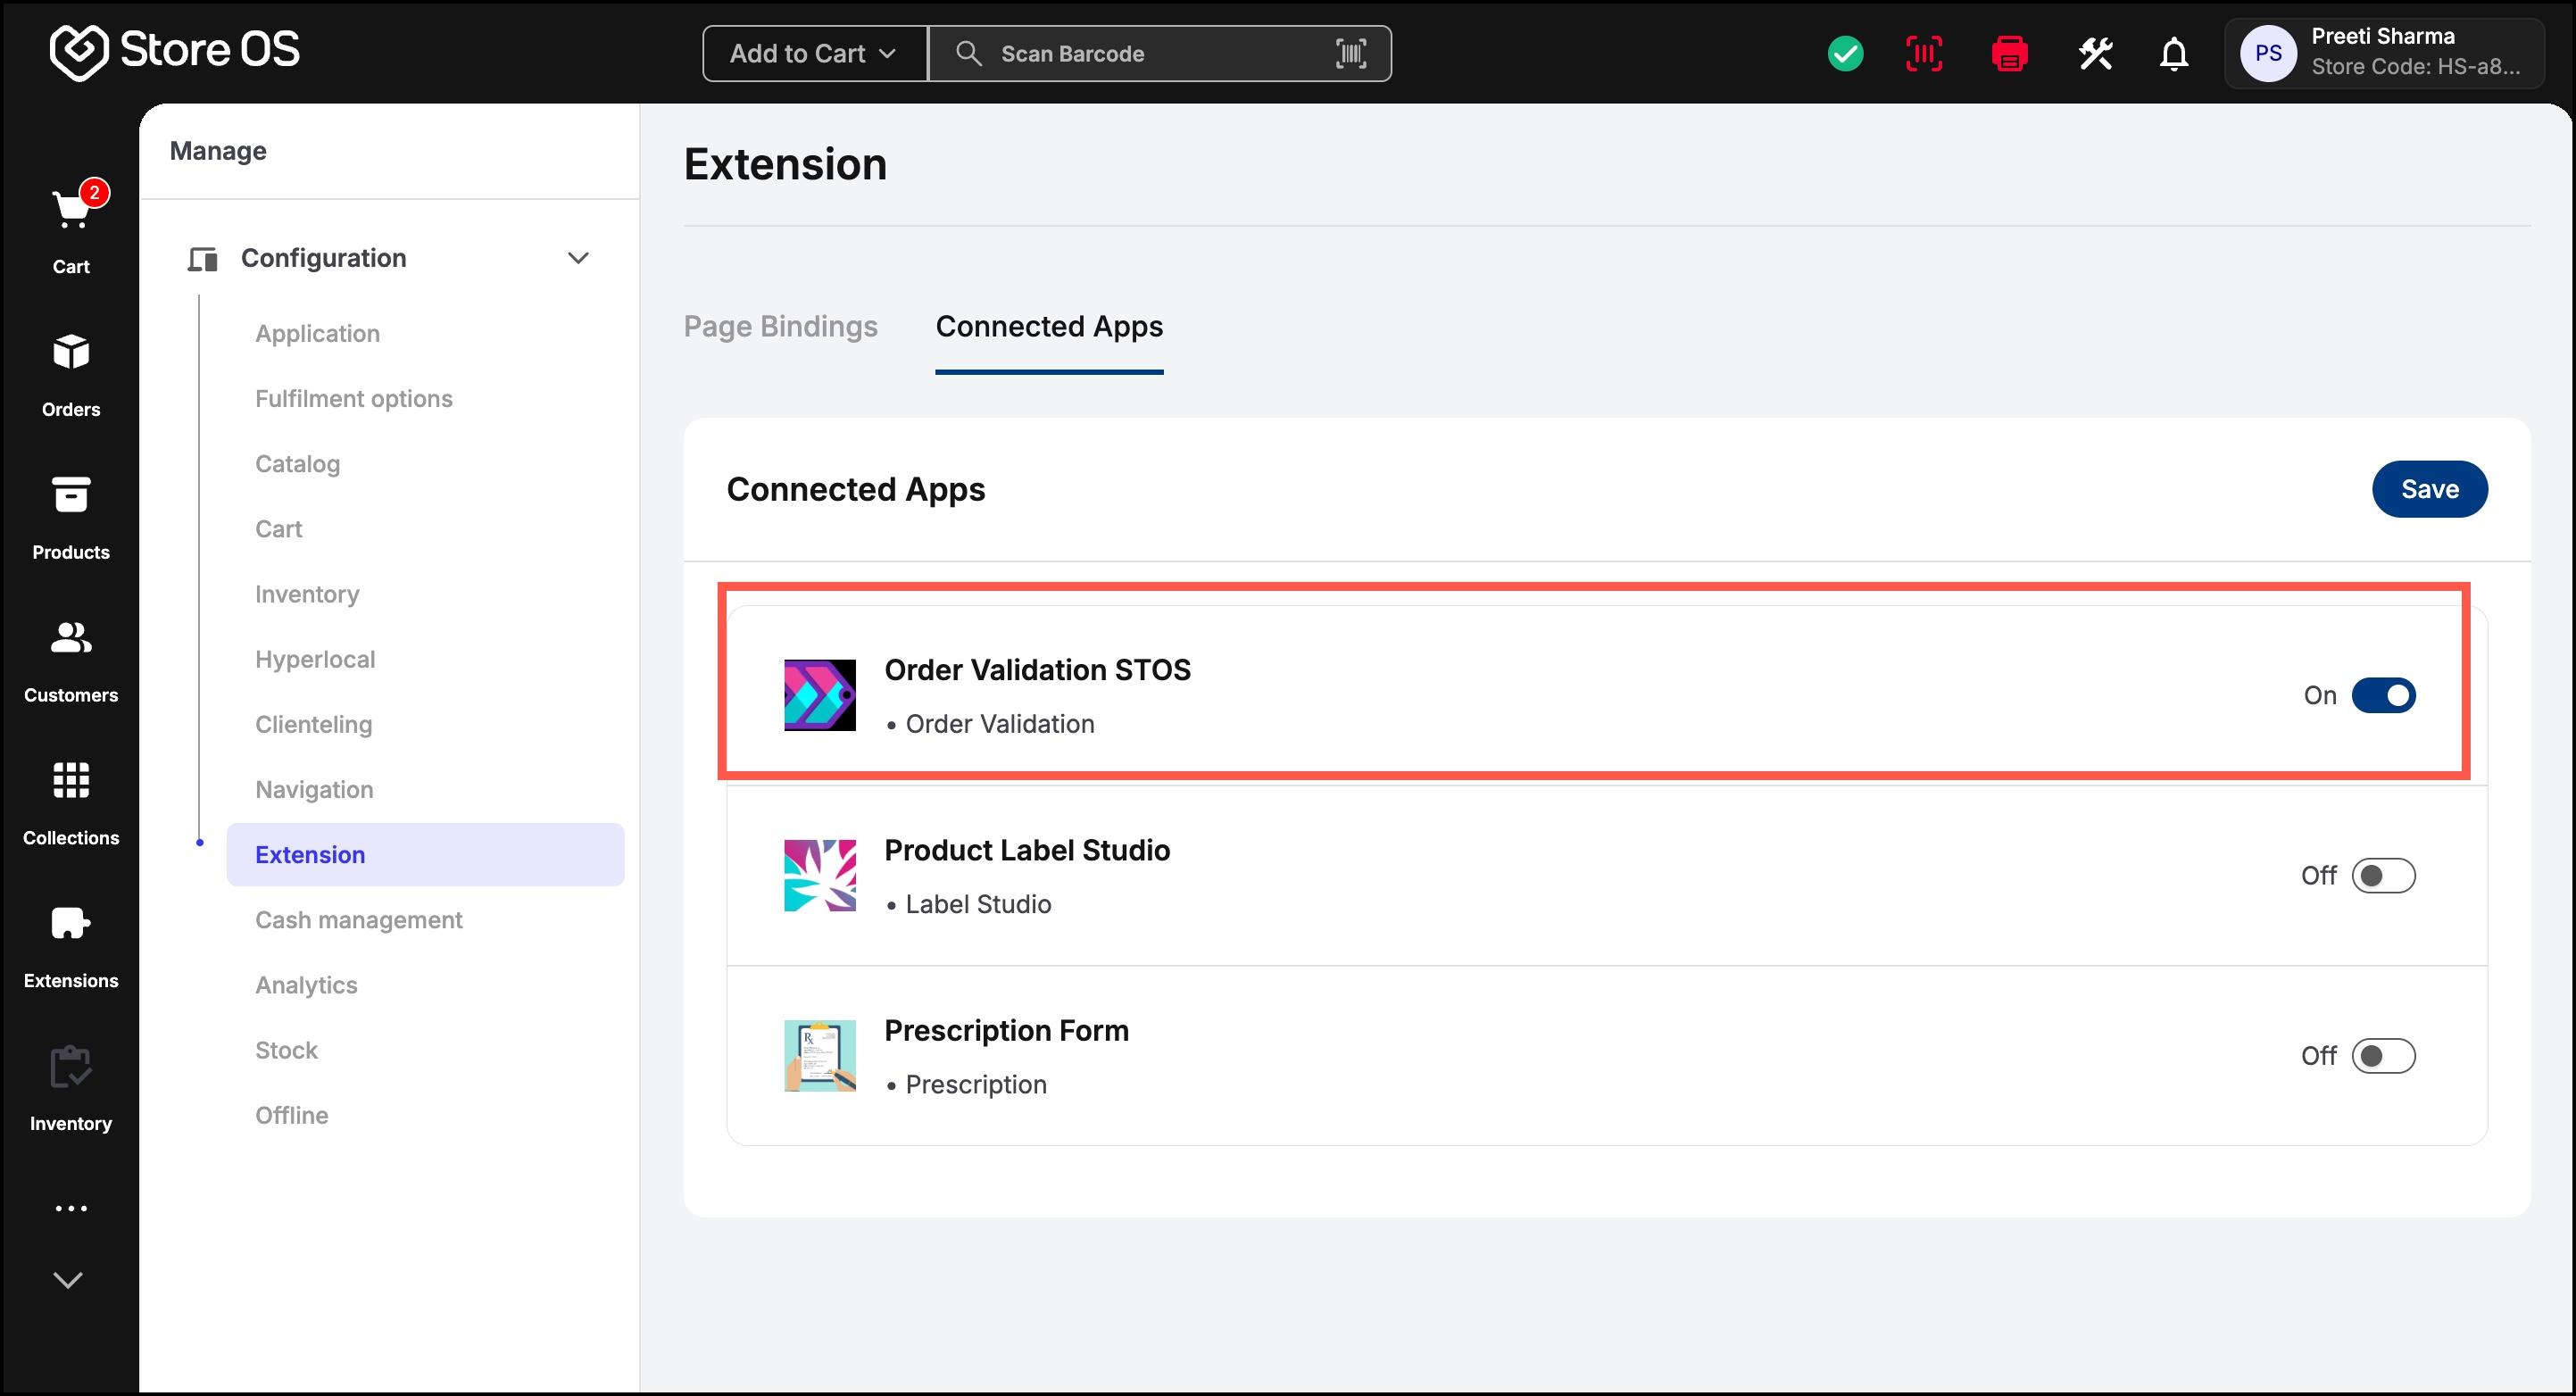
- Click Save to apply the changes. The enabled extension will then appear in the Extensions menu.