The Store OS store staff interface provides a unified platform for store staff to manage end-to-end sales & operations. It enables staff to quickly add products to the cart through scanning or search, manage customer profiles, apply coupons, process both online and offline payments, and manage inventory. This interface simplifies checkout, enhances customer service, and ensures smooth order fulfillment within the store environment. This guide walks you through how store staff can create in-store orders using the Store OS interface — from adding products to completing checkout.
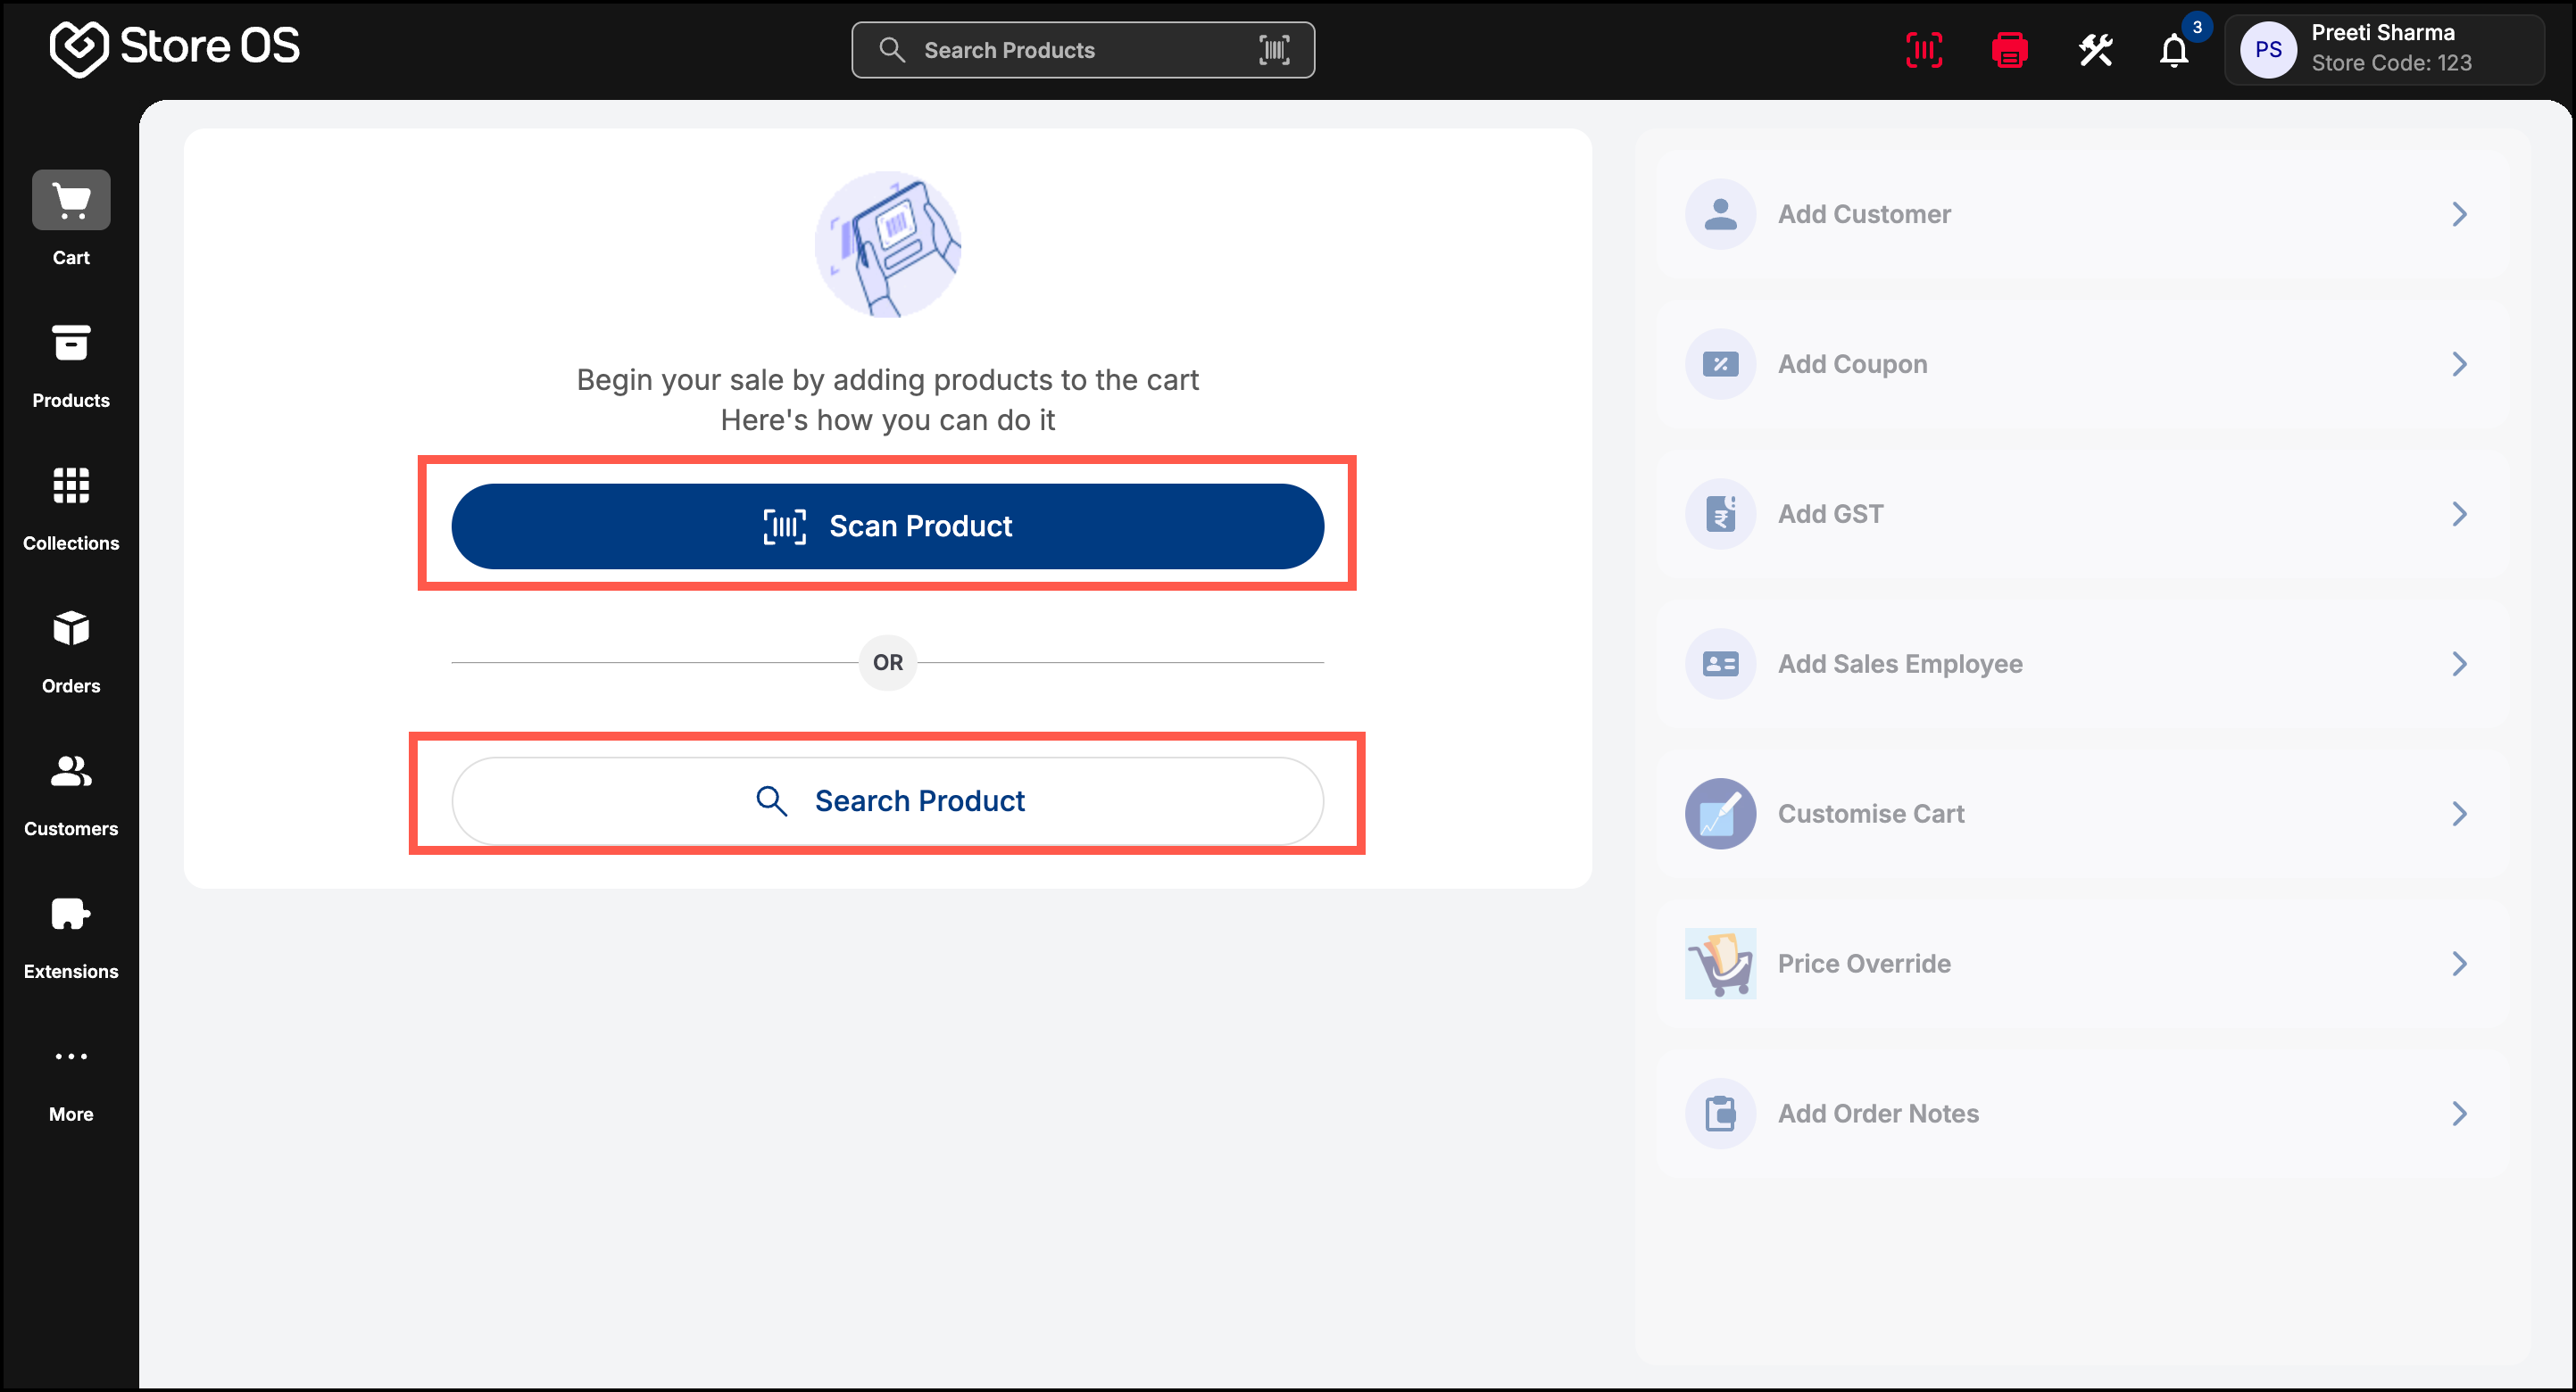
- On the StoreOS Dashboard, click Scan Product or Search Product to begin adding items to the cart.
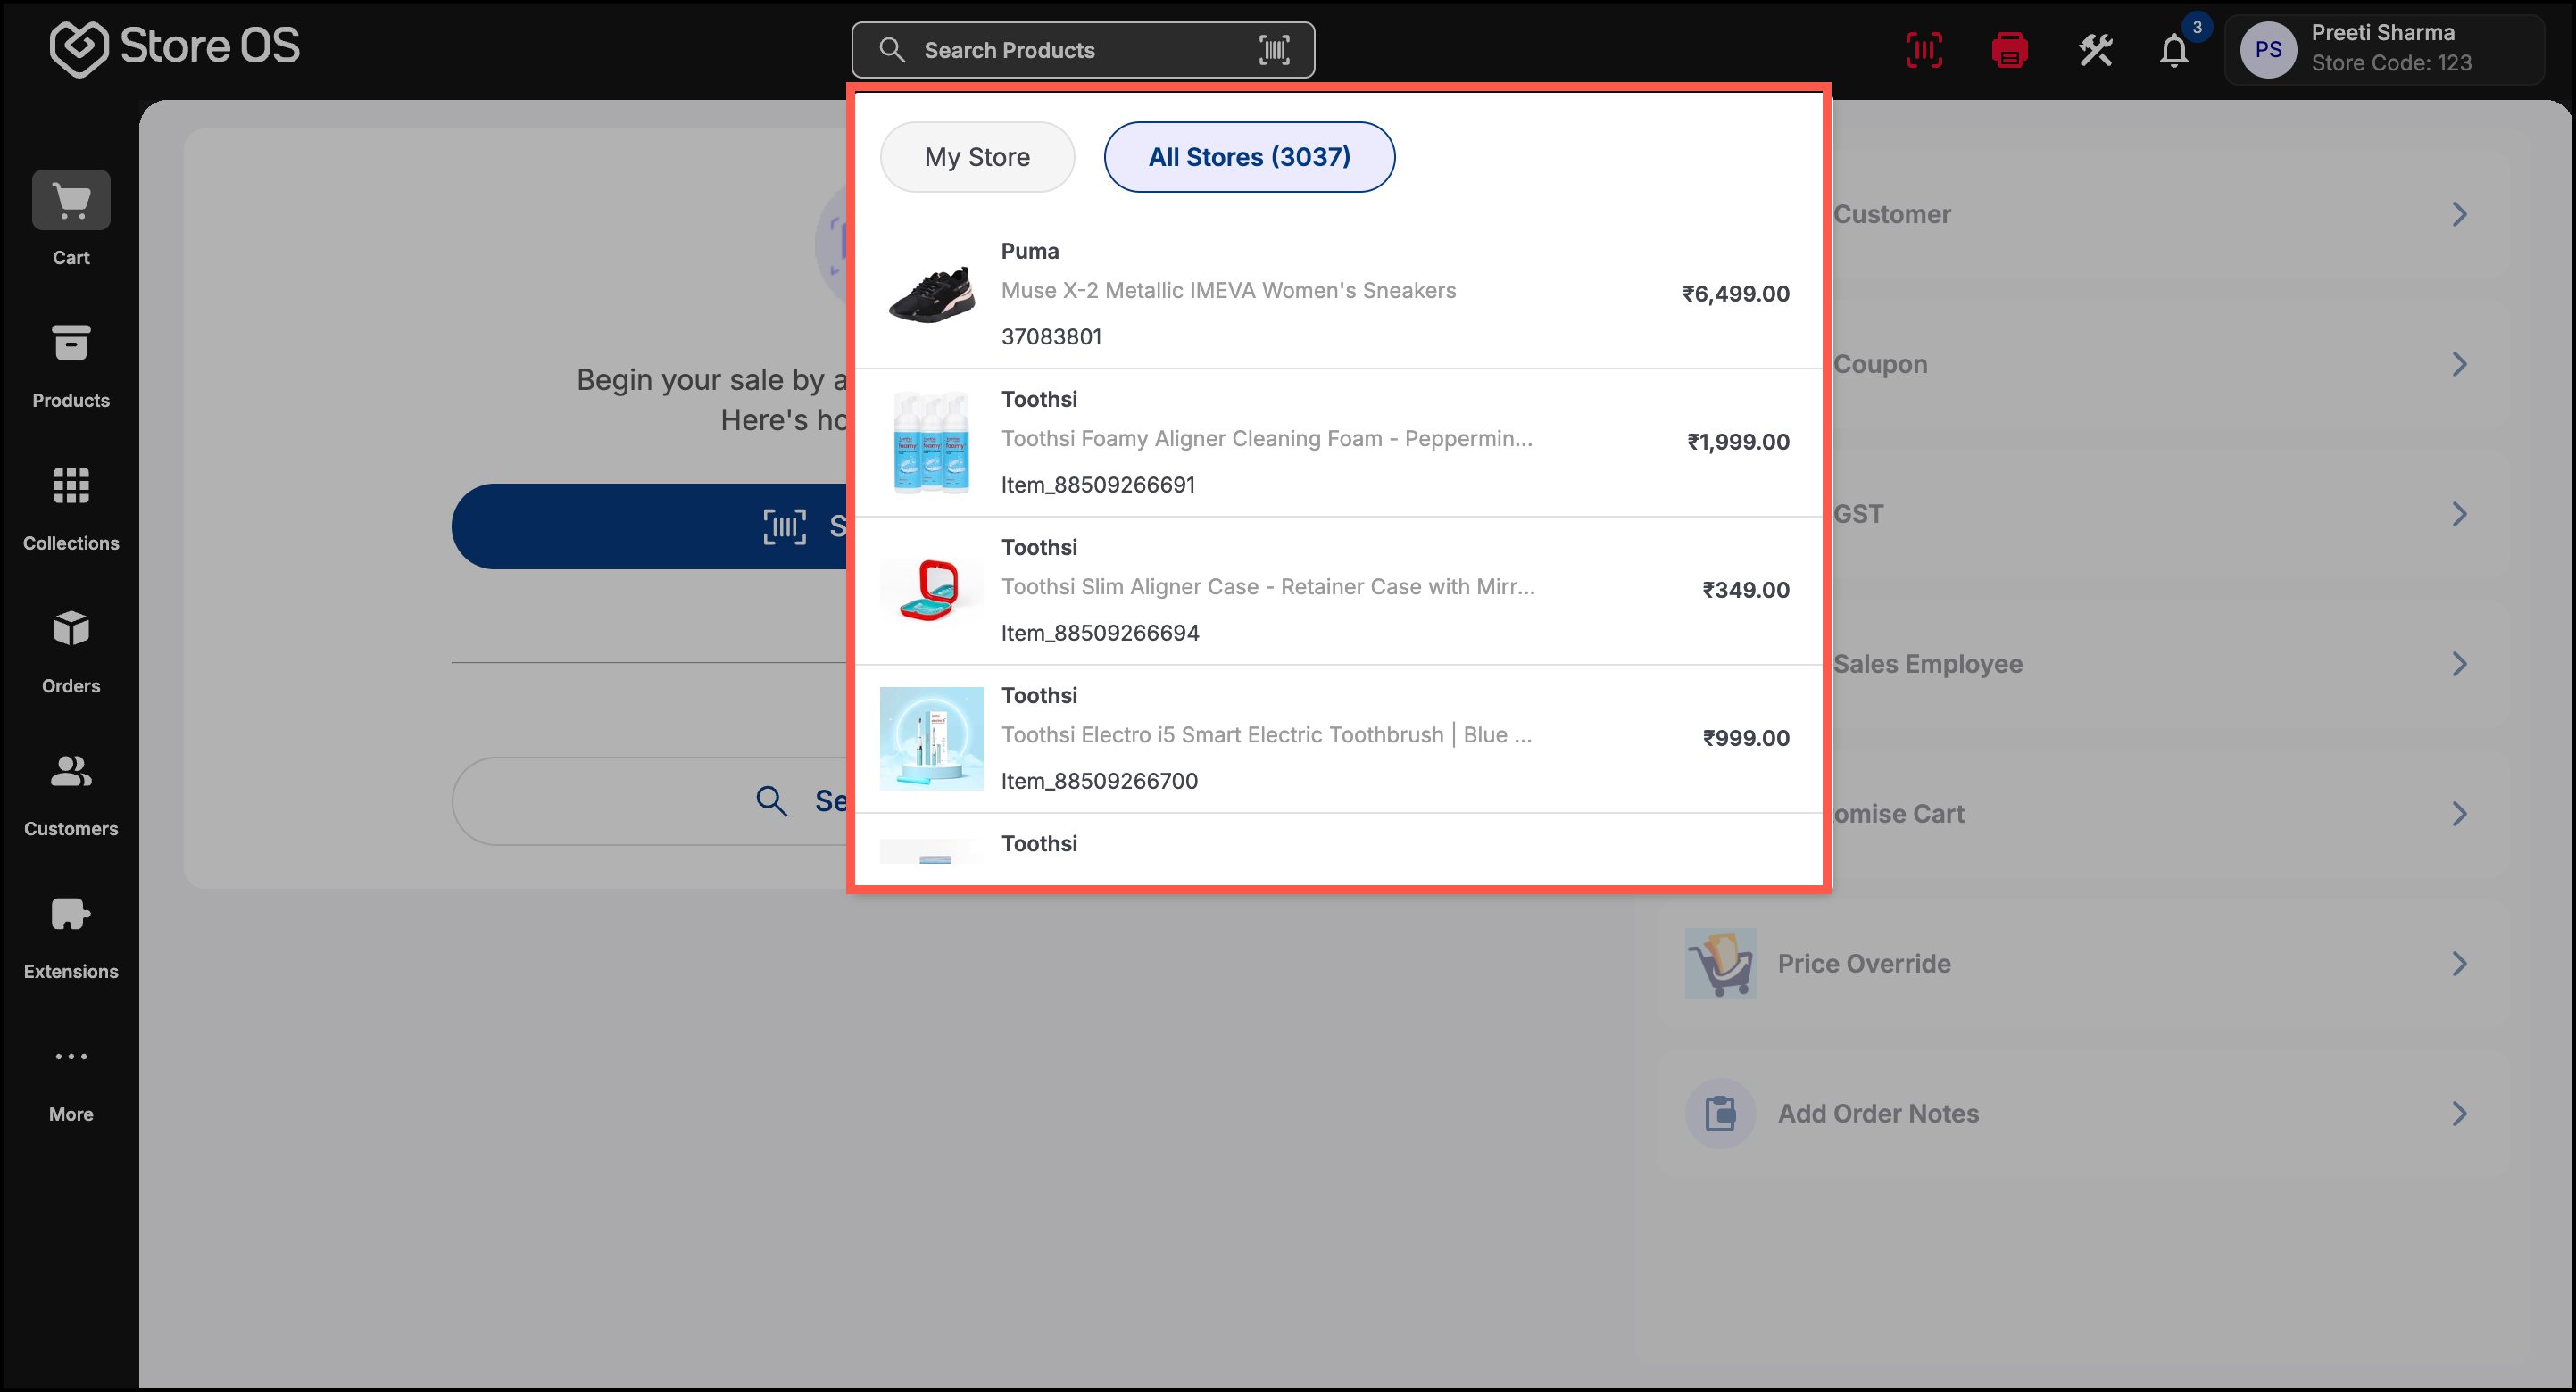
Use the search bar at the top to quickly find products by name, SKU, or barcode.
- You can search for products under My Store or All Stores.
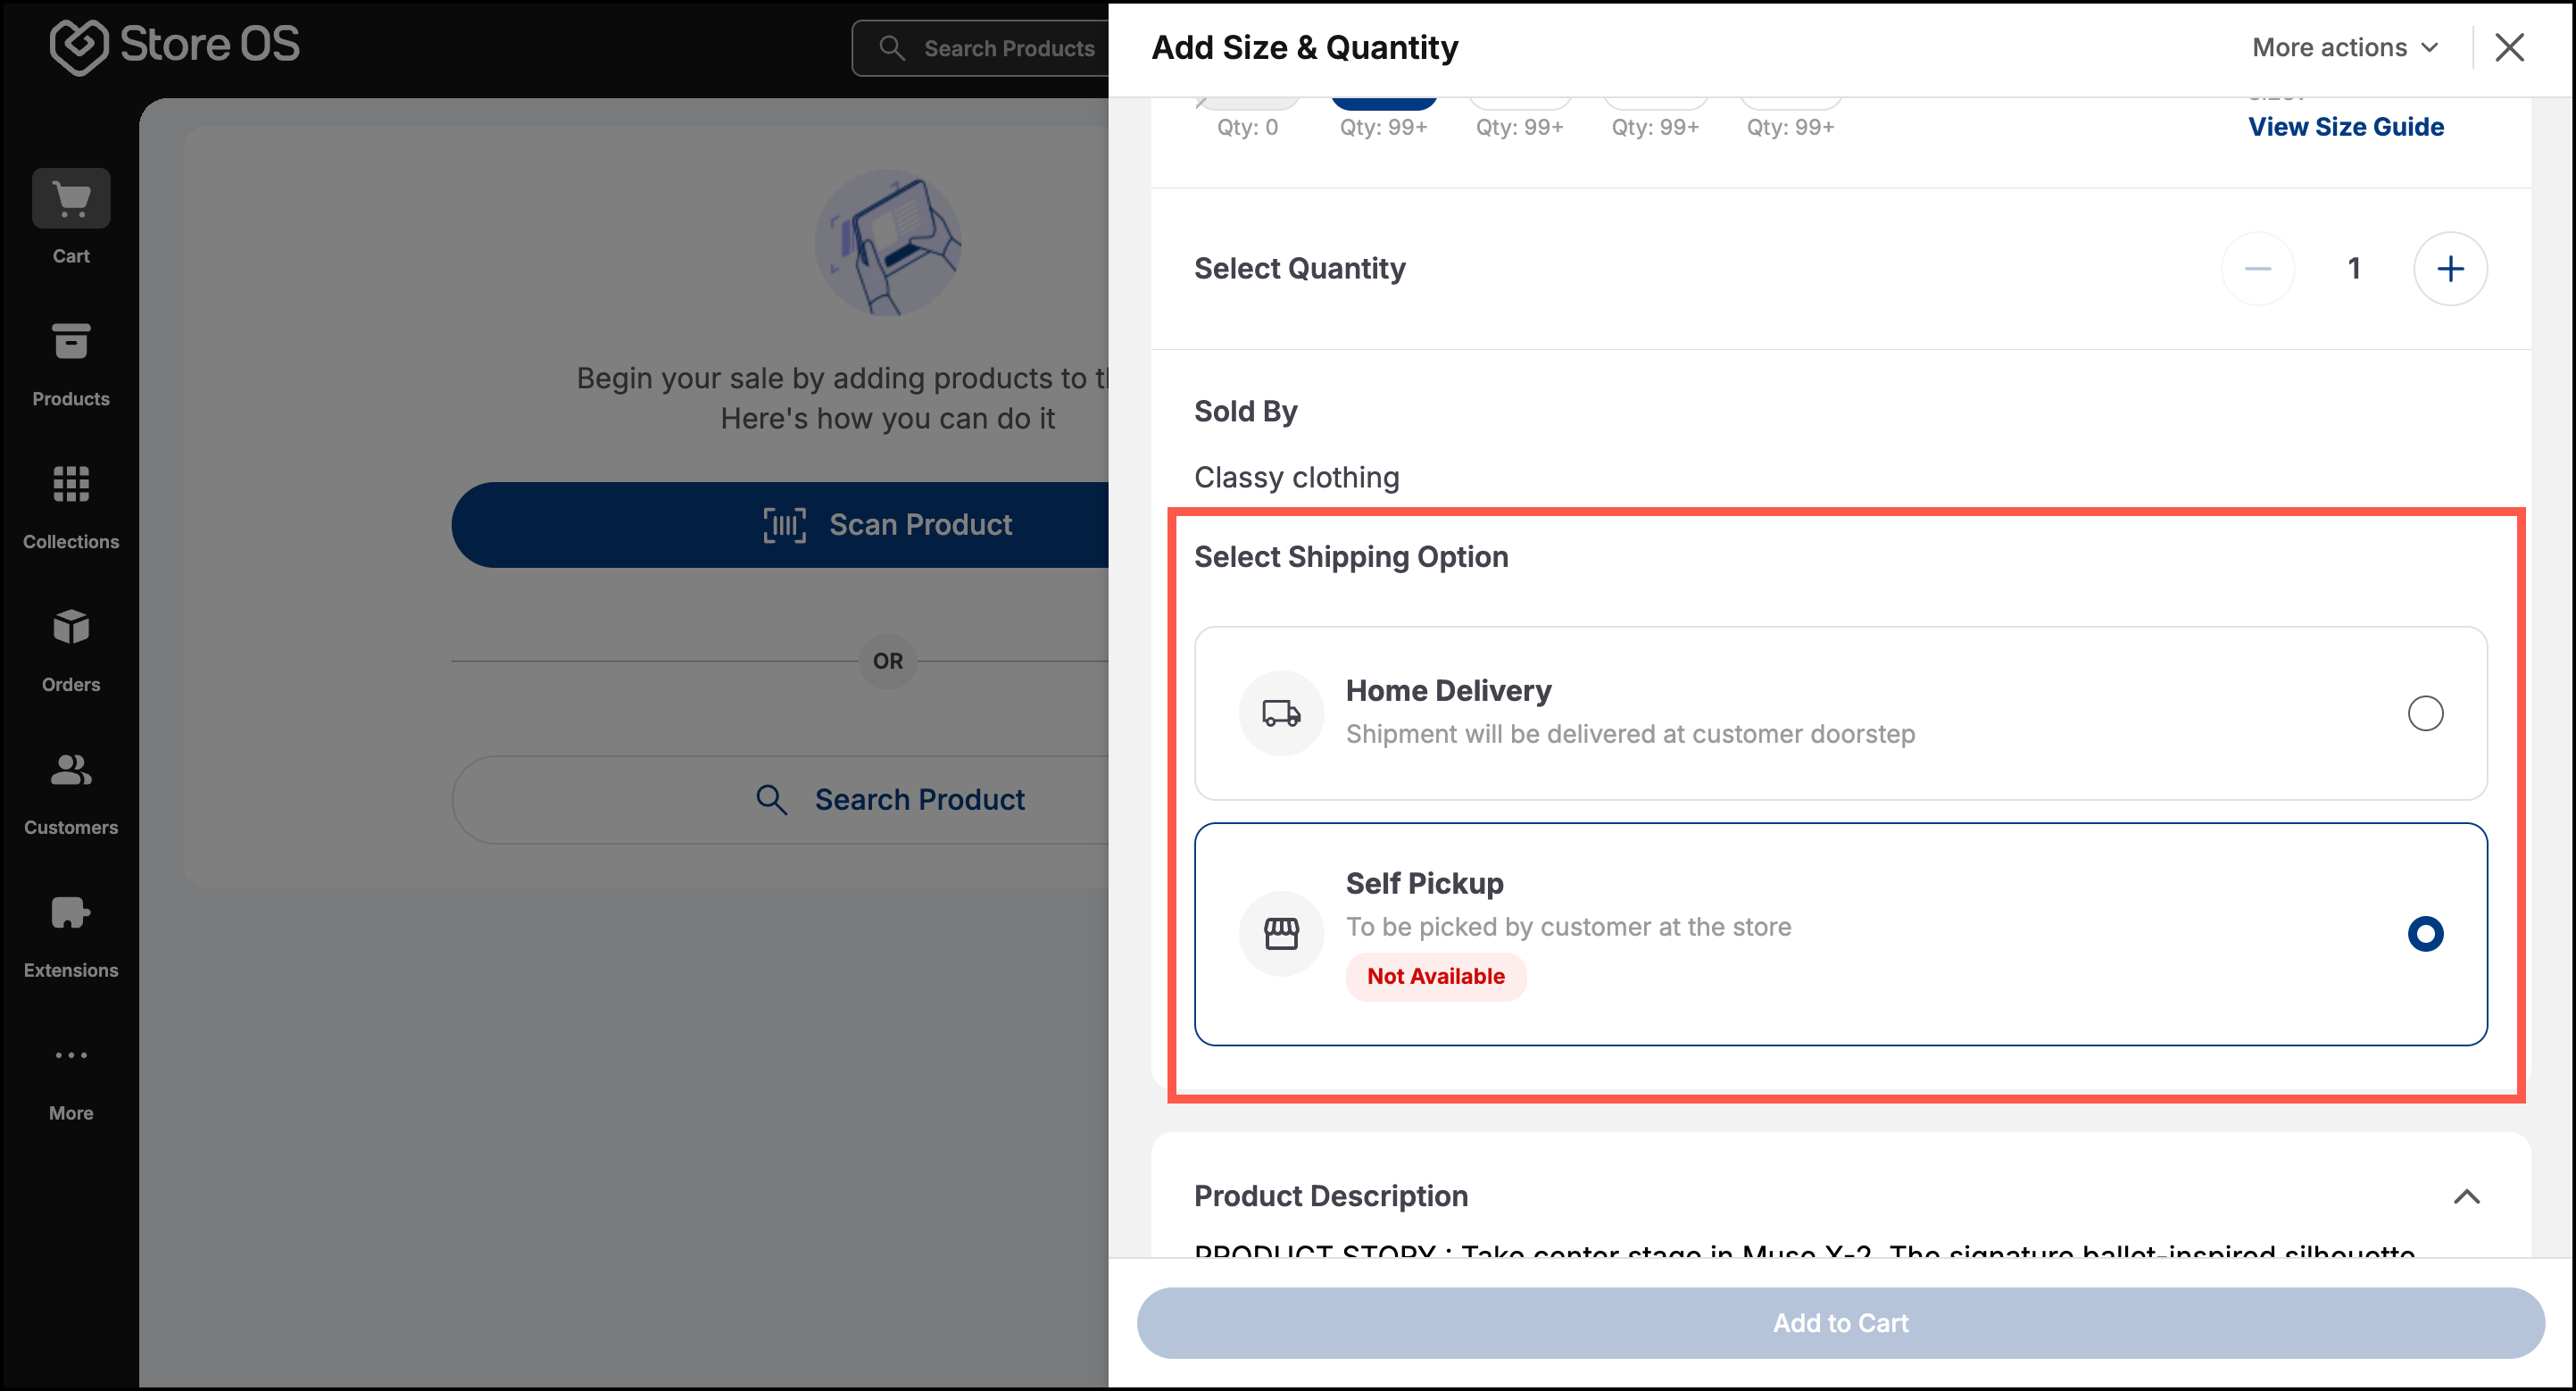
- Select the preferred Size and Quantity.
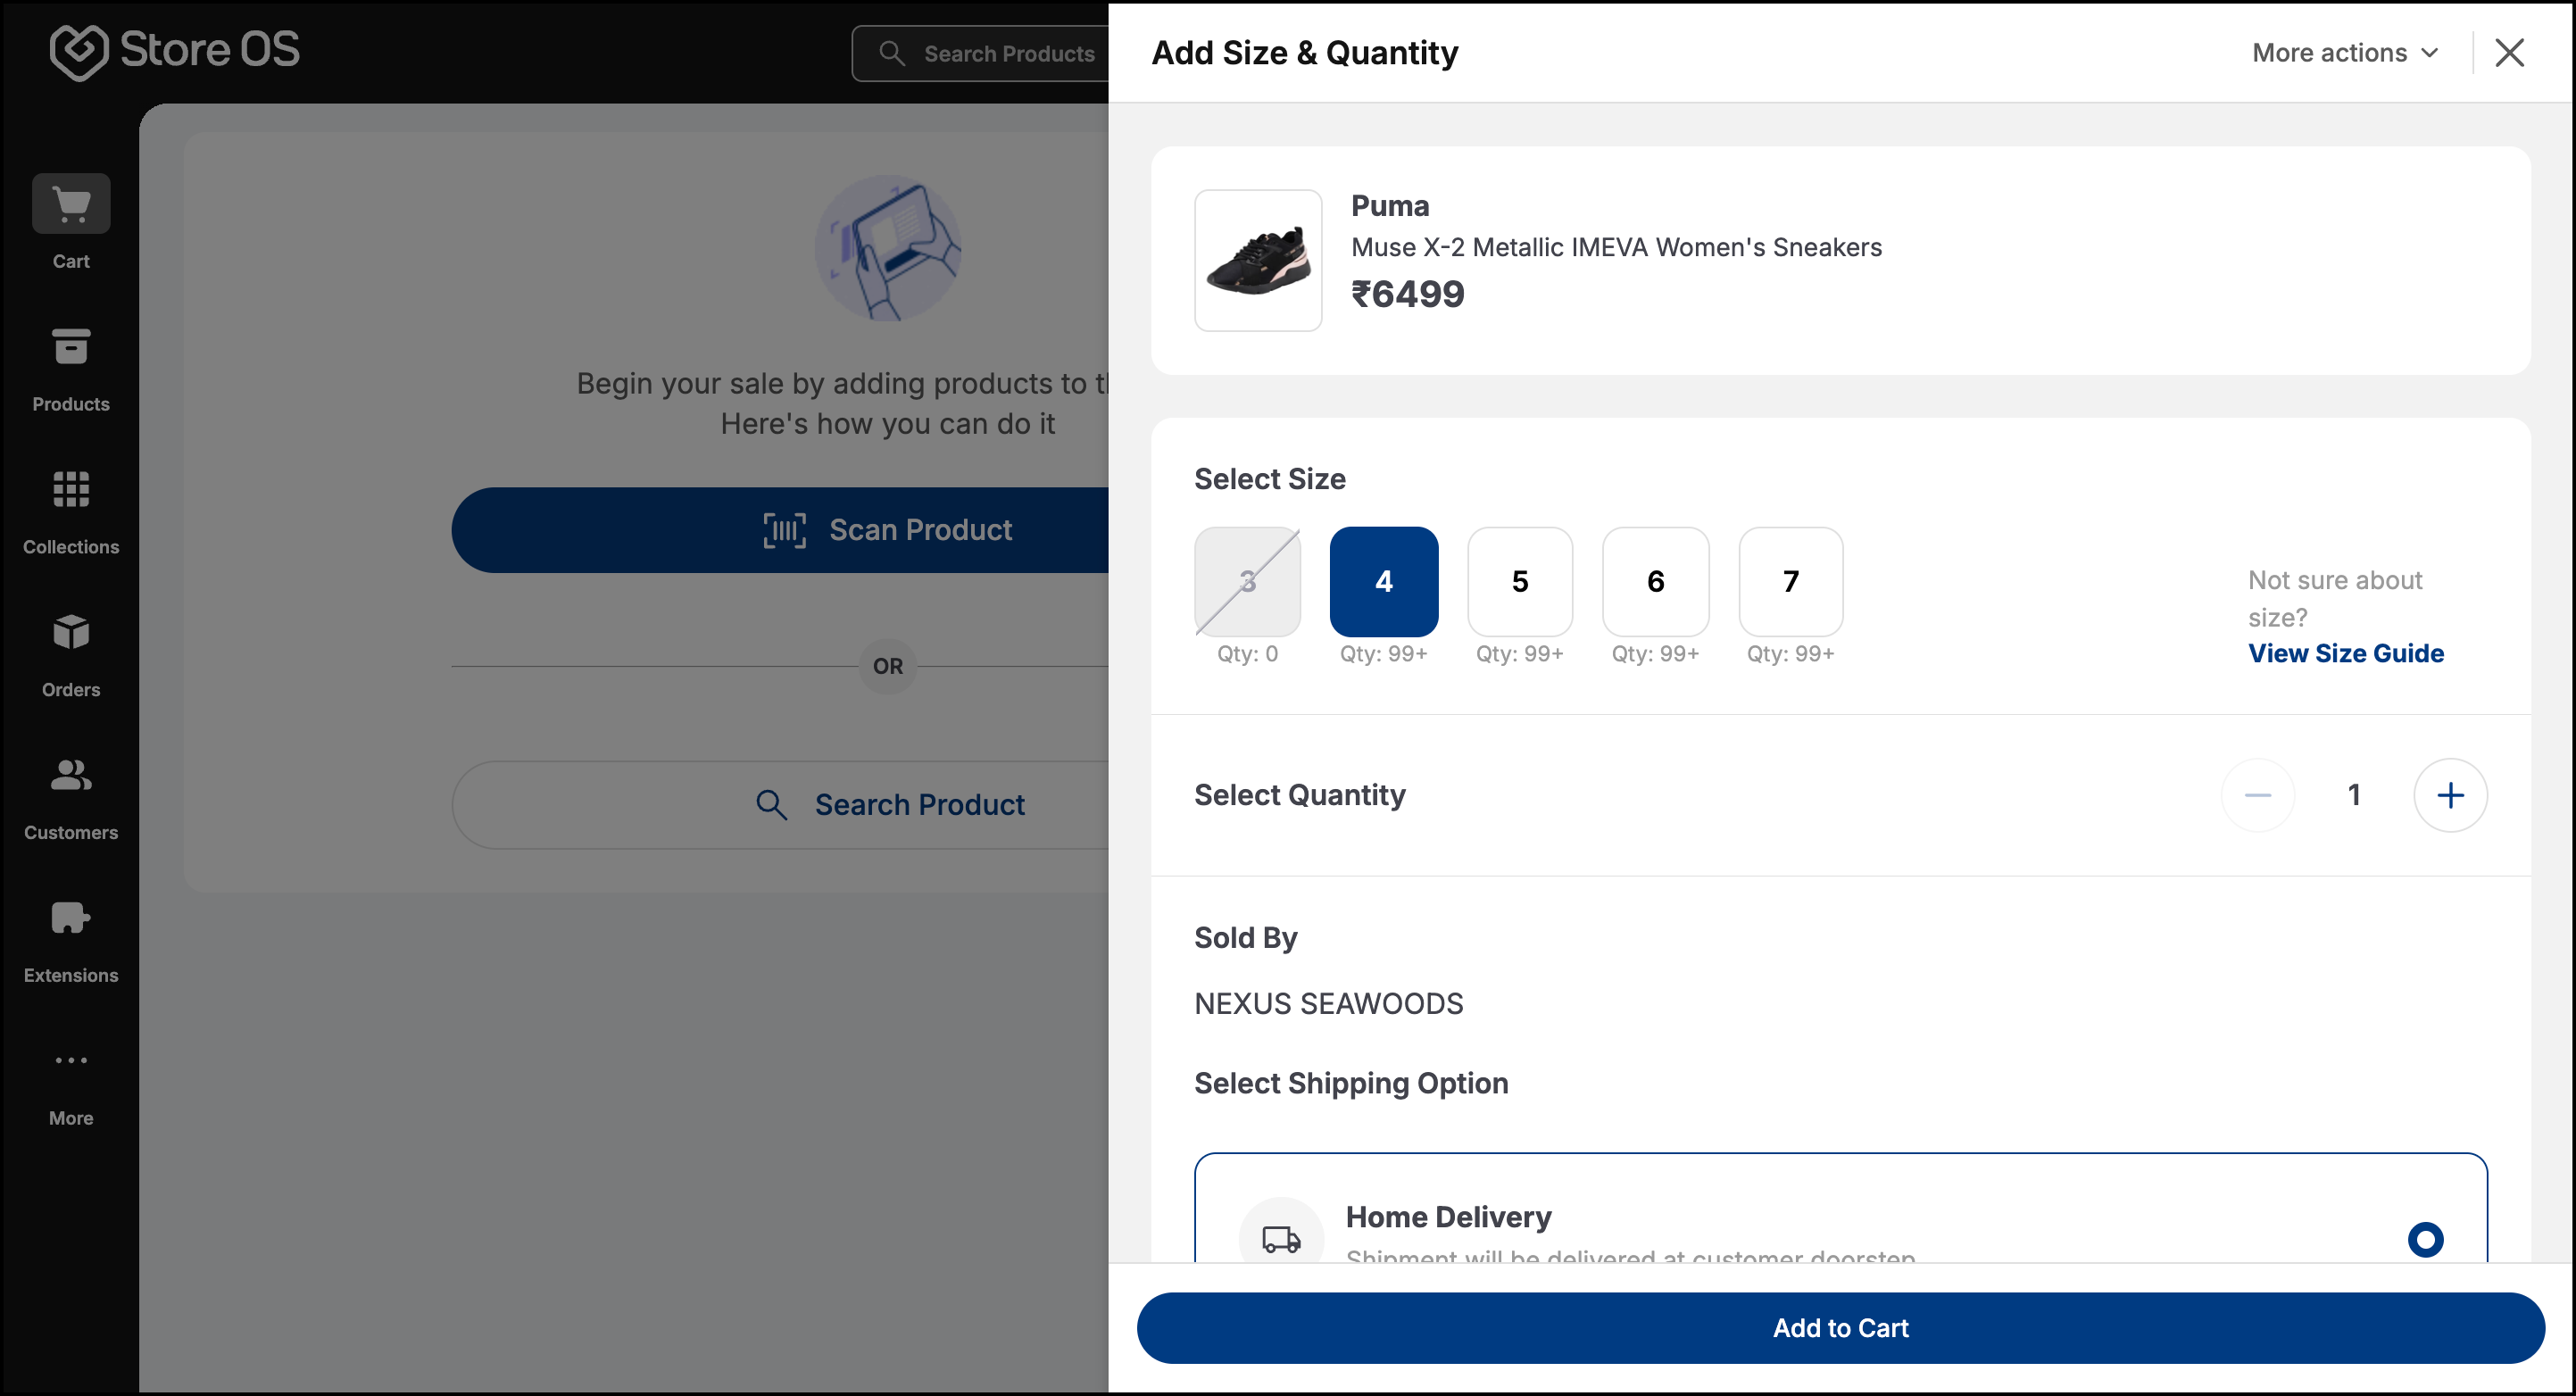
- Choose a Shipping Option:
- Home Delivery – Product shipped to customer’s address.
- Self Pickup – Customer collects item from the store.
- Add Customer Details
- Search for existing customers using their Mobile Number. If not found, add a new customer by entering the mandatory details.
- Click Add Customer.
- For existing customers, you can click Manage Addresses to view or update their details.

- Click Add Coupon and enter the coupon code or select from the list.
- Click Check to validate and apply discounts.
- Enter a valid 15-digit GSTIN number to link tax information to the order.
- Add Sales Employee by searching the employee name.
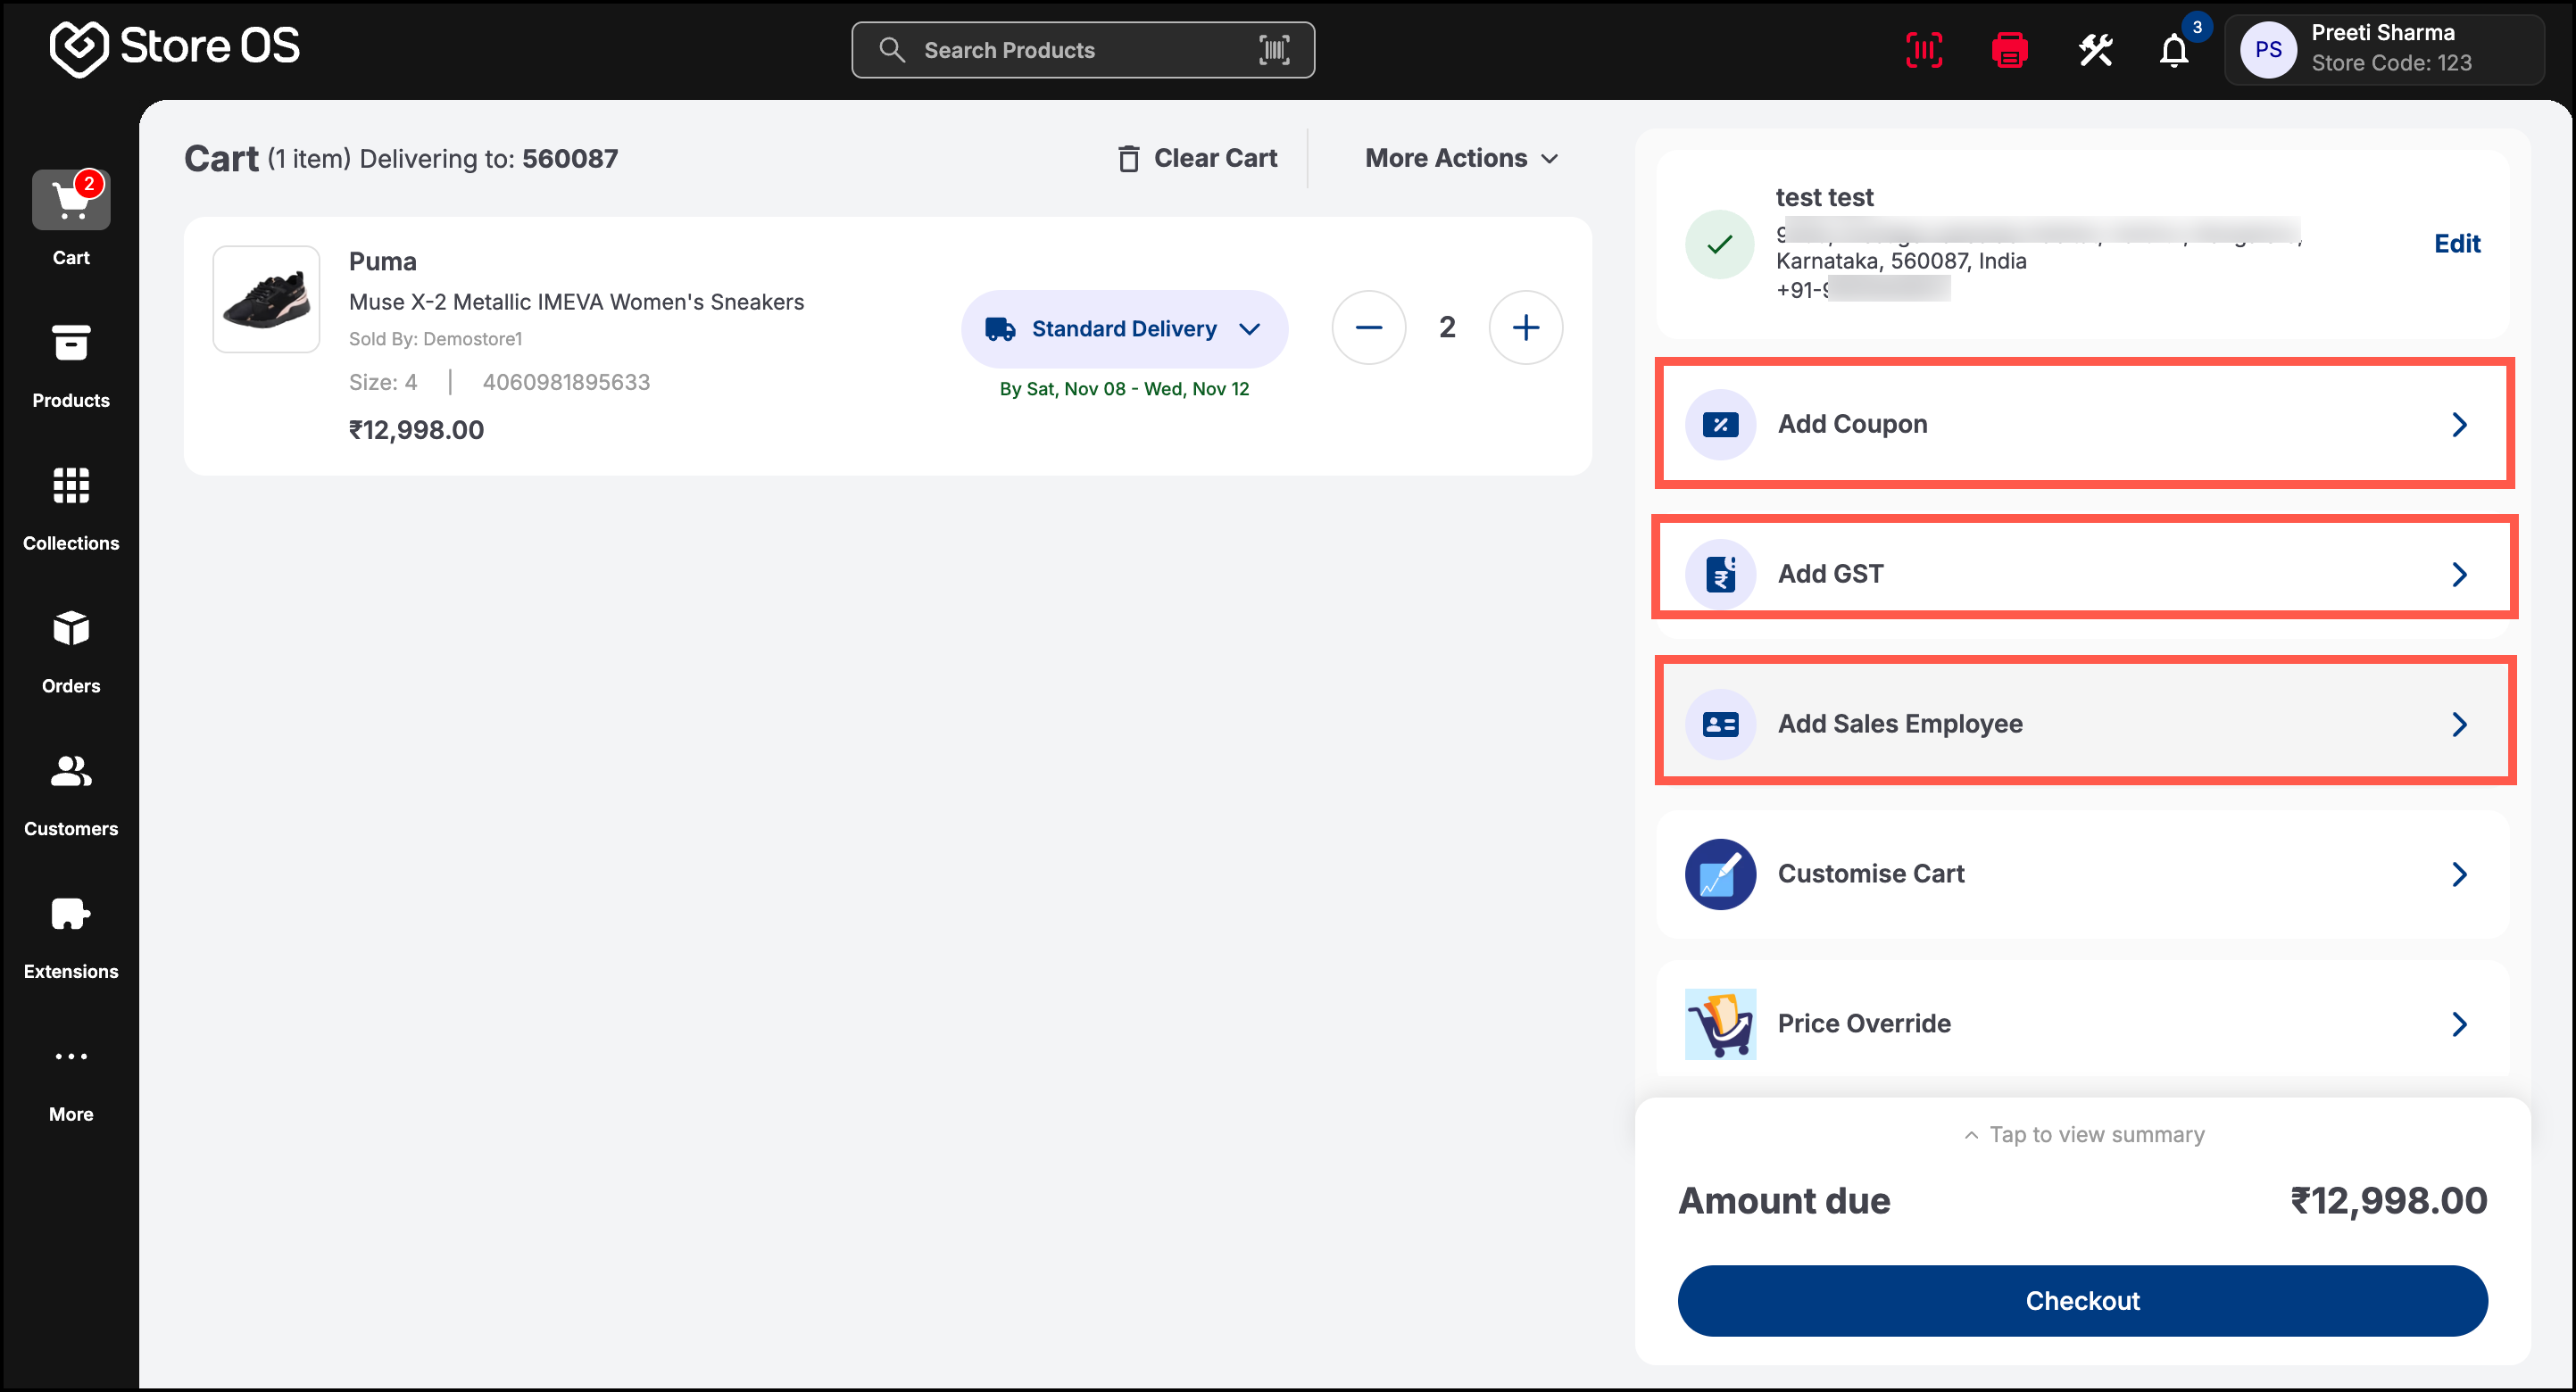
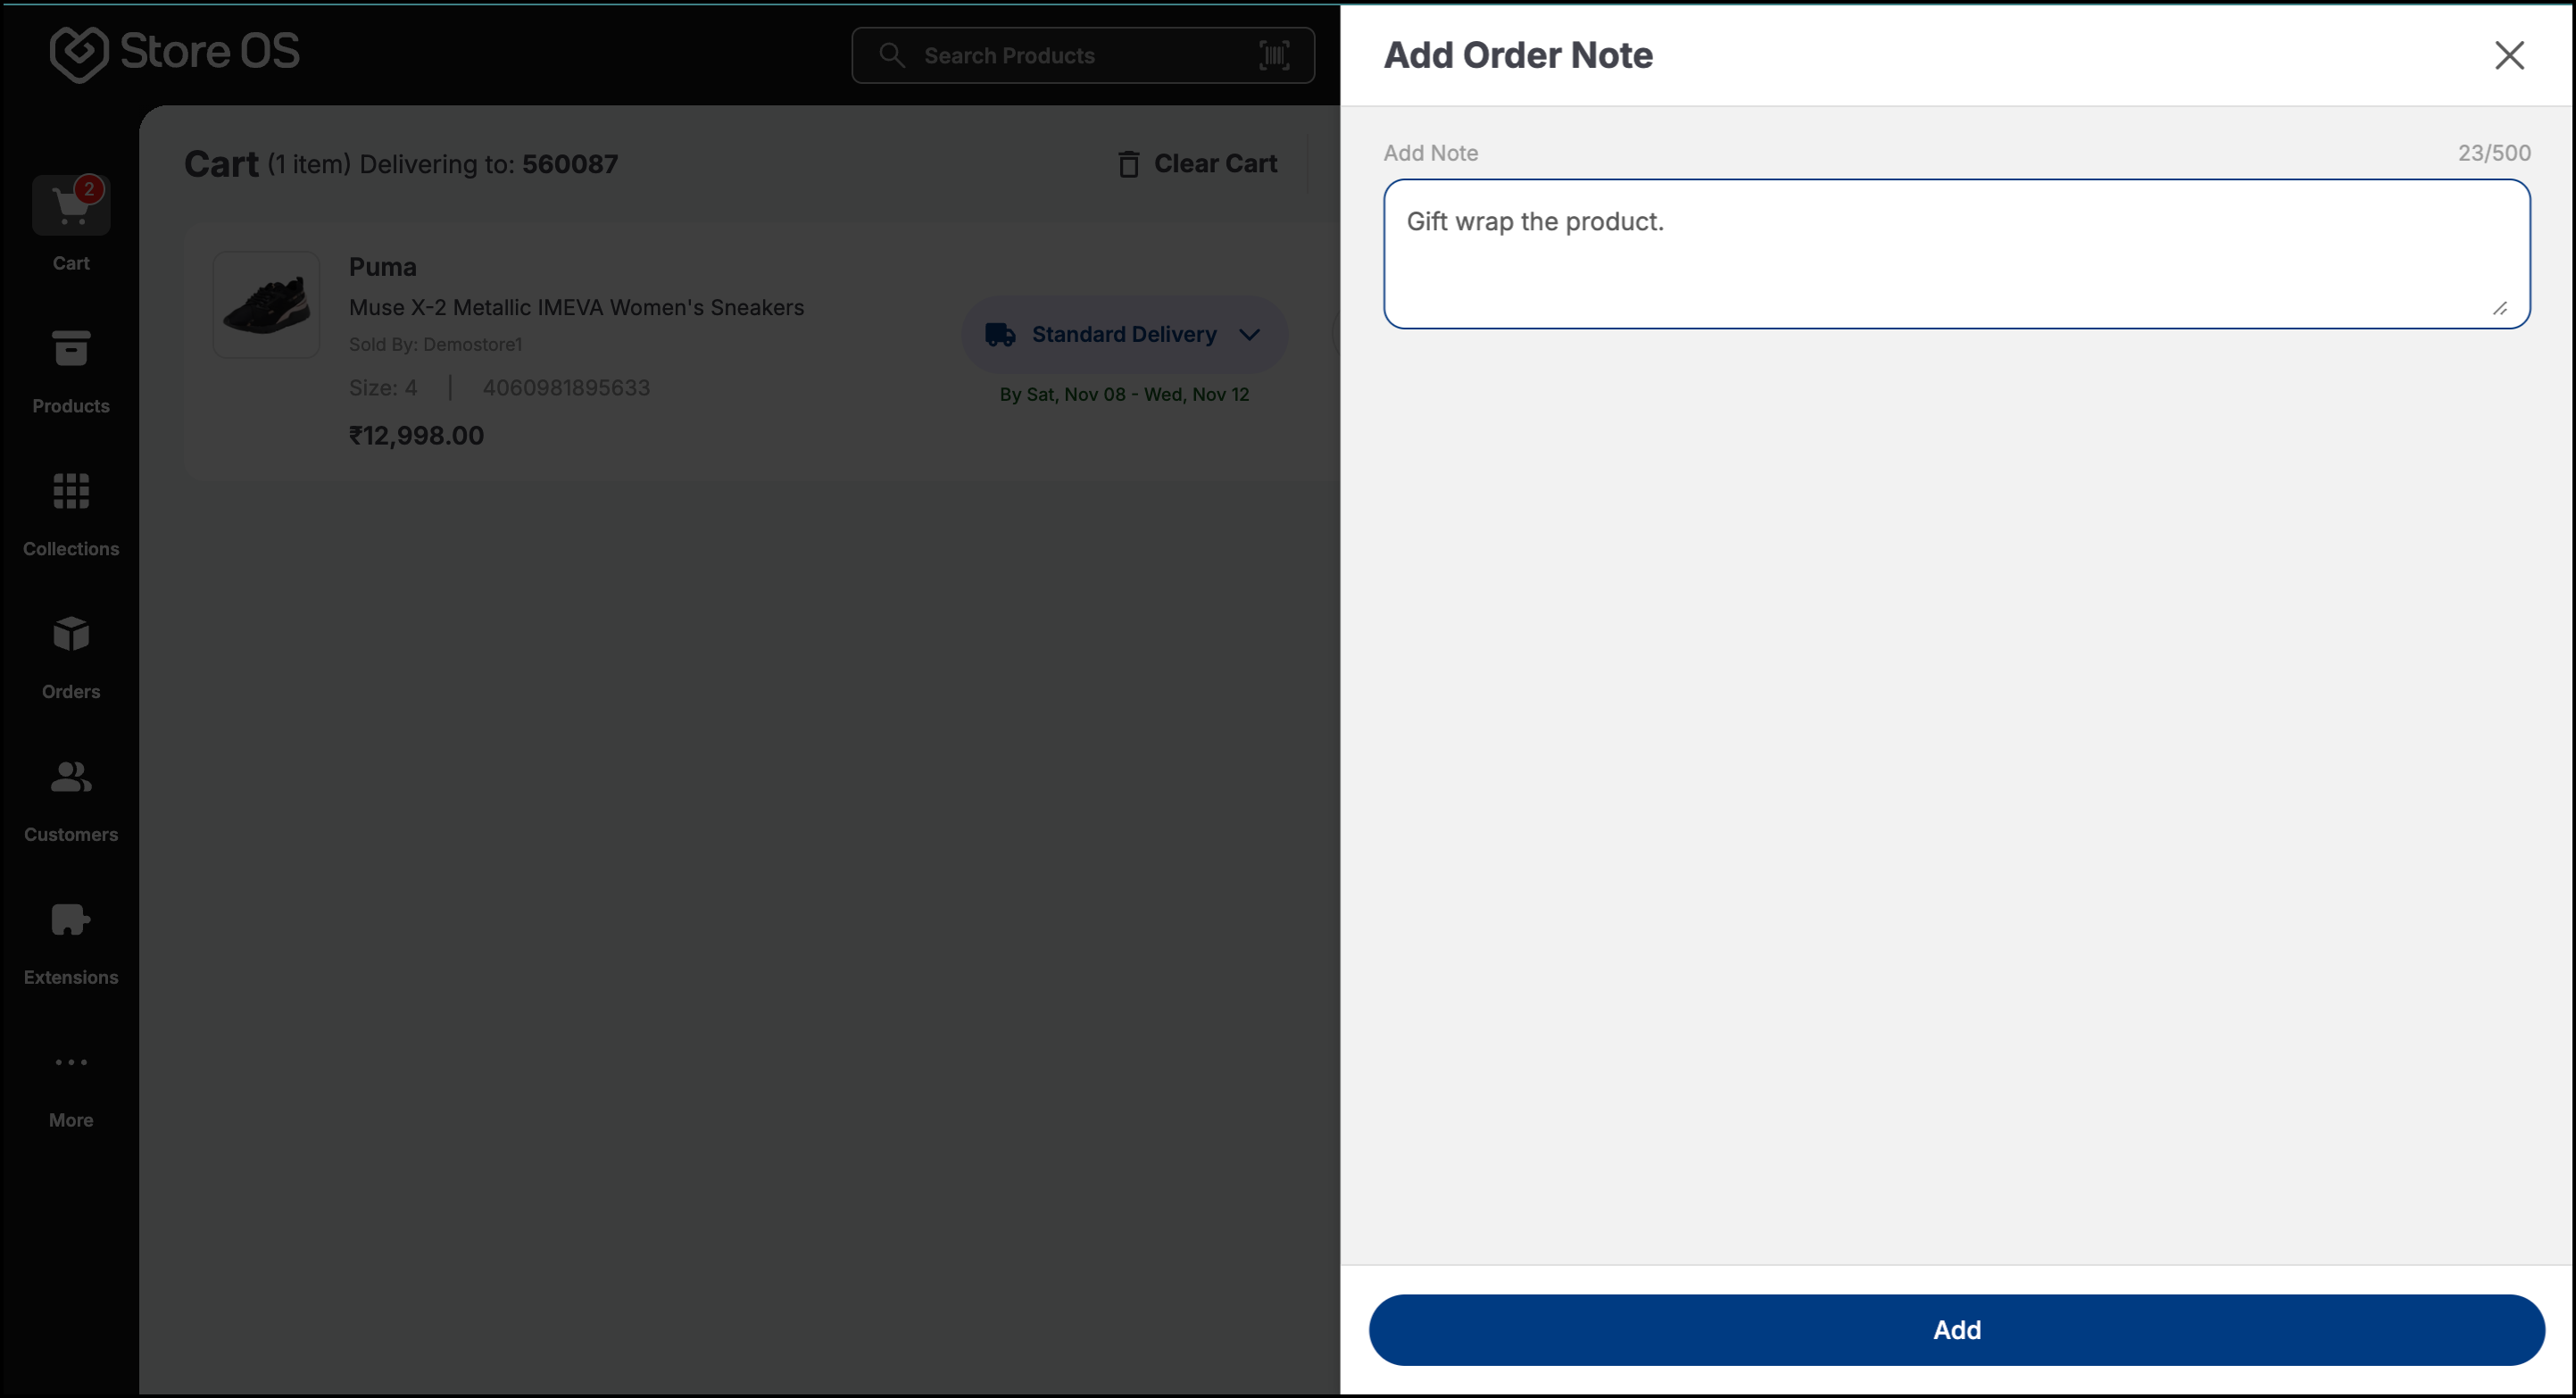
- You can also attach special instructions such as packaging or delivery requests to the respective order.
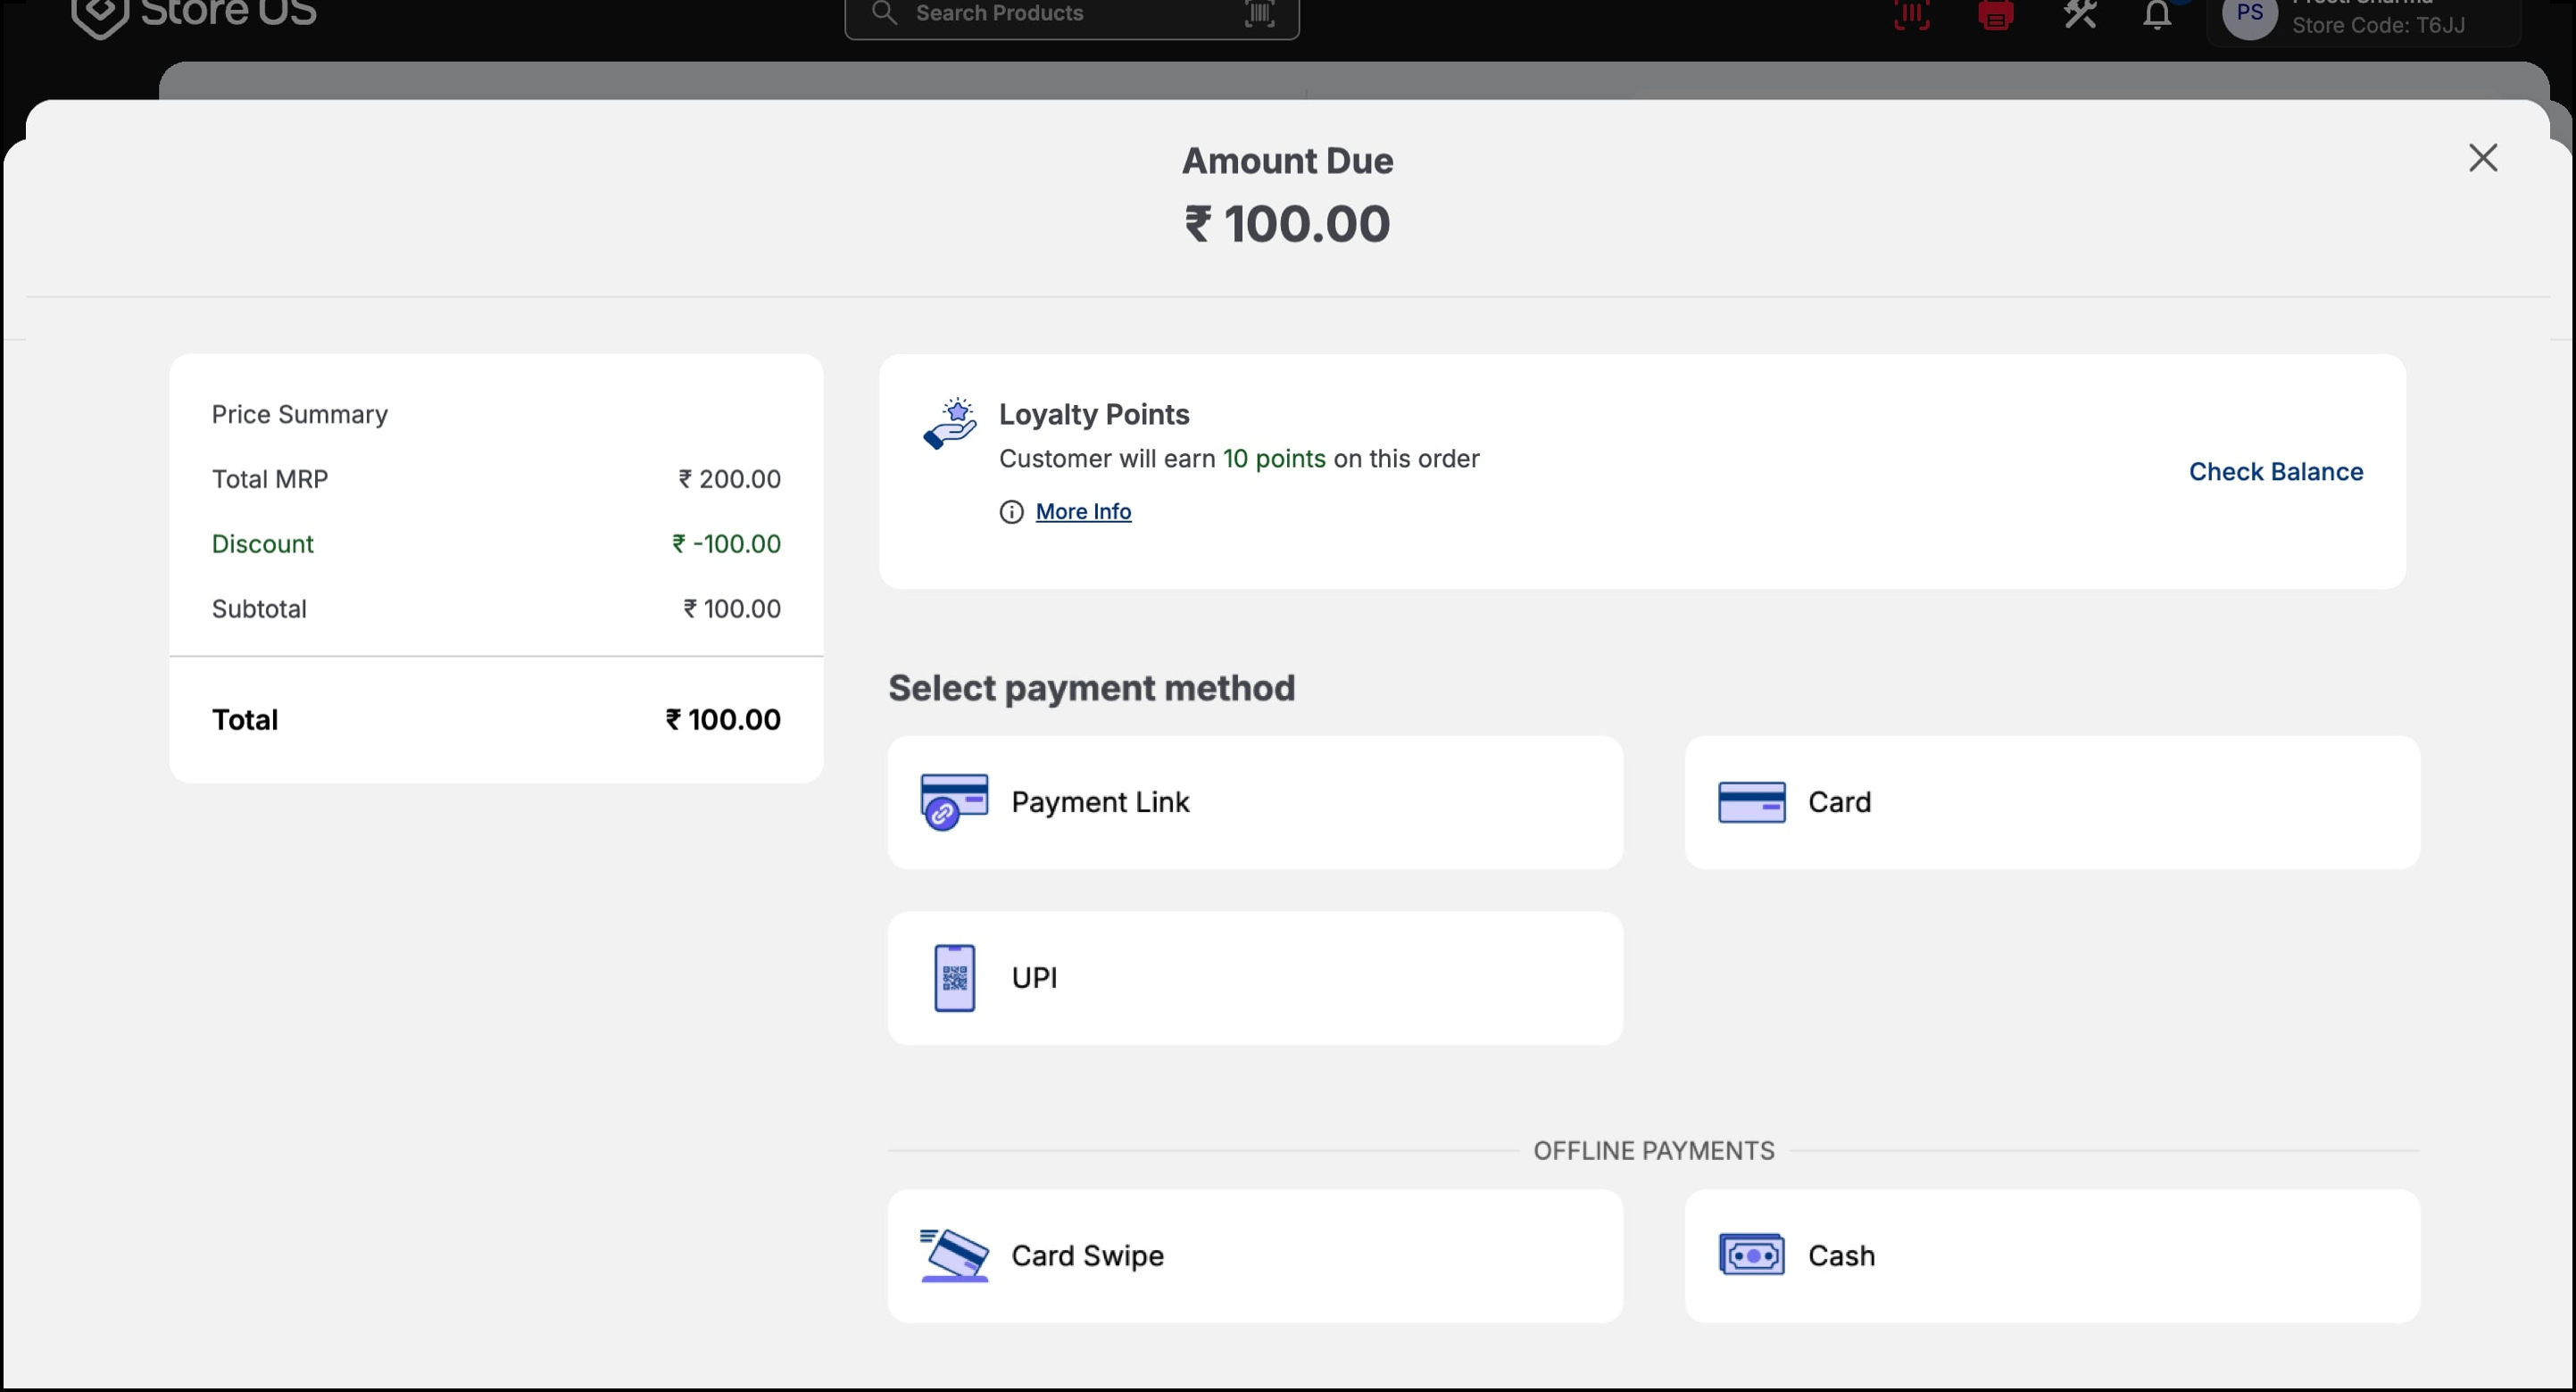
- The Amount Due screen shows a detailed price summary.
- Choose your preferred Payment Method:
- Payment Link Page (Online Payment)
- Card Swipe
- UPI at Store
- Cash
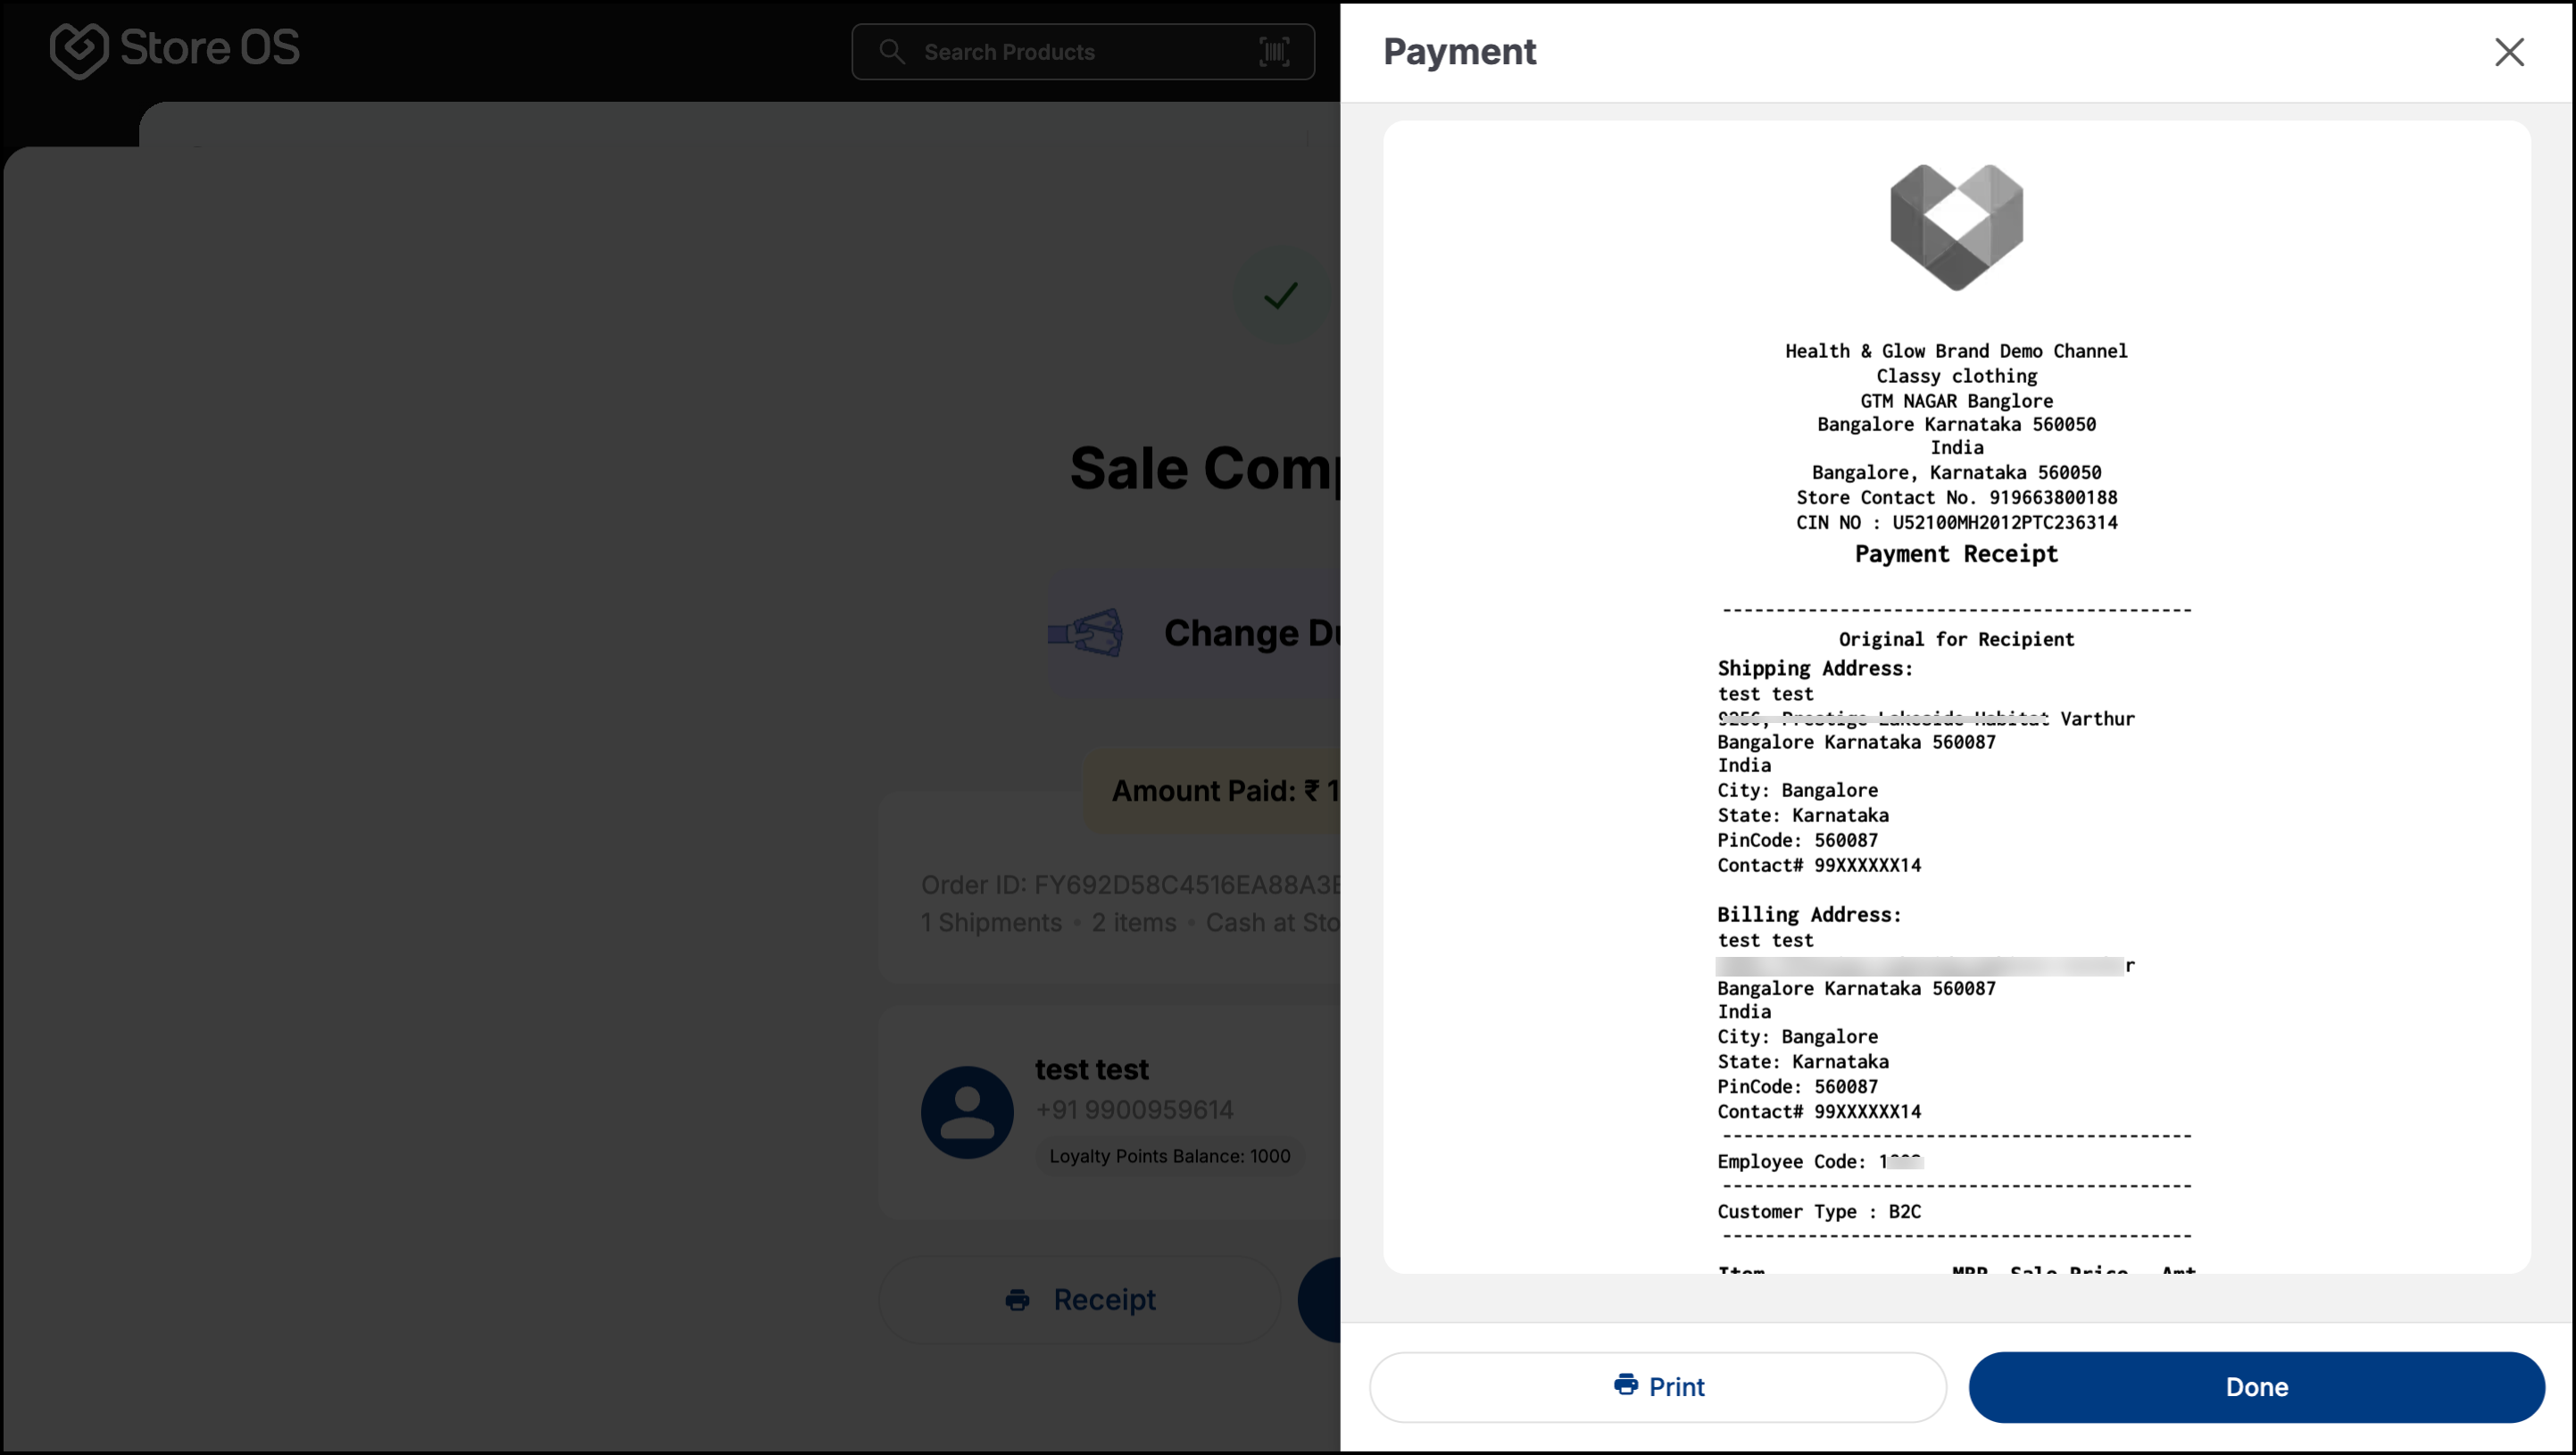
- Once payment is successful, the Sale Completed screen confirms the amount paid, order ID and order summary.
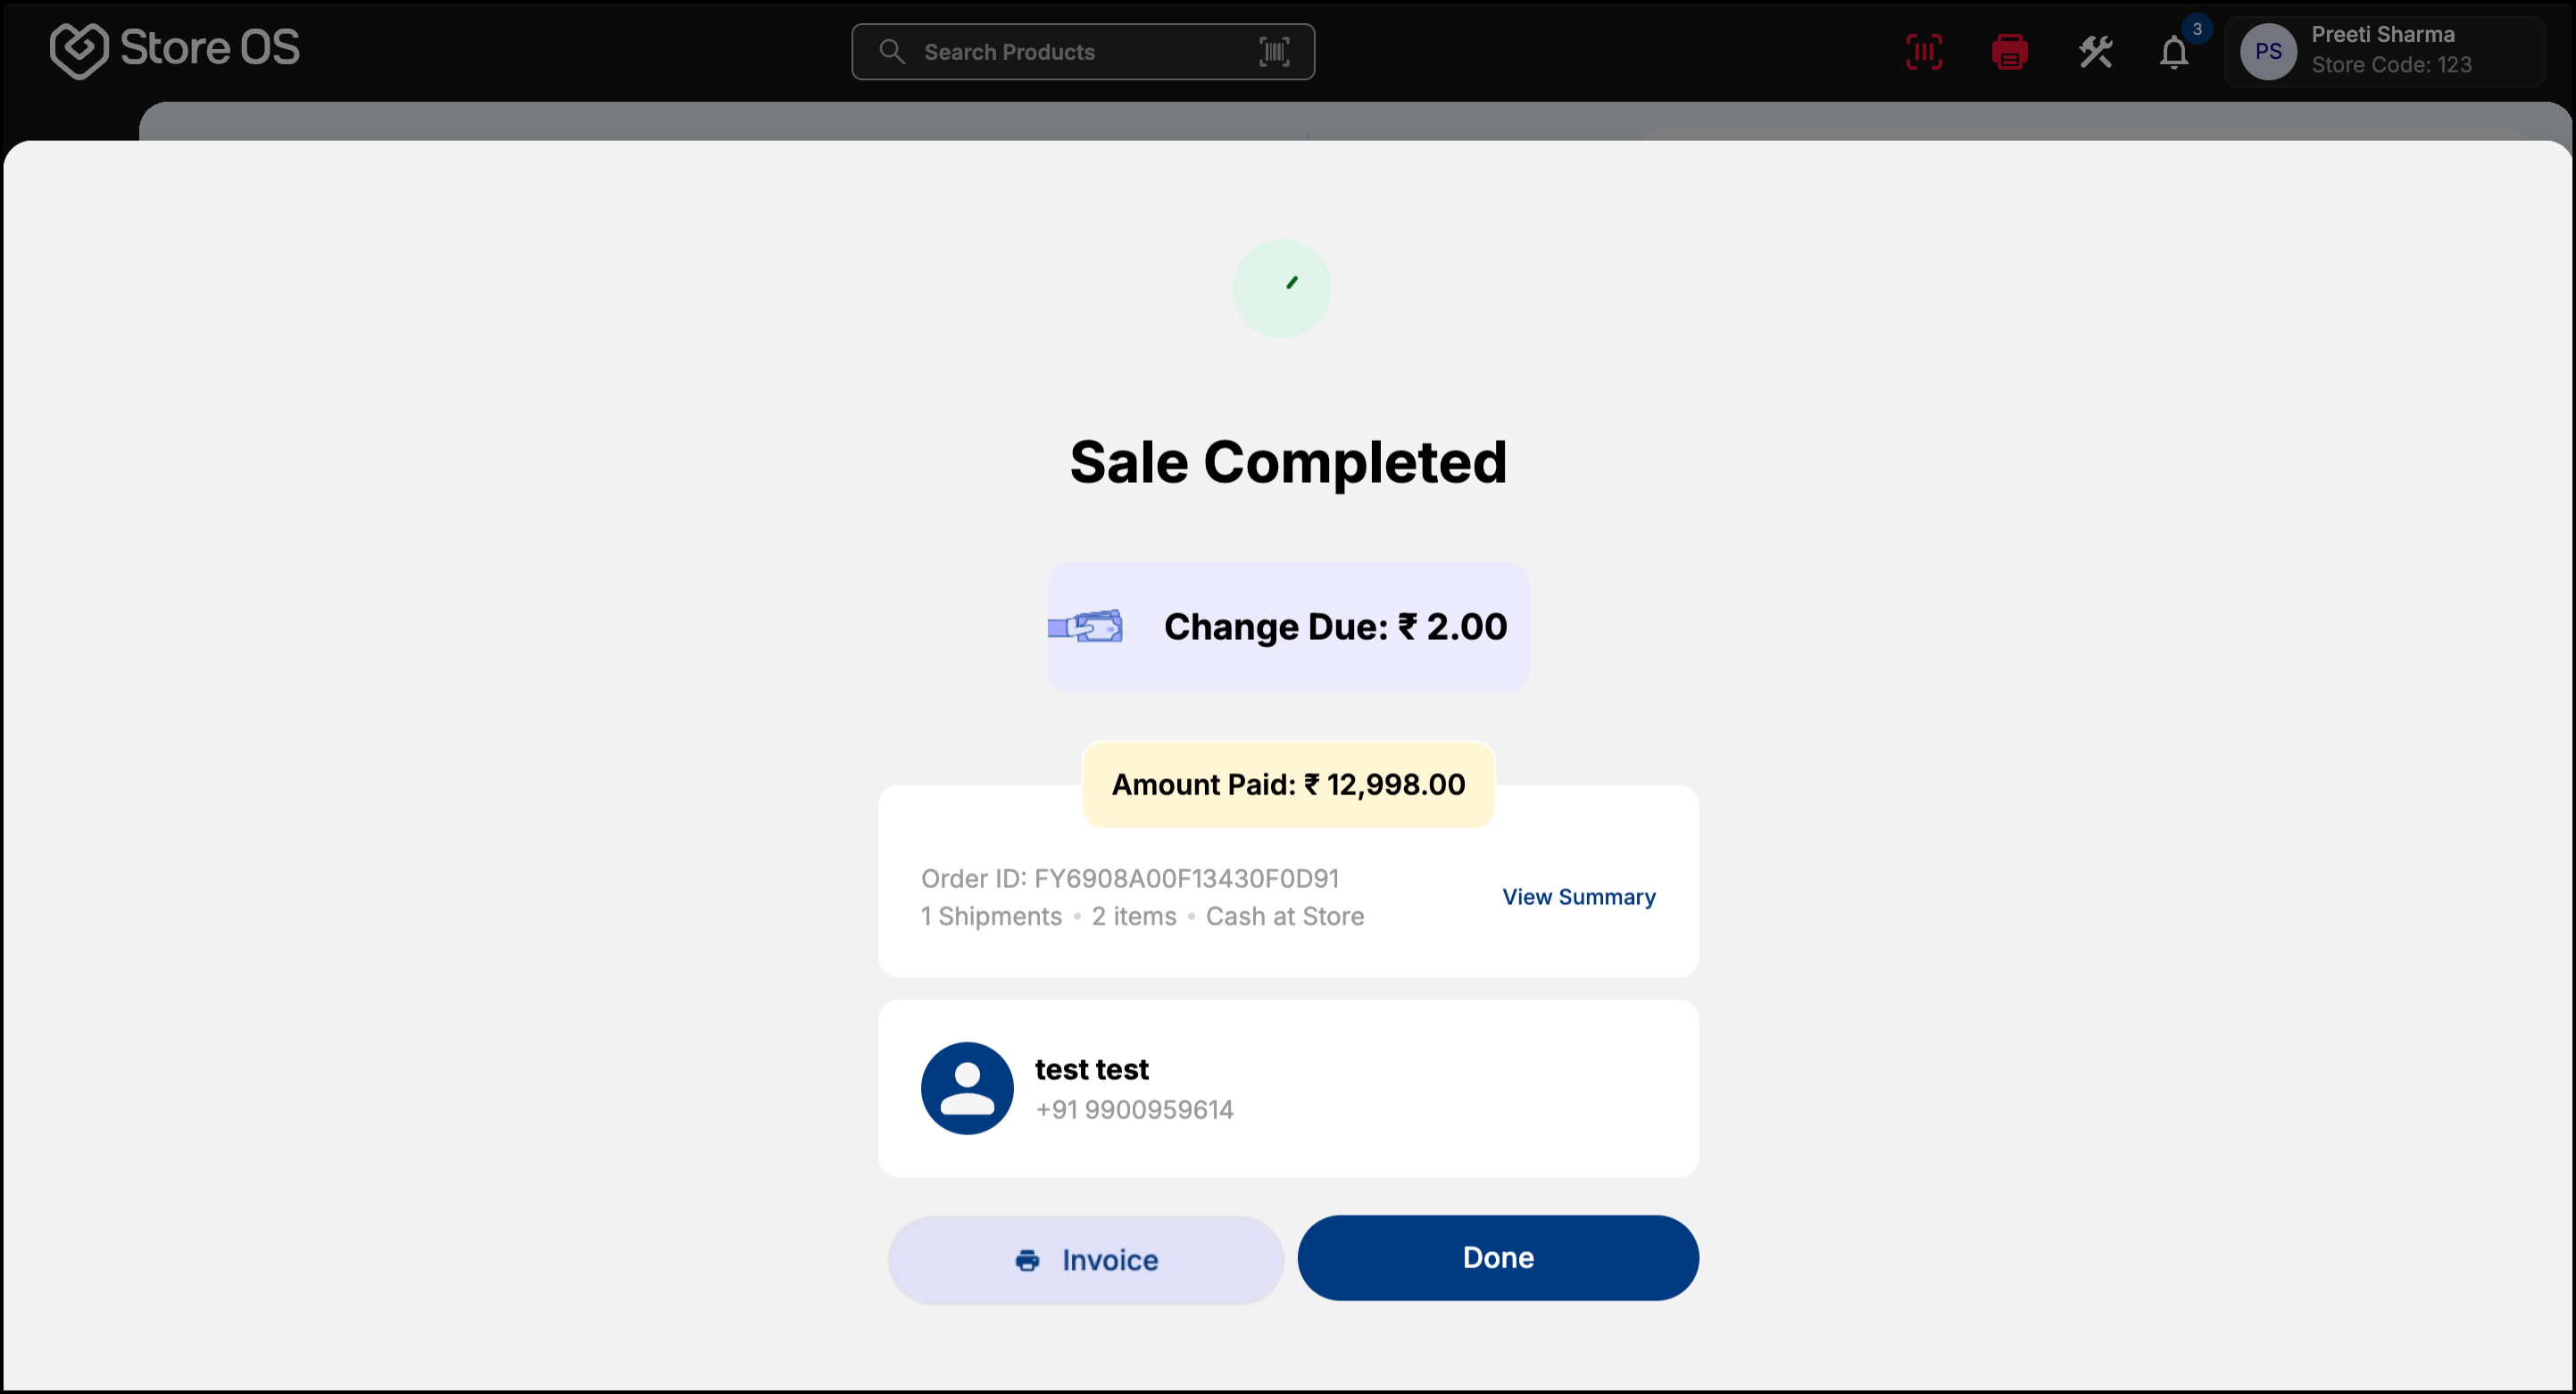
- Click Receipt to generate the invoice and click Print to share a copy with the customer. —available only if a printer is connected.