This phase details the steps required to become a registered seller on Shopee and obtain the necessary credentials to initiate the configuration within Fynd Konnect.
To sell on Shopee, we need to have a Shopee account first. Only then we can register as a seller. Here are the steps to follow:
Create & verify your Shopee account
Sign up via email, phone, Facebook, or Google on the link - Shopee Buyer Signup ↗
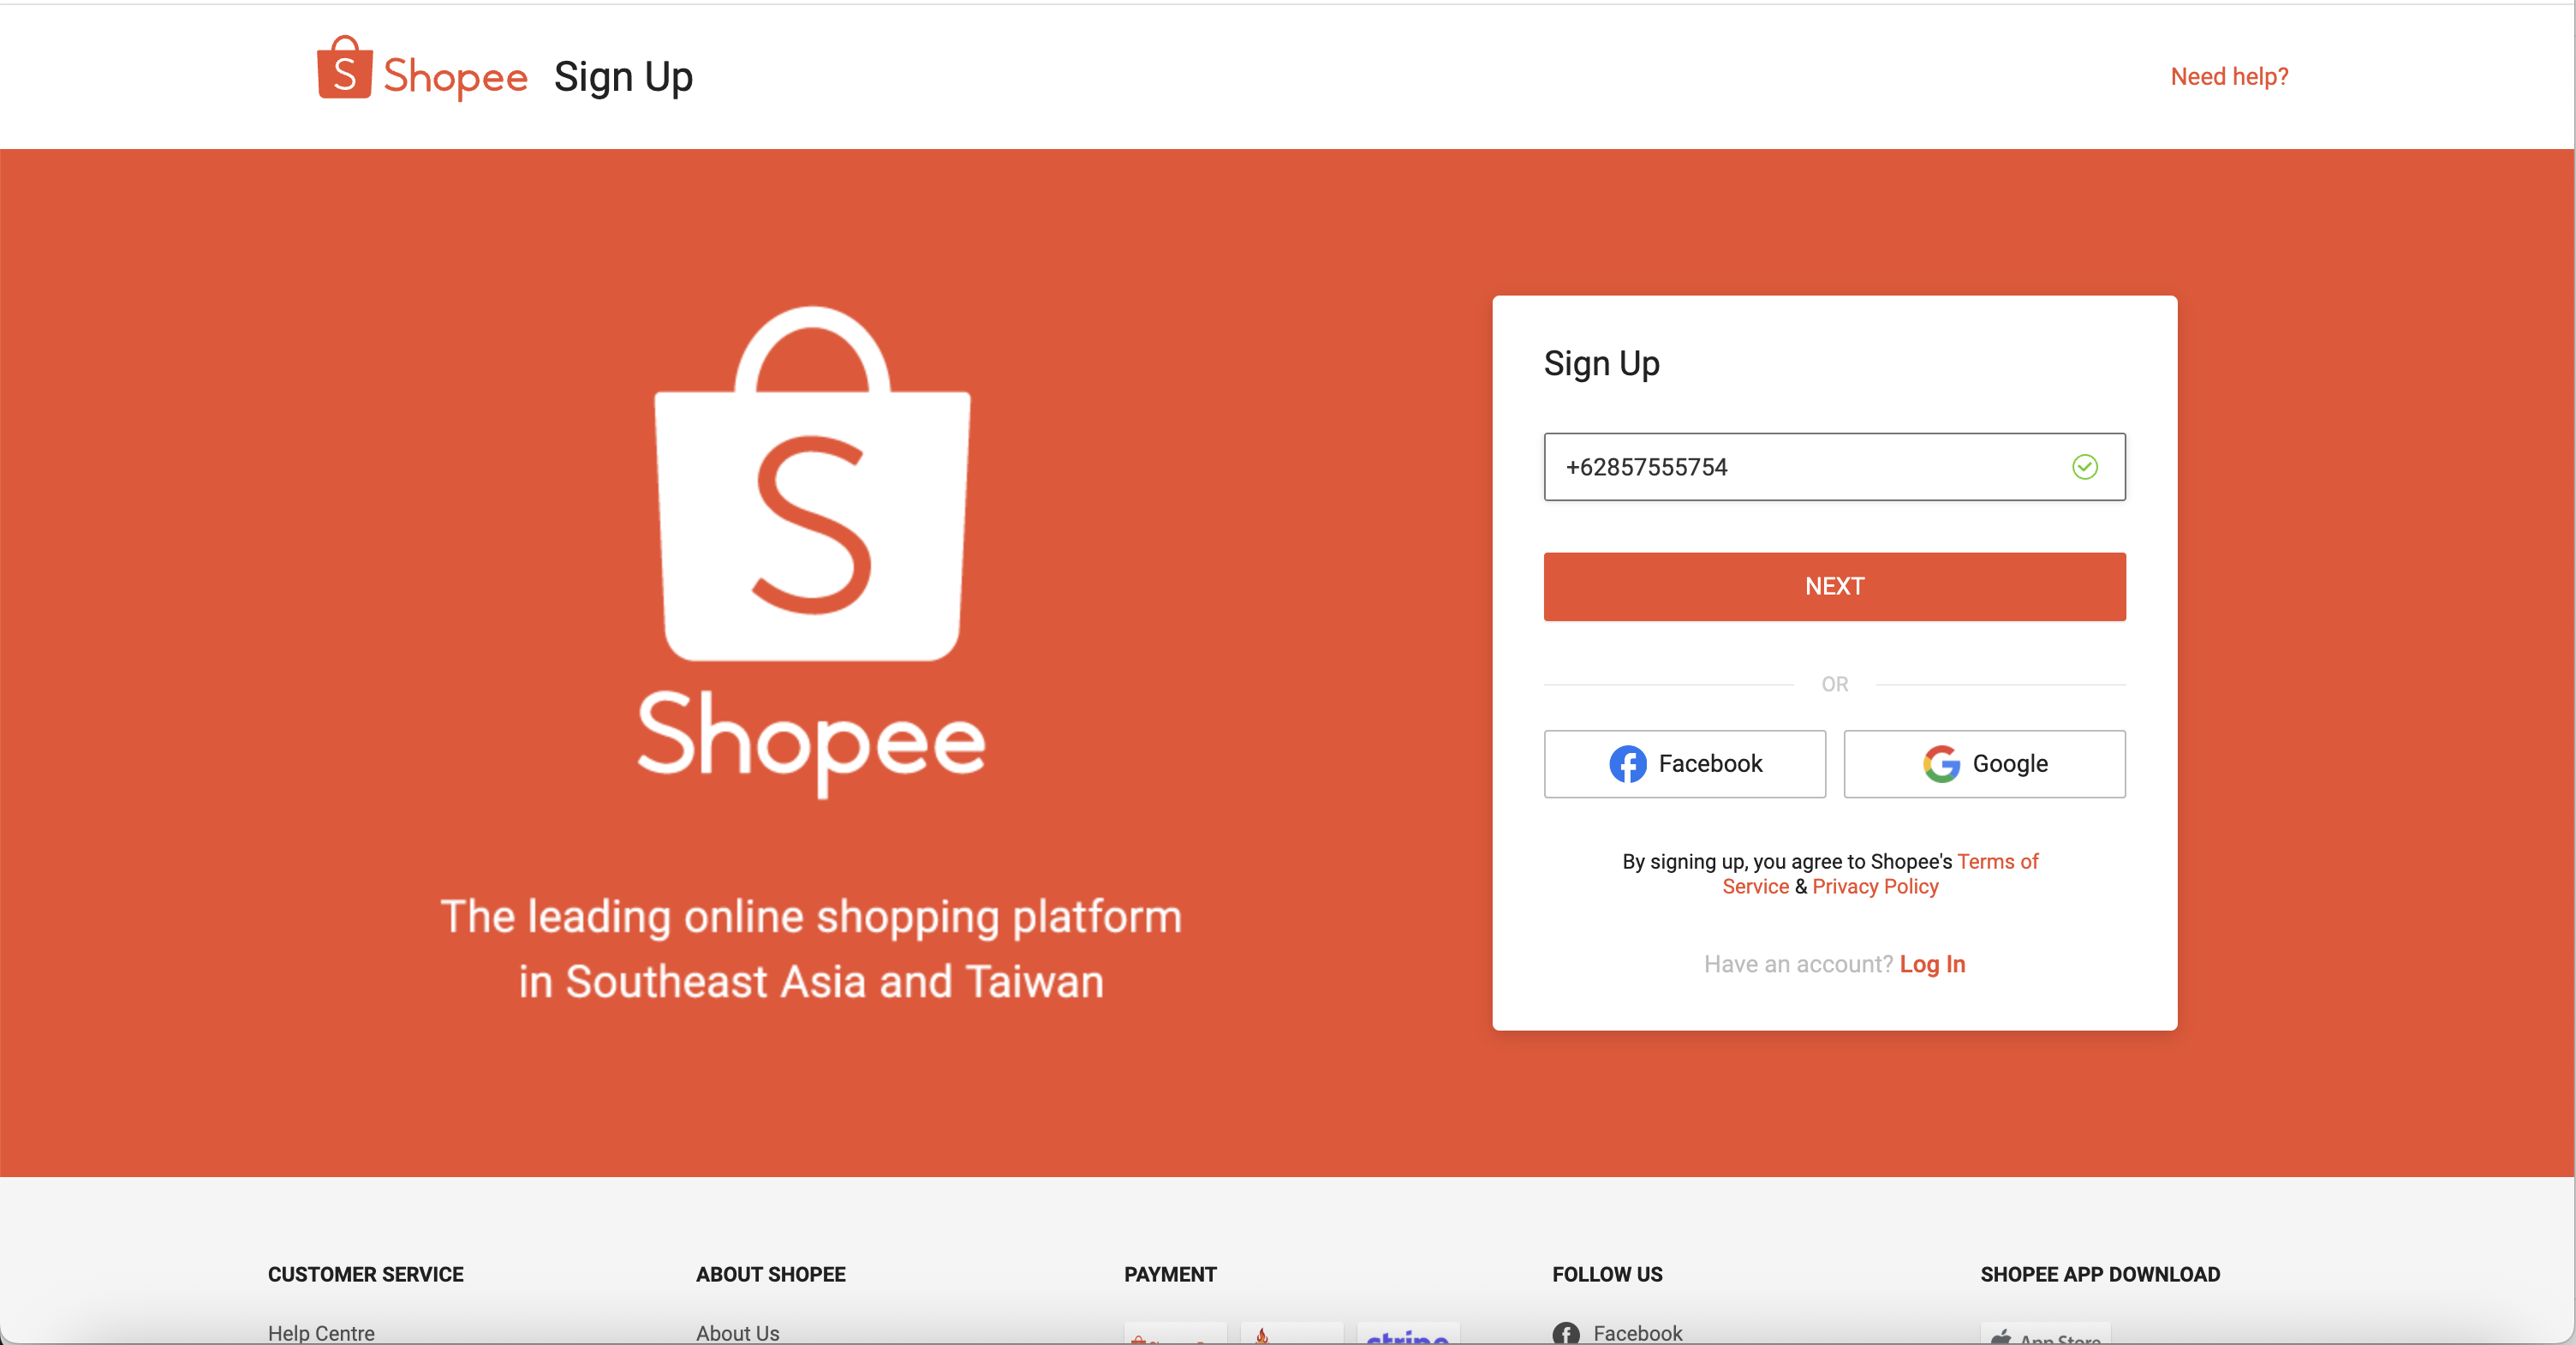
Figure 1: Shopee Seller Centre Verify your account with a 6-digit SMS or email code.
Once verified, setup a strong password for your account to keep it protected.
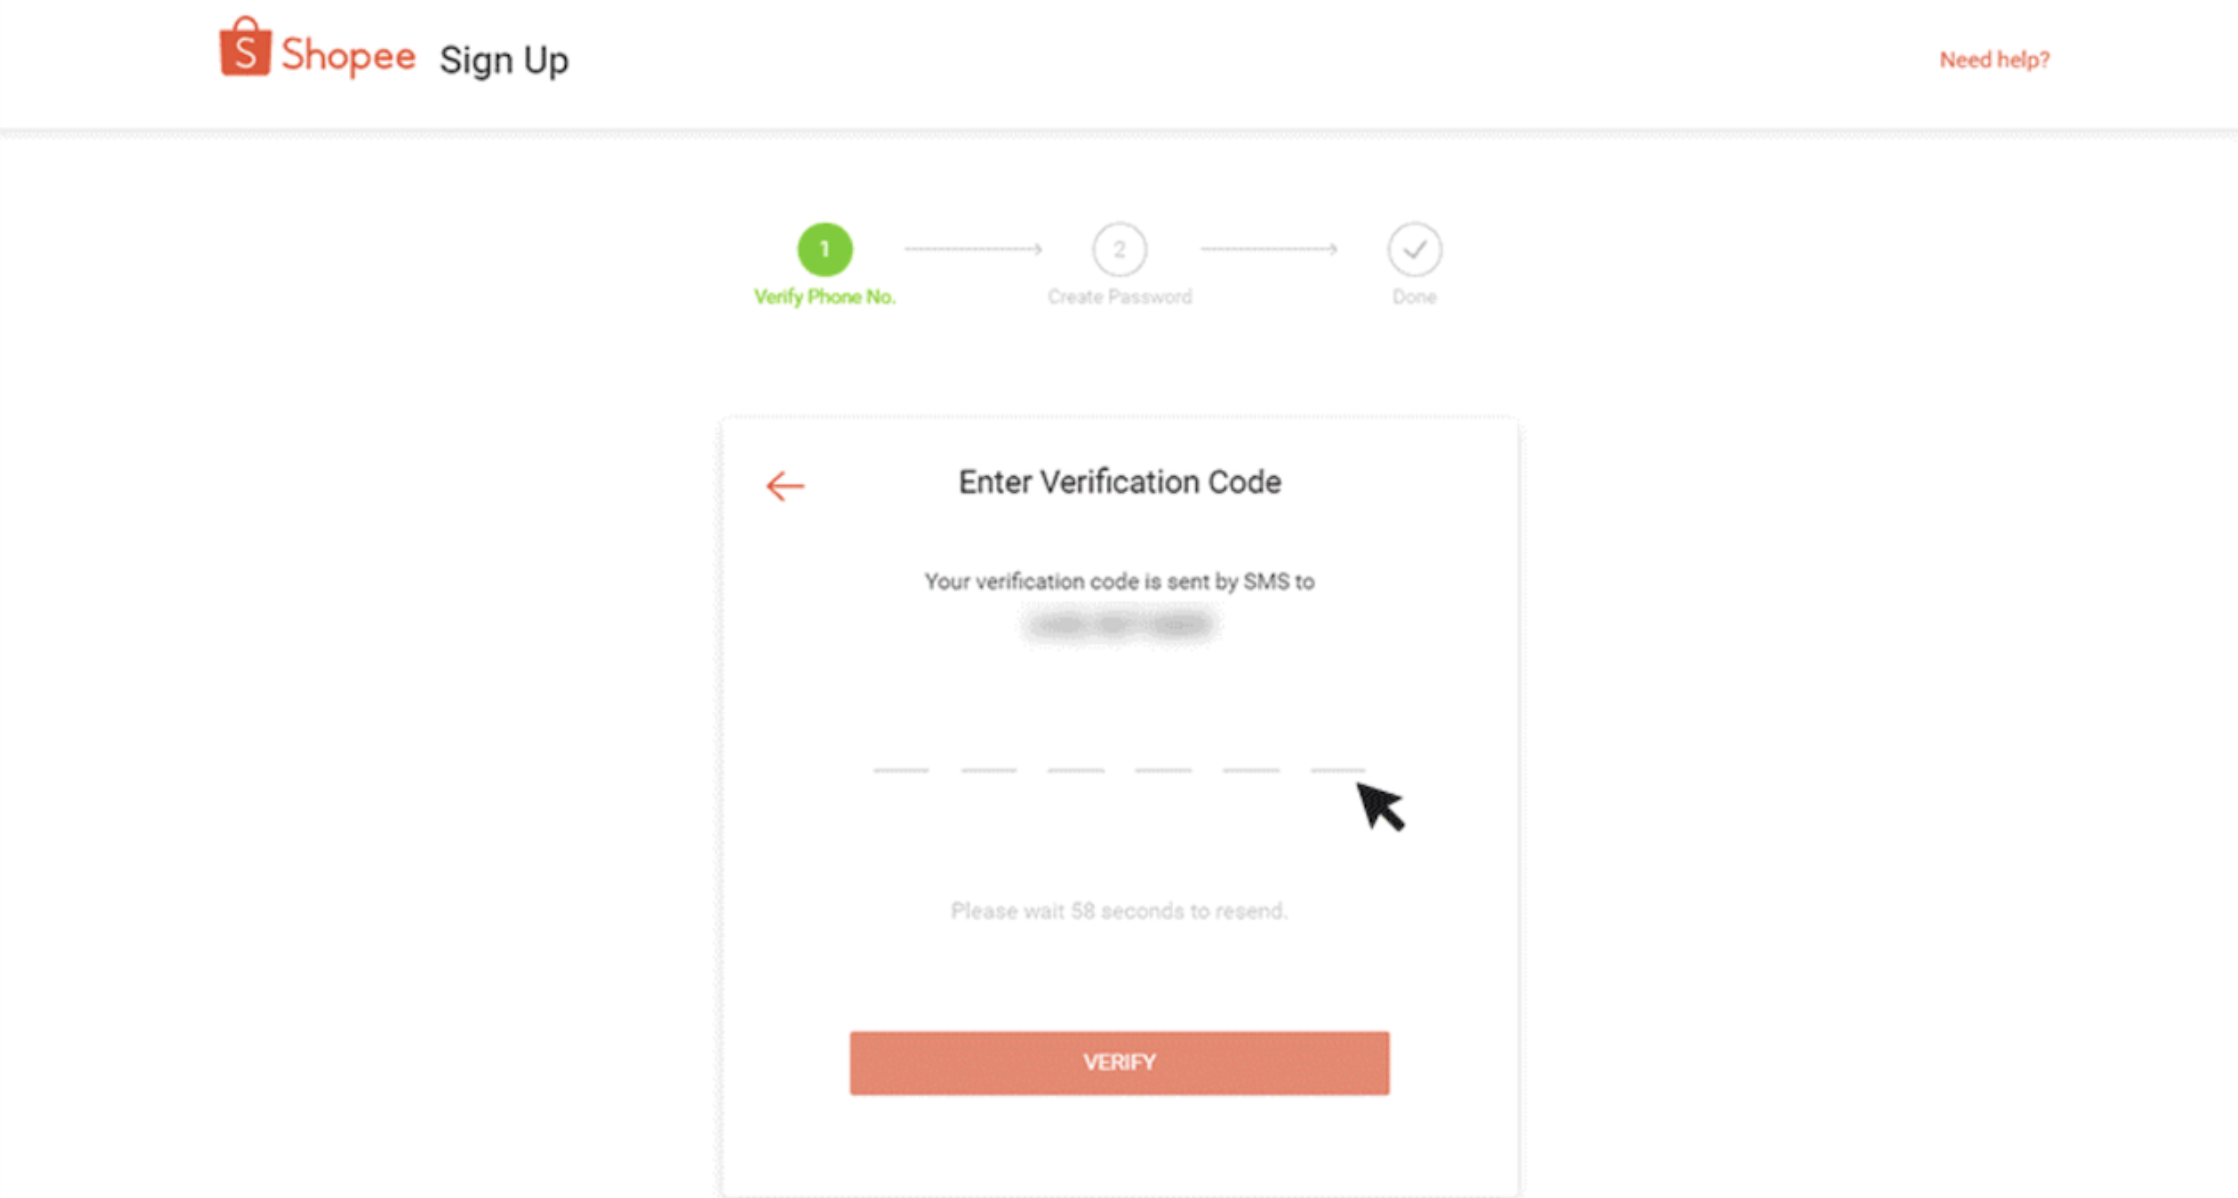
Figure 2: Buyer Account Creation
Register for a Seller account via Seller Centre
For detailed info, visit - Seller Education Hub ↗
Login to your Shopee account which was created in the previous steps
In the app: tap Me → Start Selling. On desktop: click Seller Centre after logging in.
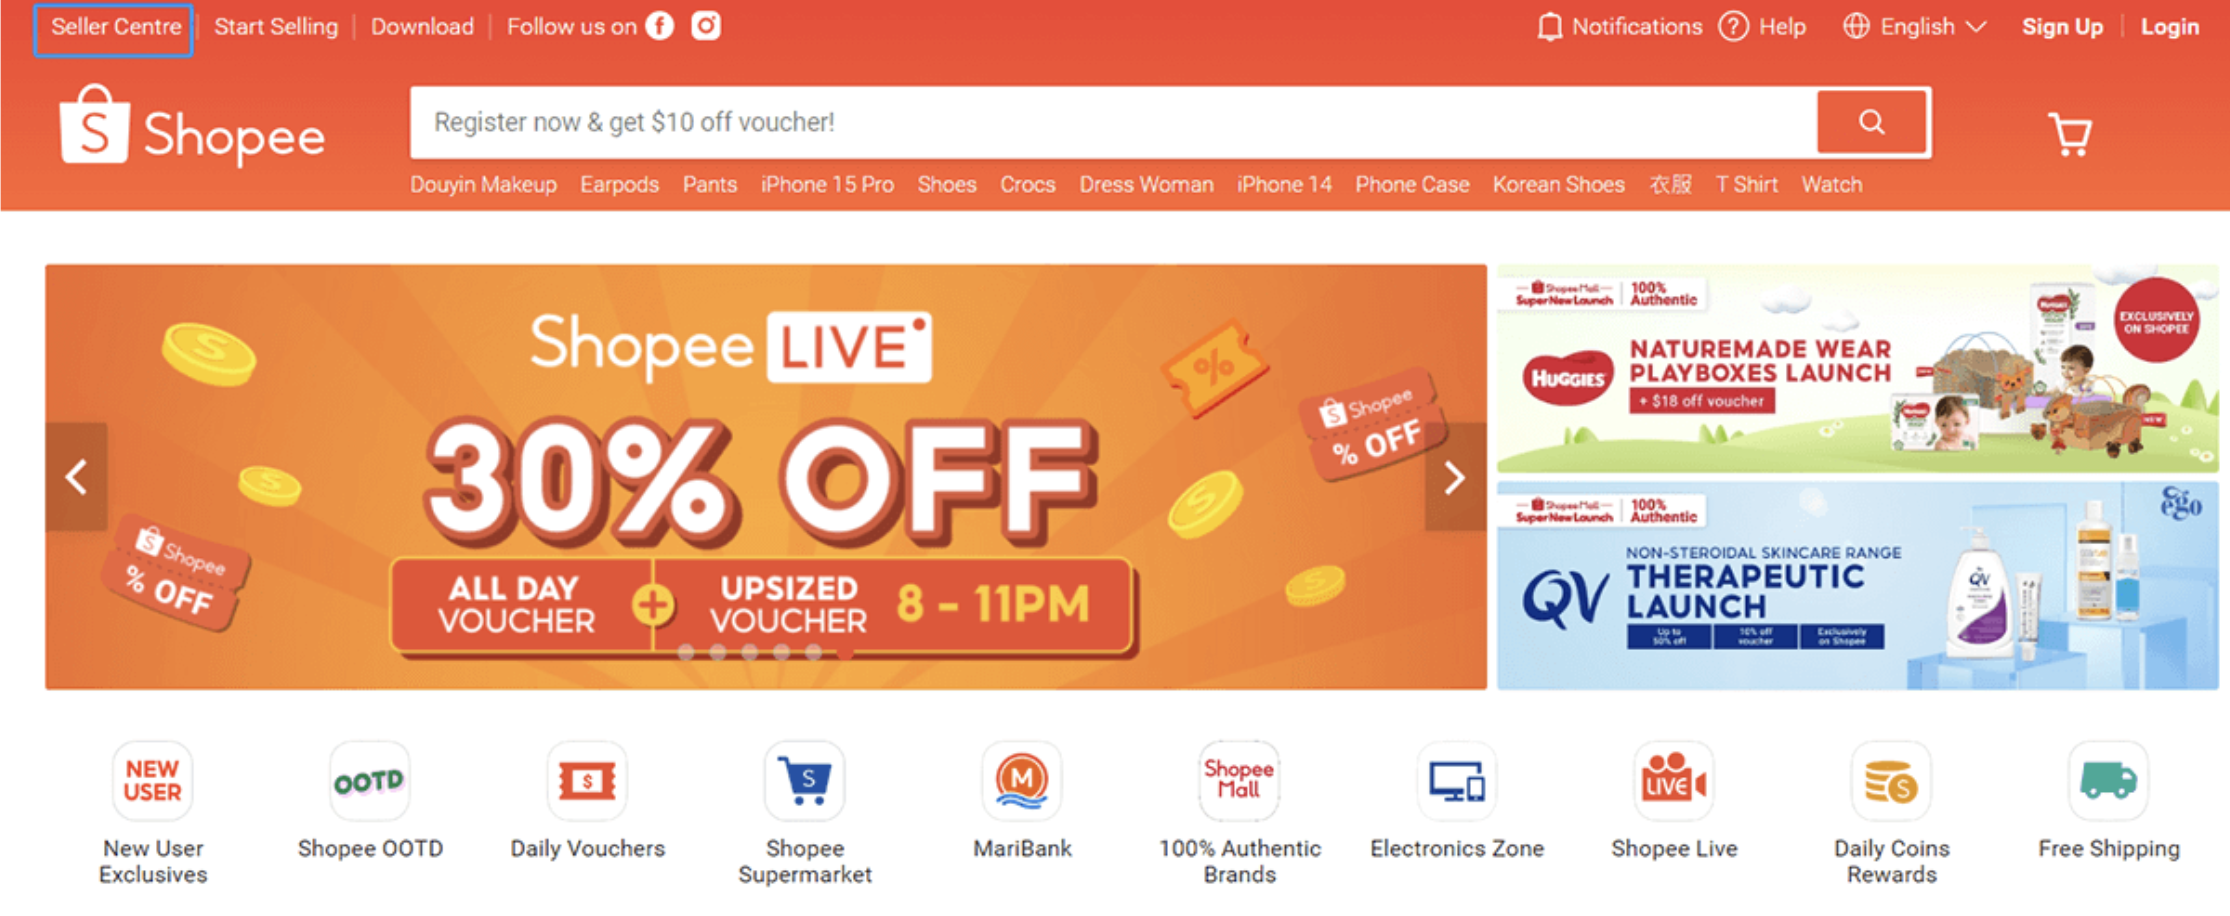
Figure 3: Navigate to Shopee Seller Centre This will redirect you to the Seller Registration page ↗
Click Start Registration and enter your information accordingly on the pages that follow.
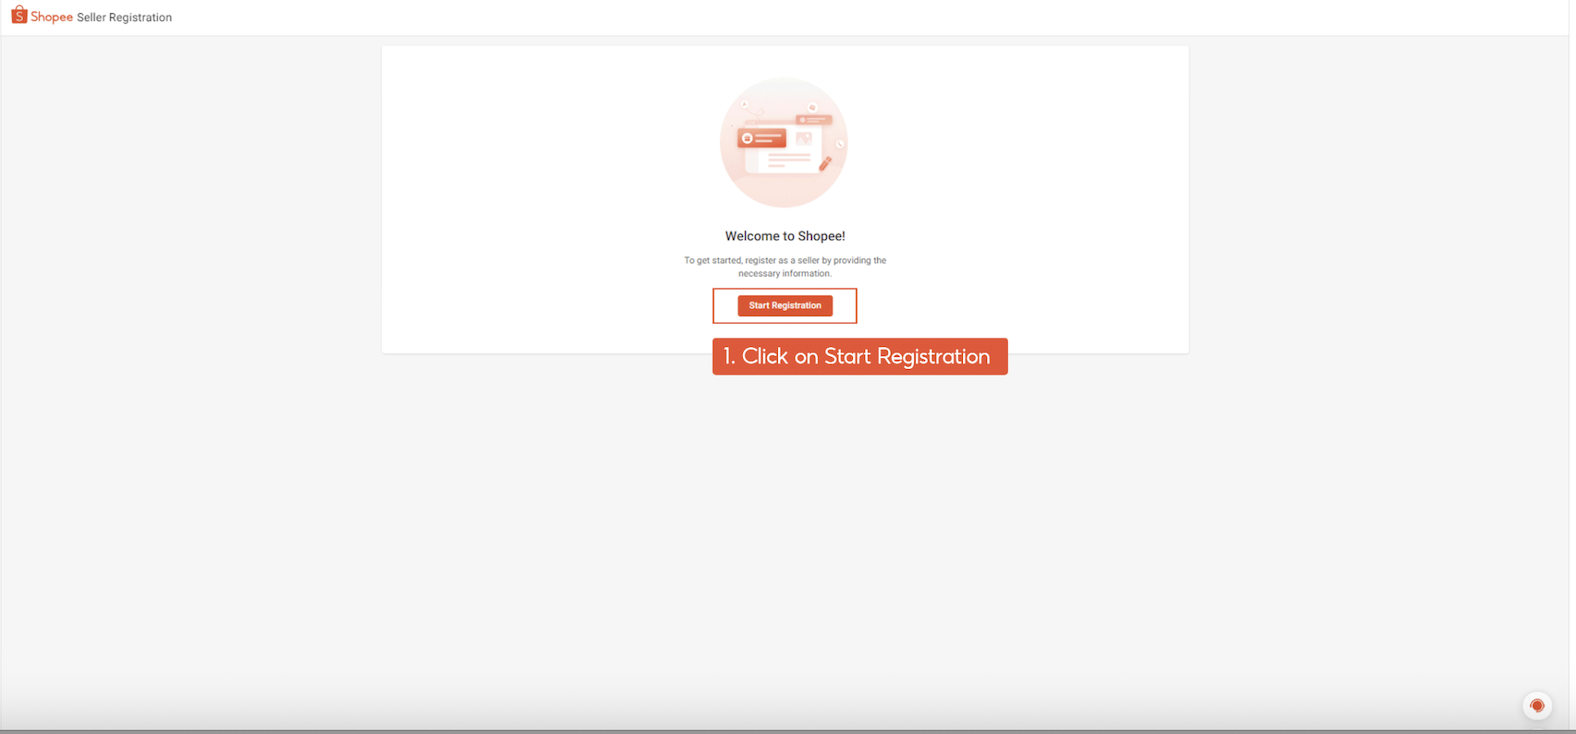
Figure 4: Account Registration
Access Seller Centre & choose seller type
Select Individual or Business/Registered Entity and provide your details and business registration if applicable.
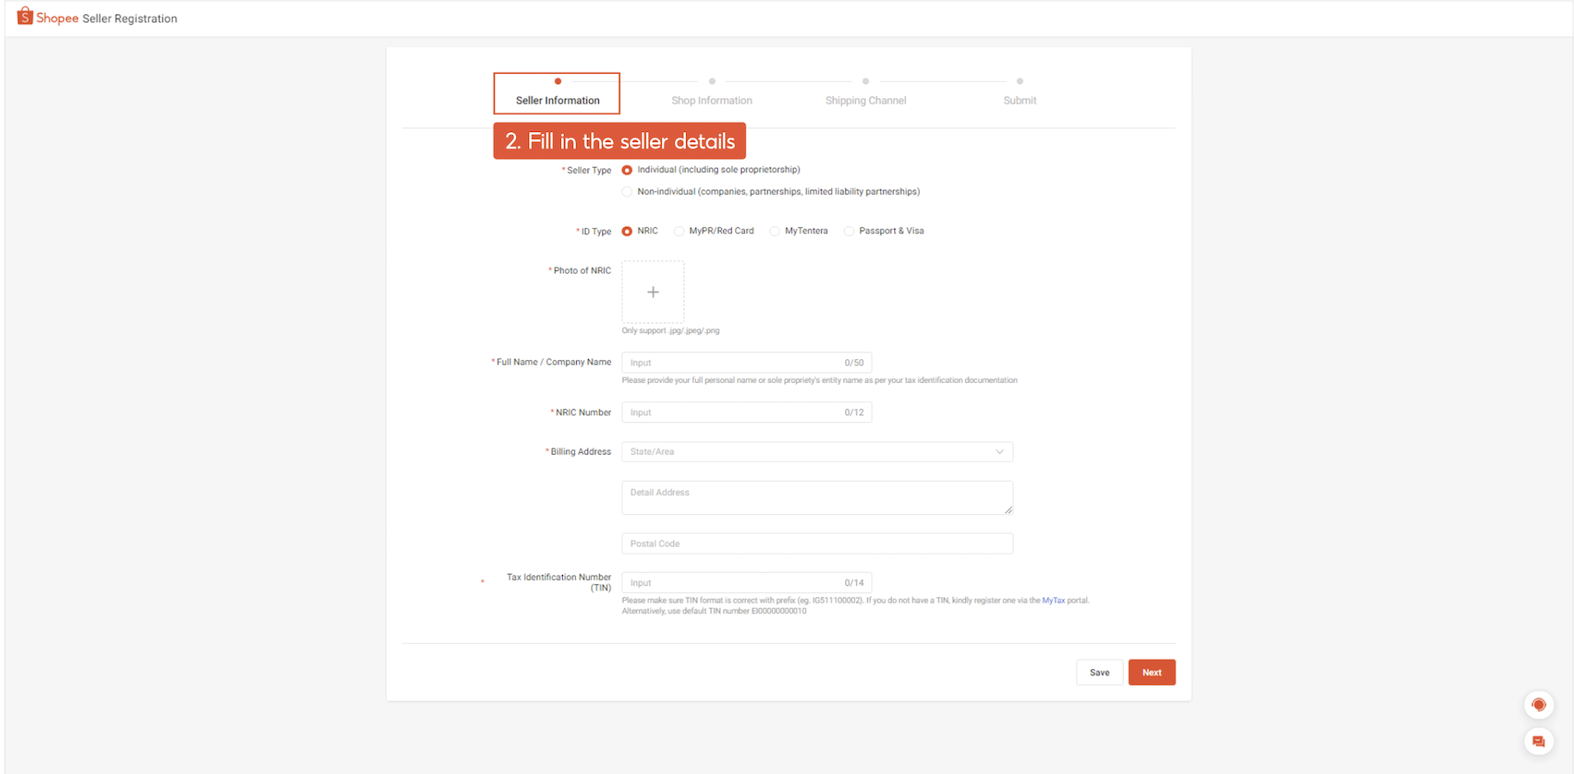
Figure 5: Choose Seller Type
Complete shop profile
Provide shop name, logo, description, and pickup address.
Shopee will also ask for identity/business documents and bank account info for payouts.
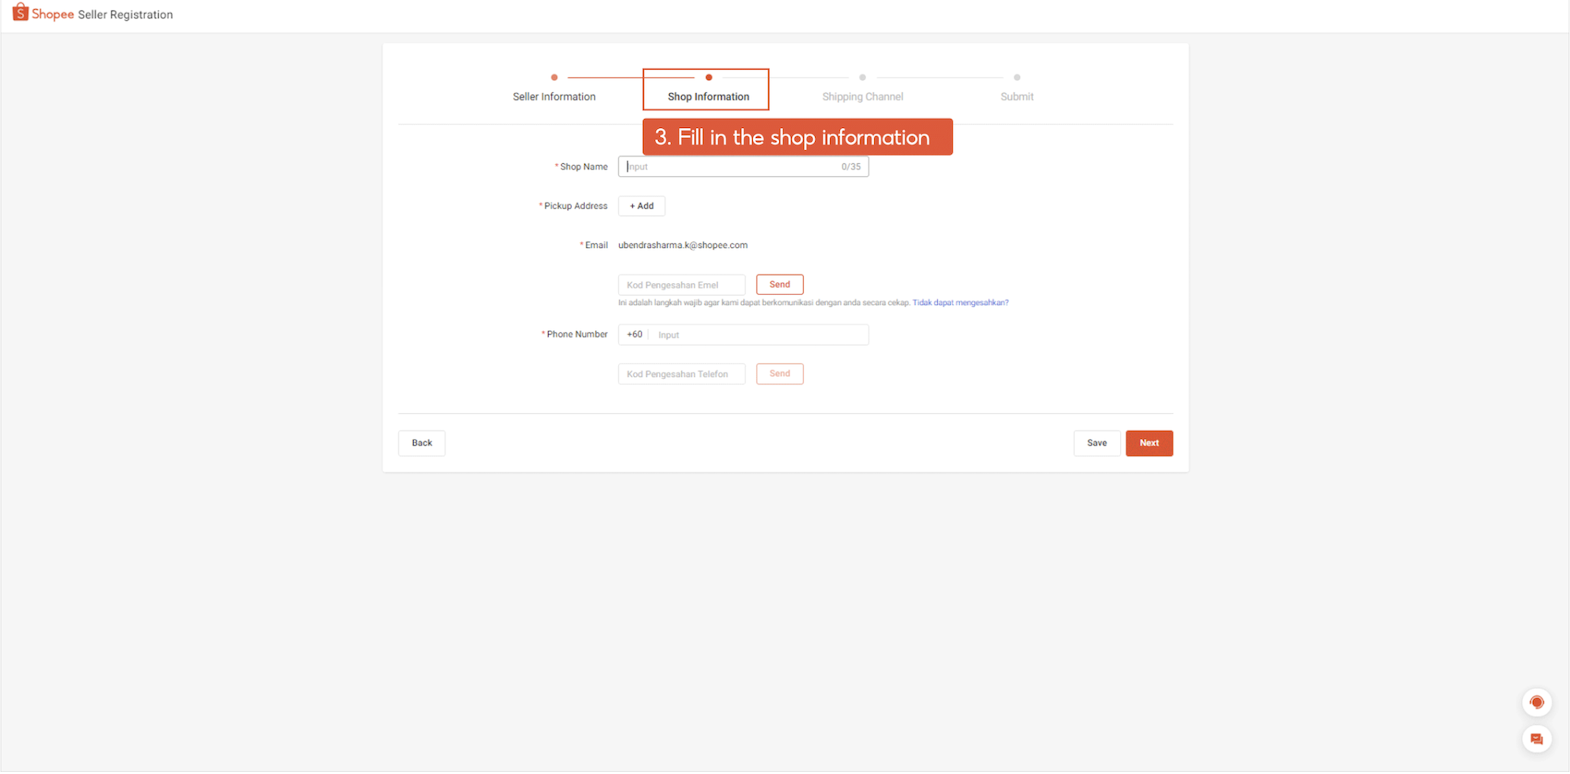
Figure 6: Shop Profile
Set up shipping channel
Opt into at least one shipping channel (e.g., Shopee Xpress or third-party logistics) based on your pickup location.
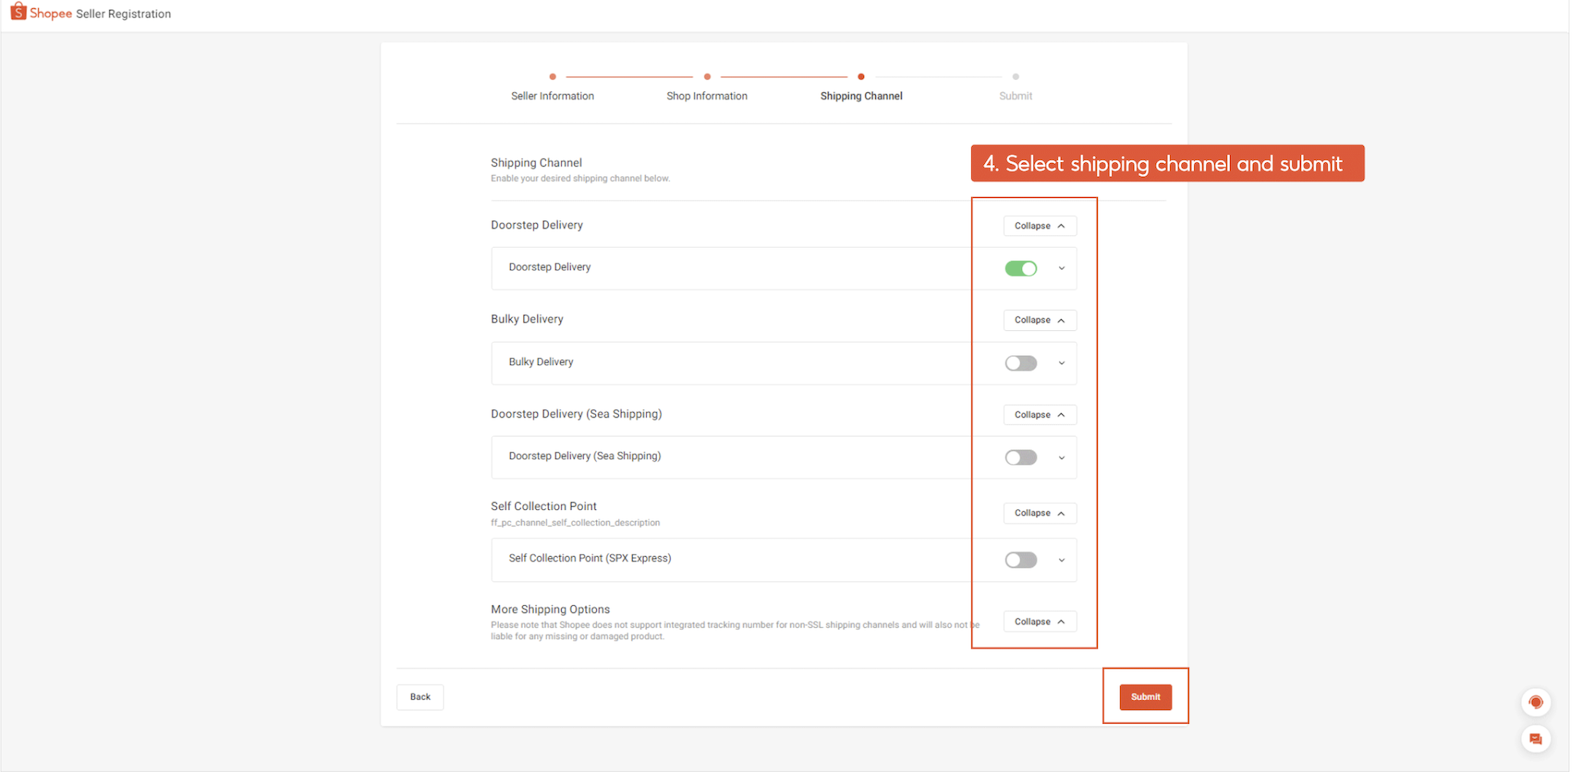
Figure 7: Shipping Channels
Submit & get approved
- Review and submit your store registration form.
- Shopee typically takes 5-10 business days for review, especially for Shopee Mall or business accounts.
List products and go live
Once approved, create your first listings (product info, images, price, stock, shipping).
Minimum of 5 products within 30 days may be required to fully activate the account.
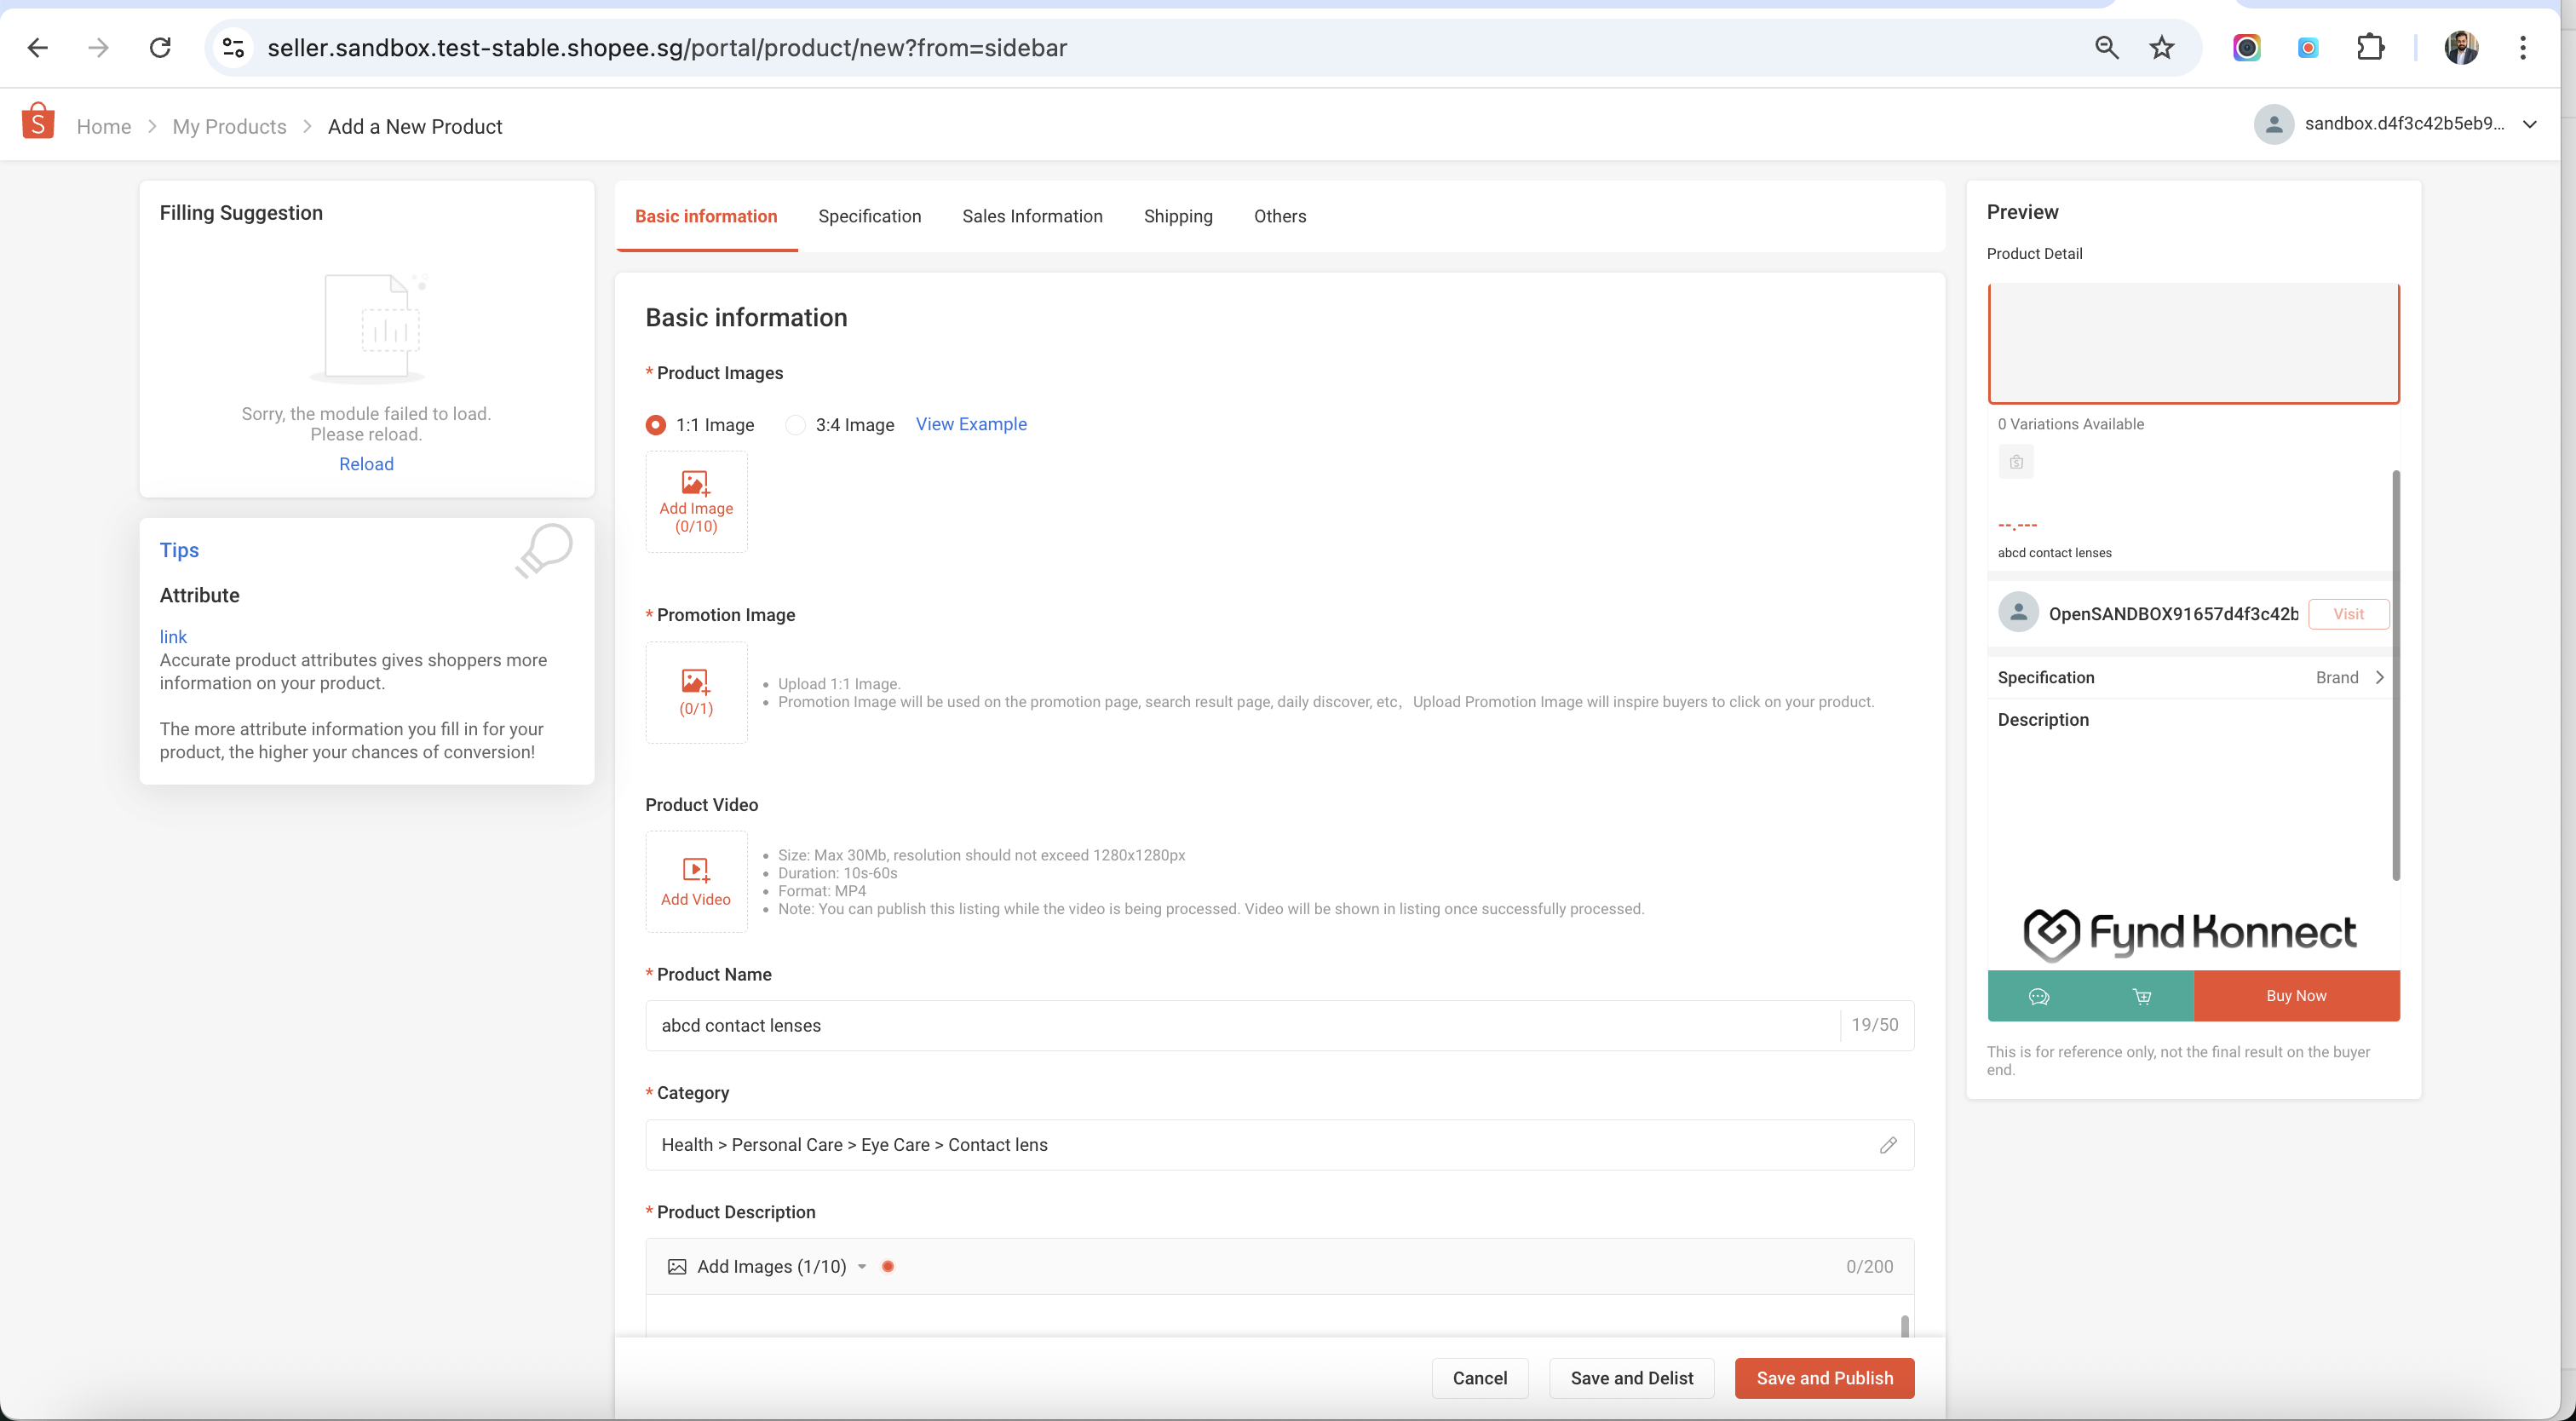
Figure 8: Create Listings 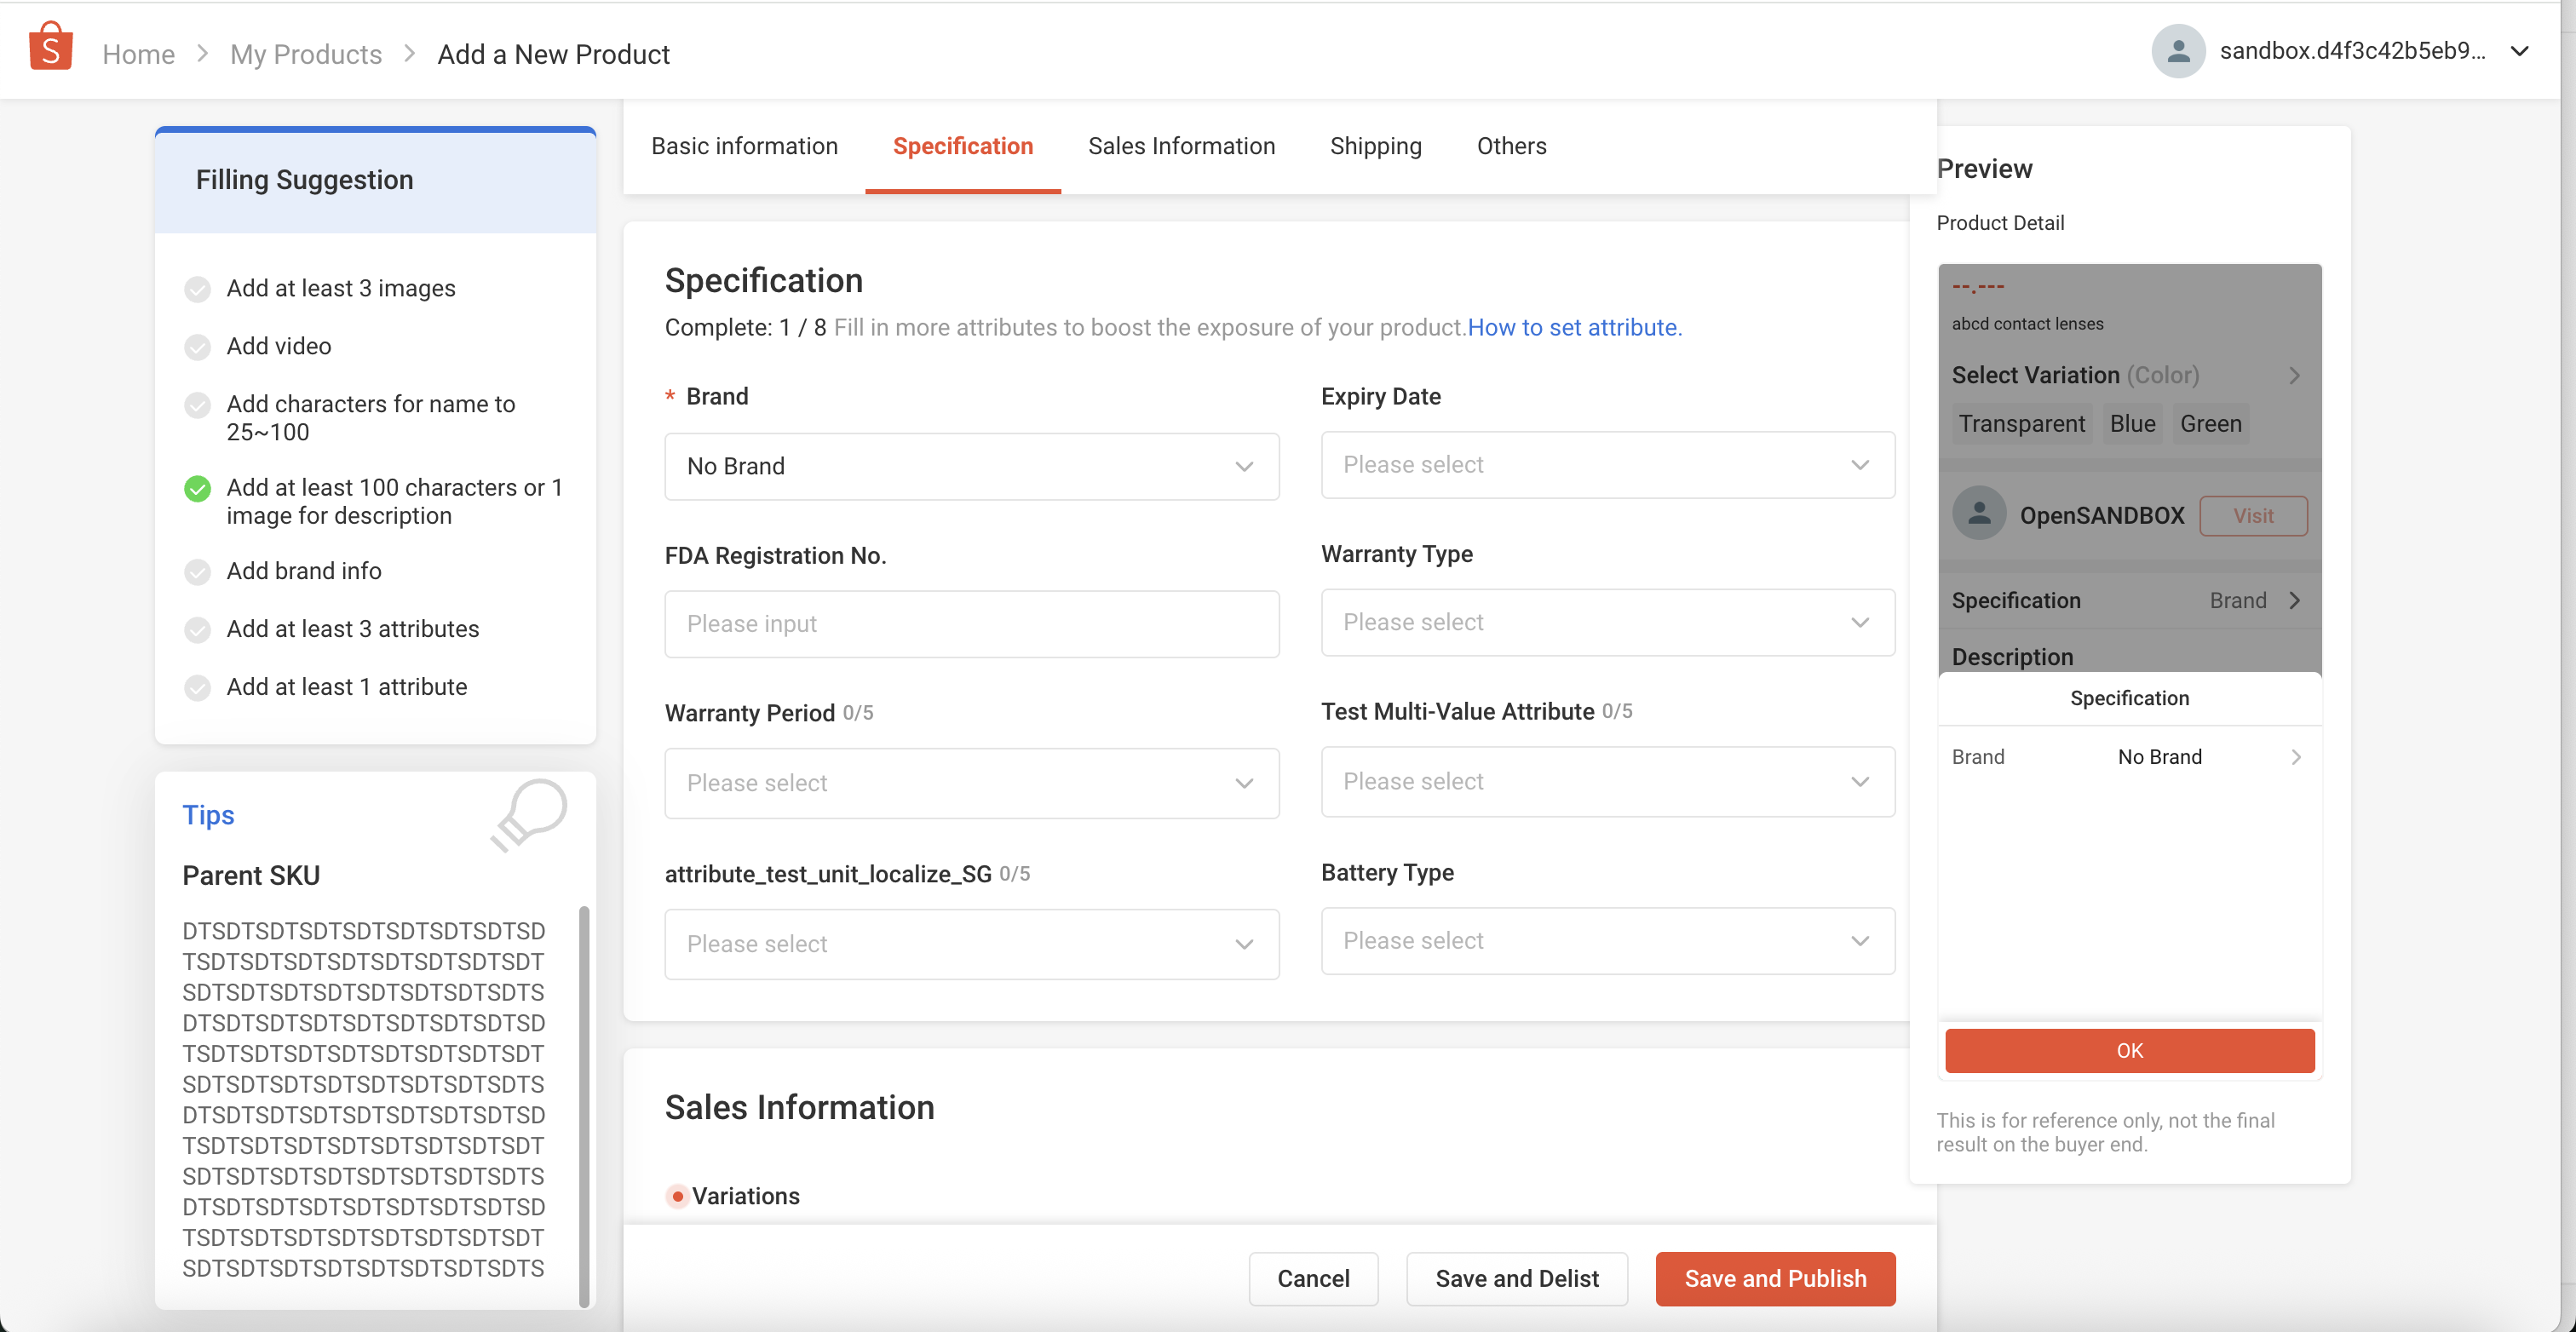
Figure 9: Product Details 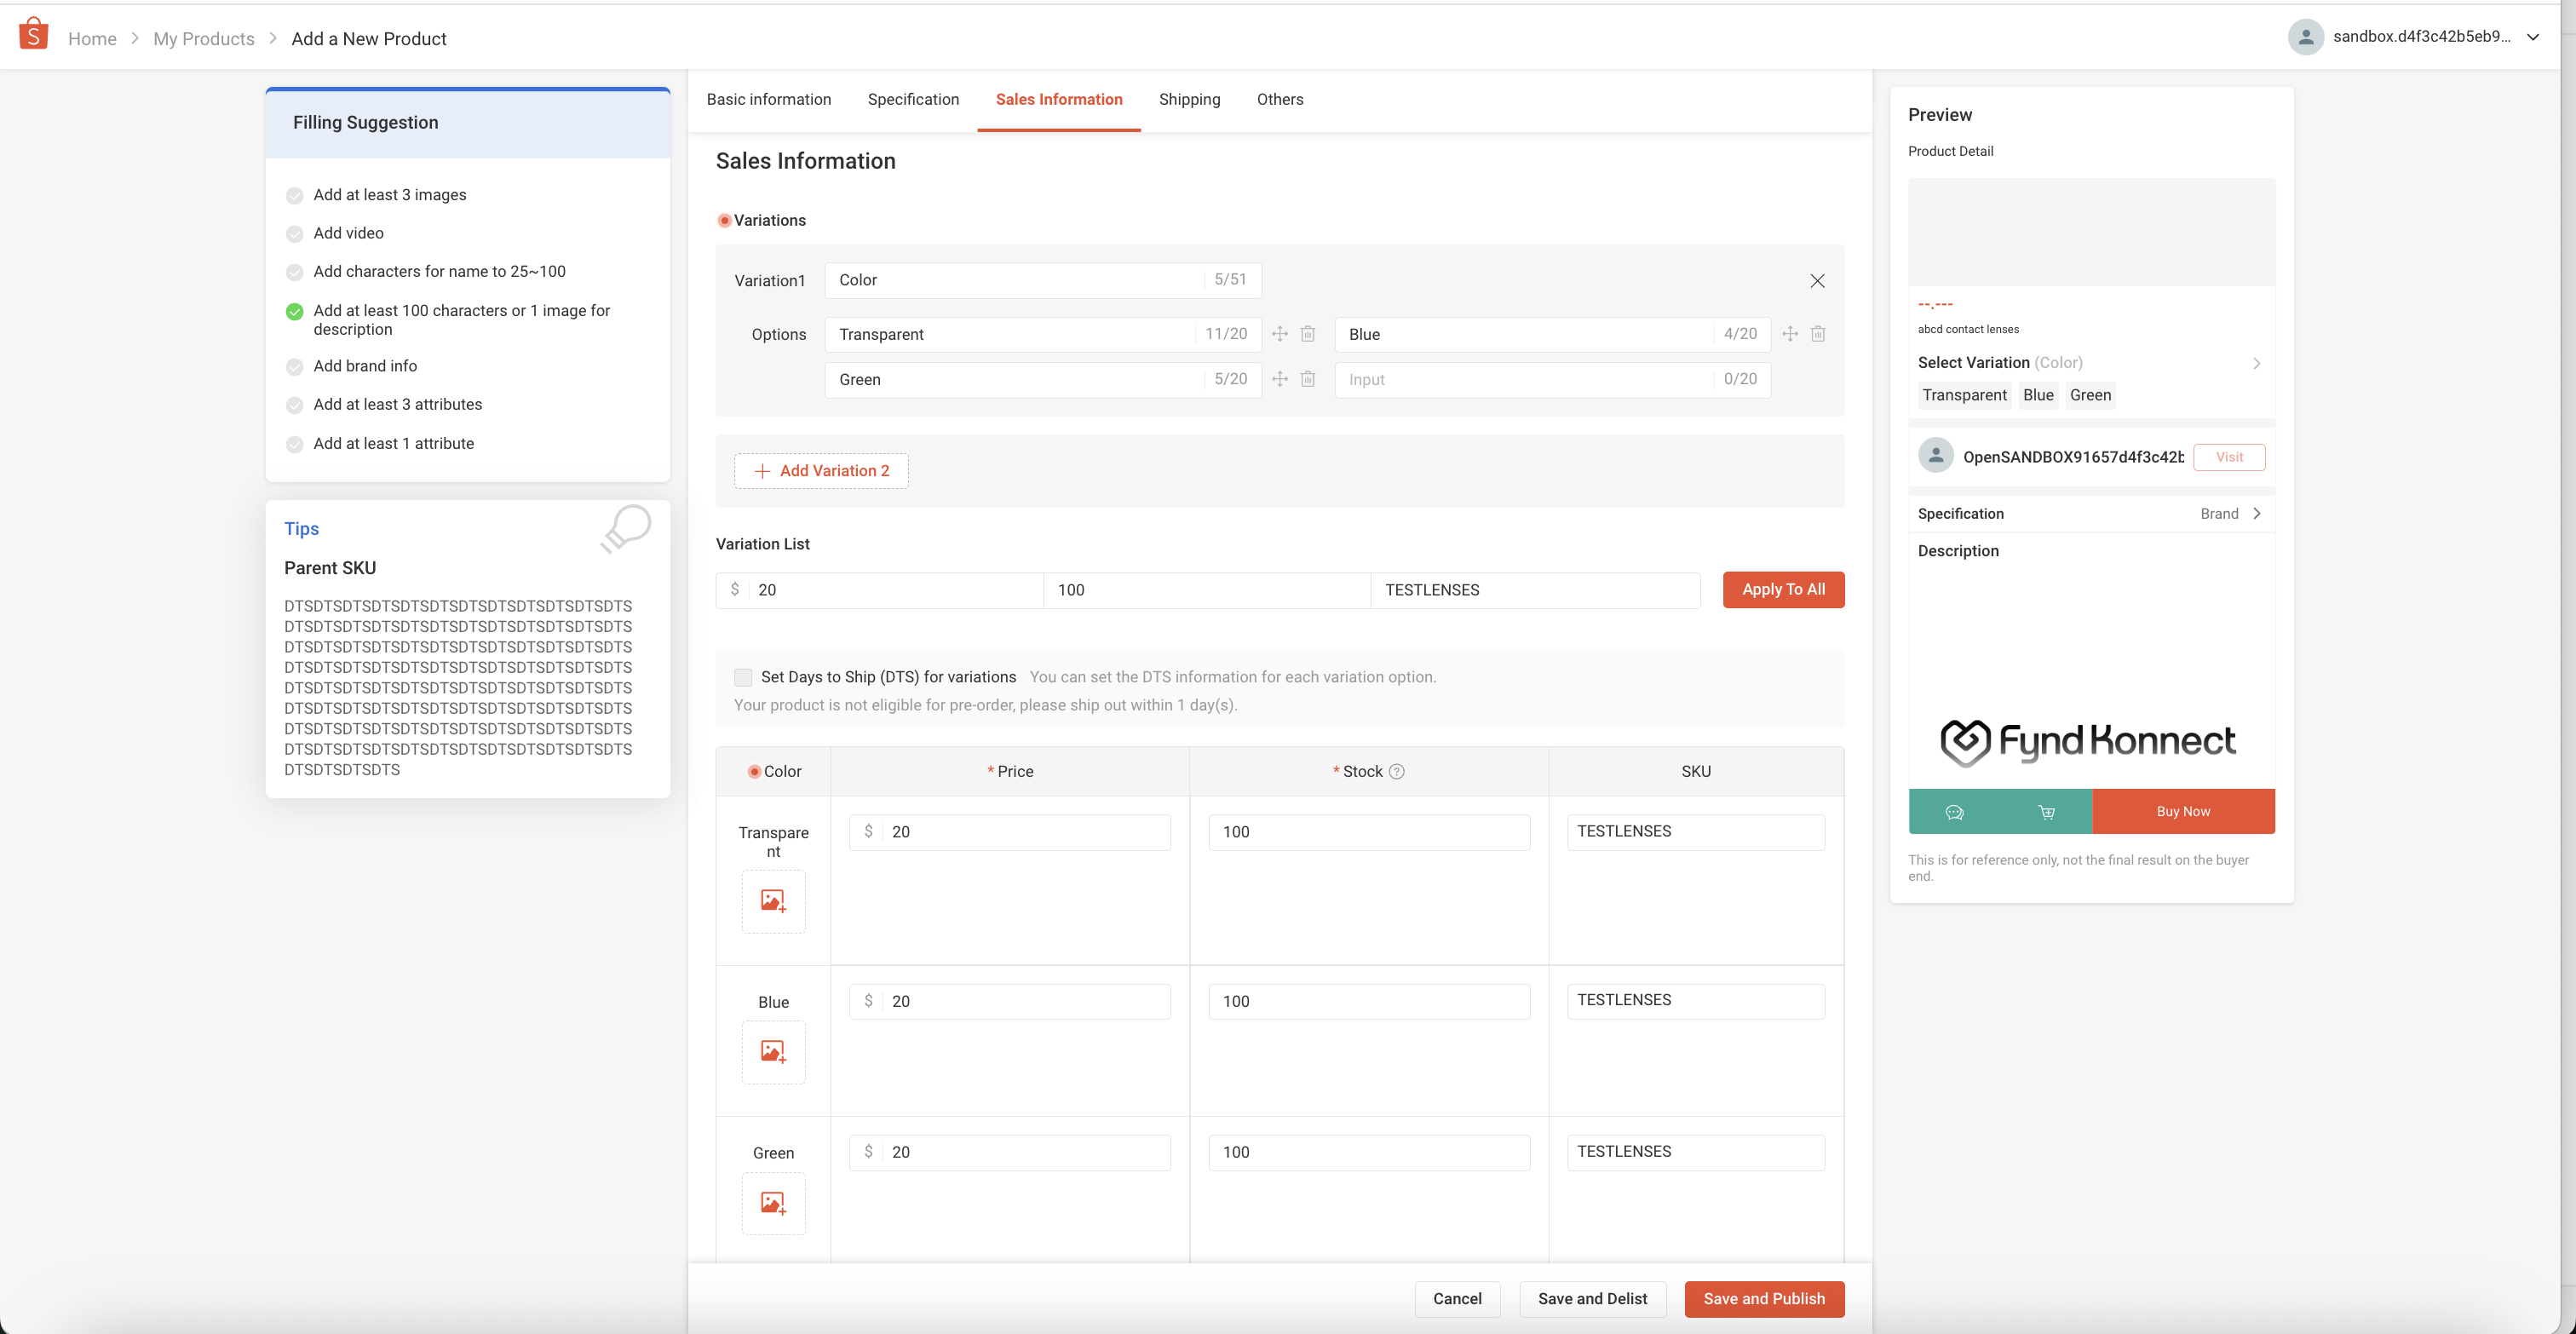
Figure 10: Pricing & Stock 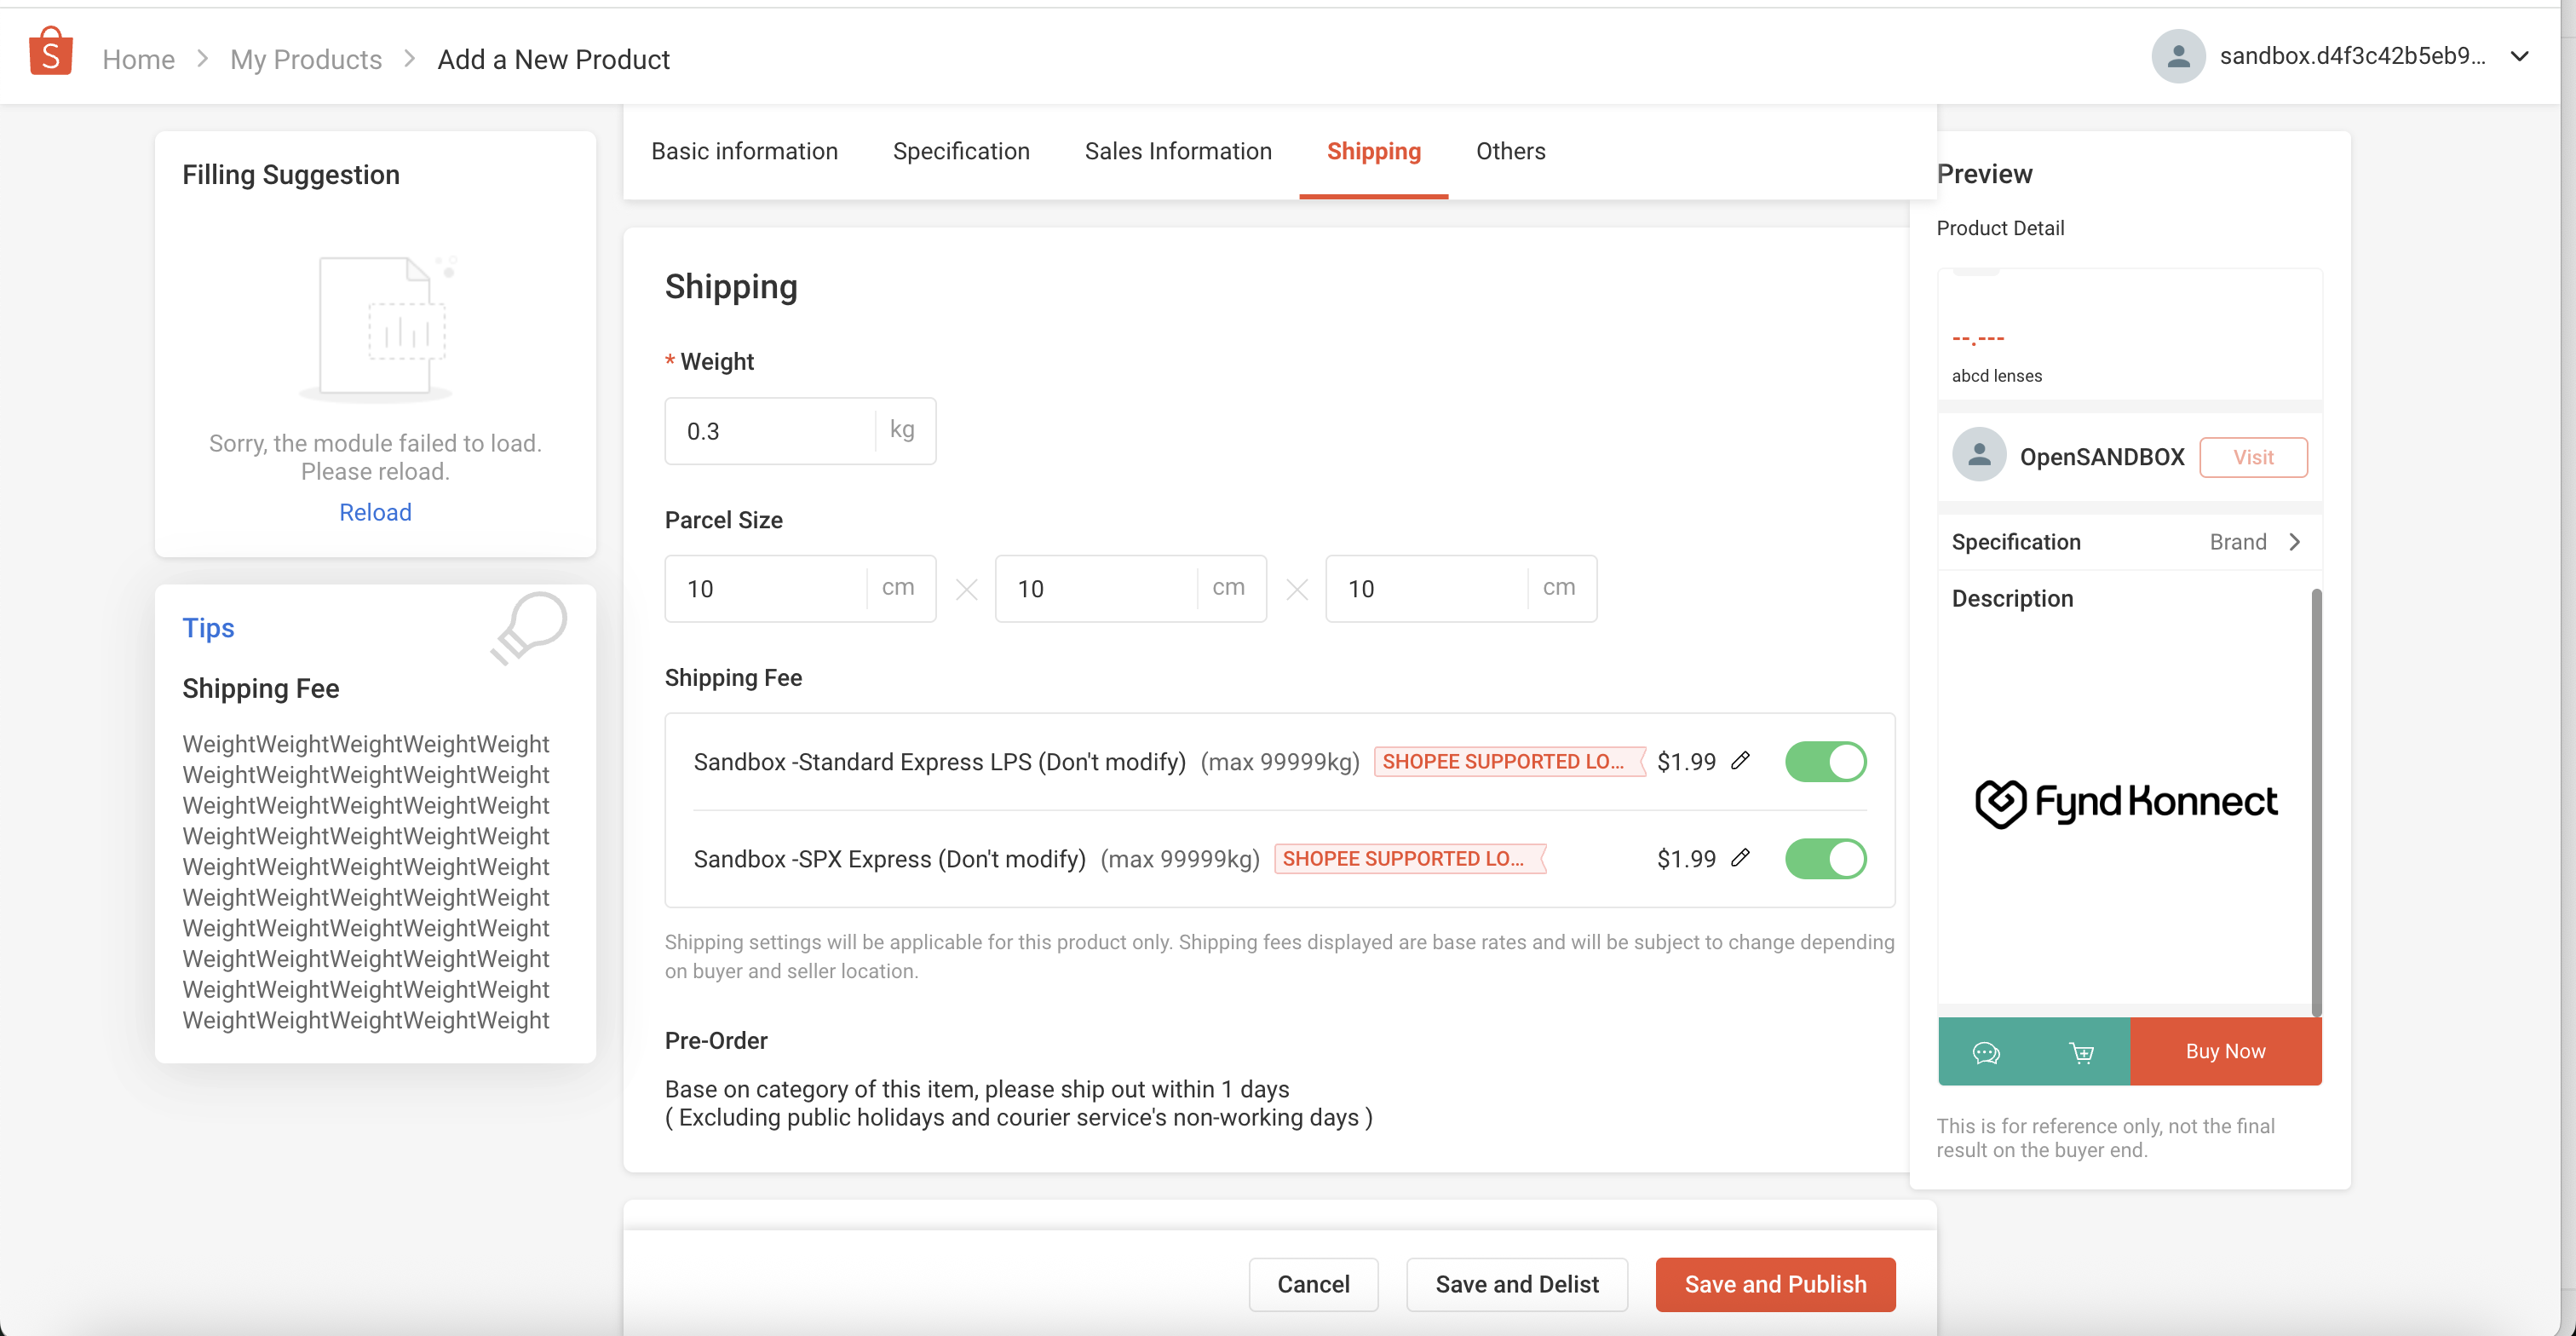
Figure 11: Shipping Setup Once all the details are filled, click on “Save and Publish“ to list your product on the product listings page. Listed products will appear as follows

Figure 12: Listing Preview
Other important steps to be fulfilled
Link your local bank or Payoneer/PayPal (cross-border sellers) for withdrawals and ad payments.
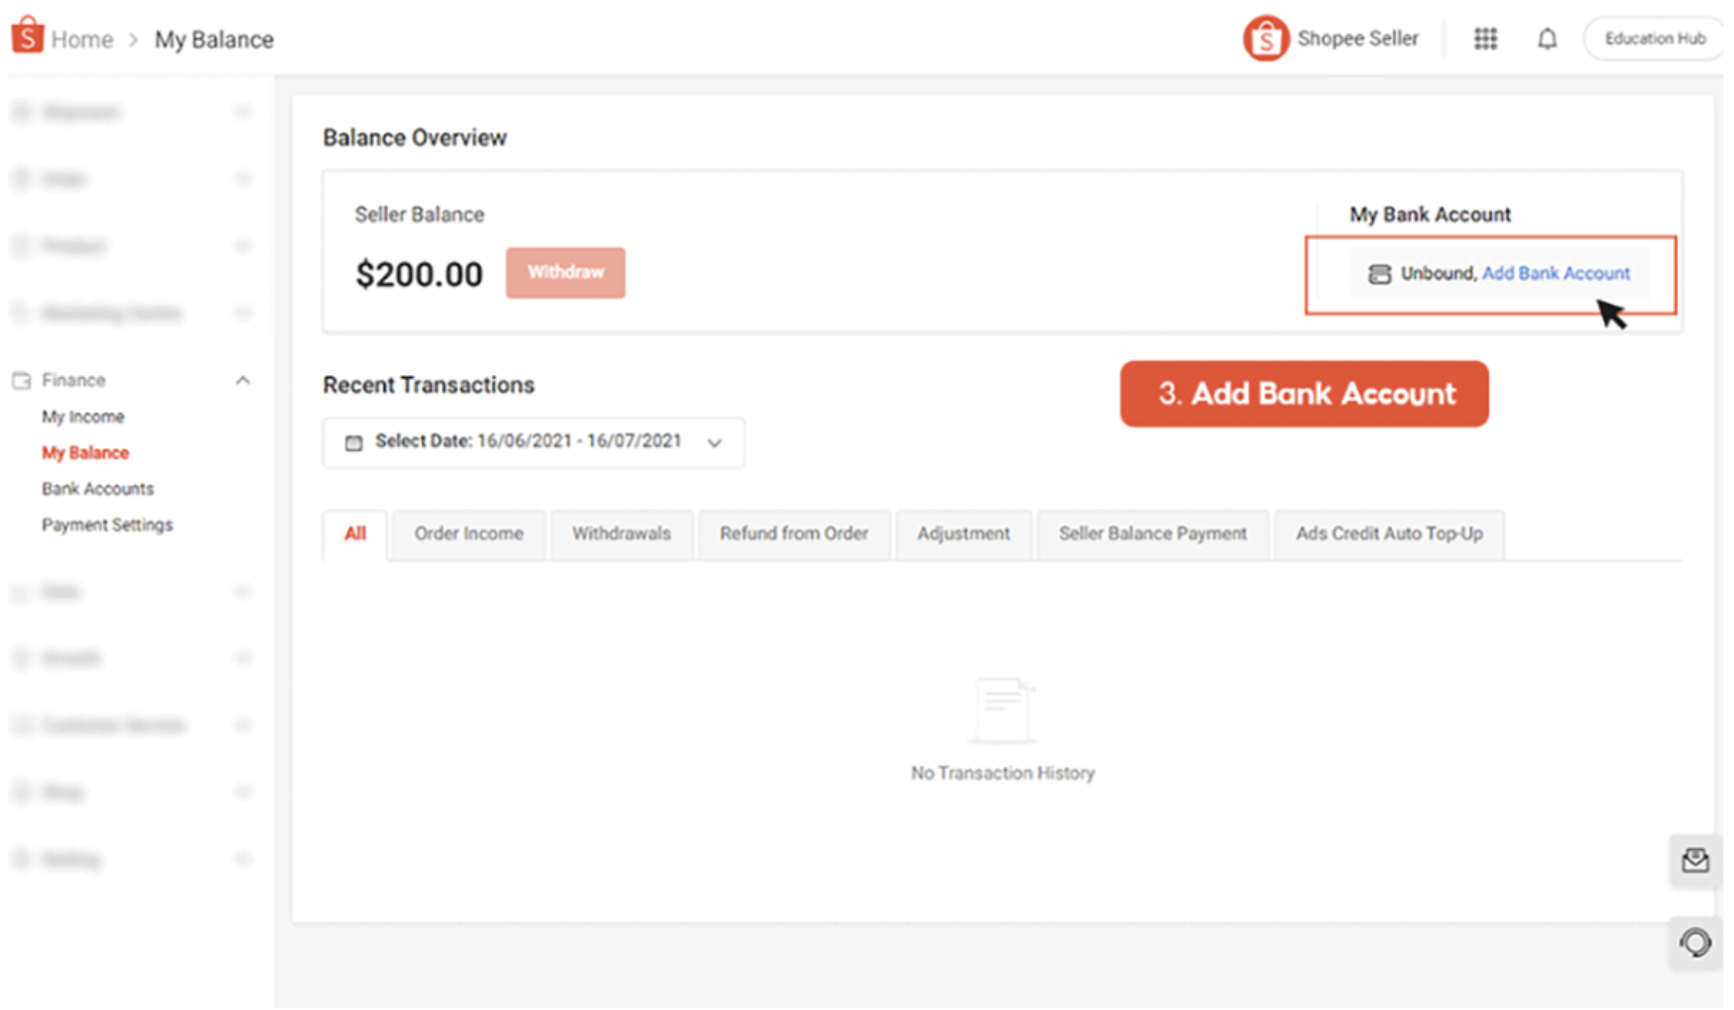
Figure 13: Payments Setup Also, add your shop address. Go to “My Address” and click “Add a new address”. Fill in the information required and click “Save”.
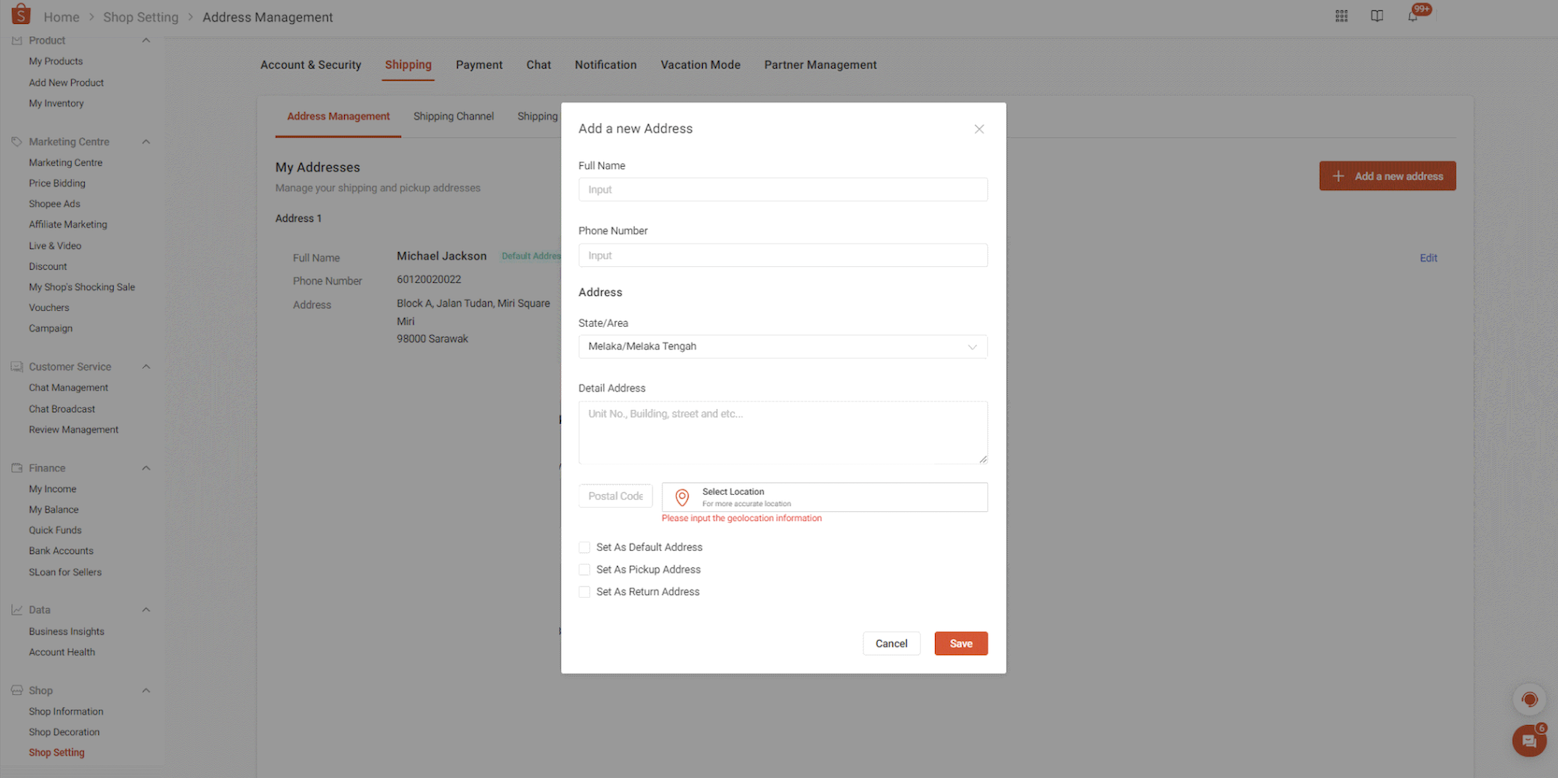
Figure 14: Add Address Enable the default logistics partners for your shop, for a hassle free experience while product addition. The default options will be auto-selected each time
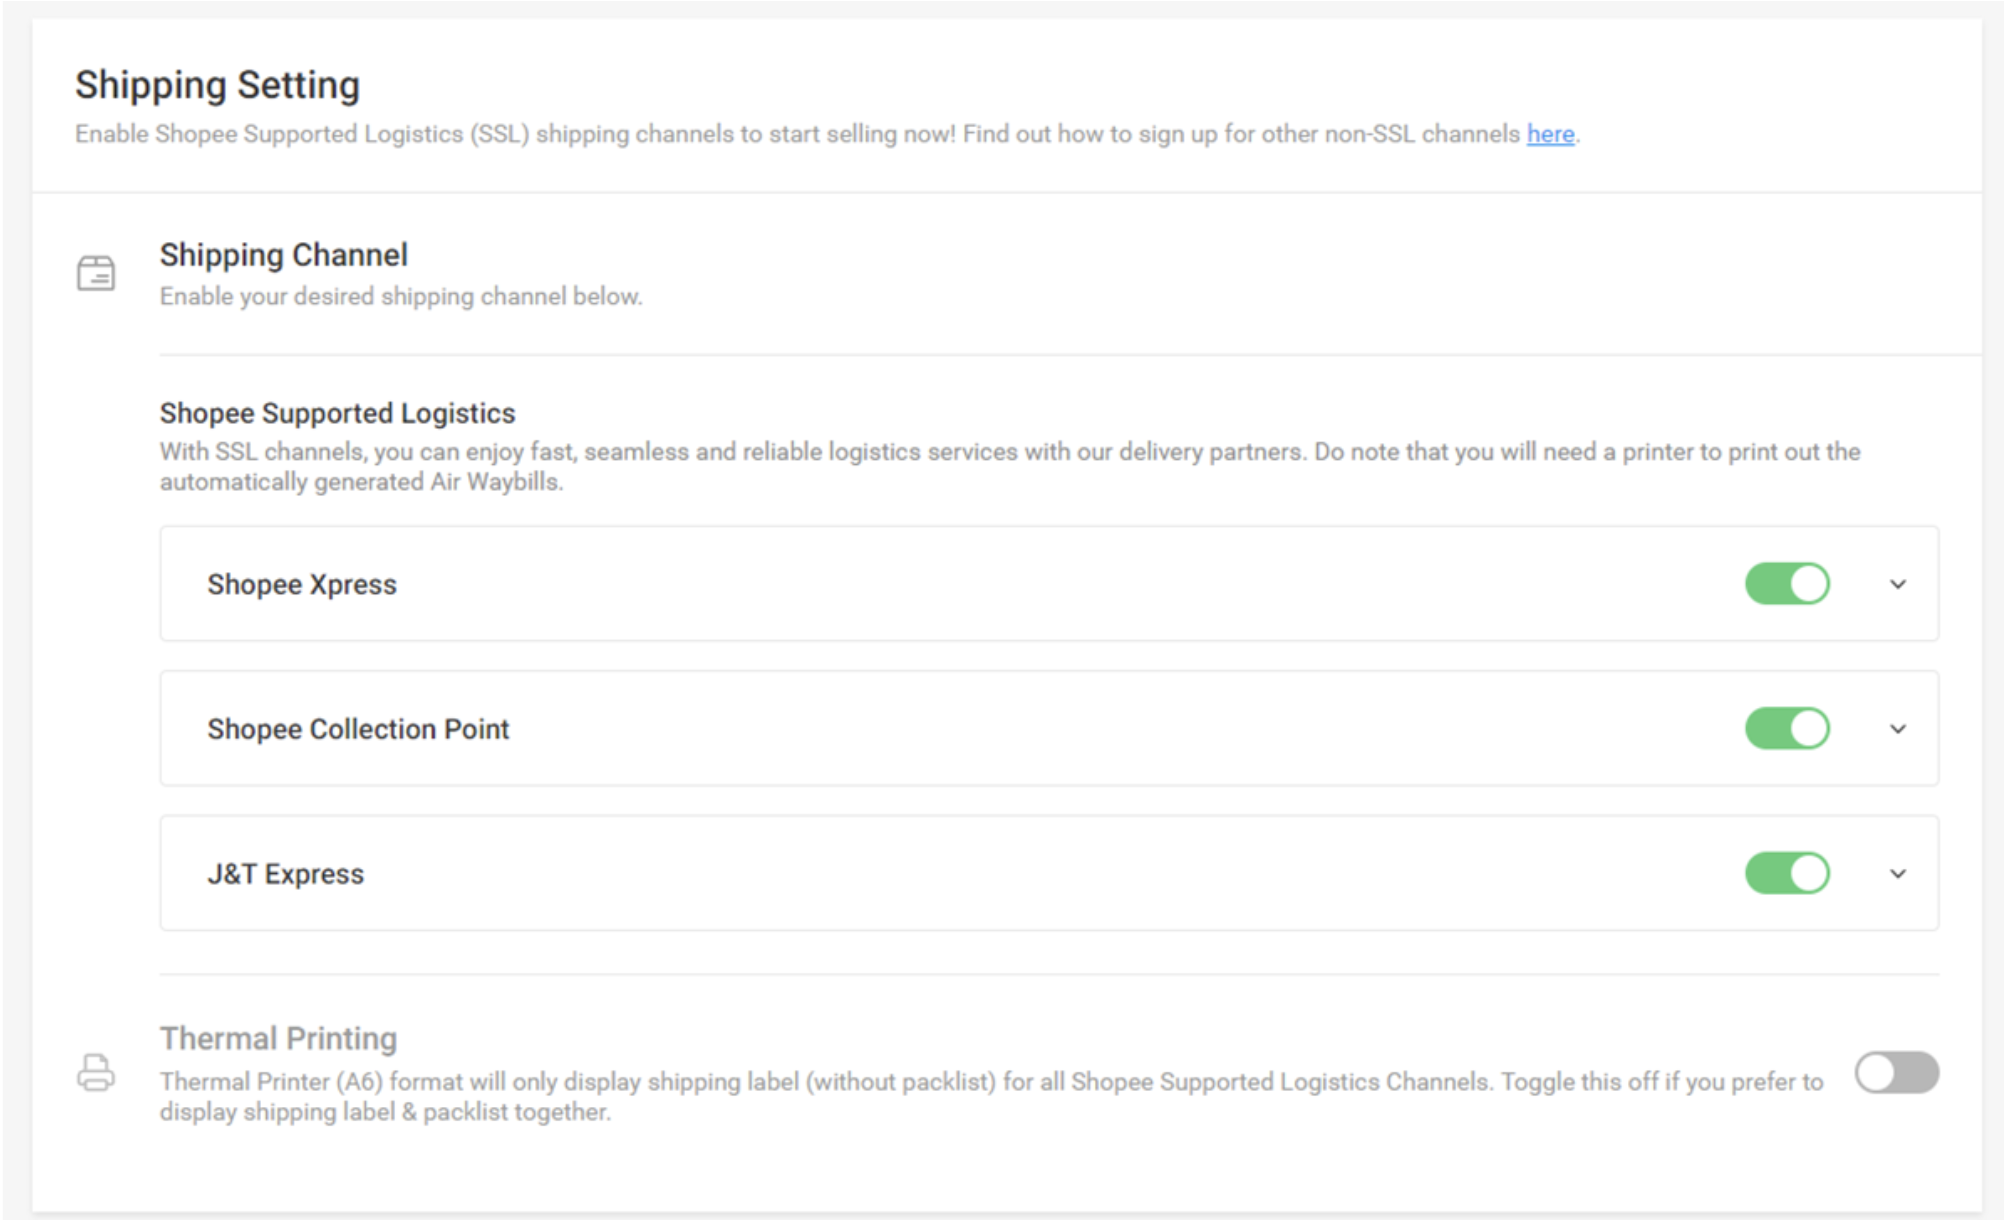
Figure 15: Default Logistics
- Standard Delivery is automatically enabled and the logistics partners will be assigned to you automatically based on your pick-up address.
- The Bulky & Heavy Delivery channel will be automatically enabled and the logistics partners will be assigned to you based on your pick-up address.
- You may visit the shipment settings page later if further changes are required.
- If you are registering from a business/company, select Registered Business; have your business Registration number ready.