Commerce Panel → Products → My products → Create Product
To successfully display product variants (like different colors or sizes) on your website, follow these updated steps.
Each variant must first be created as a separate, standalone product.
- Important: All products you intend to link as variants must belong to the same brand and category.
- Primary Color Attribute: If you are adding color variants, ensure you fill out the primary color attribute field while creating each individual product.
Once your individual products are created, choose one to act as the primary entry point:
- Navigate to the product and tick the checkbox: "I want to add variants to this product".
- Select Variant Type: Depending on your product template, choose the appropriate option from the Variant Type dropdown (e.g., "additional colors").
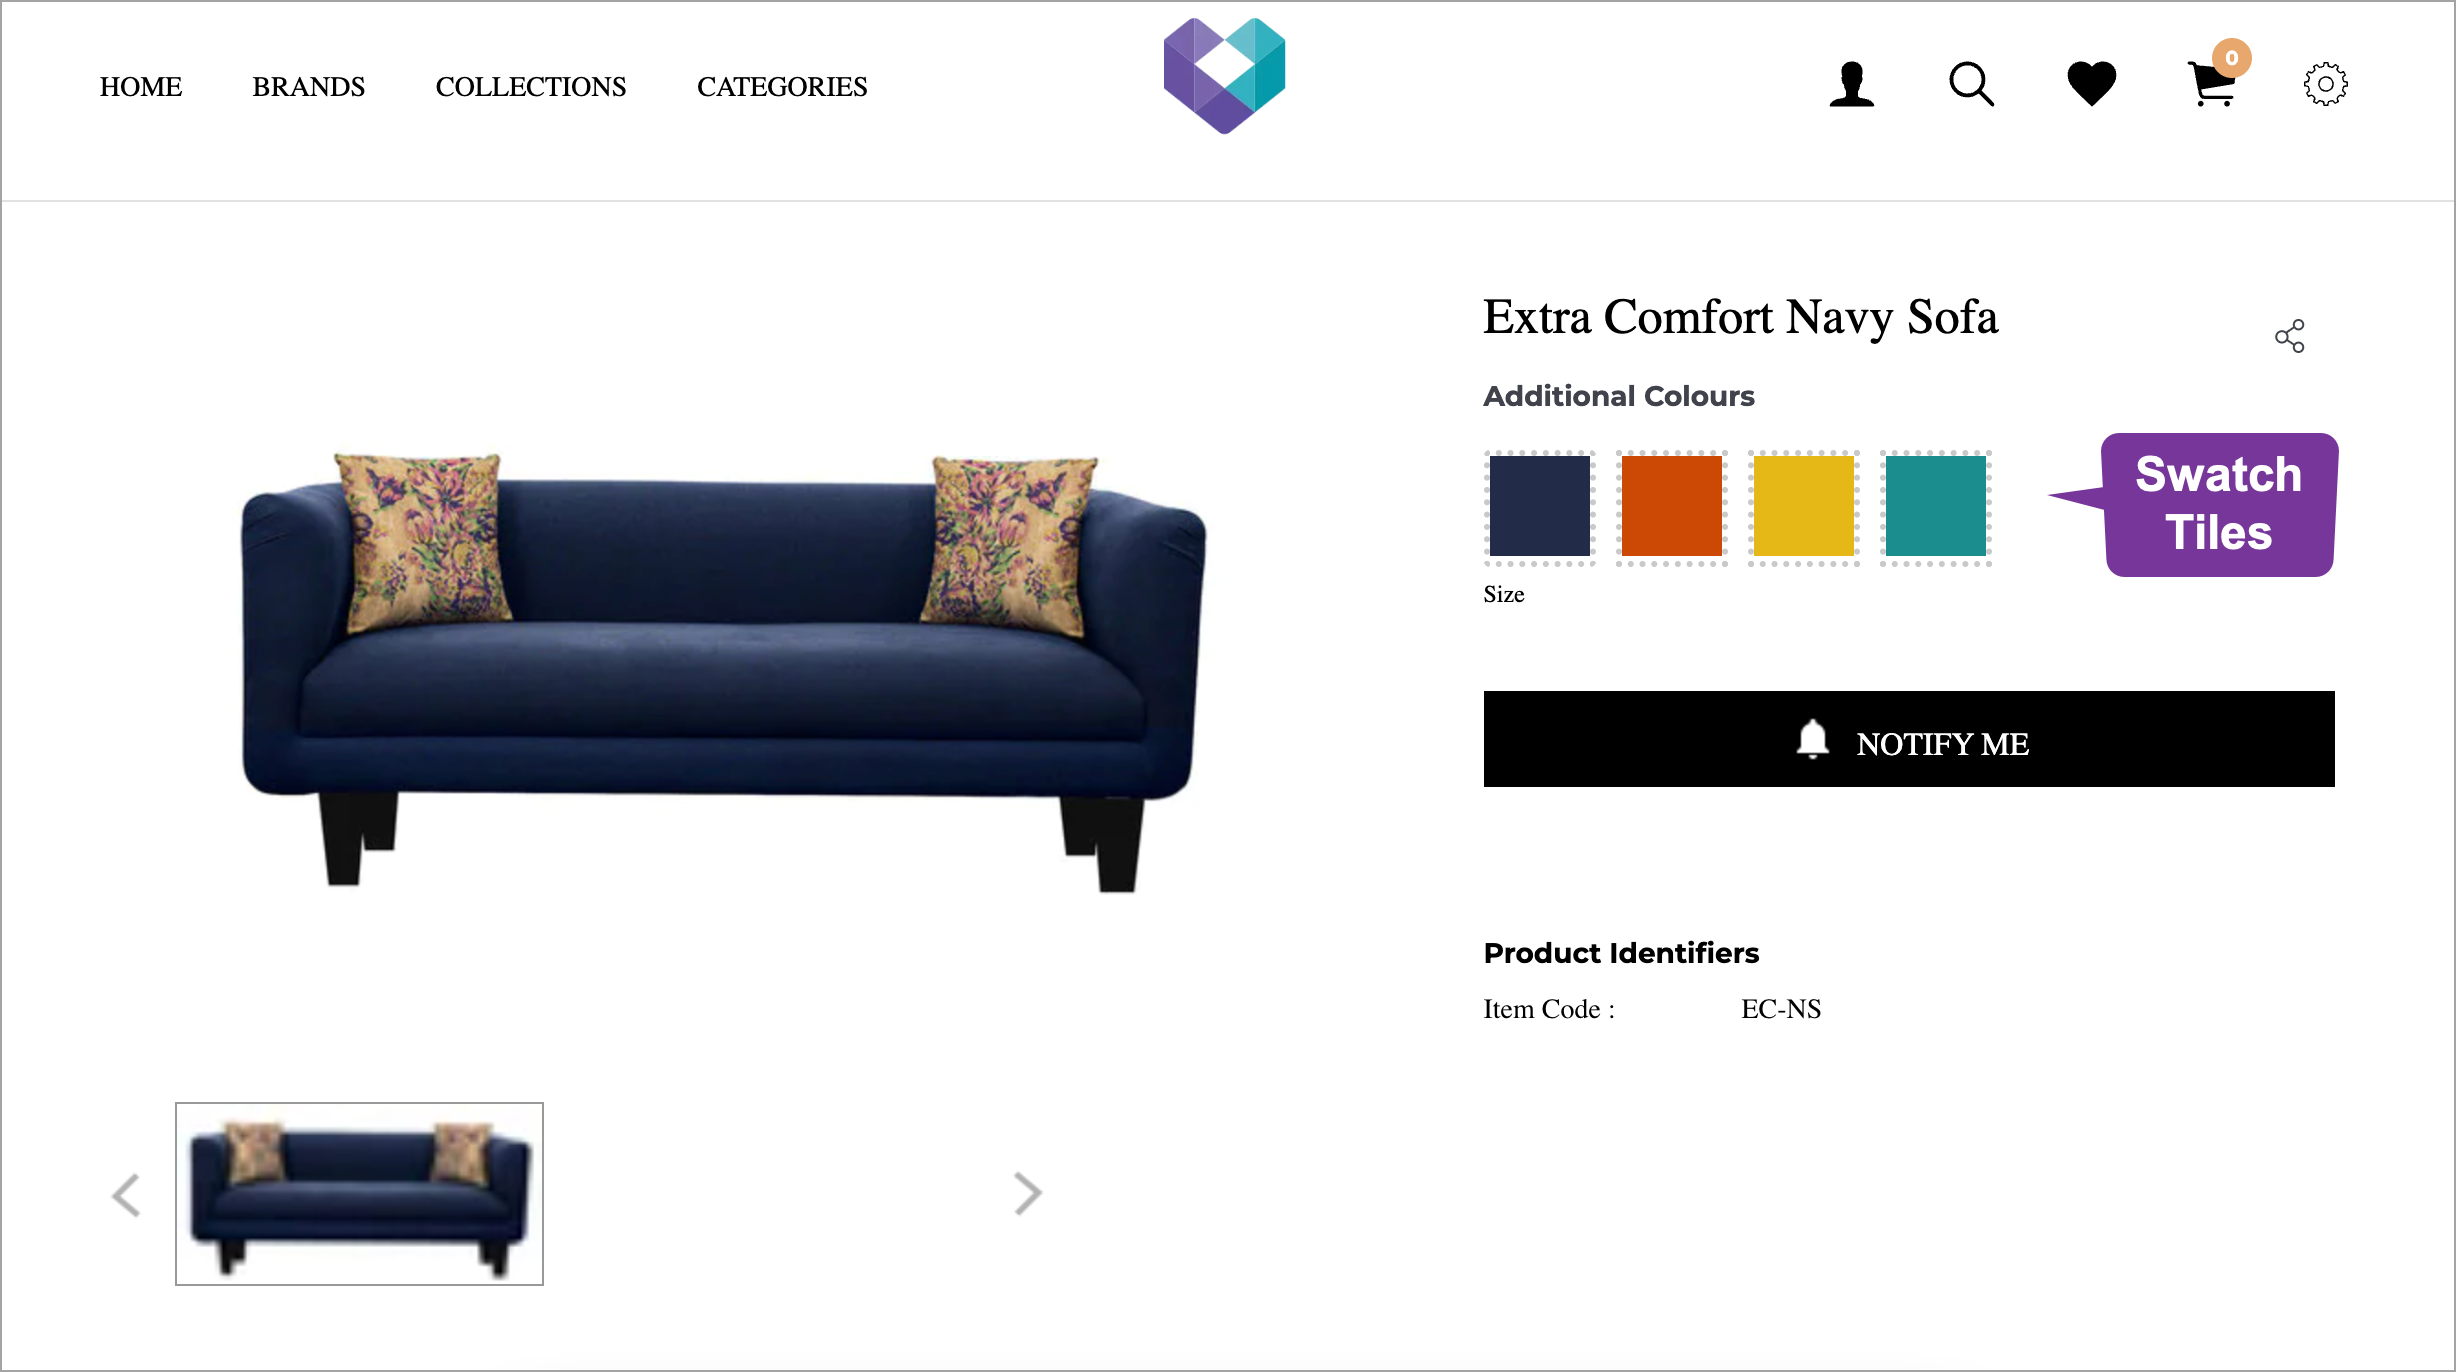
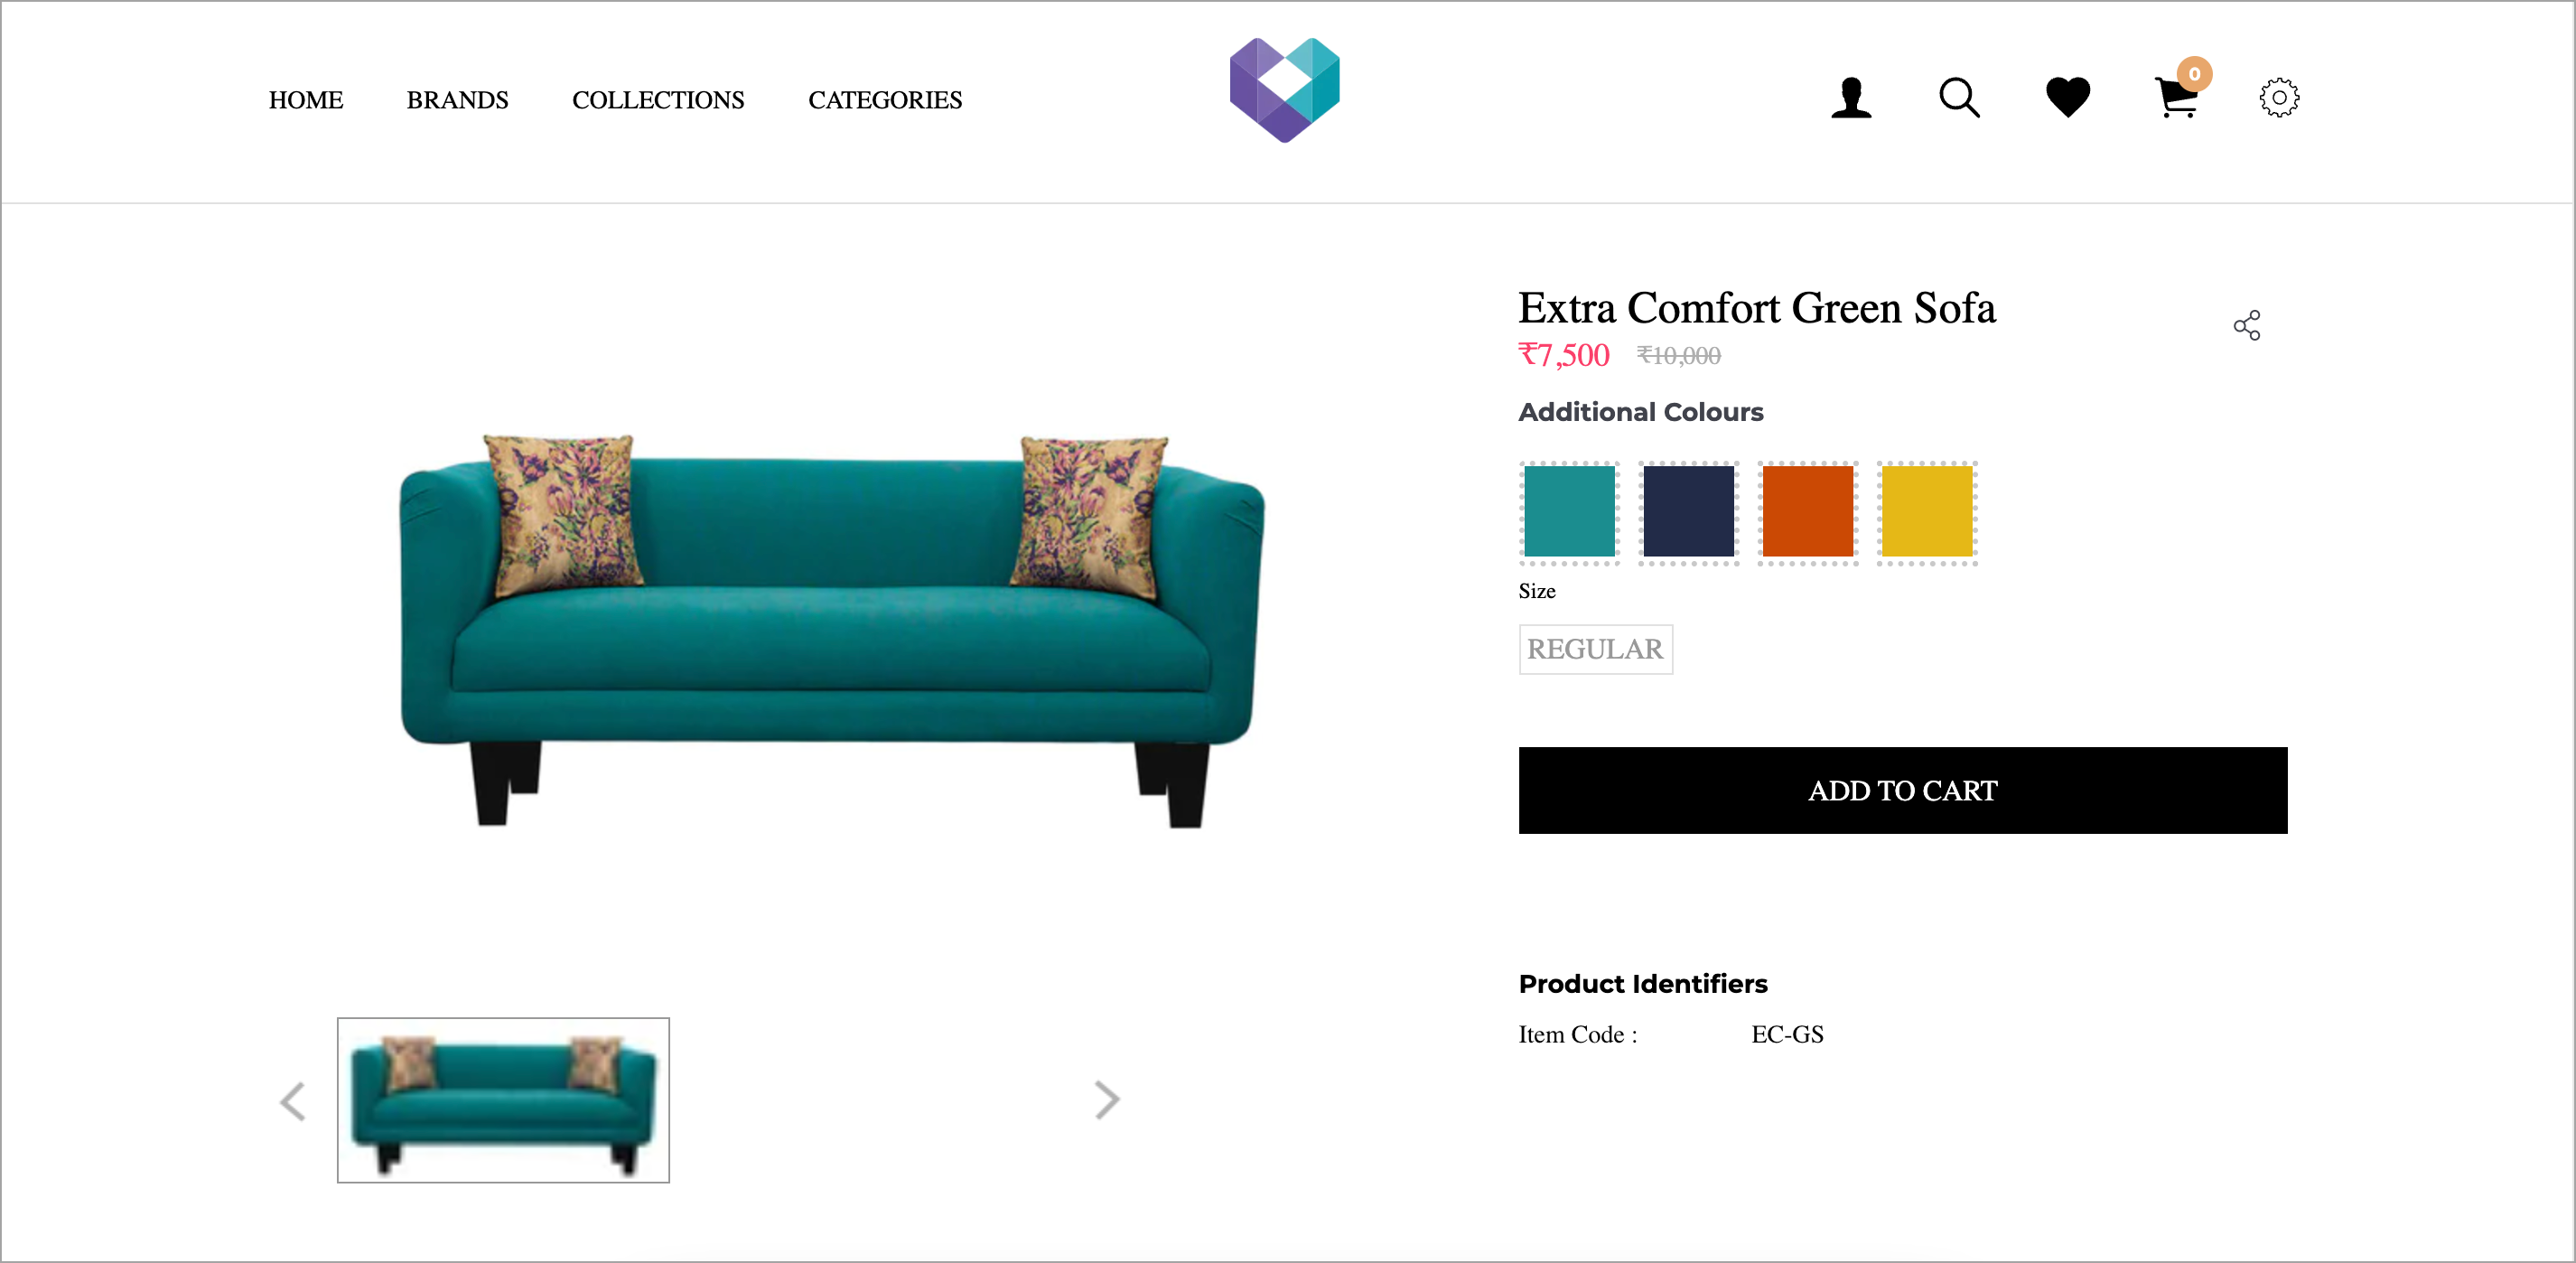
The system uses Swatch Images to represent variants on the Product Description Page (PDP) via tiles or hex codes.
- A swatch image is a visual representation of the product's color shade or specific characteristics.
- Handling Errors: If you encounter an error stating a swatch image is missing while trying to add a variant, click "Add Swatch Image". This opens the specific product in a new tab where you can upload the required media. Save that product and return to your original tab to continue.
- Search for the products you want to link and click the Add button.
- Automatic Synchronization: A key benefit is that you only need to perform this linking process once. After adding variants to one product, they are automatically added as variants of each other across the system.
- Click Save once all variants are linked.
- Inventory Requirement: Variants will only become visible to customers on the PDP after you have added inventory for every concerned product.
- Once inventory is updated, the variants will appear as selectable options on your website's product page.
Variants will not appear on your website if you don't fill the attribute required for that variant type.
For e.g. if you're choosing 'Additional Colour' from the dropdown, fill the Primary Colour attribute.
For e.g. if you're choosing 'Additional Shade' from the dropdown, make sure to fill the Shade attribute.
When a product has more than one distinguishing characteristic (for example, a sofa available in different fabric colors and different wicker colors), you can link them using multiple variant types. Follow these steps to set them up correctly.
Before linking them, every combination must be created as a separate product.
- Fill Mandatory Fields: Ensure you complete all required sections, including the product description, primary identifier, packaging materials, and dimensions.
- Trader Information: This information is mandatory for the product setup.
- Required Attributes: To ensure the variants link correctly:
- If you are adding Additional Color variants, you must fill in the primary color attribute.
- If you are adding Wicker Color variants (or any other secondary type), you must fill in that specific attribute (e.g., Wicker color).
Once the individual products are created, select one to begin the linking process:
- Tick the option indicating you want to add variants to the product.
- Select Multiple Types: In the variant type dropdown, choose all relevant types that apply (e.g., select both "Additional Colors" and "Wicker Color").
- Upload Multiple Swatches: You will need to provide a swatch image for each variant type selected (e.g., a swatch for the sofa's fabric color and a separate swatch for the wicker color) so they display correctly on the PDP.
- Scroll to the bottom of the product editor to the variant section.
- Add Variants by Category: Search for and add the other sofas you created. You will add them as "Additional Color" variants and then repeat the steps to categorize them as "Wicker Color" variants as well.
- Automatic Linking: You only need to perform this linking on one of the products. The system will automatically link all selected products to each other as variants.
- Inventory: The variants will not appear on your website until you add inventory for every individual product in the group.
- Website Display: Once inventory is updated, customers will be able to see and select from all available color and material combinations on the product page.
- You can add or remove variants as and when required.
- If you're adding multiple variant types to a product, repeat steps 6 and 7 for all the variant types.
- You can control how your variants appear on the website. It can either be in the form of text, colour, swatch, or product image. You can configure it in your sales channel settings. Click here to know more.
- Currently, Fynd Commerce supports maximum 40 variants for each product.
- Hex support in variant swatches is available. Hence, you'll have the flexibility to precisely define colours to match your brand's unique palette.