This phase connects your internal variants to Clozzet's product codes. Proper product mapping is essential to sync inventory, list your items, and process orders. You can map products one at a time for granular control, or bulk upload an entire catalogue from a single file.
Product mapping creates a relationship between:
- Your variant SKU (internal identifier)
- The Clozzet product/variant code (external identifier)
- Inventory location
- Buffer stock
- Selling status (
Active/Inactive)
Once your configuration is set up on both Fynd and Clozzet, go to Products → Channel Mapping in the left sidebar. Use the column selector to choose the account for which you want to map products.
Types of Mapping:
Manual Mapping (granular control, variant by variant)
Bulk Mapping (via CSV/XLSX upload)
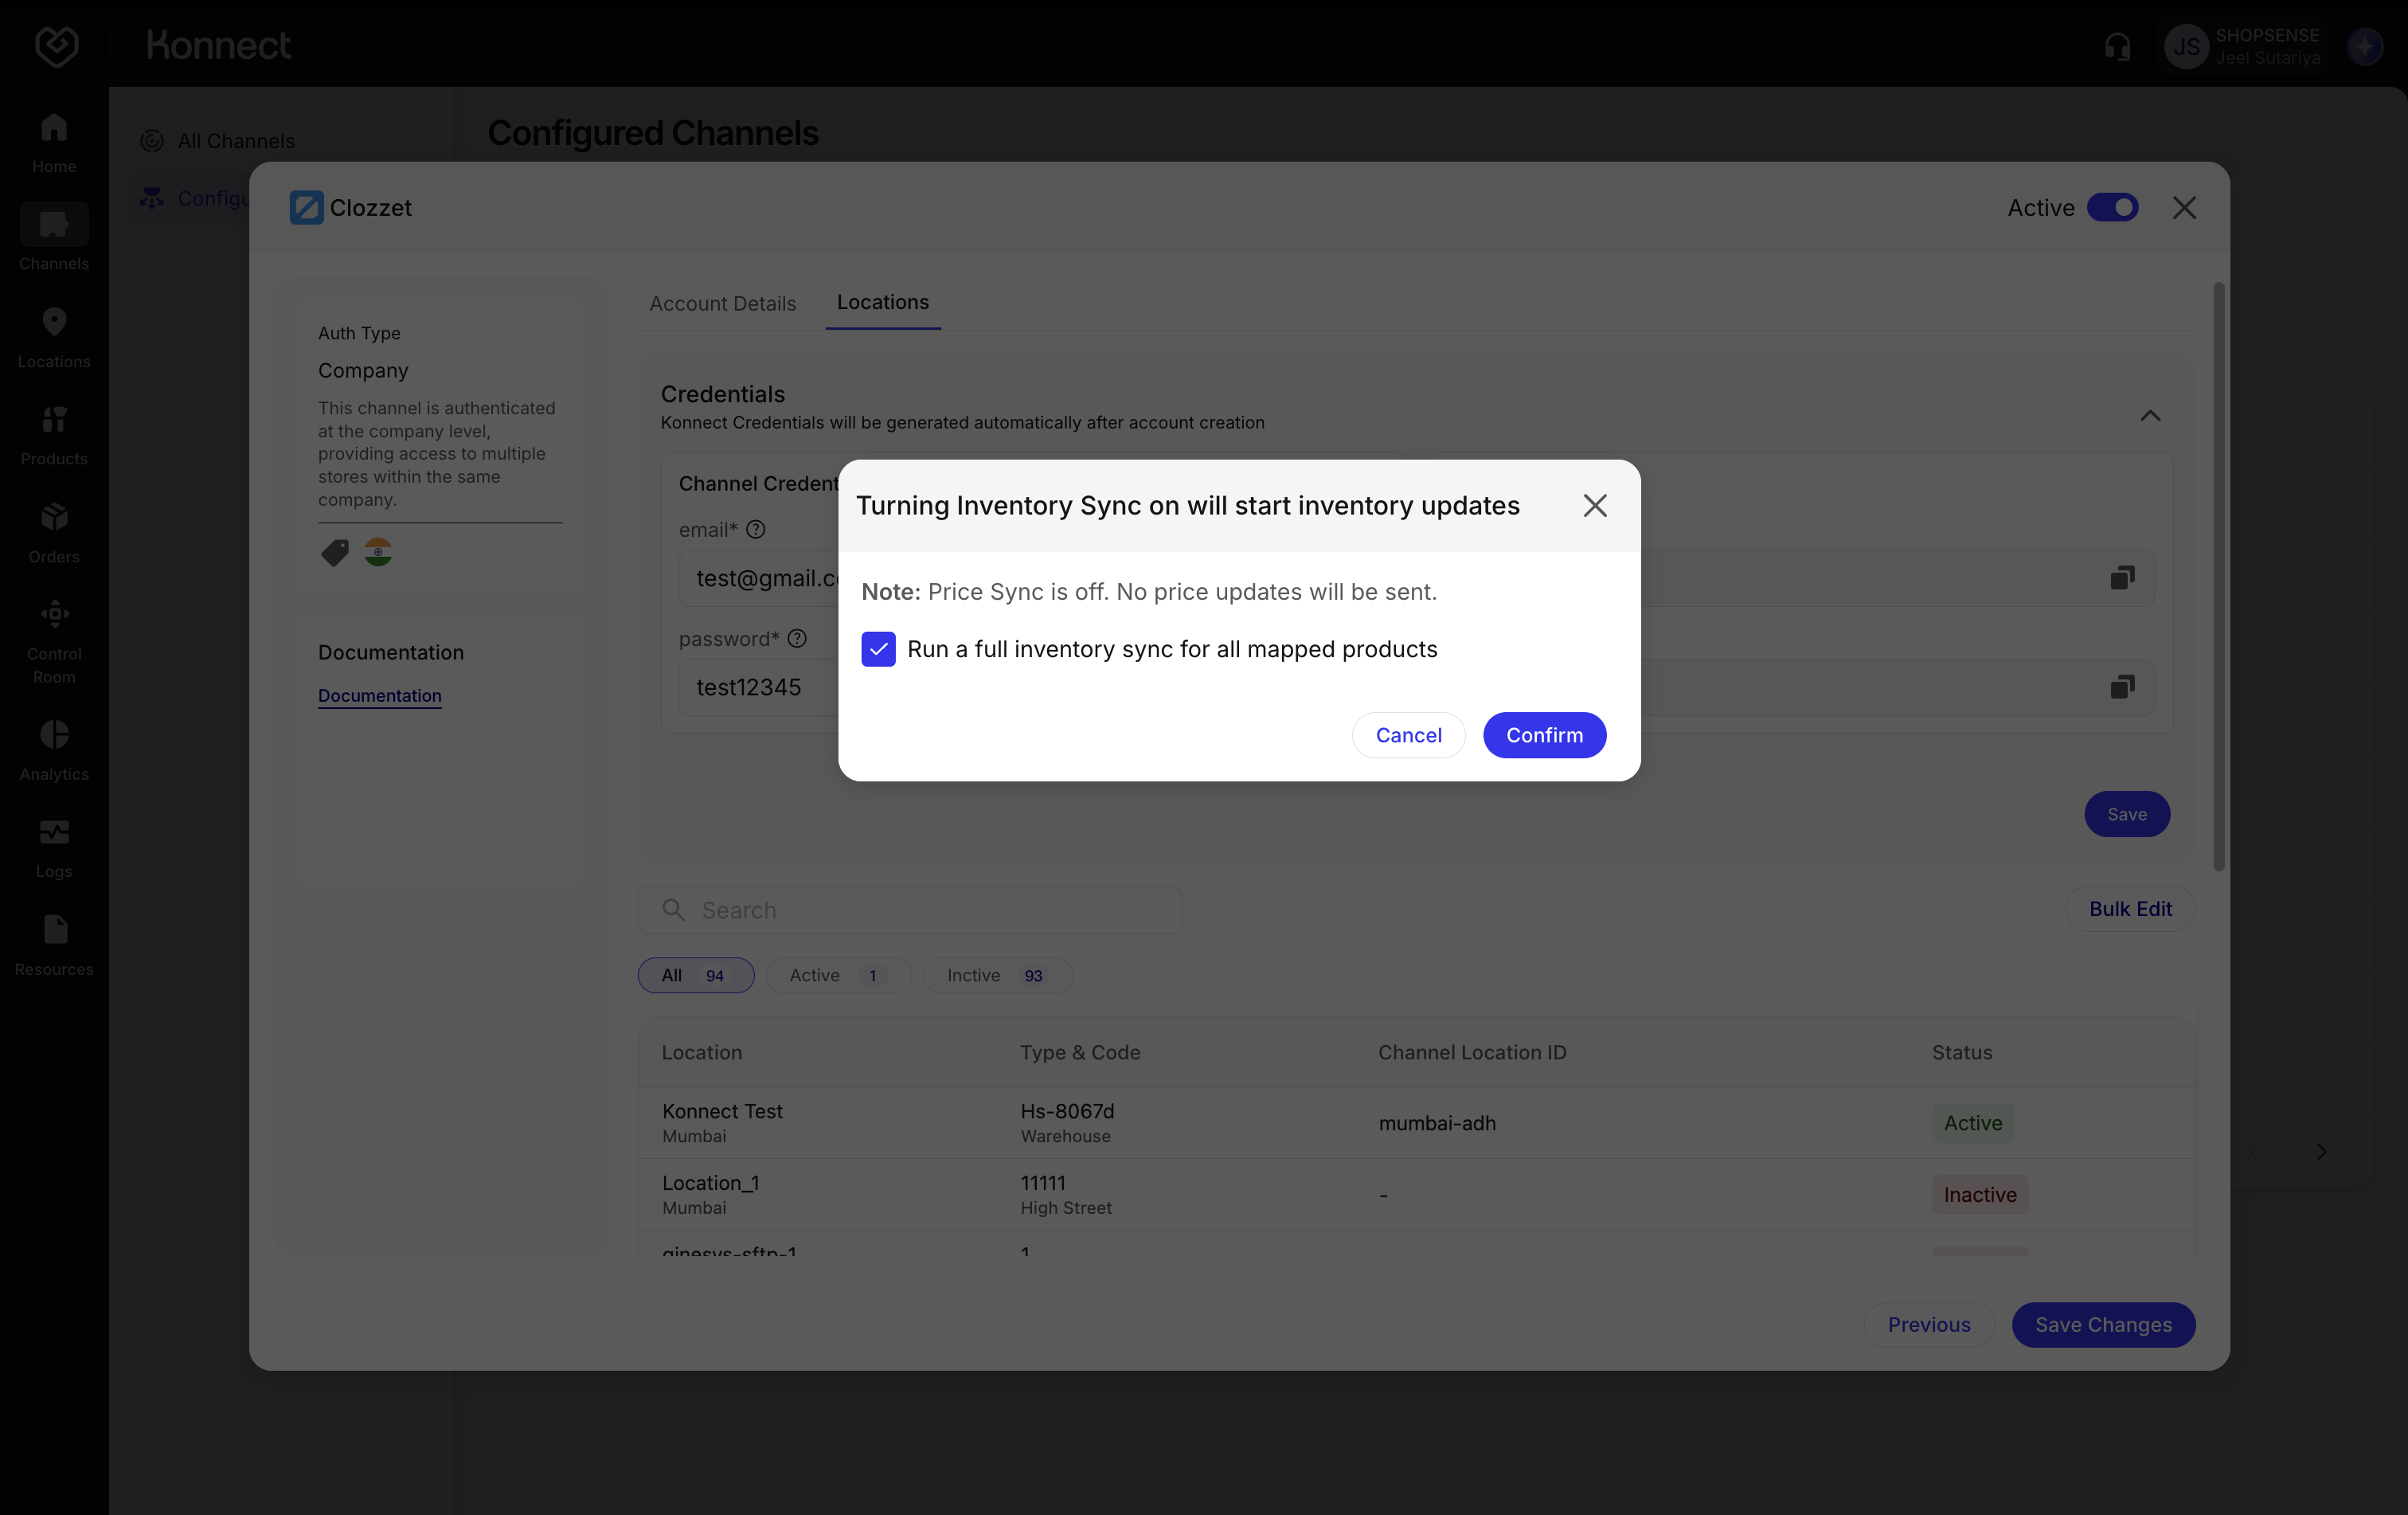
Figure 1: Channel Mapping — Select the Account
Learn more about Konnect's Channel Mapping Feature here
Best for: Specific variants, new products, or items you want to control individually.
On Products → Channel Mapping, locate the variant SKU you want to map.
Click the Action button for that variant SKU.
Under Channel Identifier, add the product/variant code provided by Clozzet for that variant, then toggle it on.
Click Validate before saving. If the code is invalid, a clear error message is shown—correct the variant code and try again.
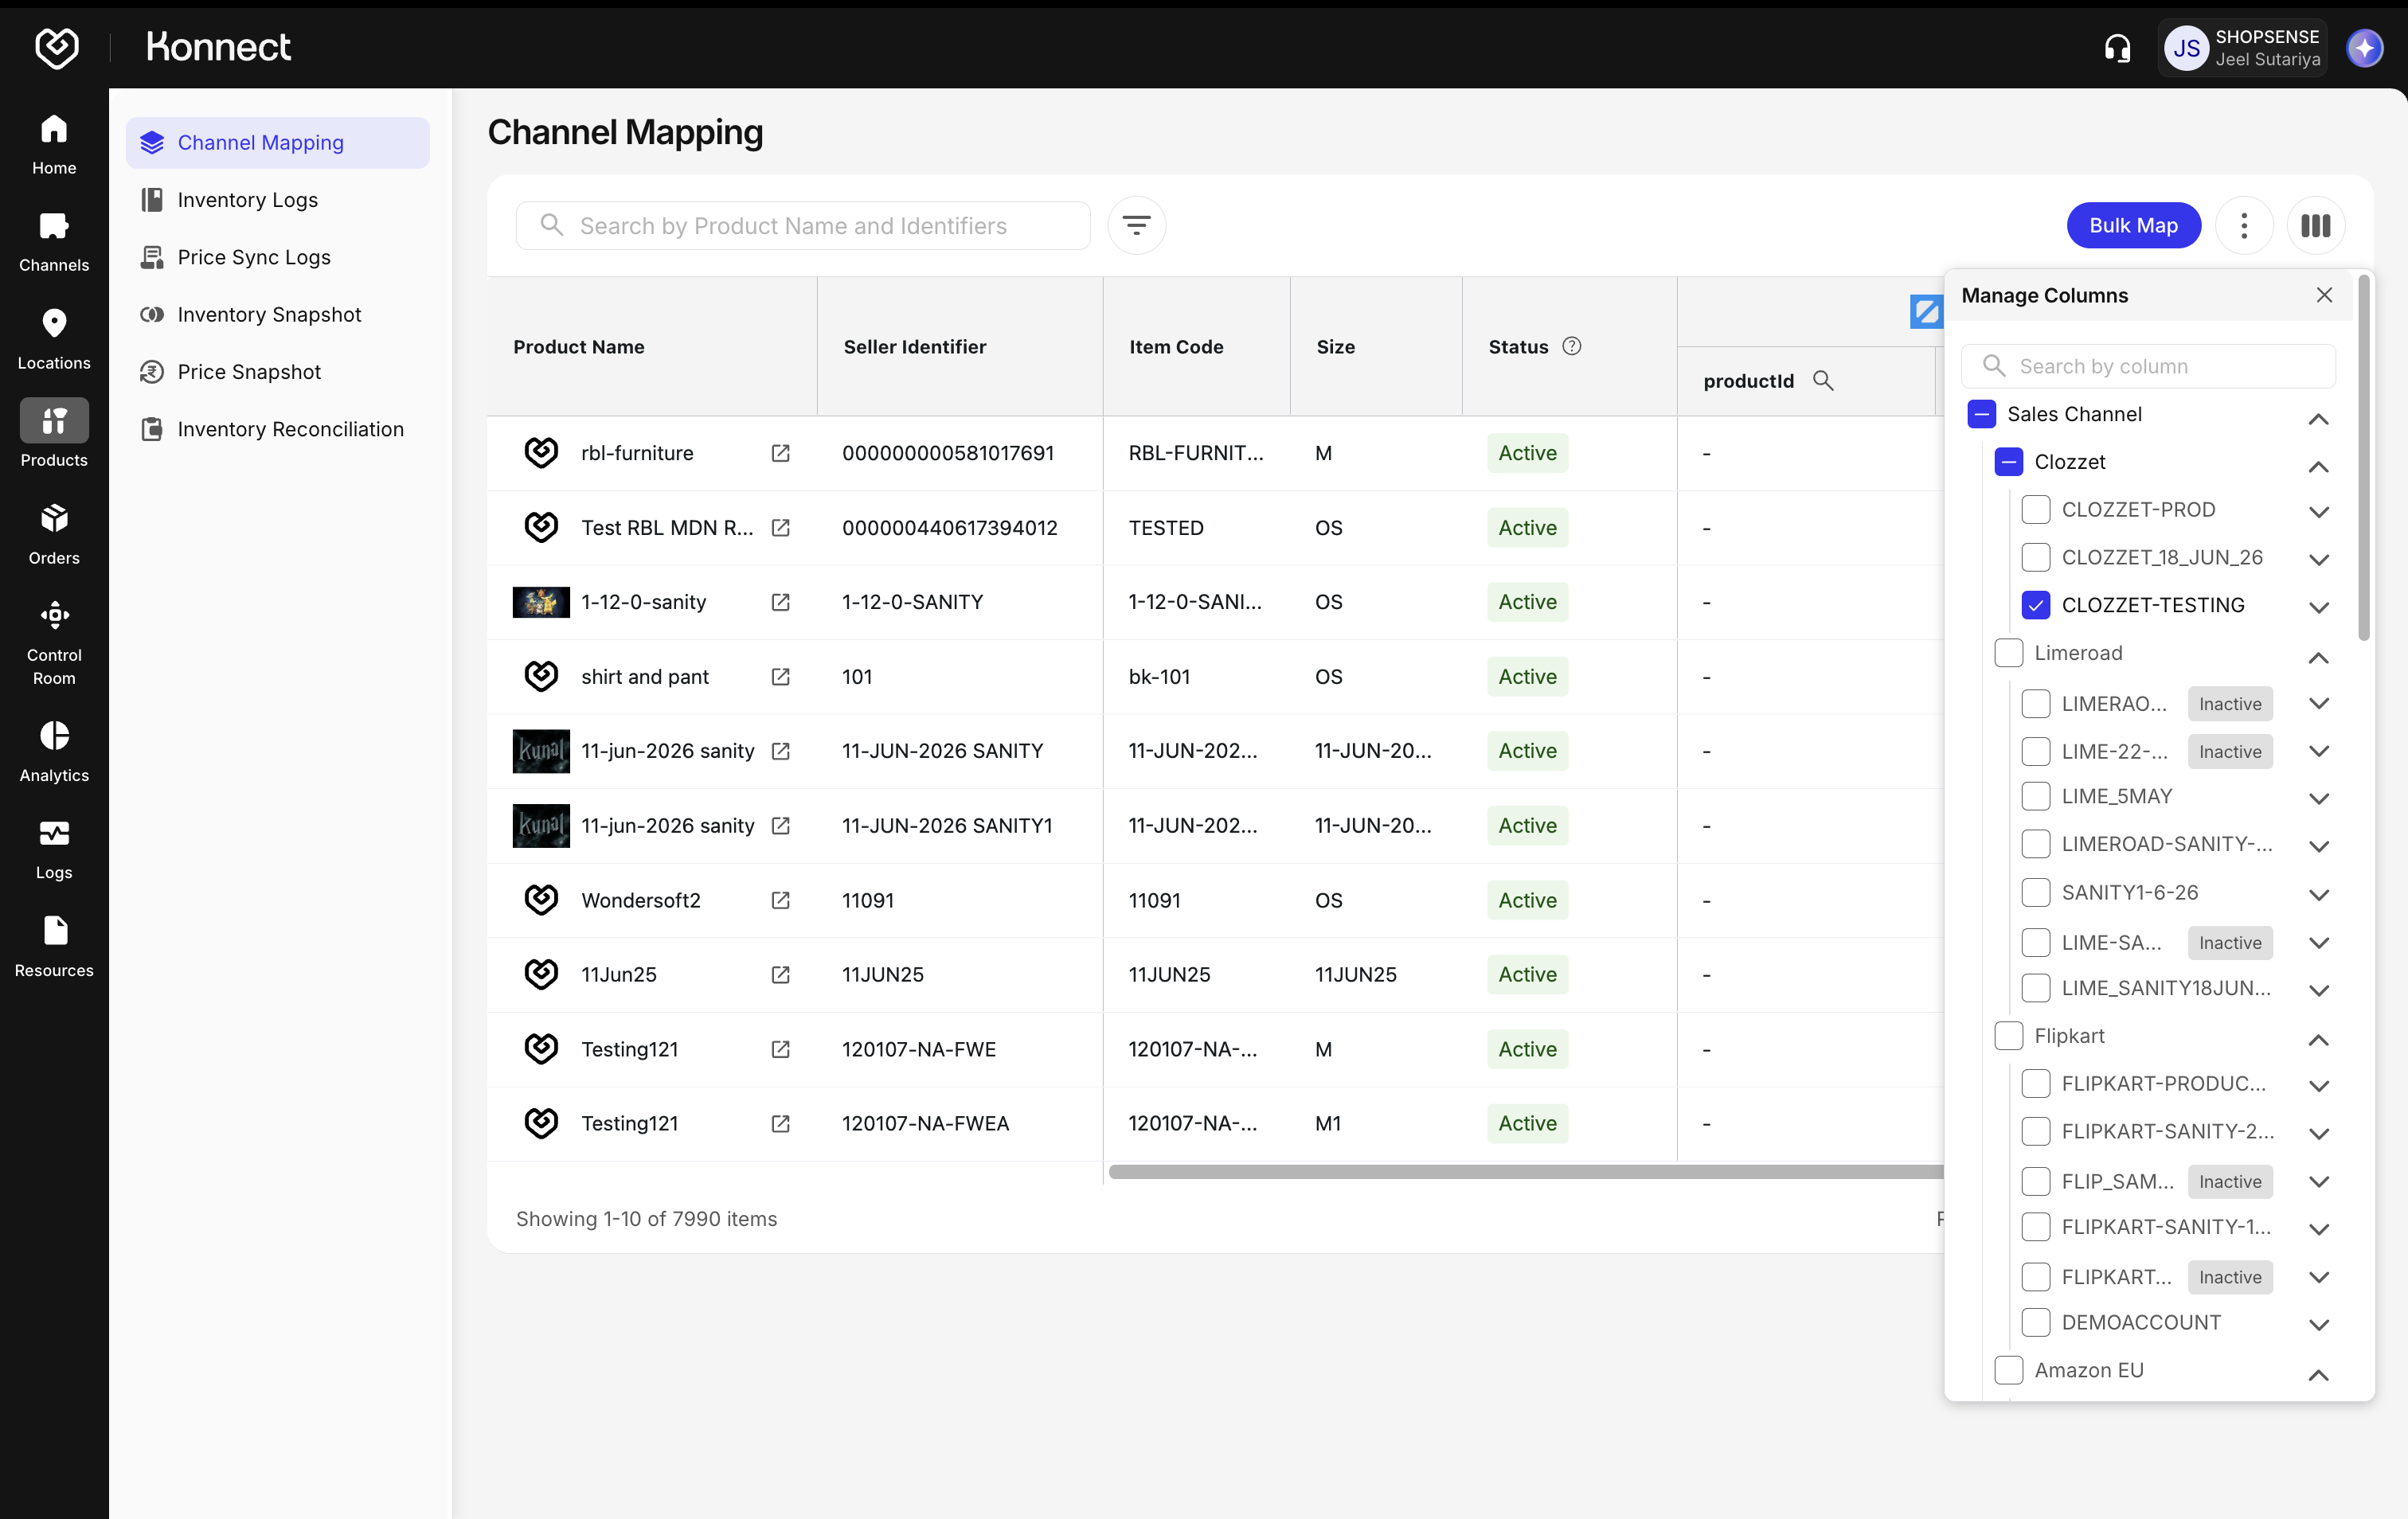
Figure 2: Add the Channel Identifier and Validate Once the mapping is saved, add the Buffer Quantity. This is a variant-level buffer that applies to all locations. A buffer gives you depth in inventory and helps prevent overselling.
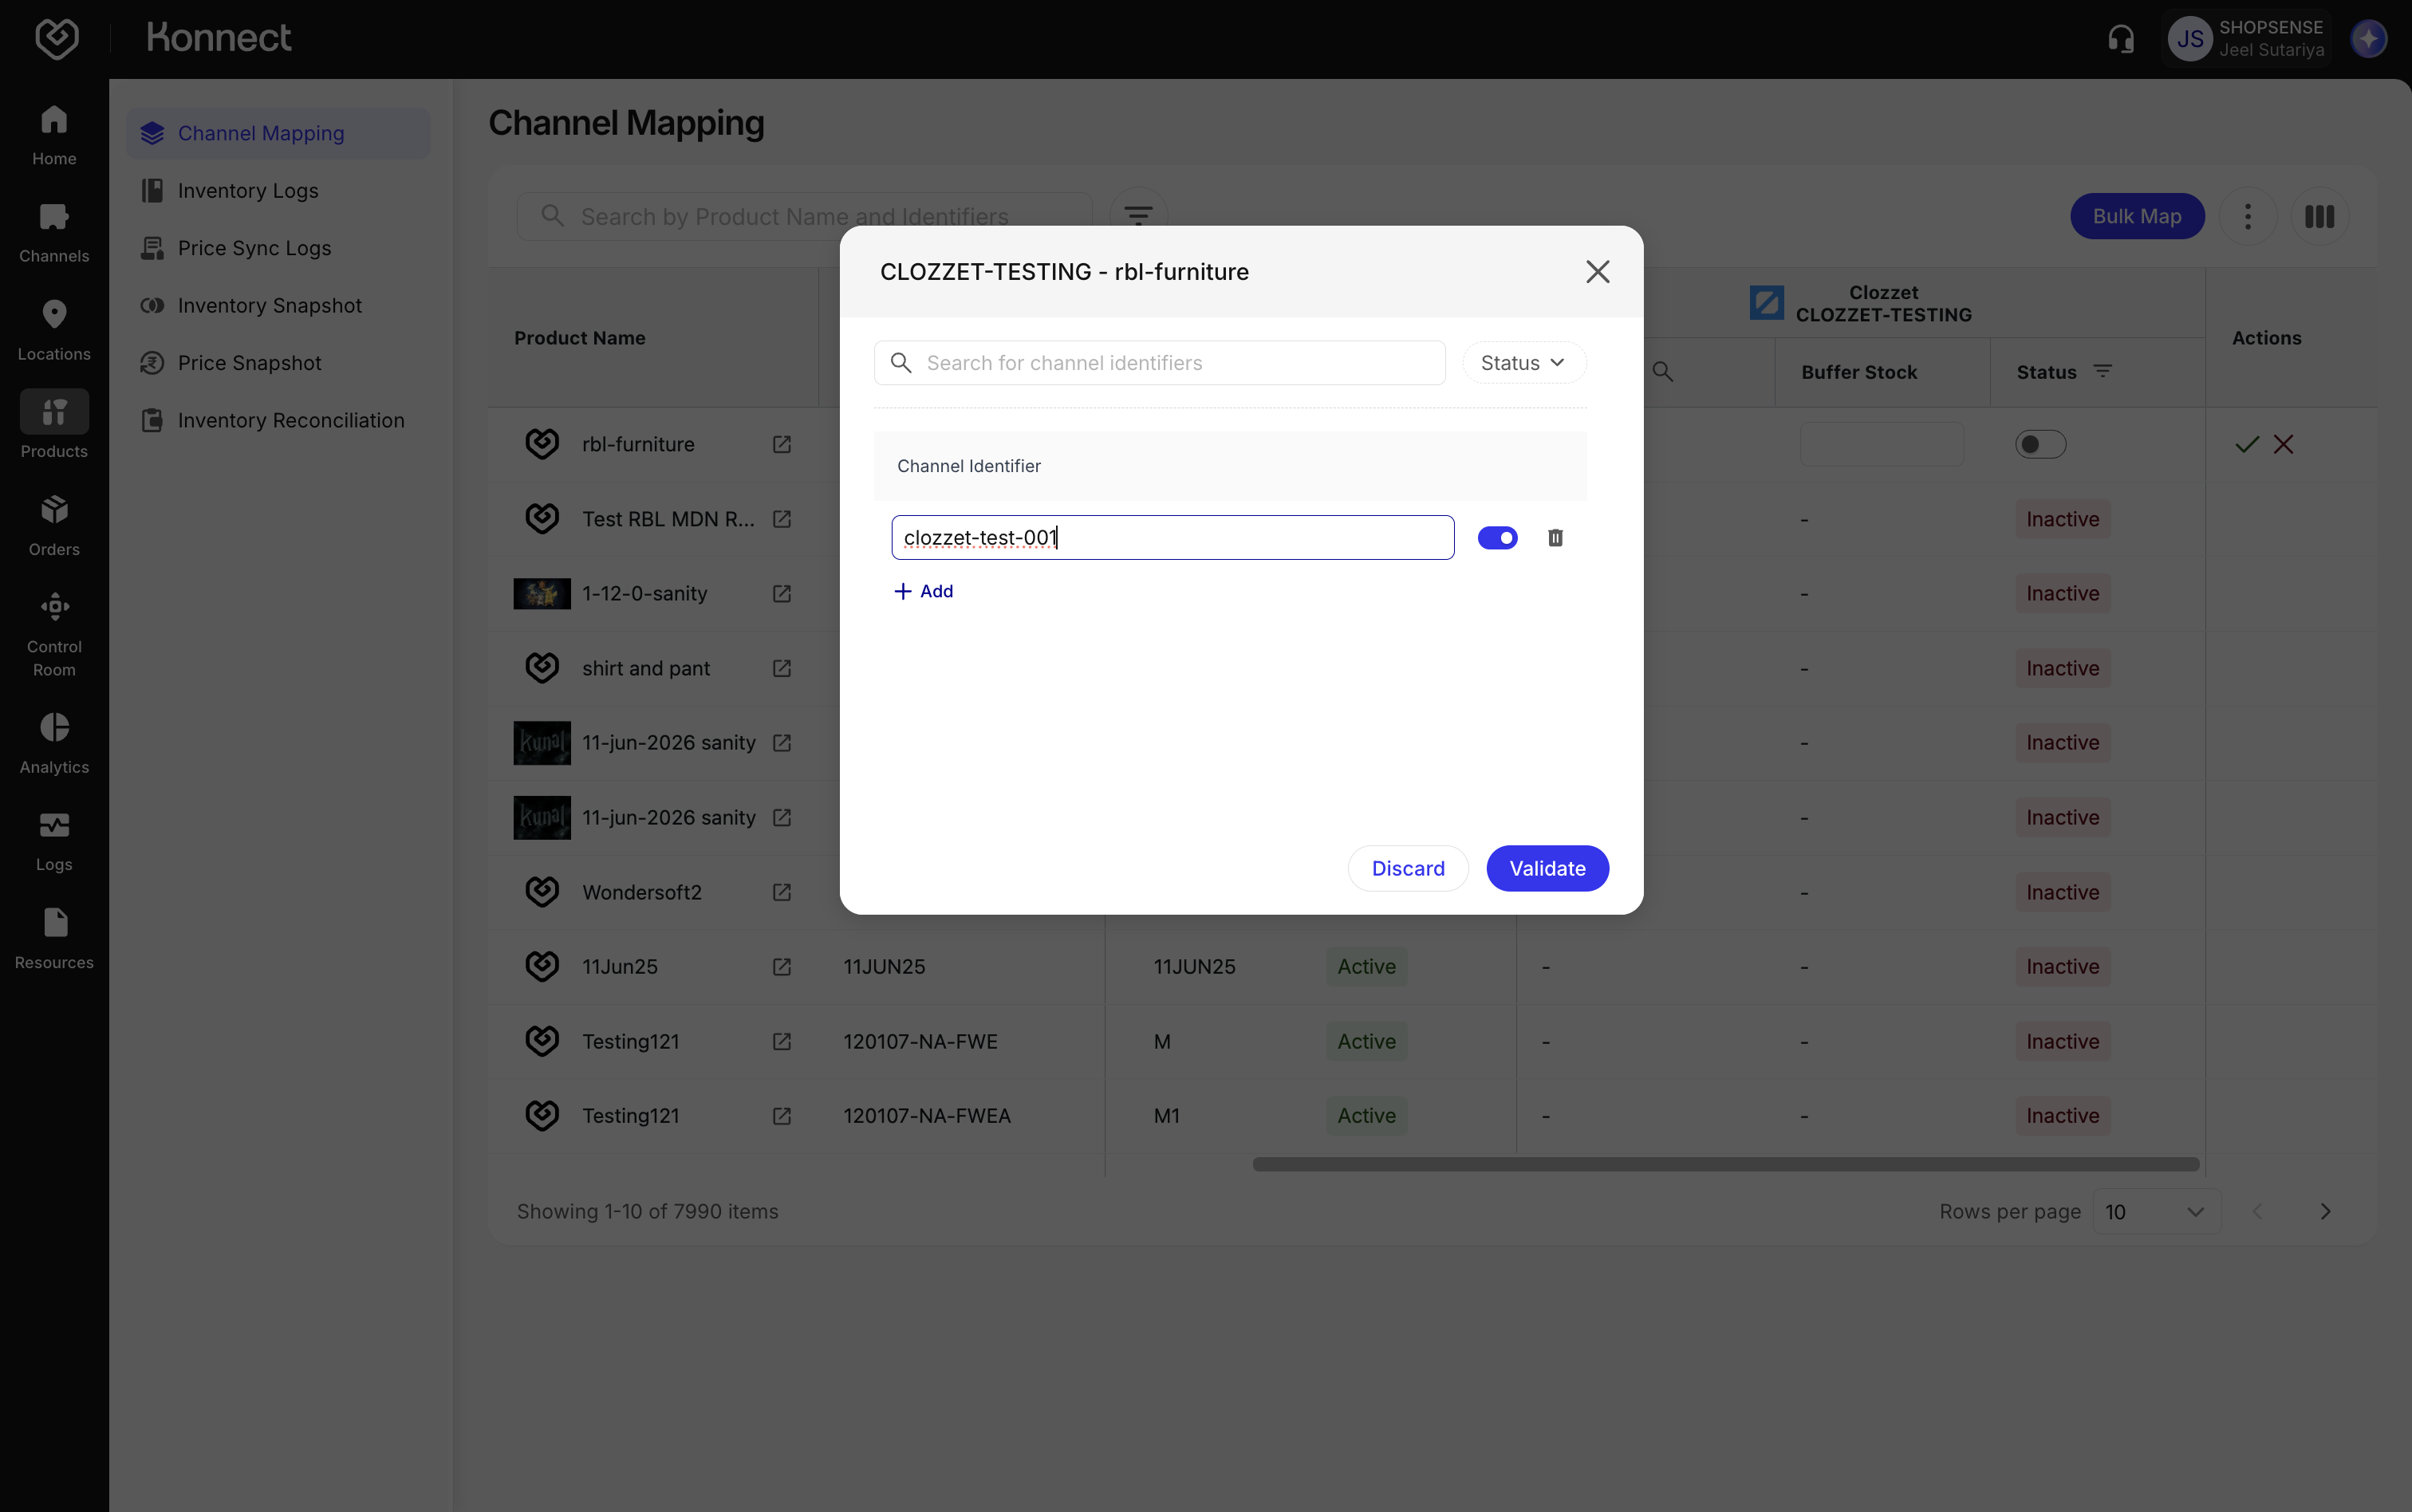
Figure 3: Save the Mapping and Add Buffer Quantity
Fynd pushes the current OMS inventory for that product at the variant x location level. In other words, it pushes inventory for every location that the SKU is live on.
Learn more about Konnect's Bulk Mapping Feature here
Best for: Onboarding large catalogues in one pass.
Go to Products → Channel Mapping → Bulk Map. In the Bulk Product Mapping panel, set:
- Mapping Mode — Single Mapping (this is the mode used for Clozzet)
- Channel — Clozzet
- Account — the account you wish to bulk map products for
Click Download Samples and choose the file you need (All Products, Mapped Products, or Unmapped Products). A CSV is generated based on the filters you selected.
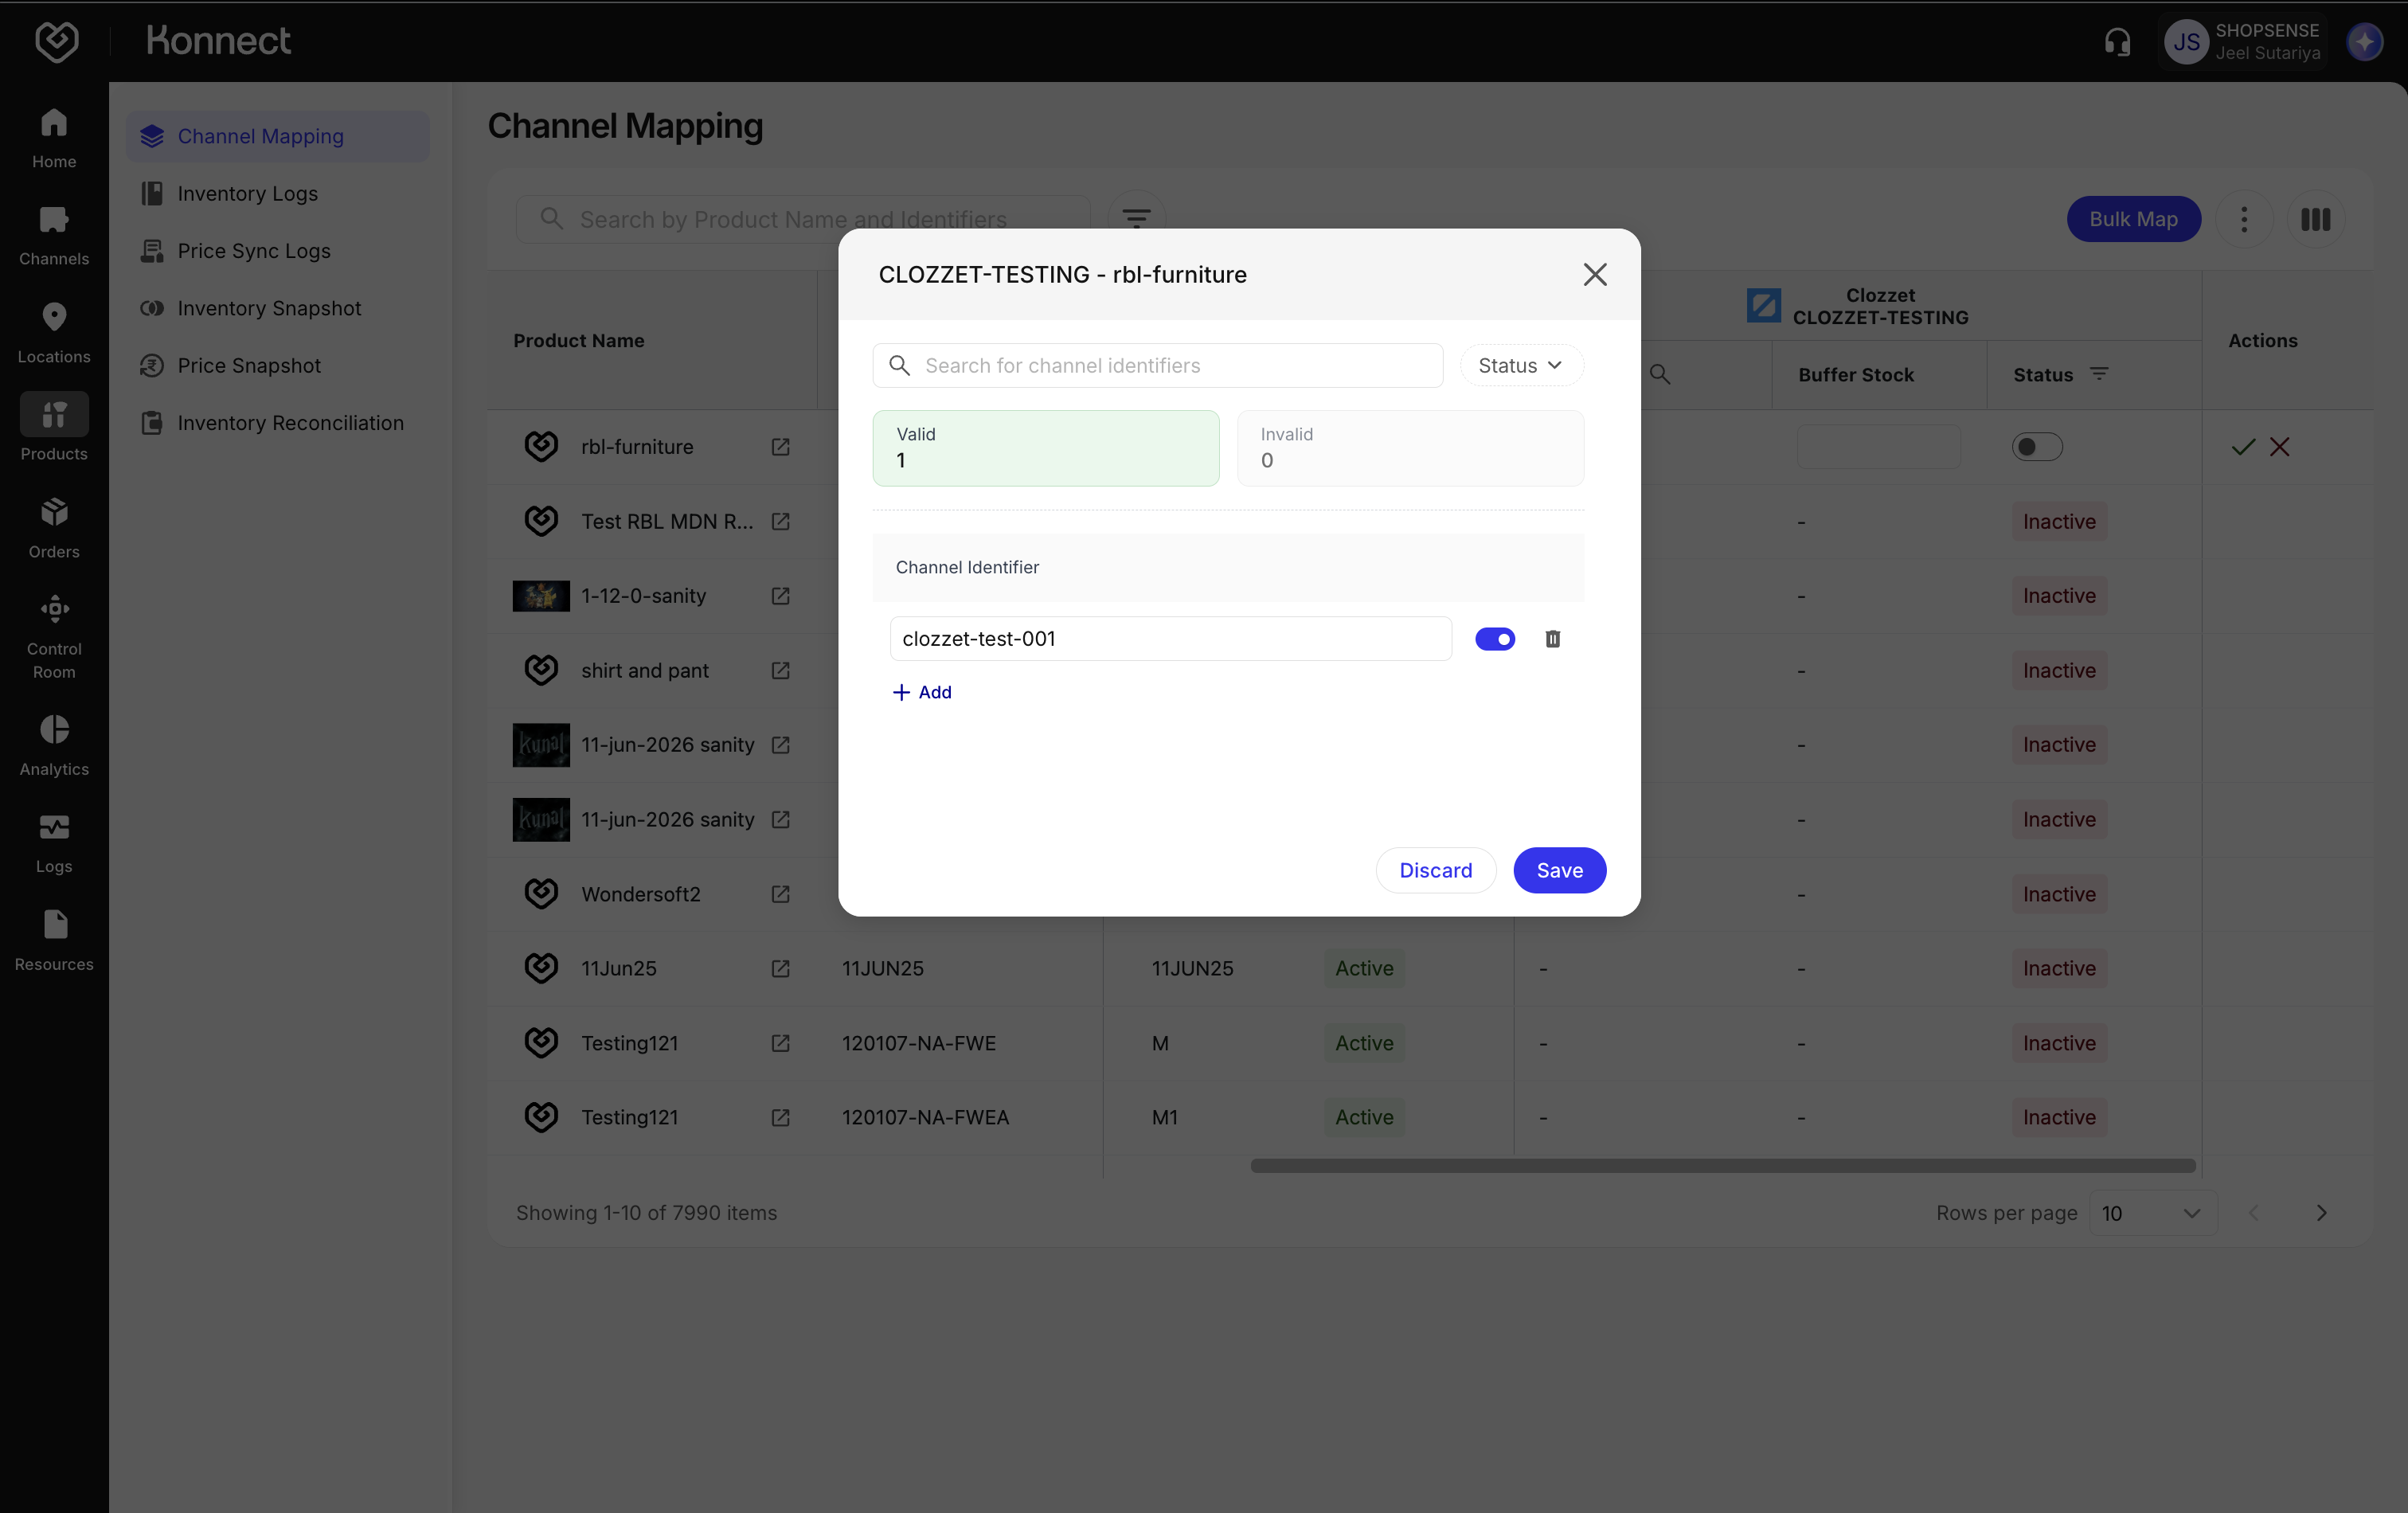
Figure 4: Bulk Product Mapping Setup In the downloaded file, fill in the productId and Buffer Quantity columns for each SKU, and set the Status to
active(the mapping will be activated for that variant) orinactive. Remove any extra rows you do not want to map.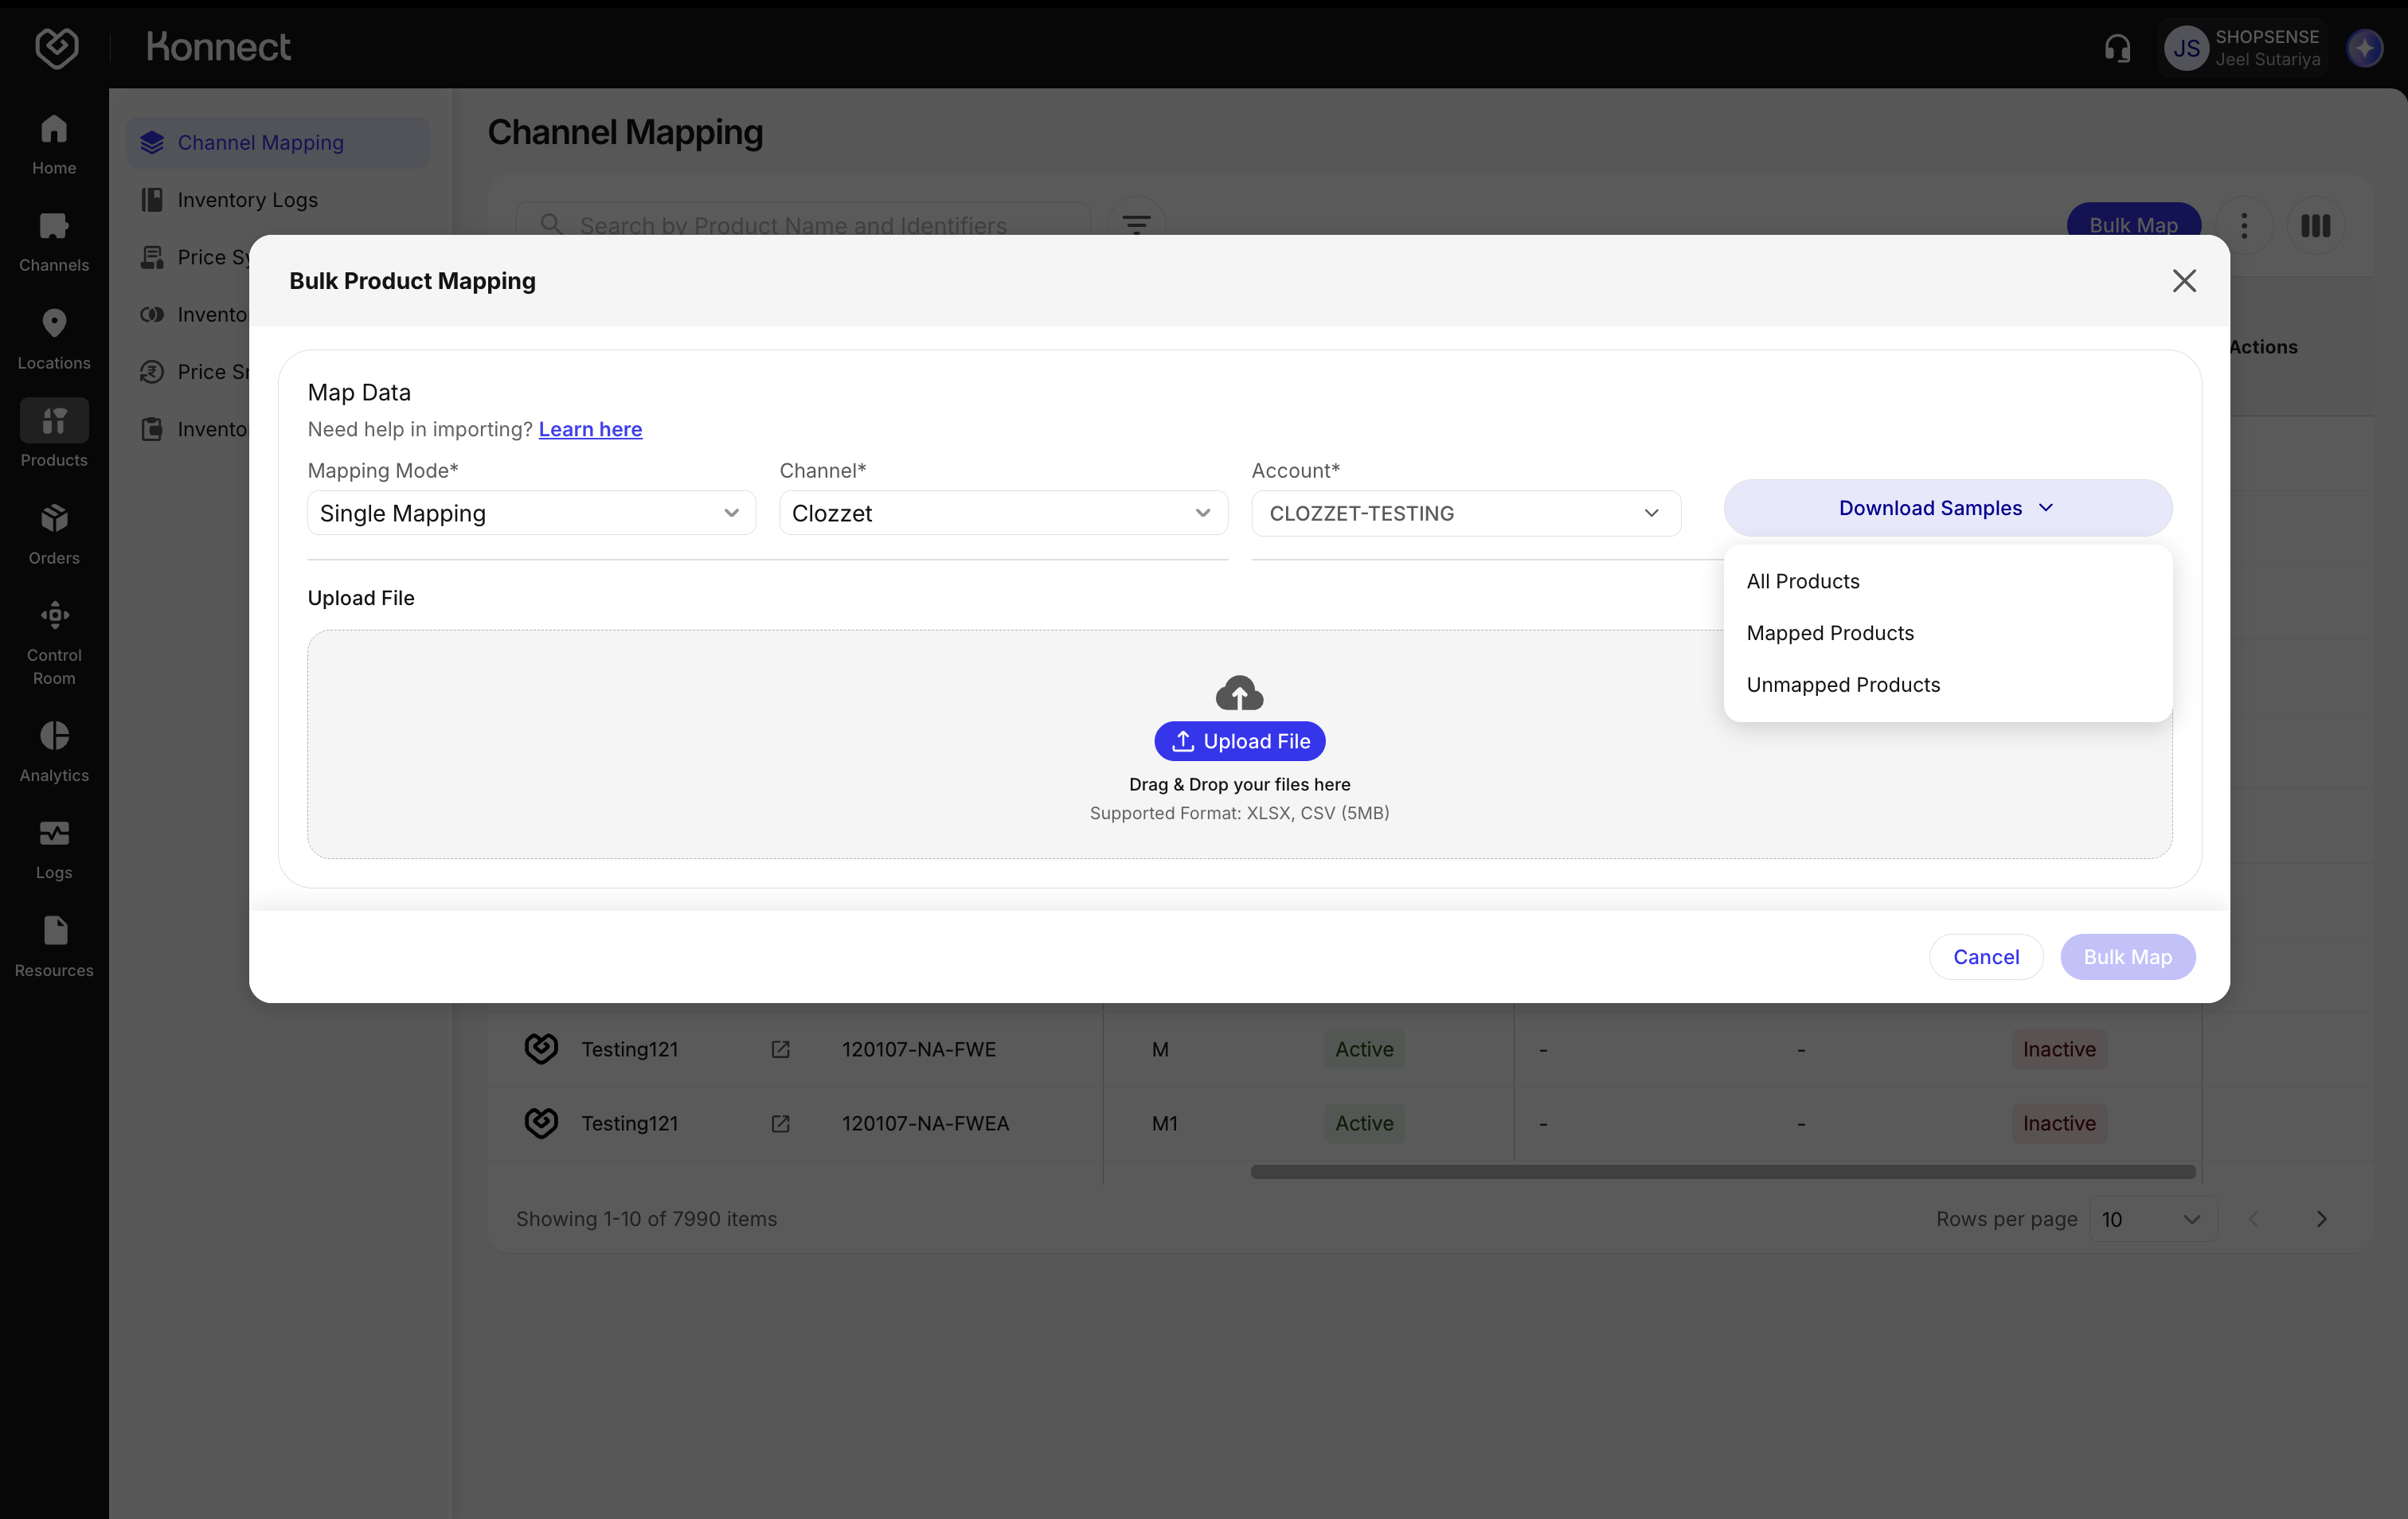
Figure 5: Prepare the Mapping File Upload the completed CSV or XLSX file back into the bulk mapping panel. Konnect validates the file, after which you can click Bulk Map.
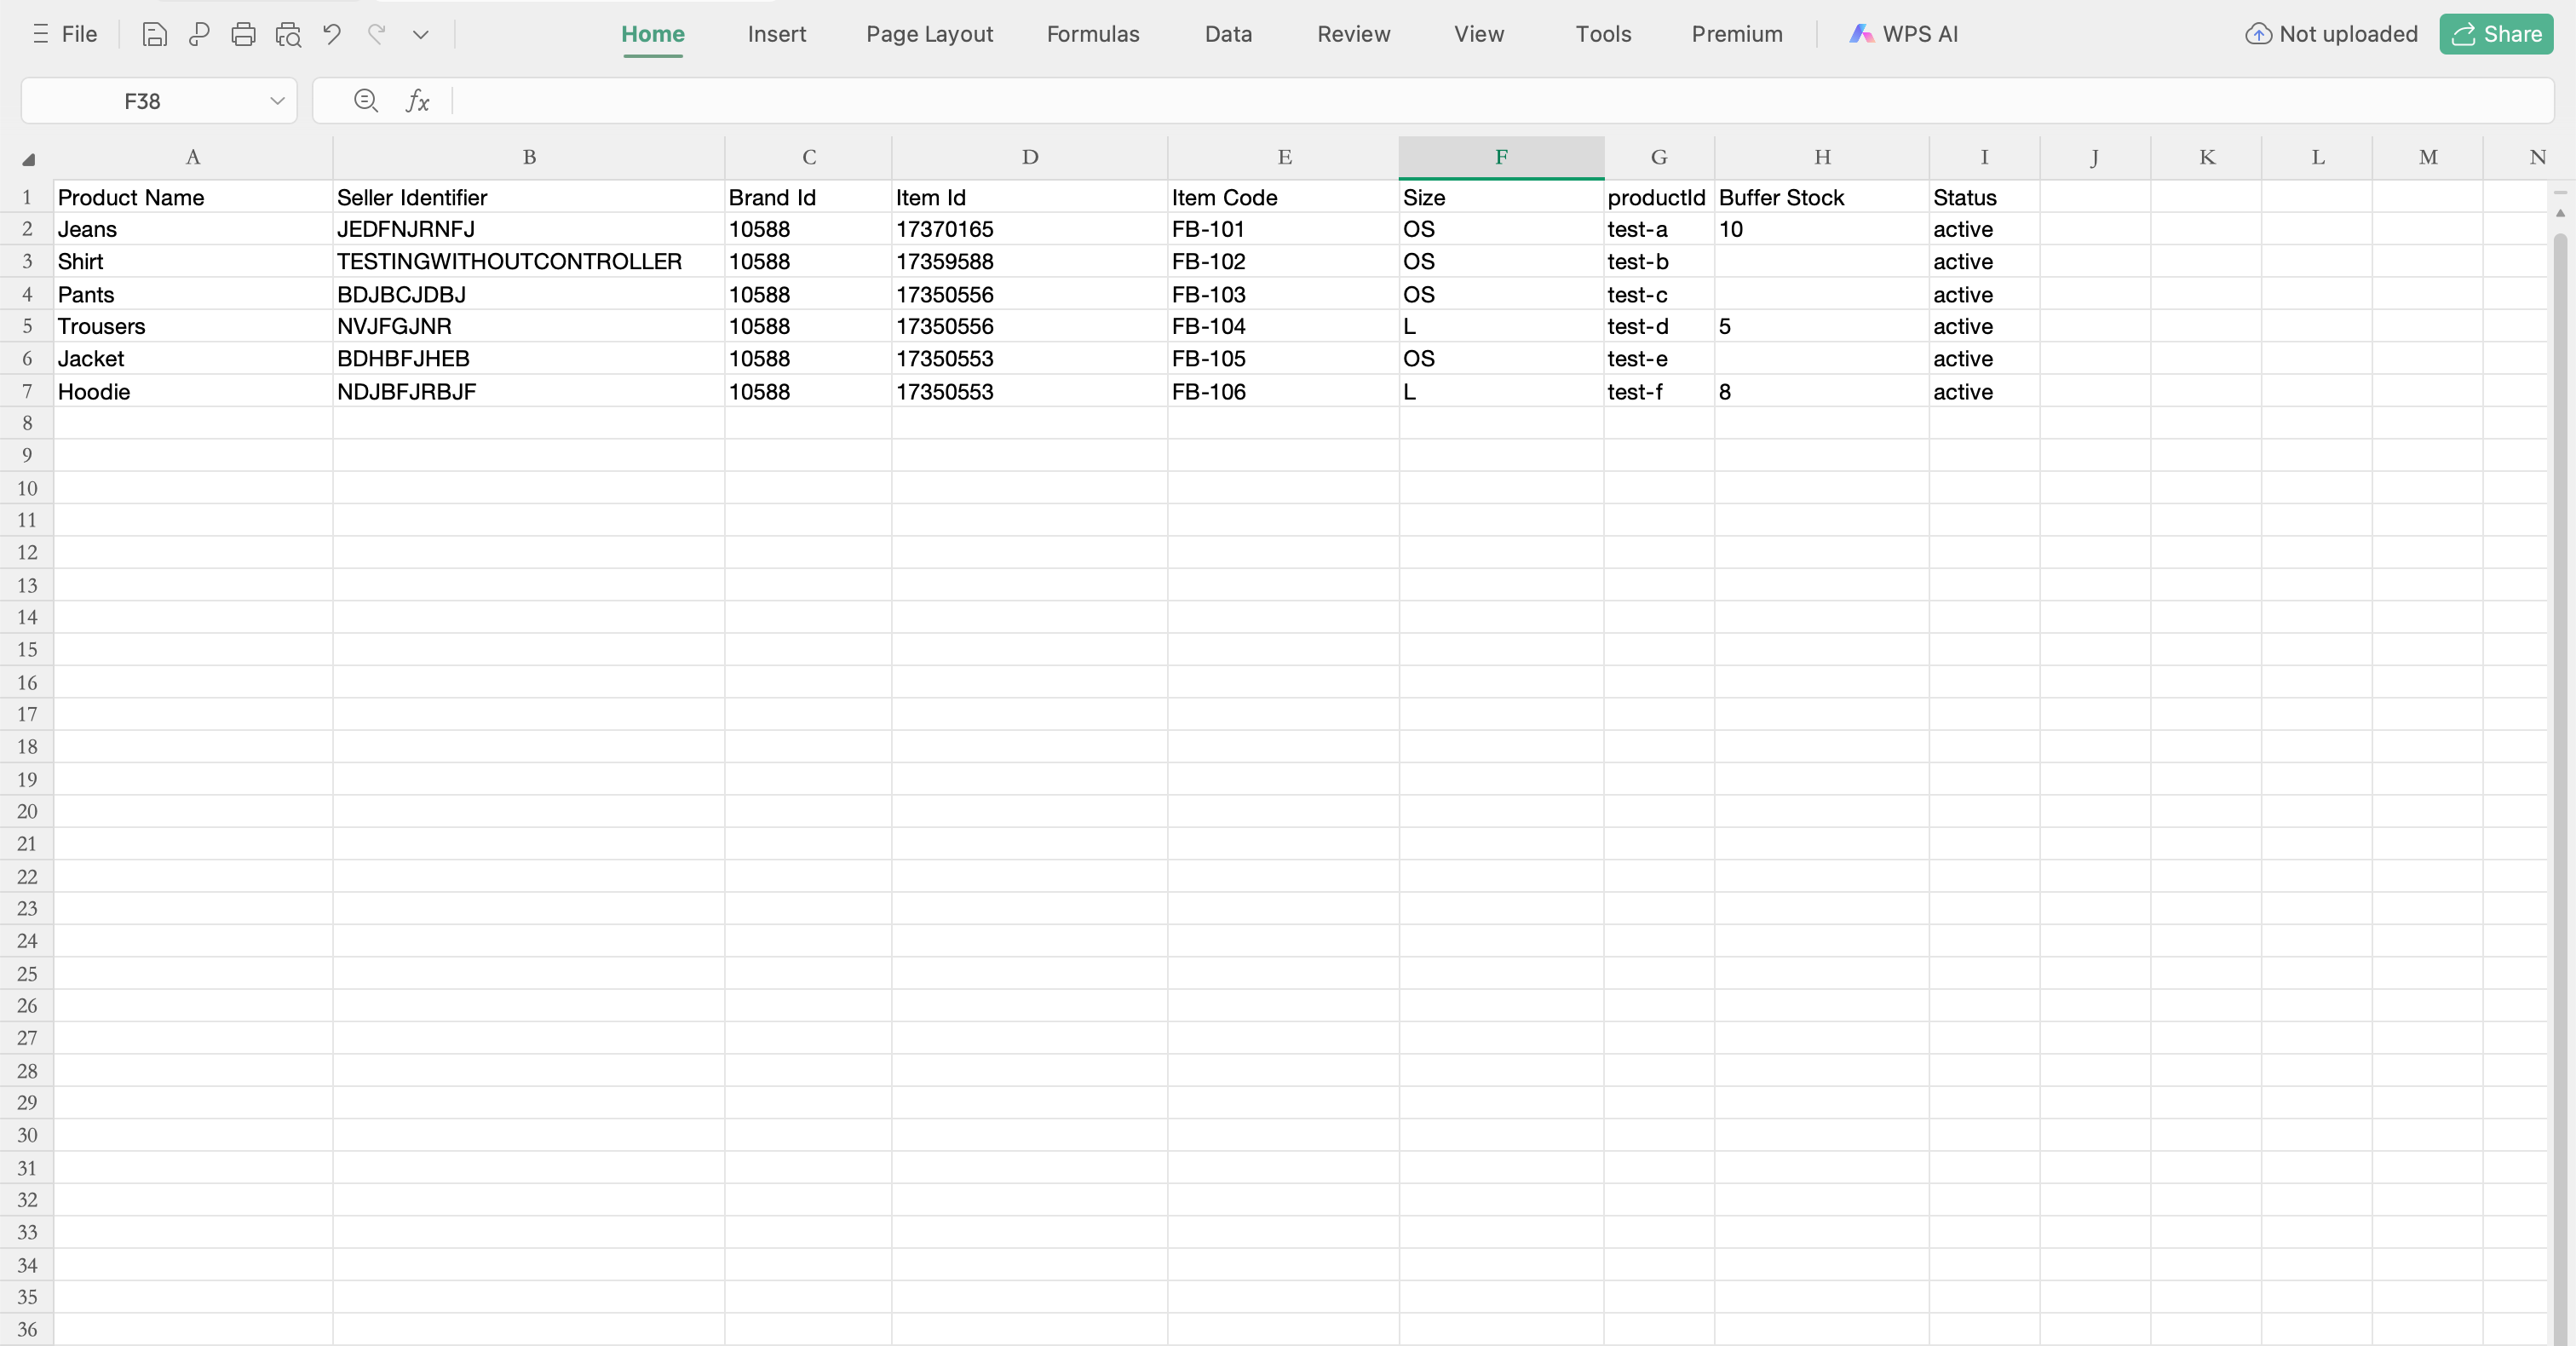
Figure 6: Upload and Run Bulk Map
Bulk mapping runs as a backend process, so you can track its status after submitting.
Click the three-dot menu next to Bulk Map and select Bulk Mapping History to see the status of each job.
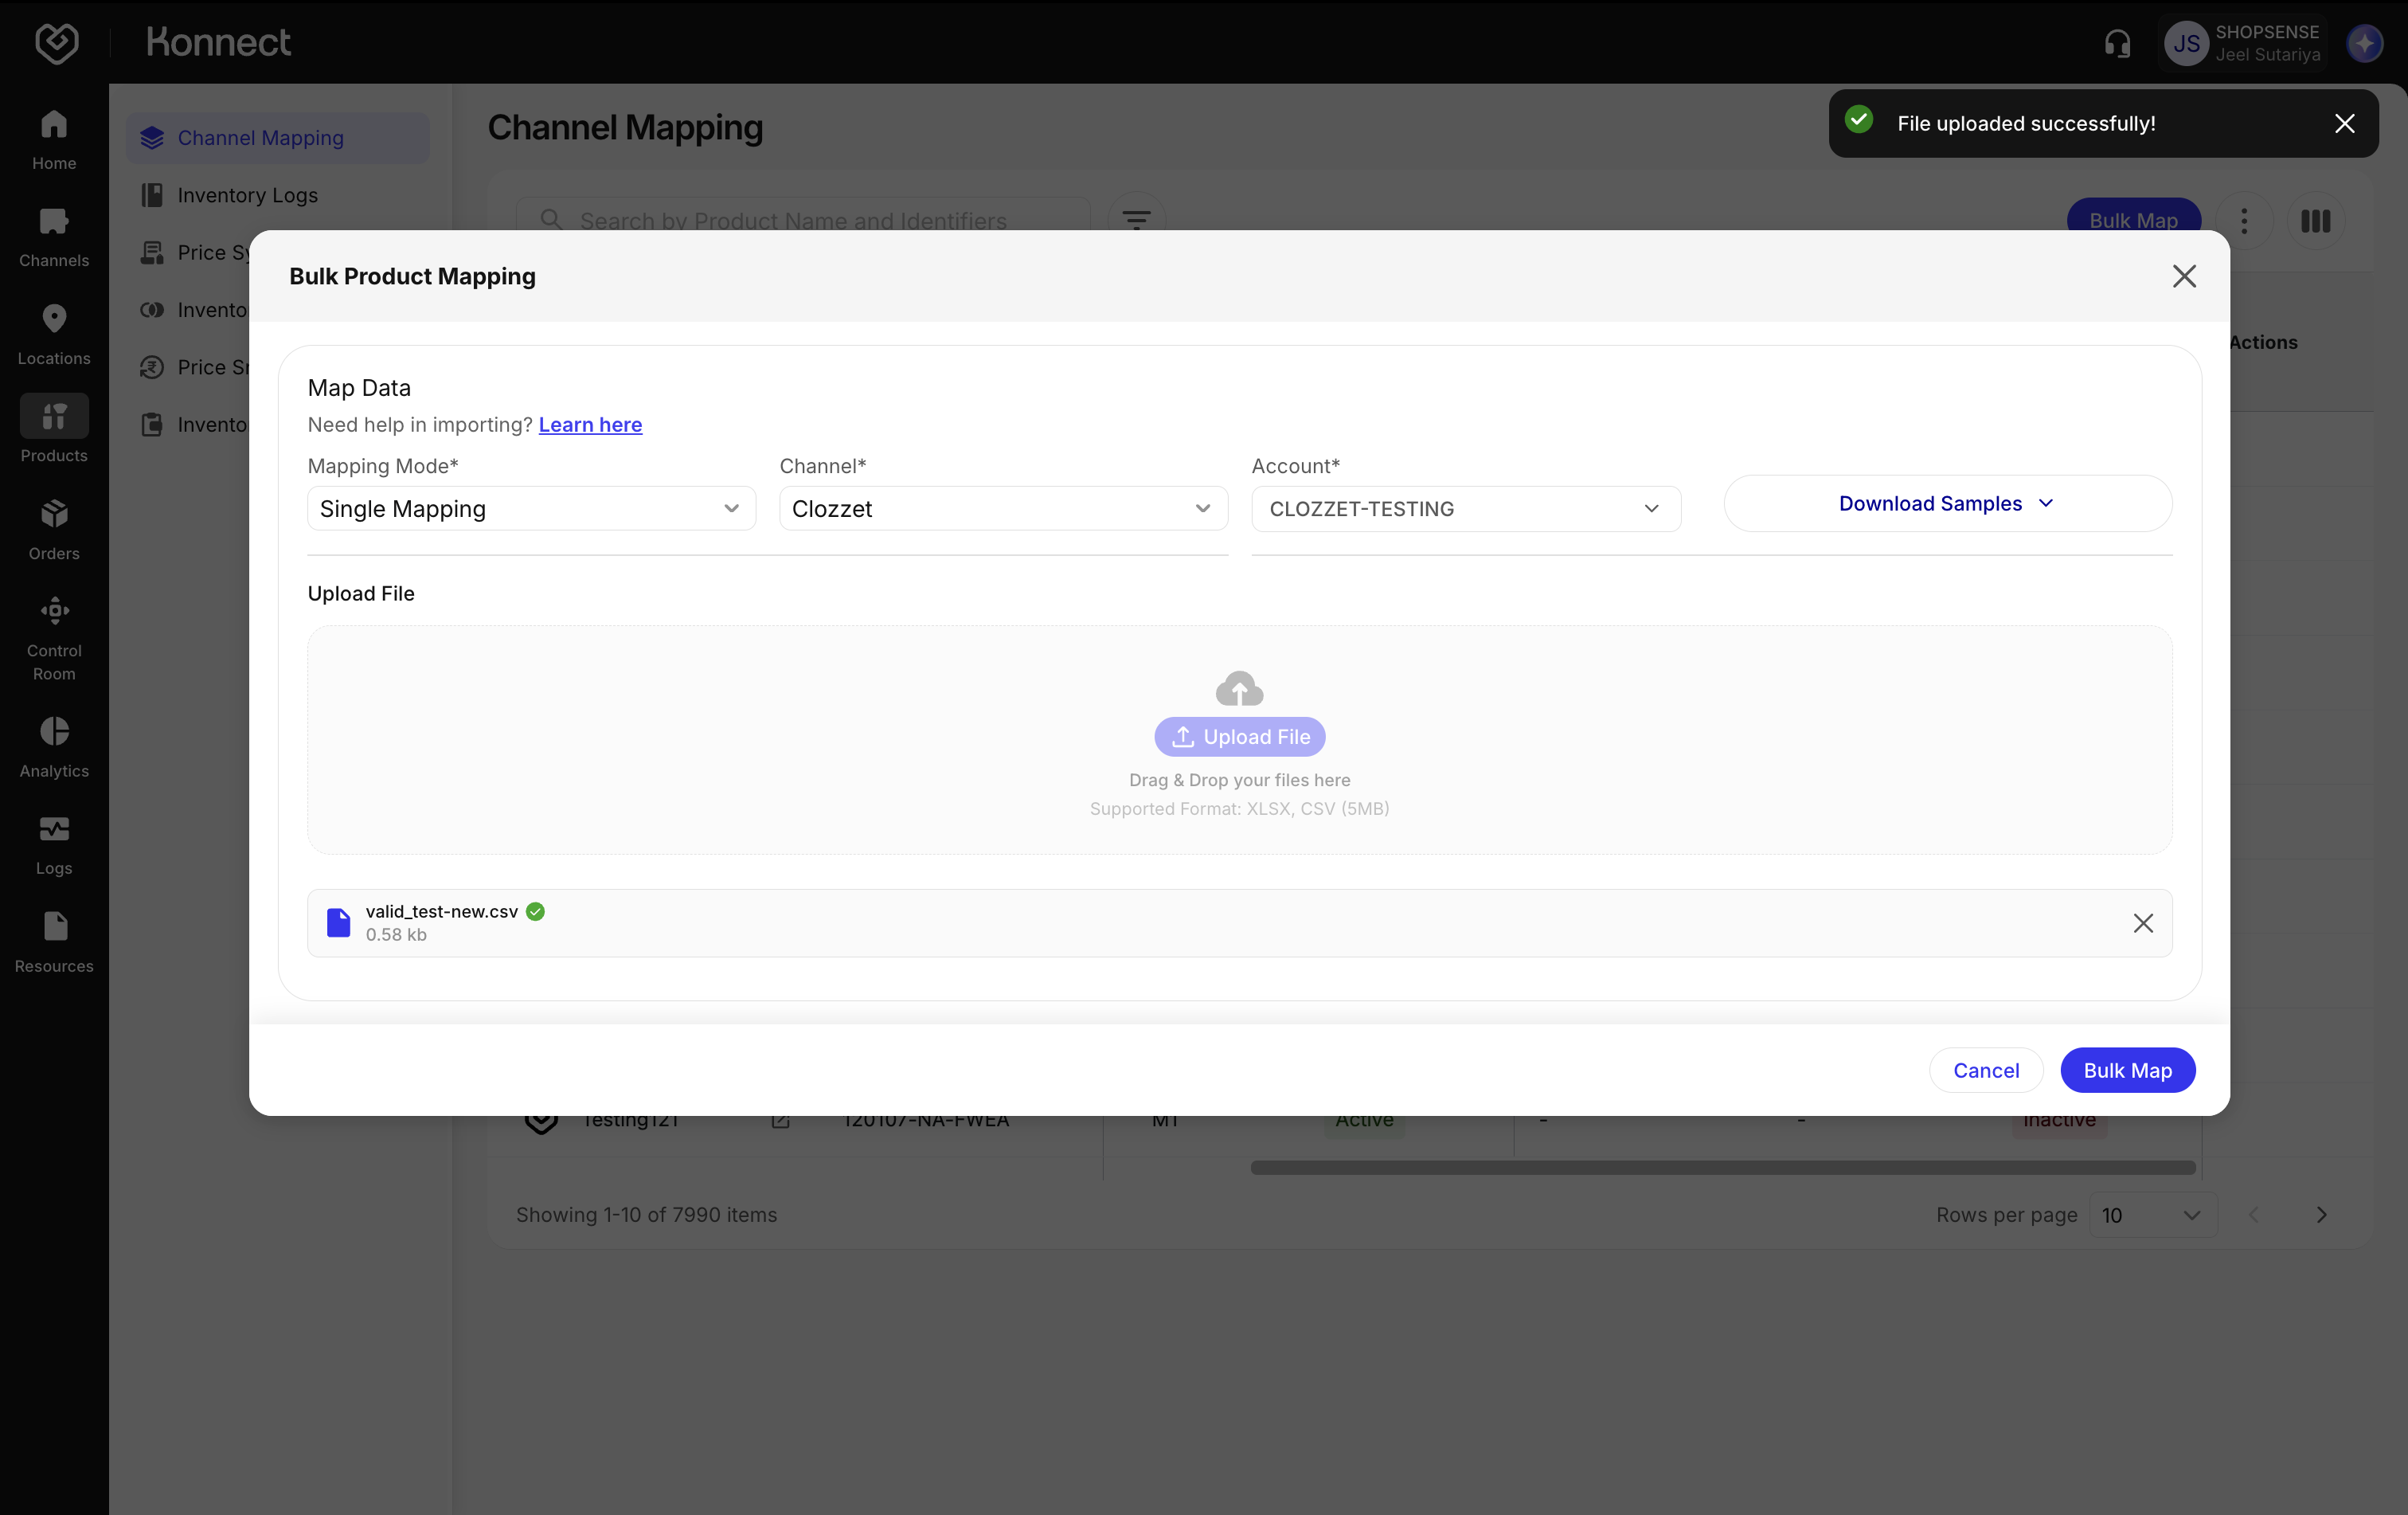
Figure 7: Open Bulk Mapping History For any job, download the Source File and Processed File to check errors for partial or failed uploads at the SKU level.
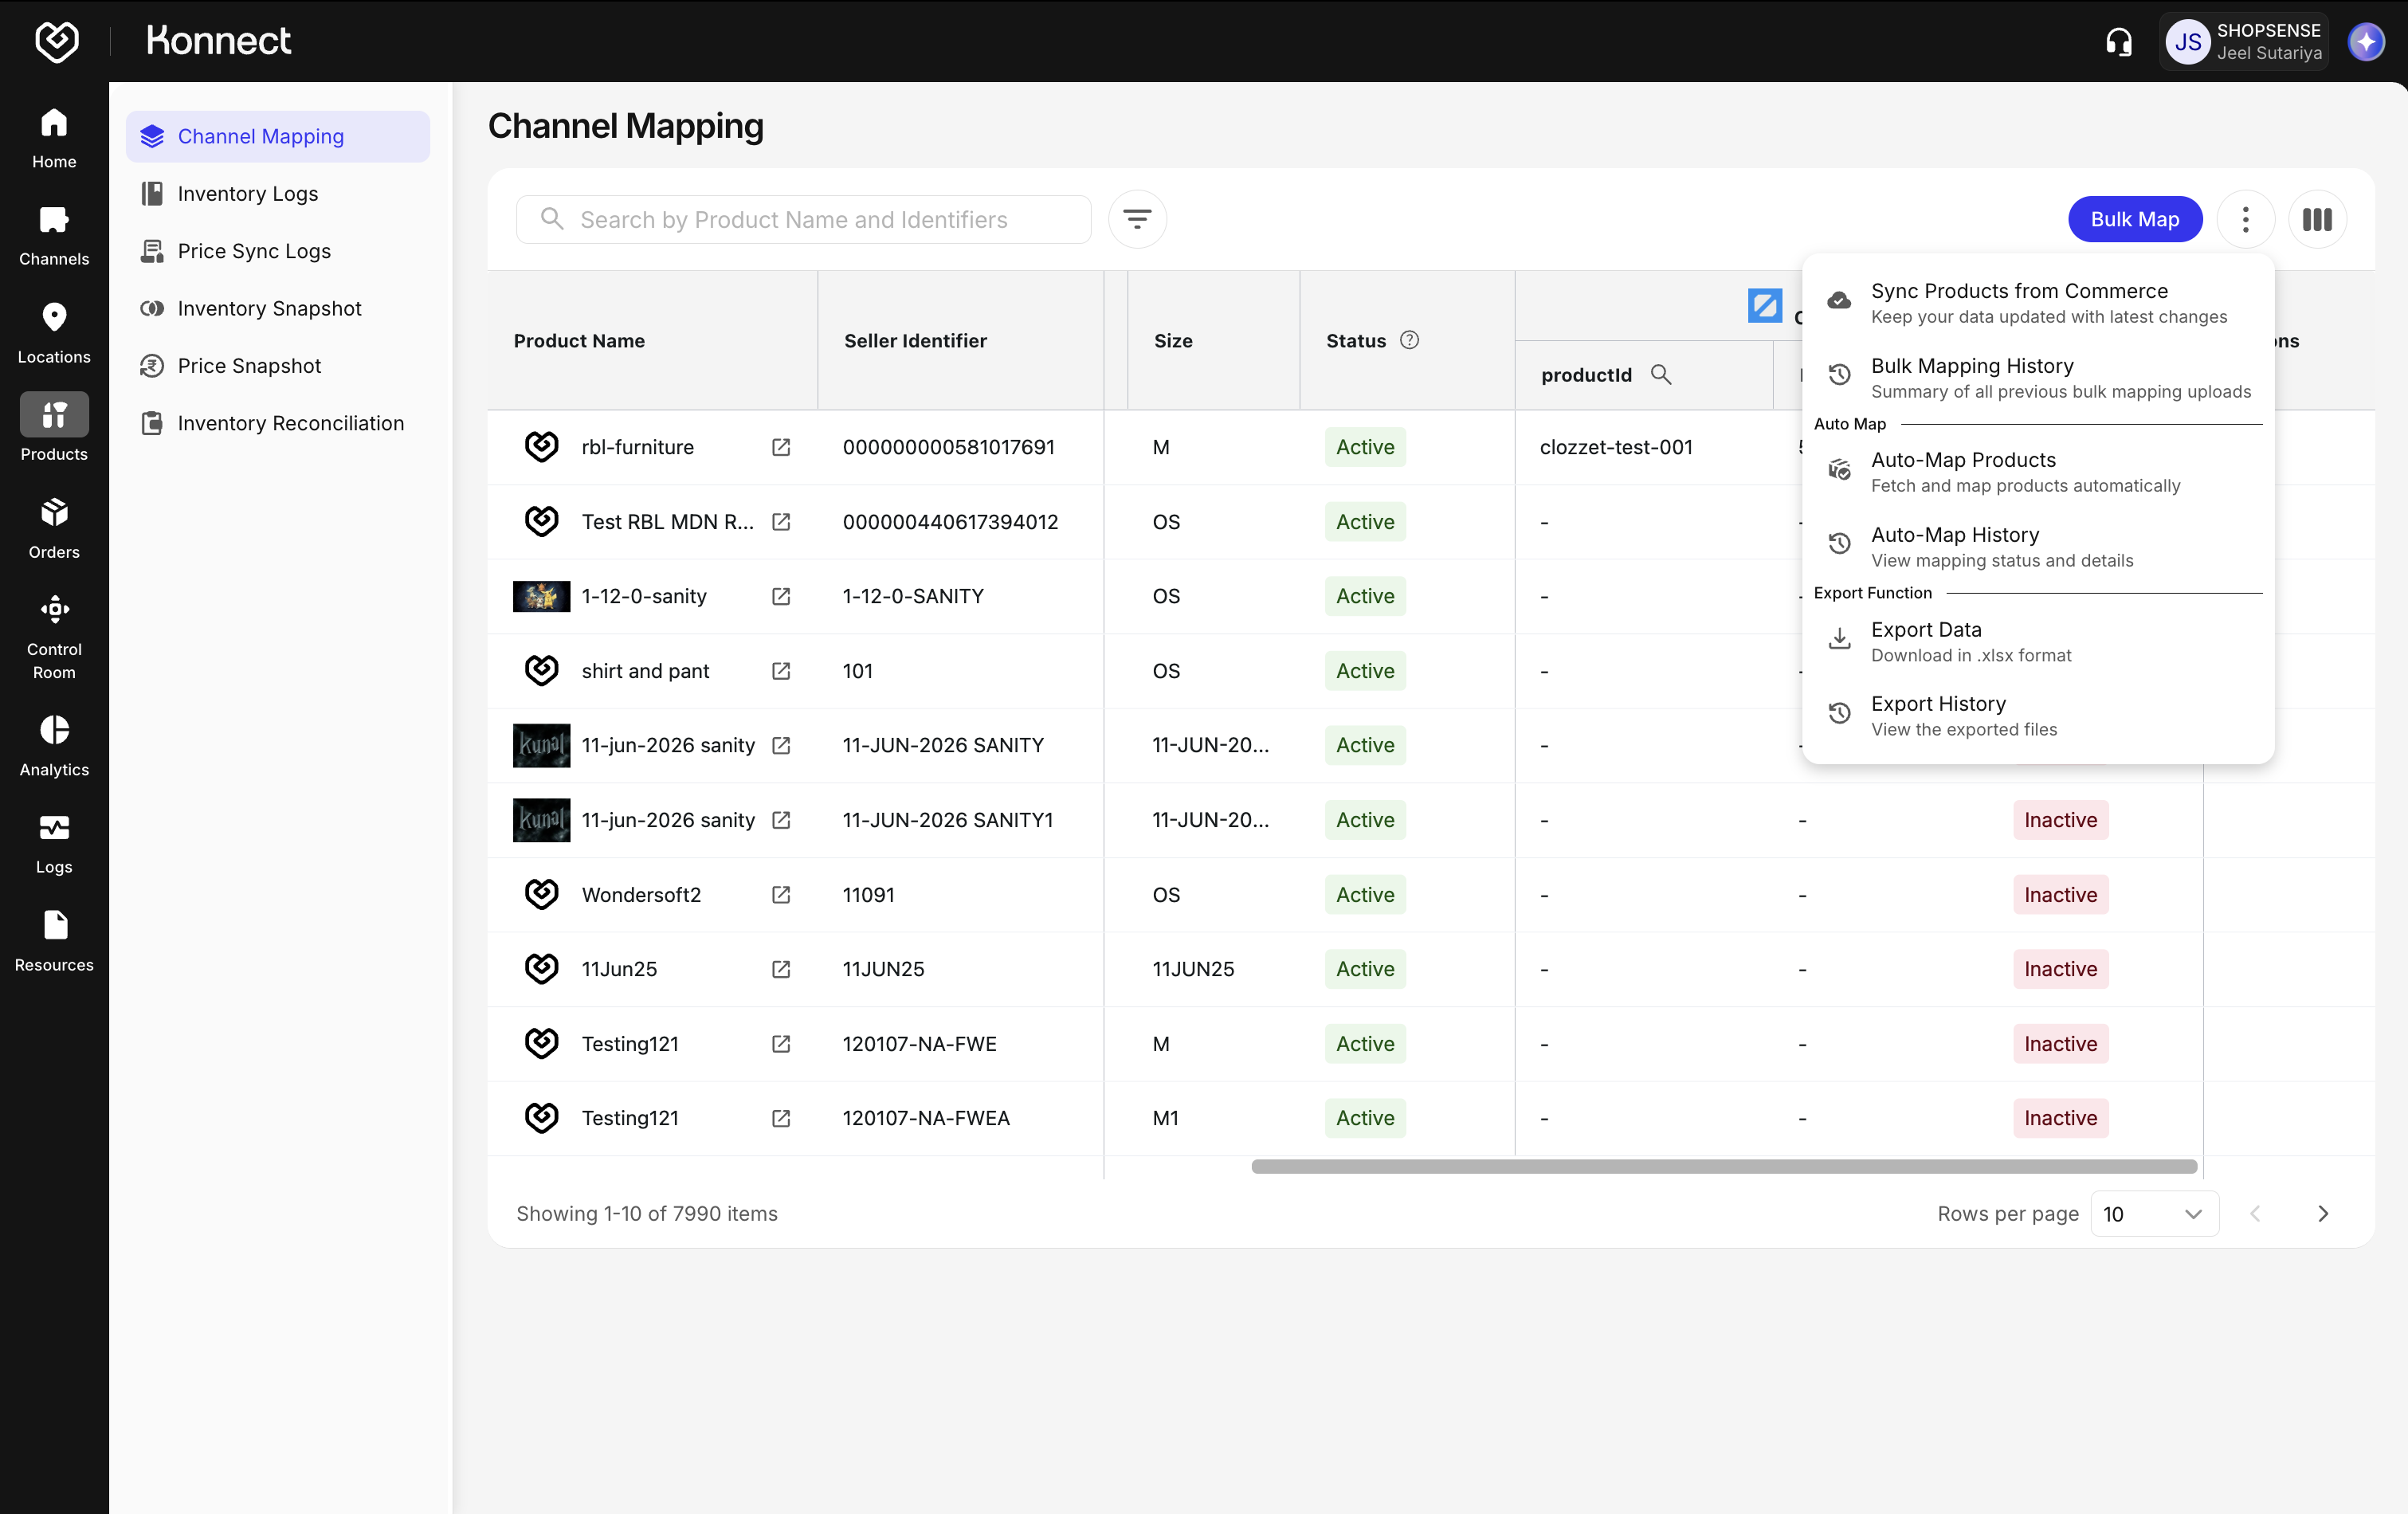
Figure 8: Bulk Mapping History
- Active Products
- Sync inventory to Clozzet
- Are eligible to receive orders
- Inactive Products
- Do not sync inventory
- Useful for seasonal SKUs or testing
Activation options:
- Toggle individual variants and click Save (✓)
- Set status in bulk via the mapping file
Statuscolumn
Next step: Confirm everything is working in Verification & Monitoring.