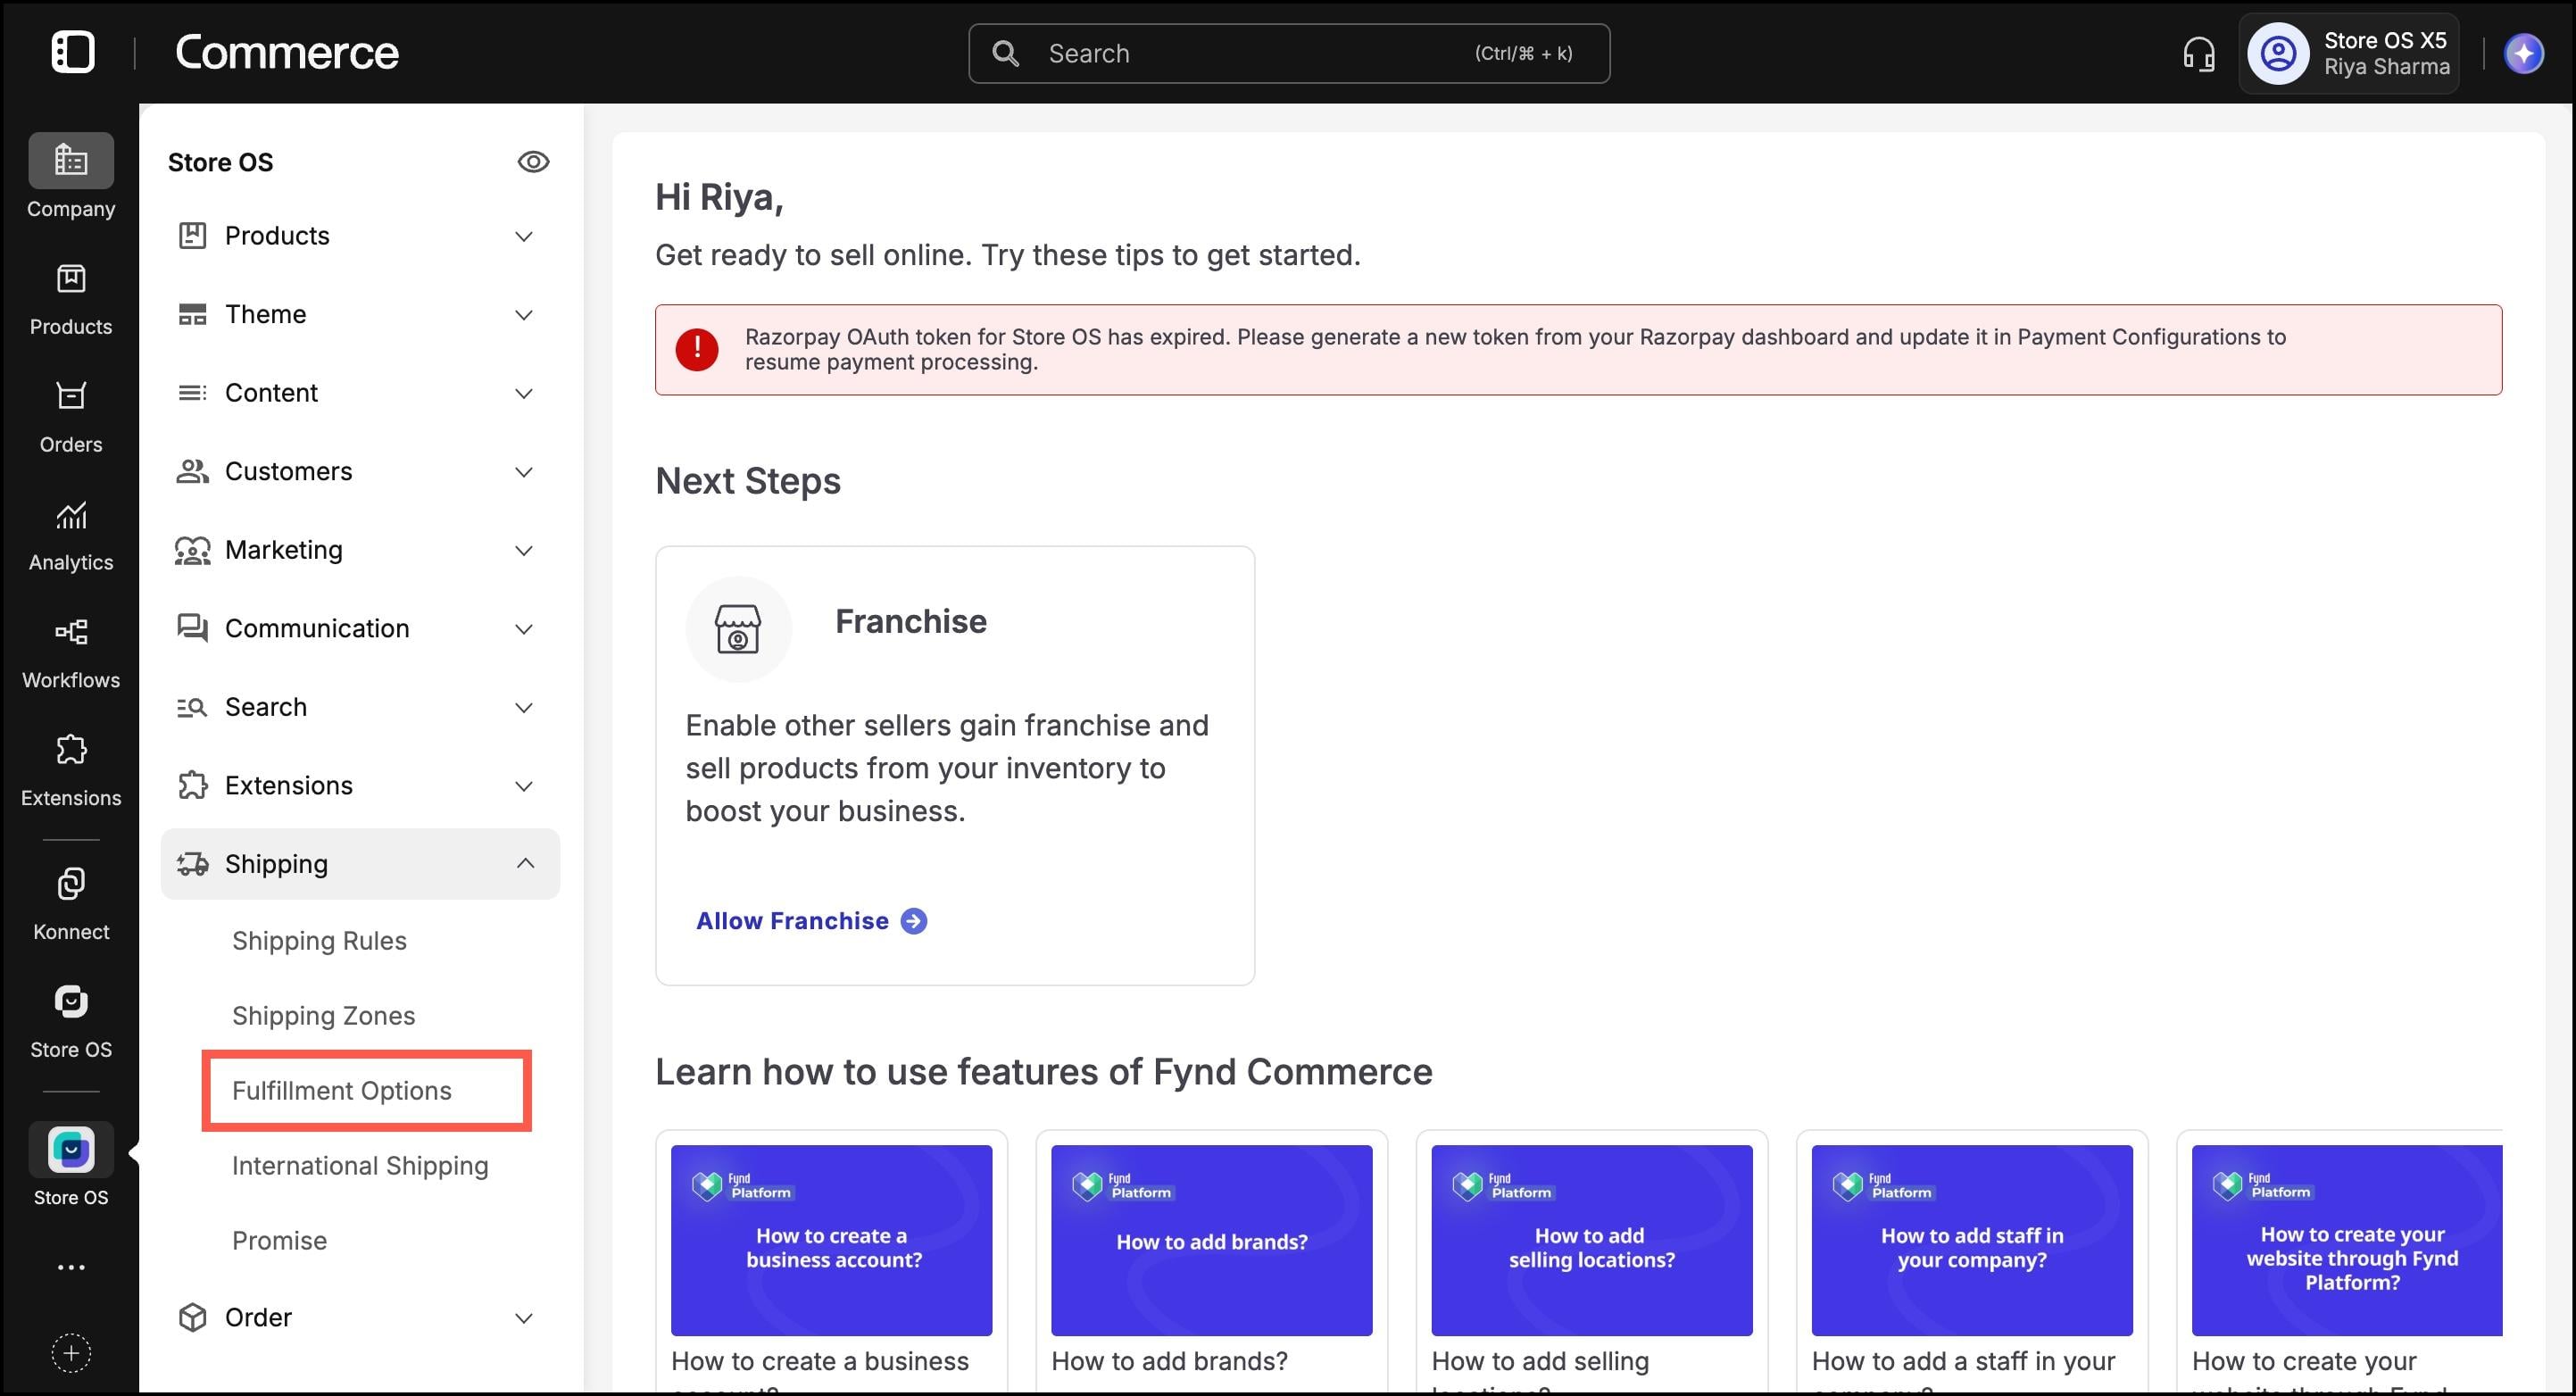
Commerce Panel > Sales Channel > Shipping > Fulfillment Options
To support delivery flows for your Endless Aisle operations, you must configure the appropriate fulfillment options within your sales channel on the Fynd Commerce platform. By default, a Standard Delivery option is enabled for all products, stores, and delivery partners.
- Standard Delivery (enabled by default): Supports shipping via delivery partners.
- Custom Delivery Options: Merchants can configure additional fulfilment types such as Same Day Delivery, Next Day Delivery, or any other custom delivery service based on operational capabilities.
Open Fulfillment Options.
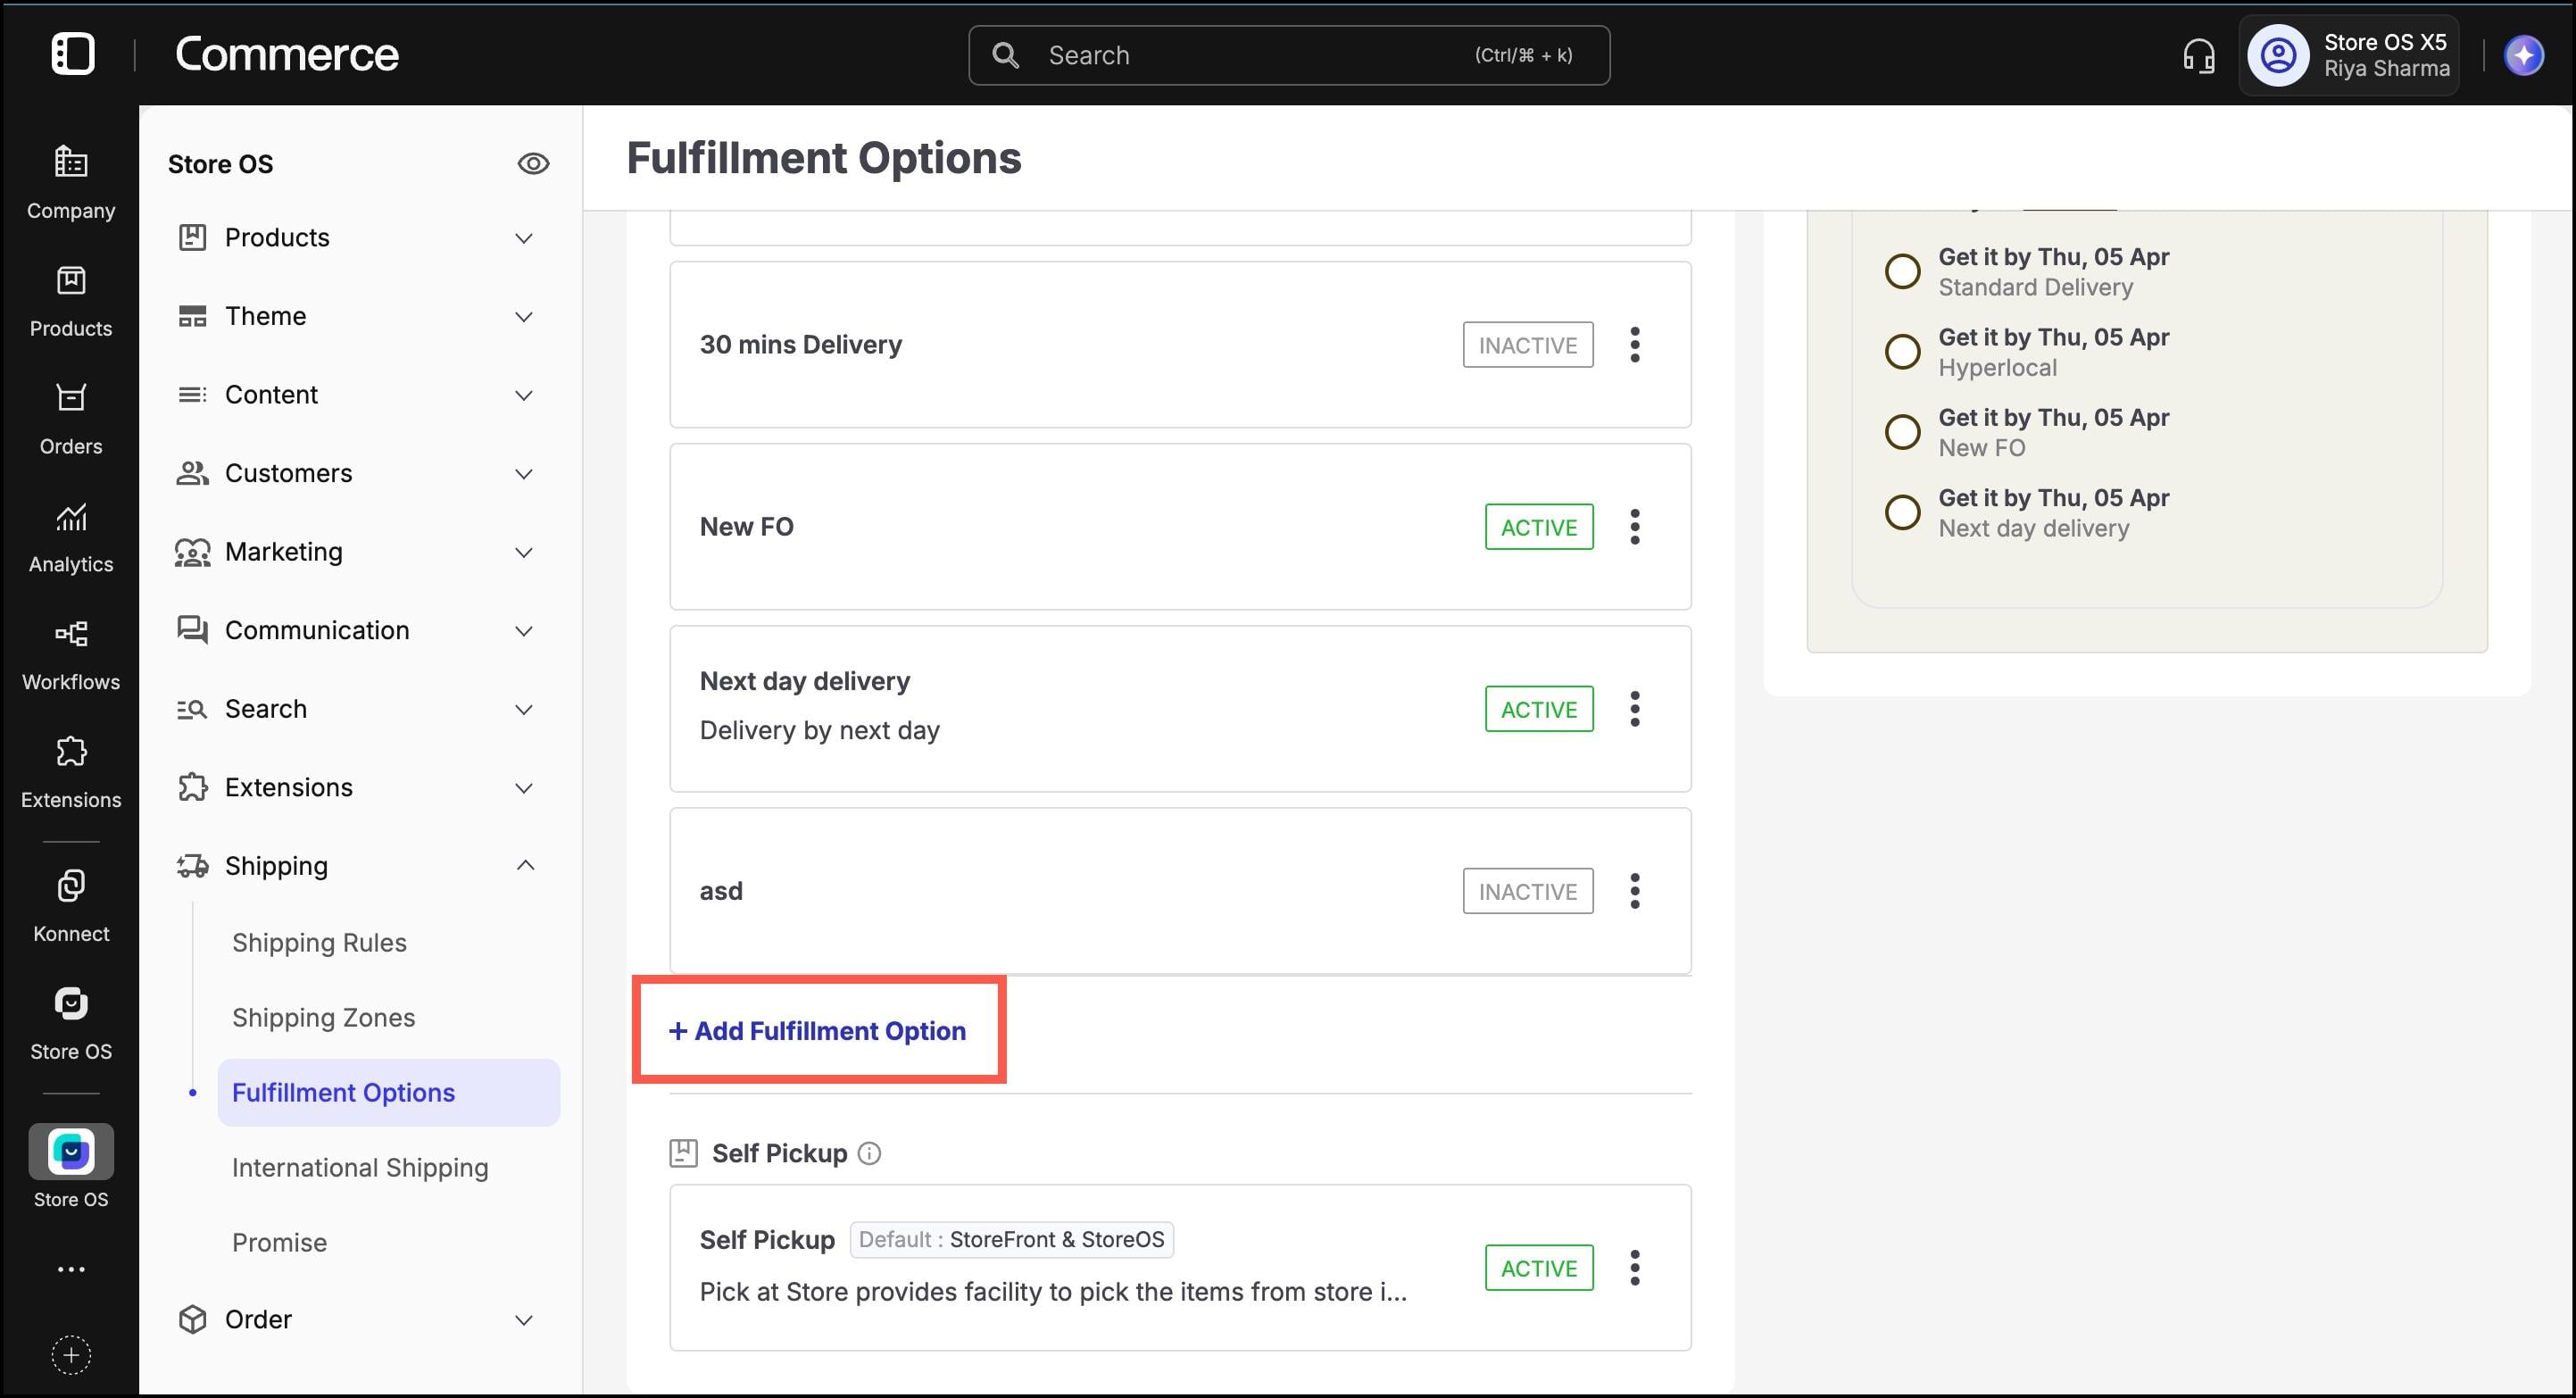
In the Delivery tab, click Add Fulfillment Option.
- Go to the Basic Details tab:
Enter a Fulfillment Option Name (e.g., Self Pickup at Store).
Enter a short Description (e.g., Pickup your order directly from our store).
Slug will auto-generate based on the name.
For Business Units, keep Store OS selected (this makes it visible for in-store Endless Aisle operations).

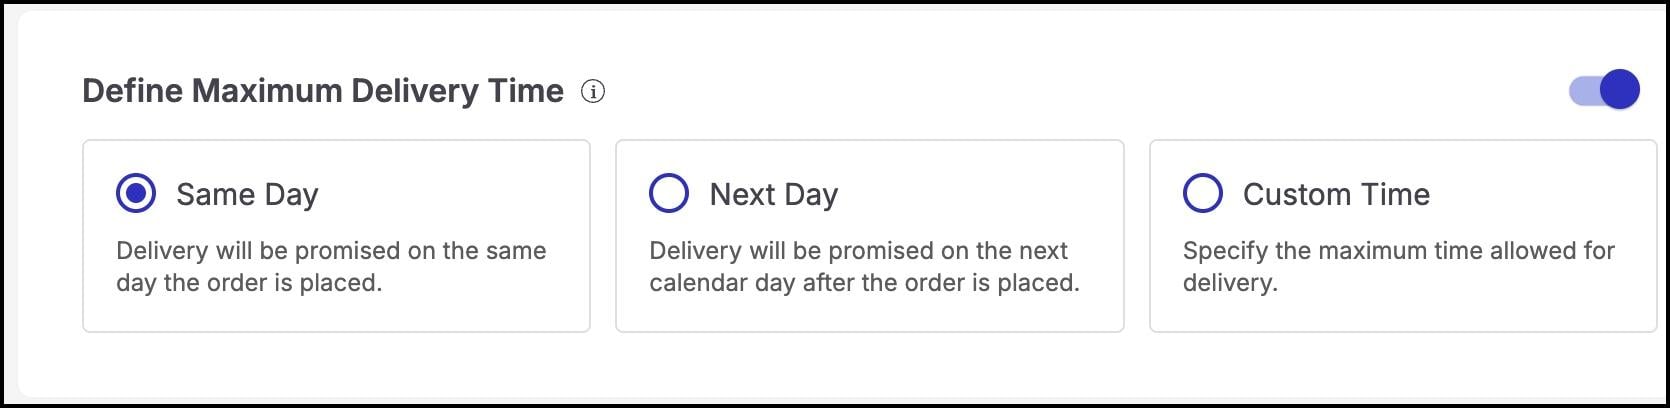
- In the Define Maximum Delivery Time section:
Toggle the switch to enable. The fulfillment option will be shown to customers for a product only if its delivery promise falls within the maximum limit defined here. This helps ensure the delivery timeline matches the name of the fulfillment option.
Choose a delivery promise:
- Same Day – Deliver the shipment on the same day the order is placed.
- Next Day – Deliver the shipment the day after the order is placed.
- Custom Time – Set a custom delivery timeline, such as 30 minutes or 3 days.
In the Fulfilling Locations section:
Click Add, then select either Add manually or use Bulk Upload (see separate steps below).
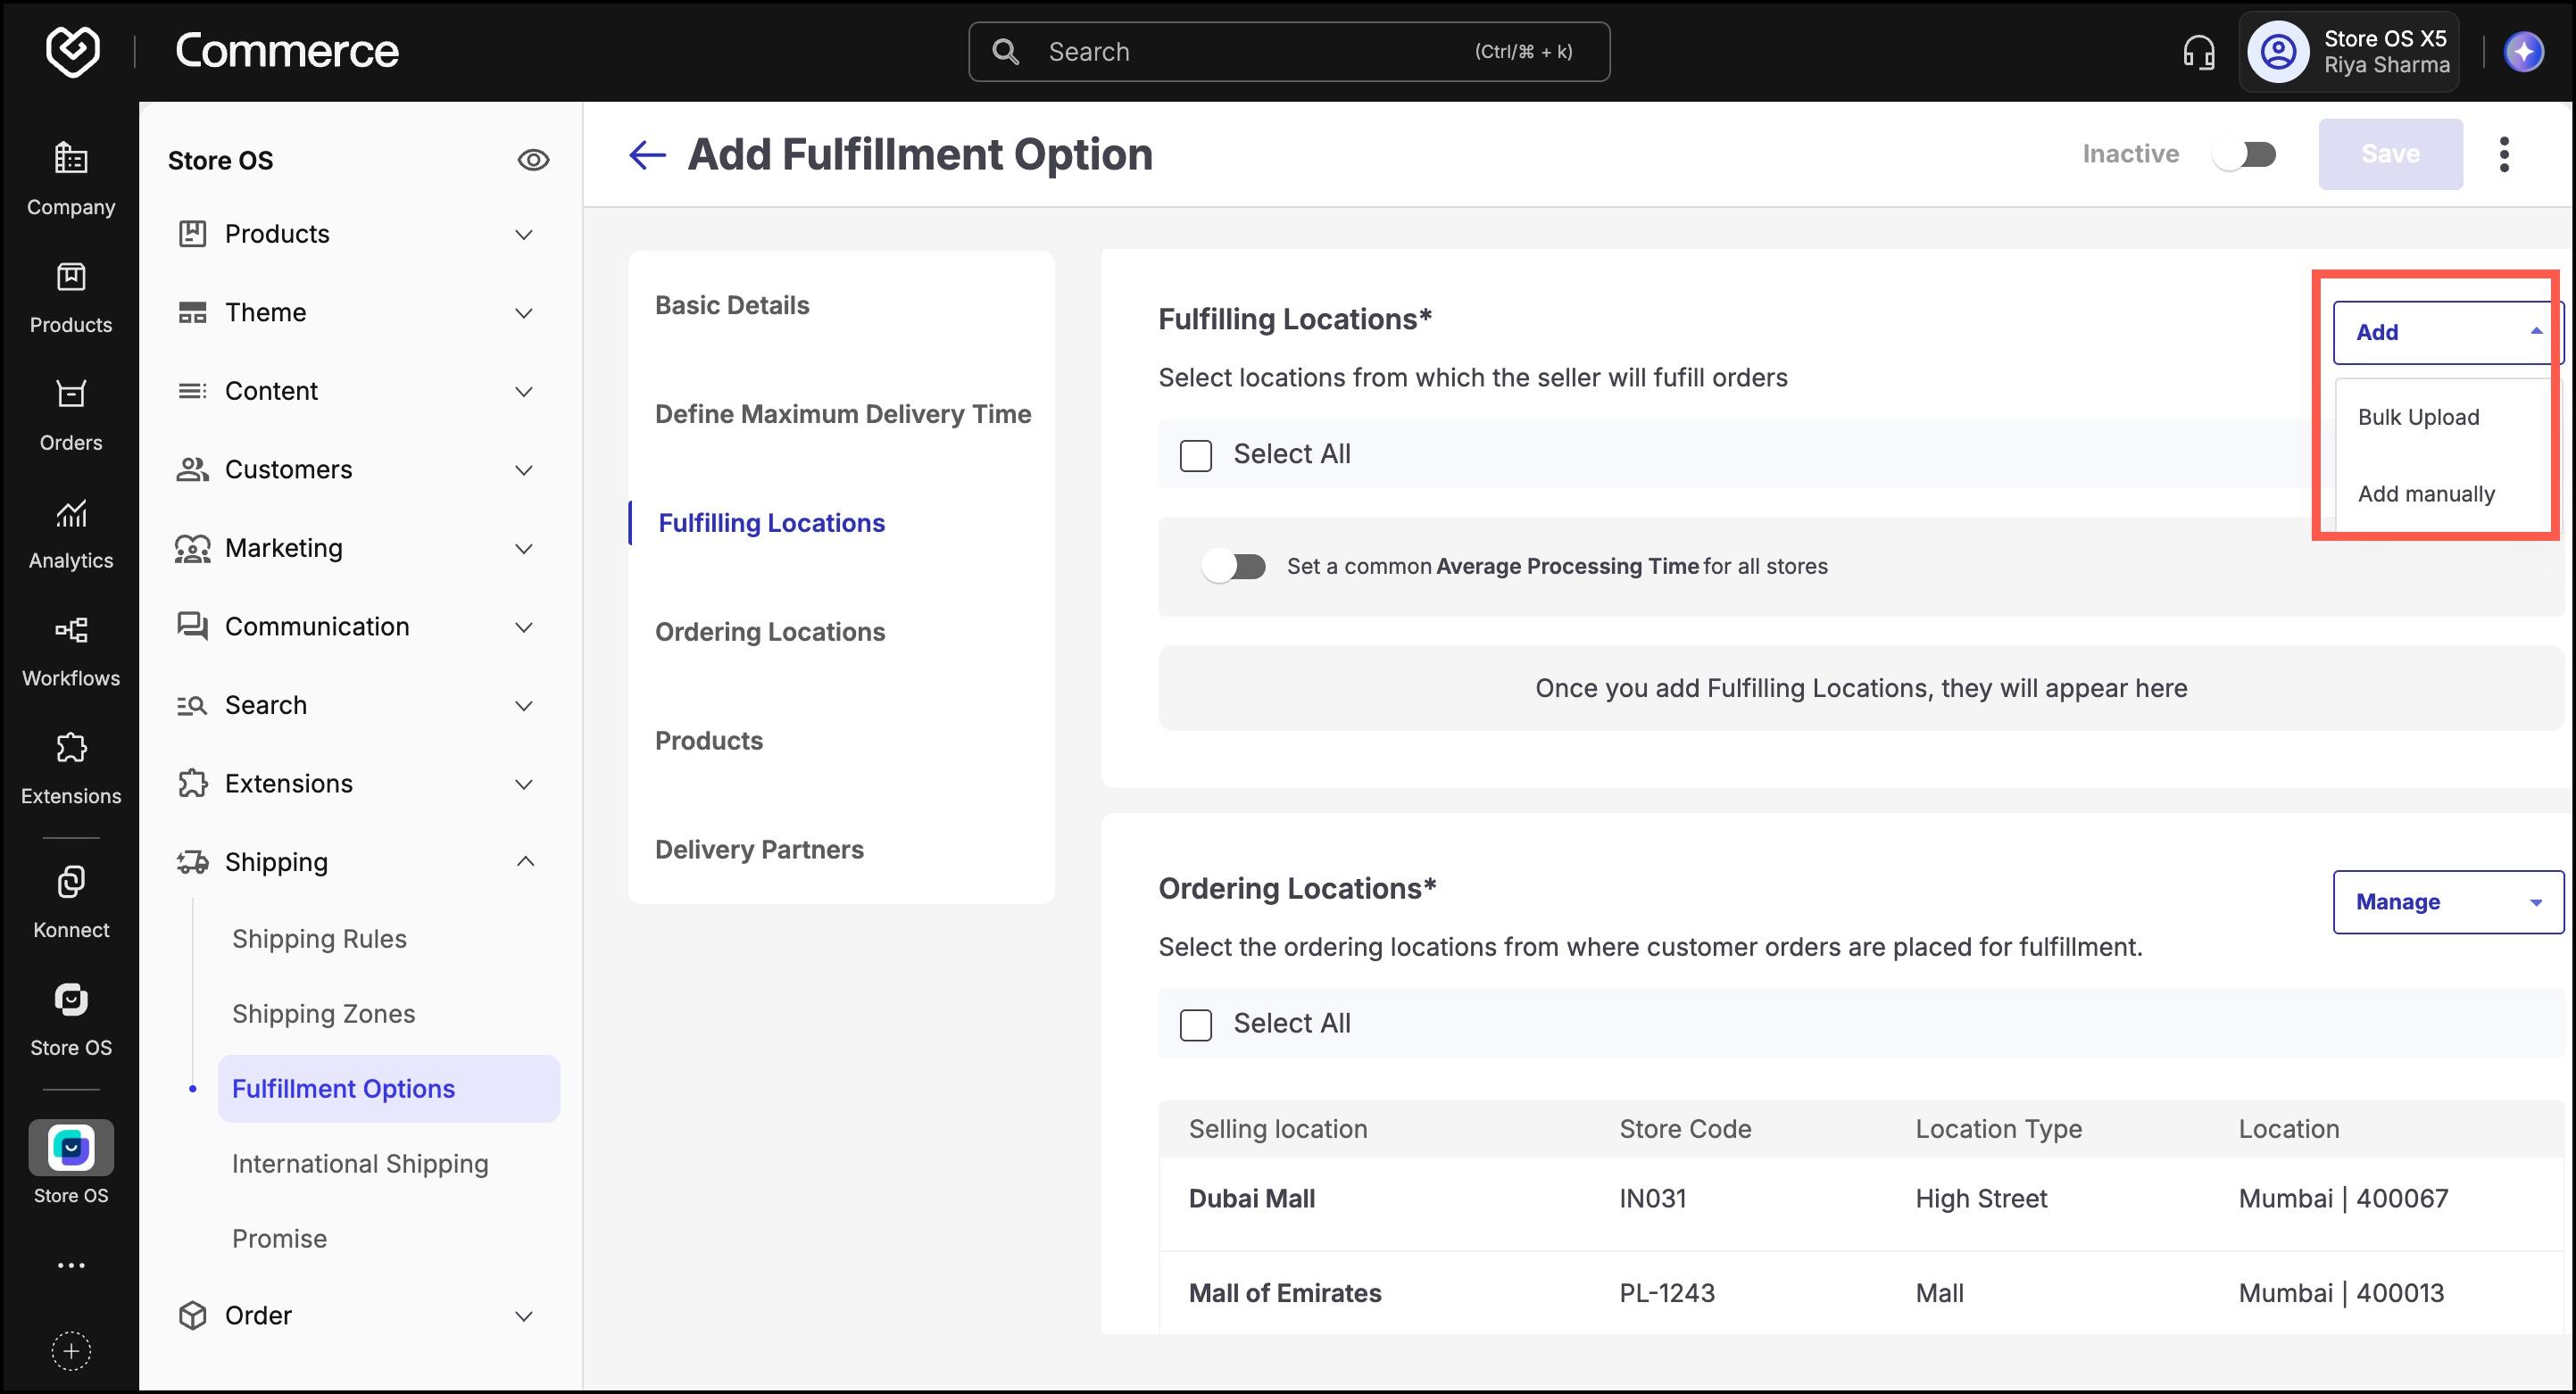
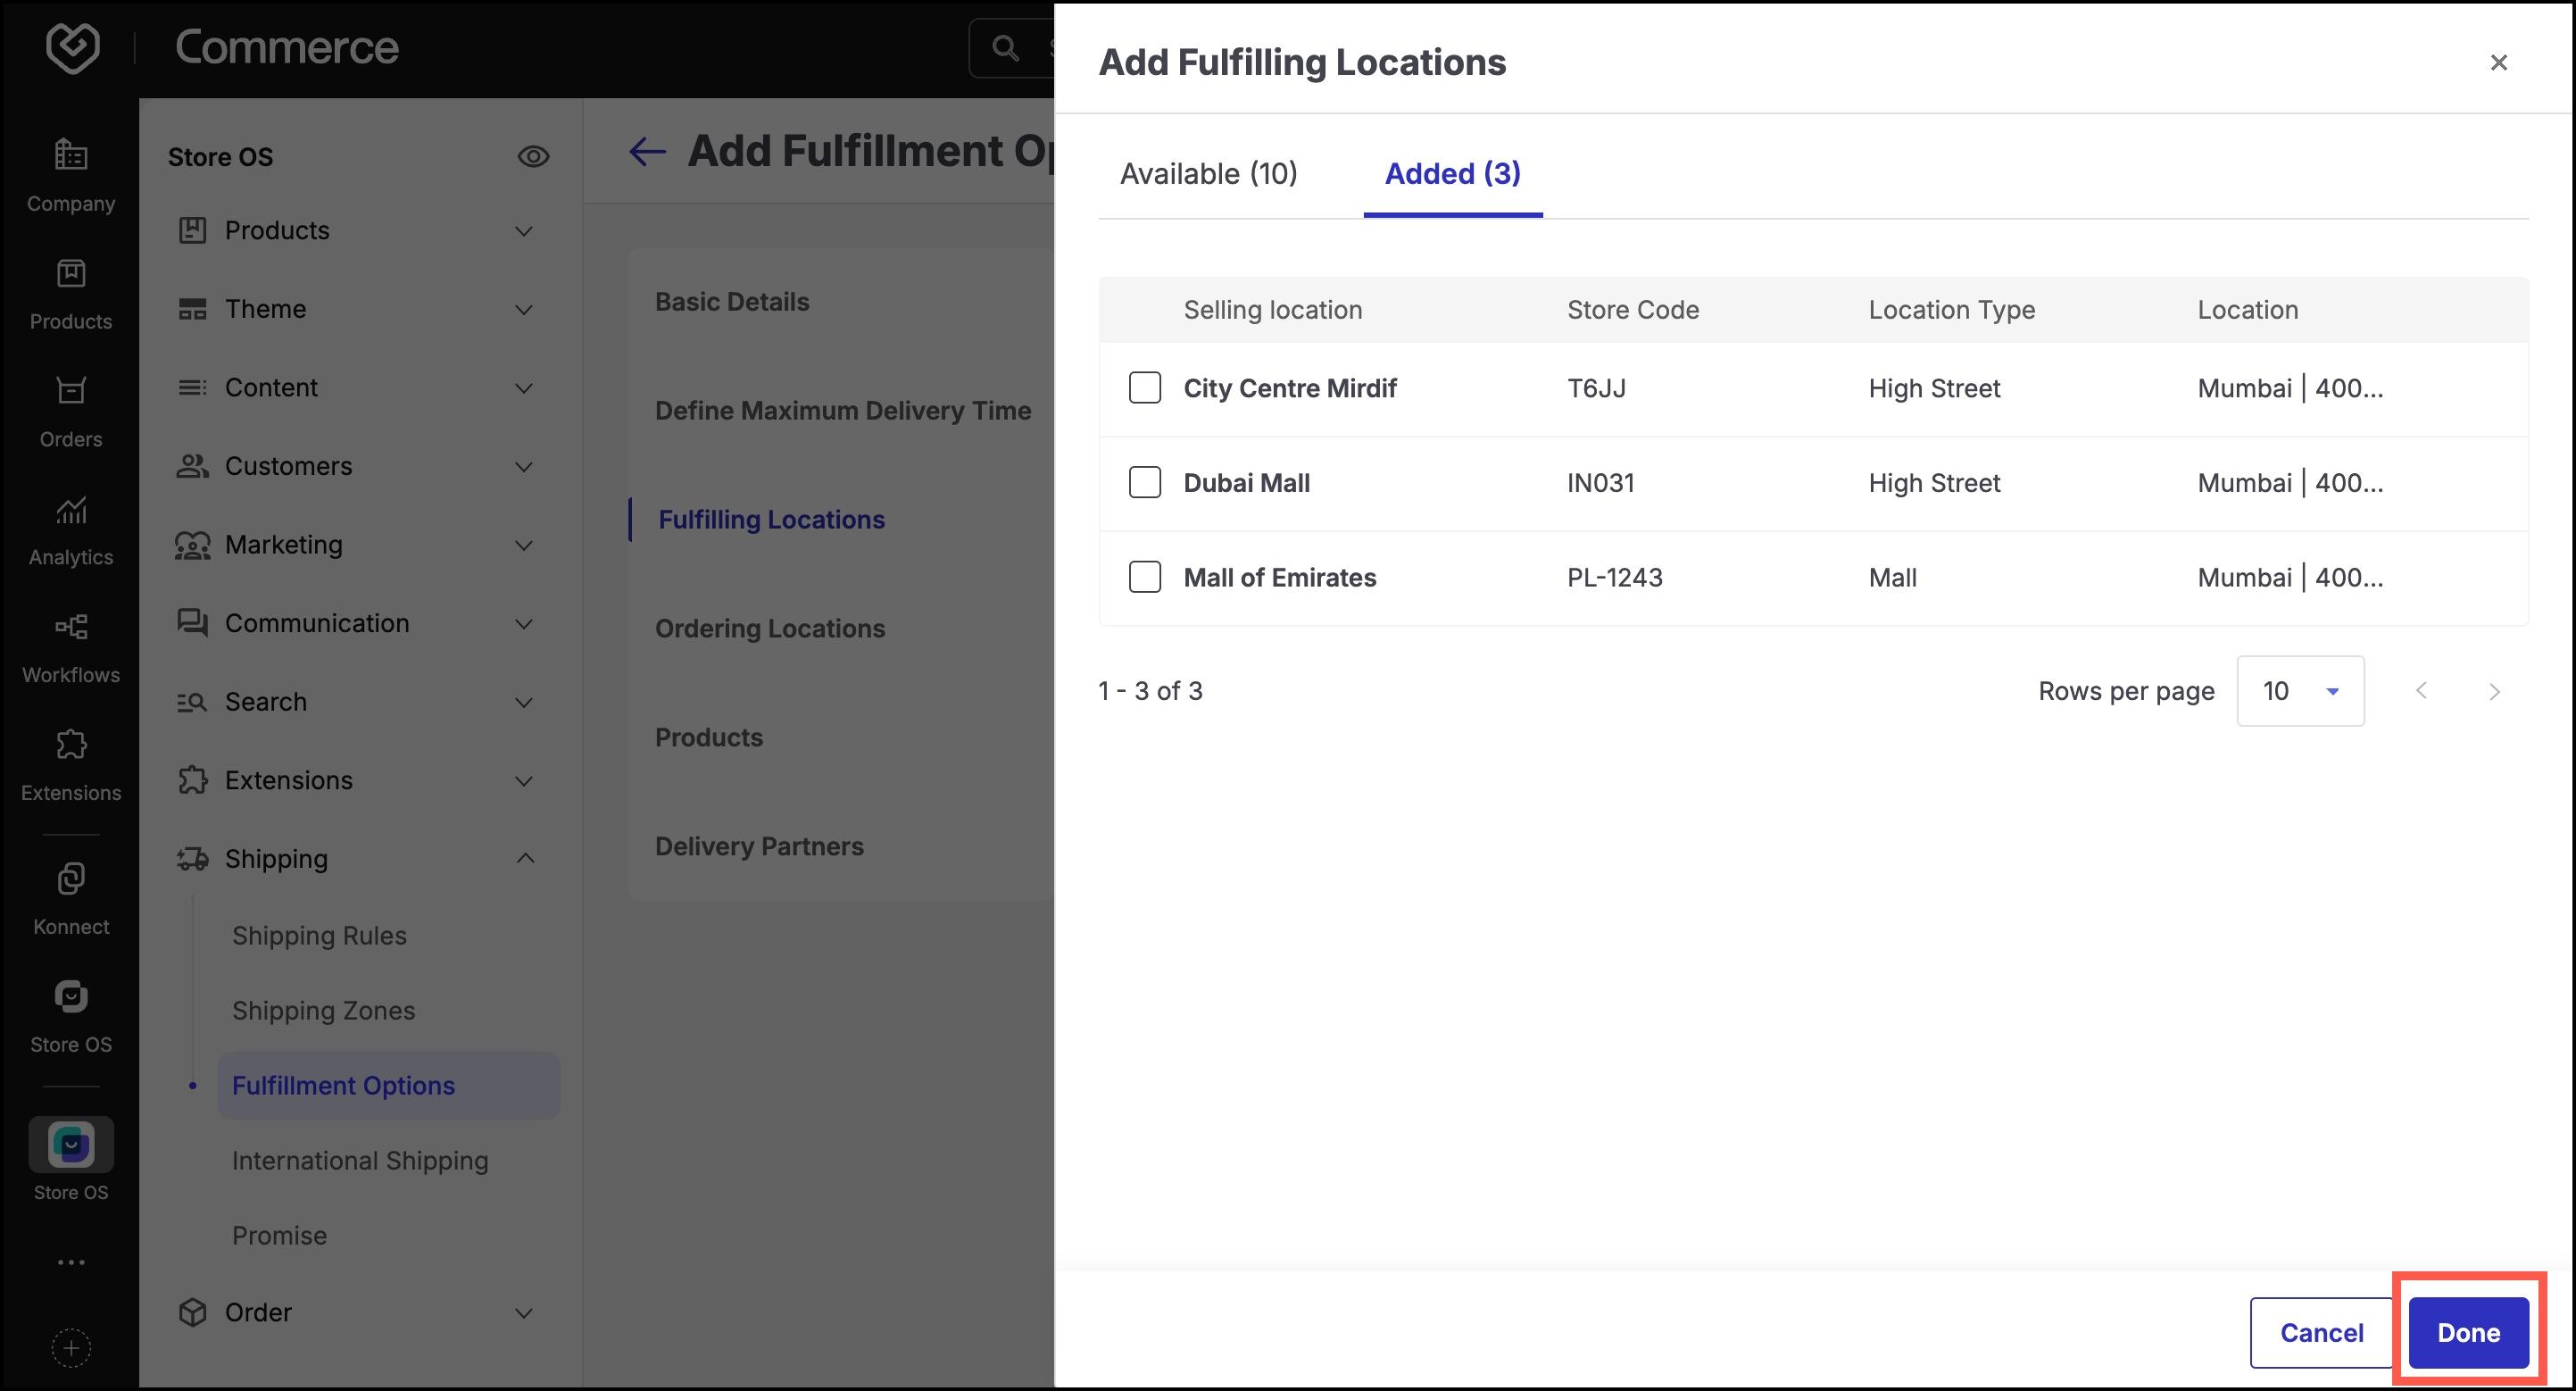
Manually select the locations that will fulfil the orders.
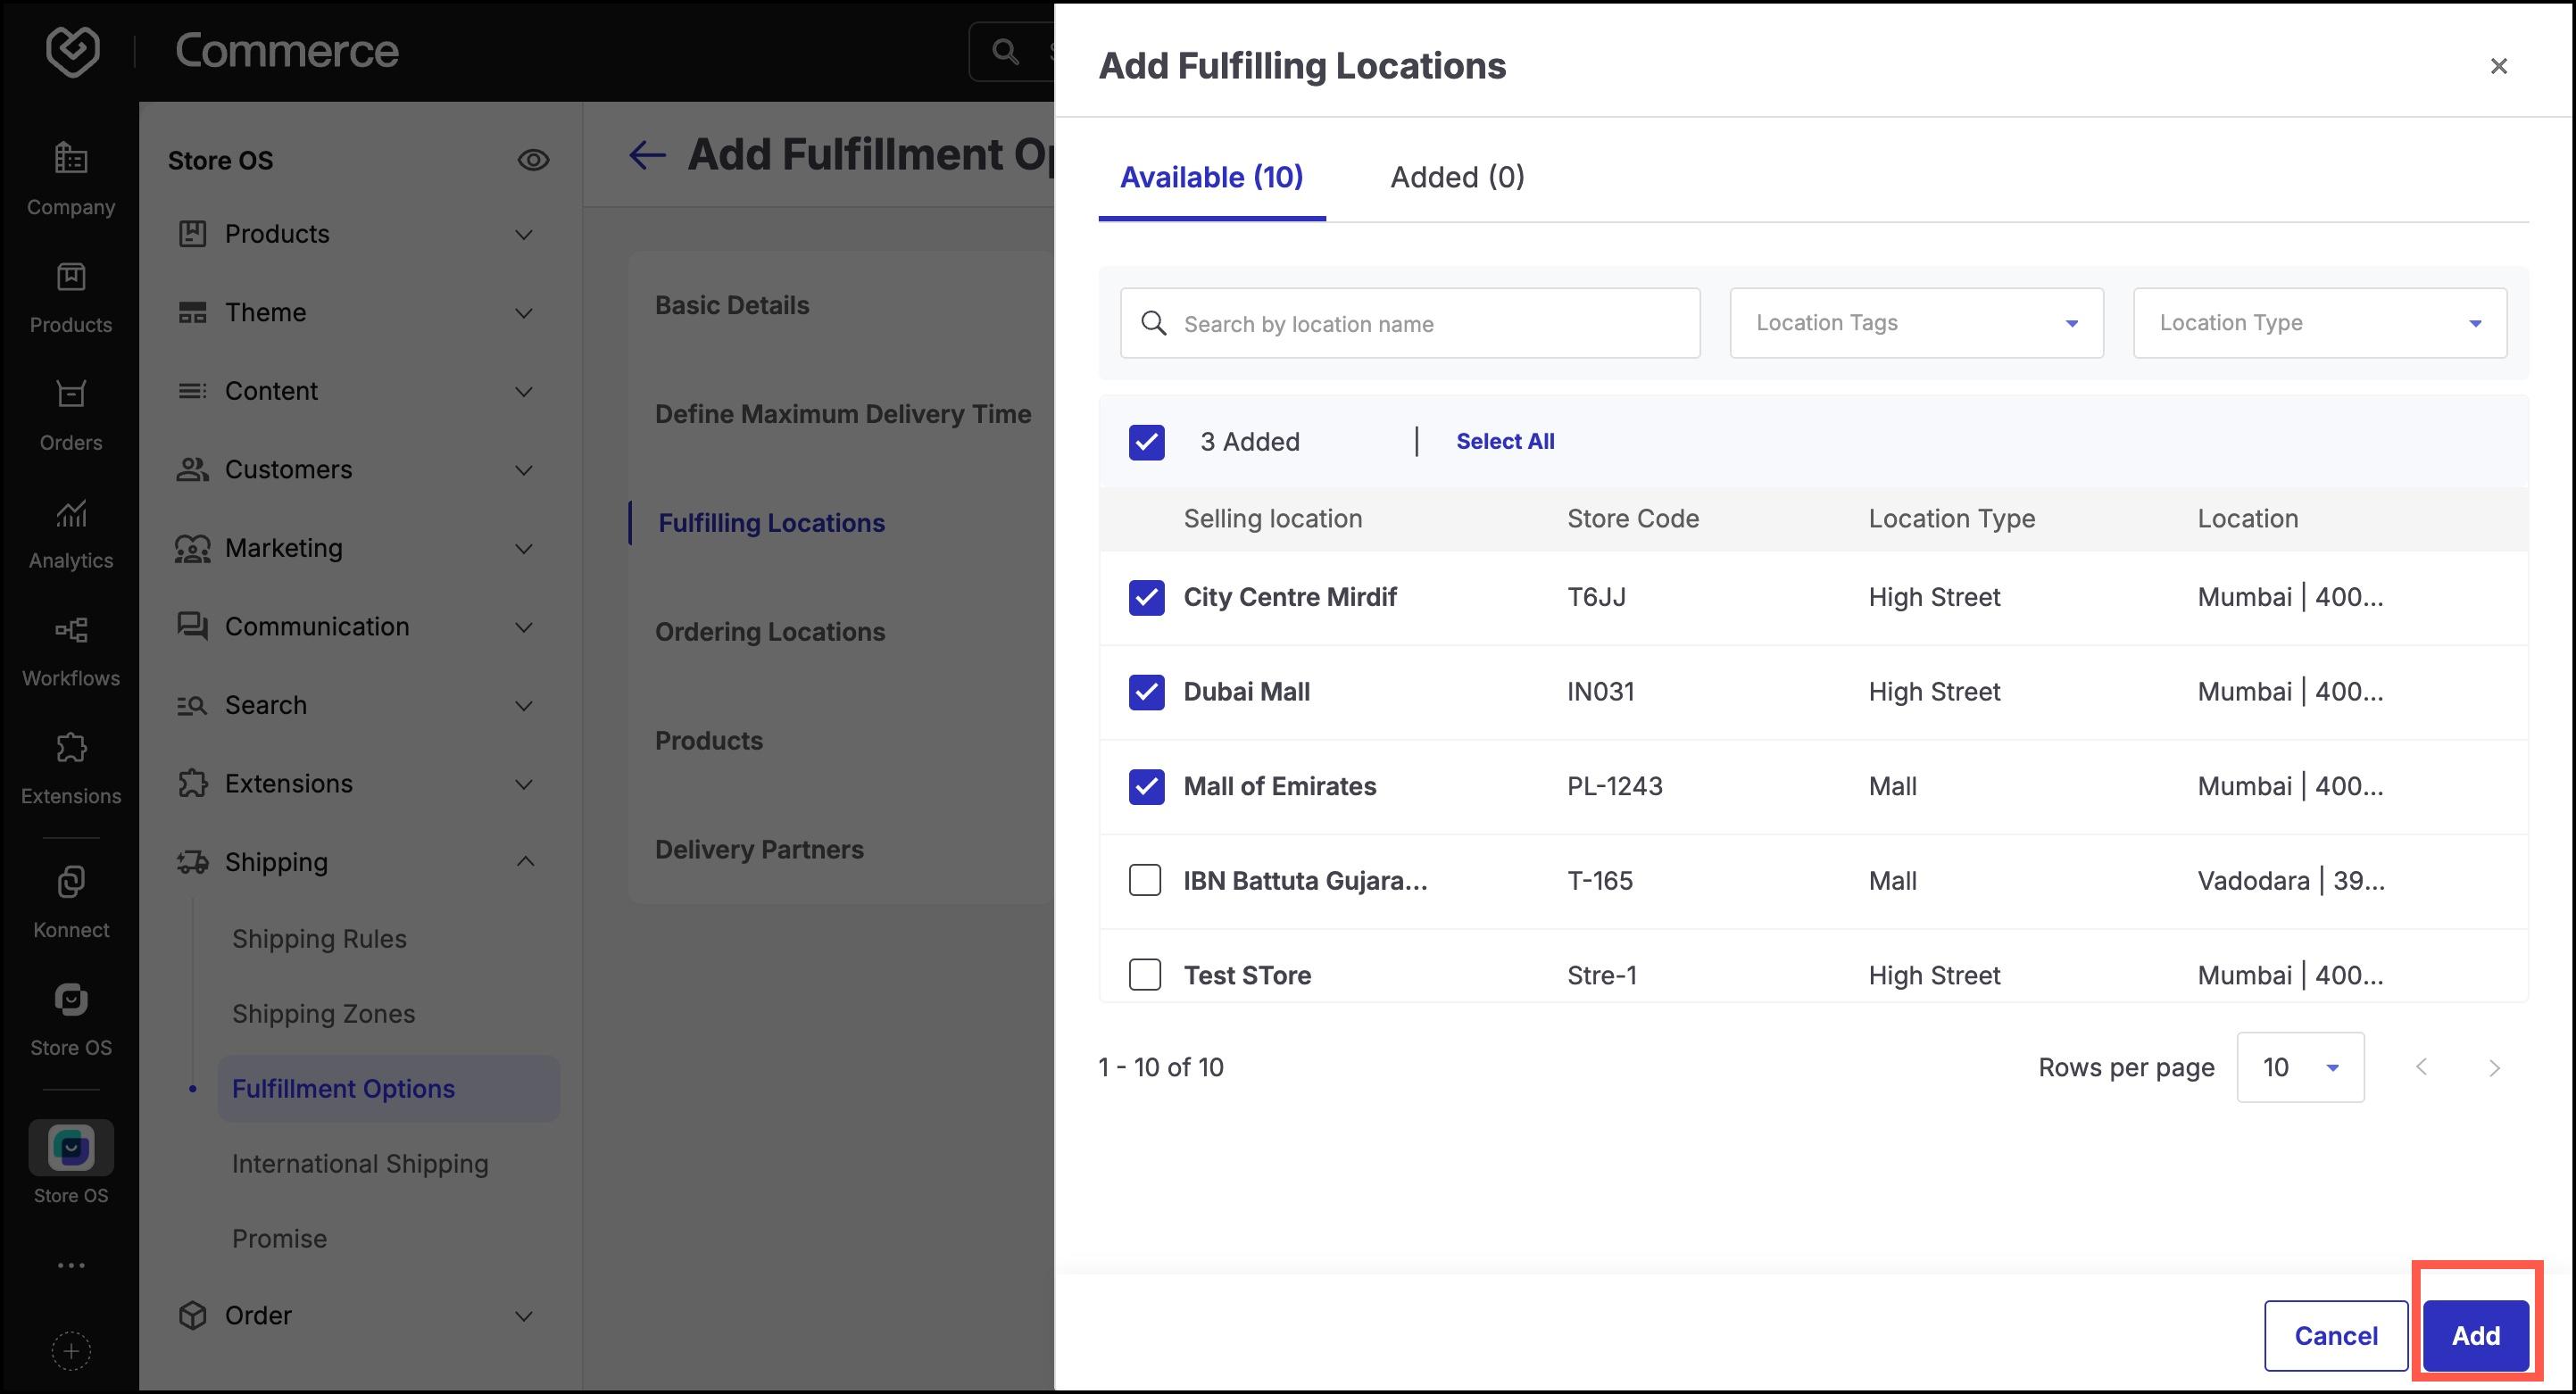
Click Done to confirm the selected locations.
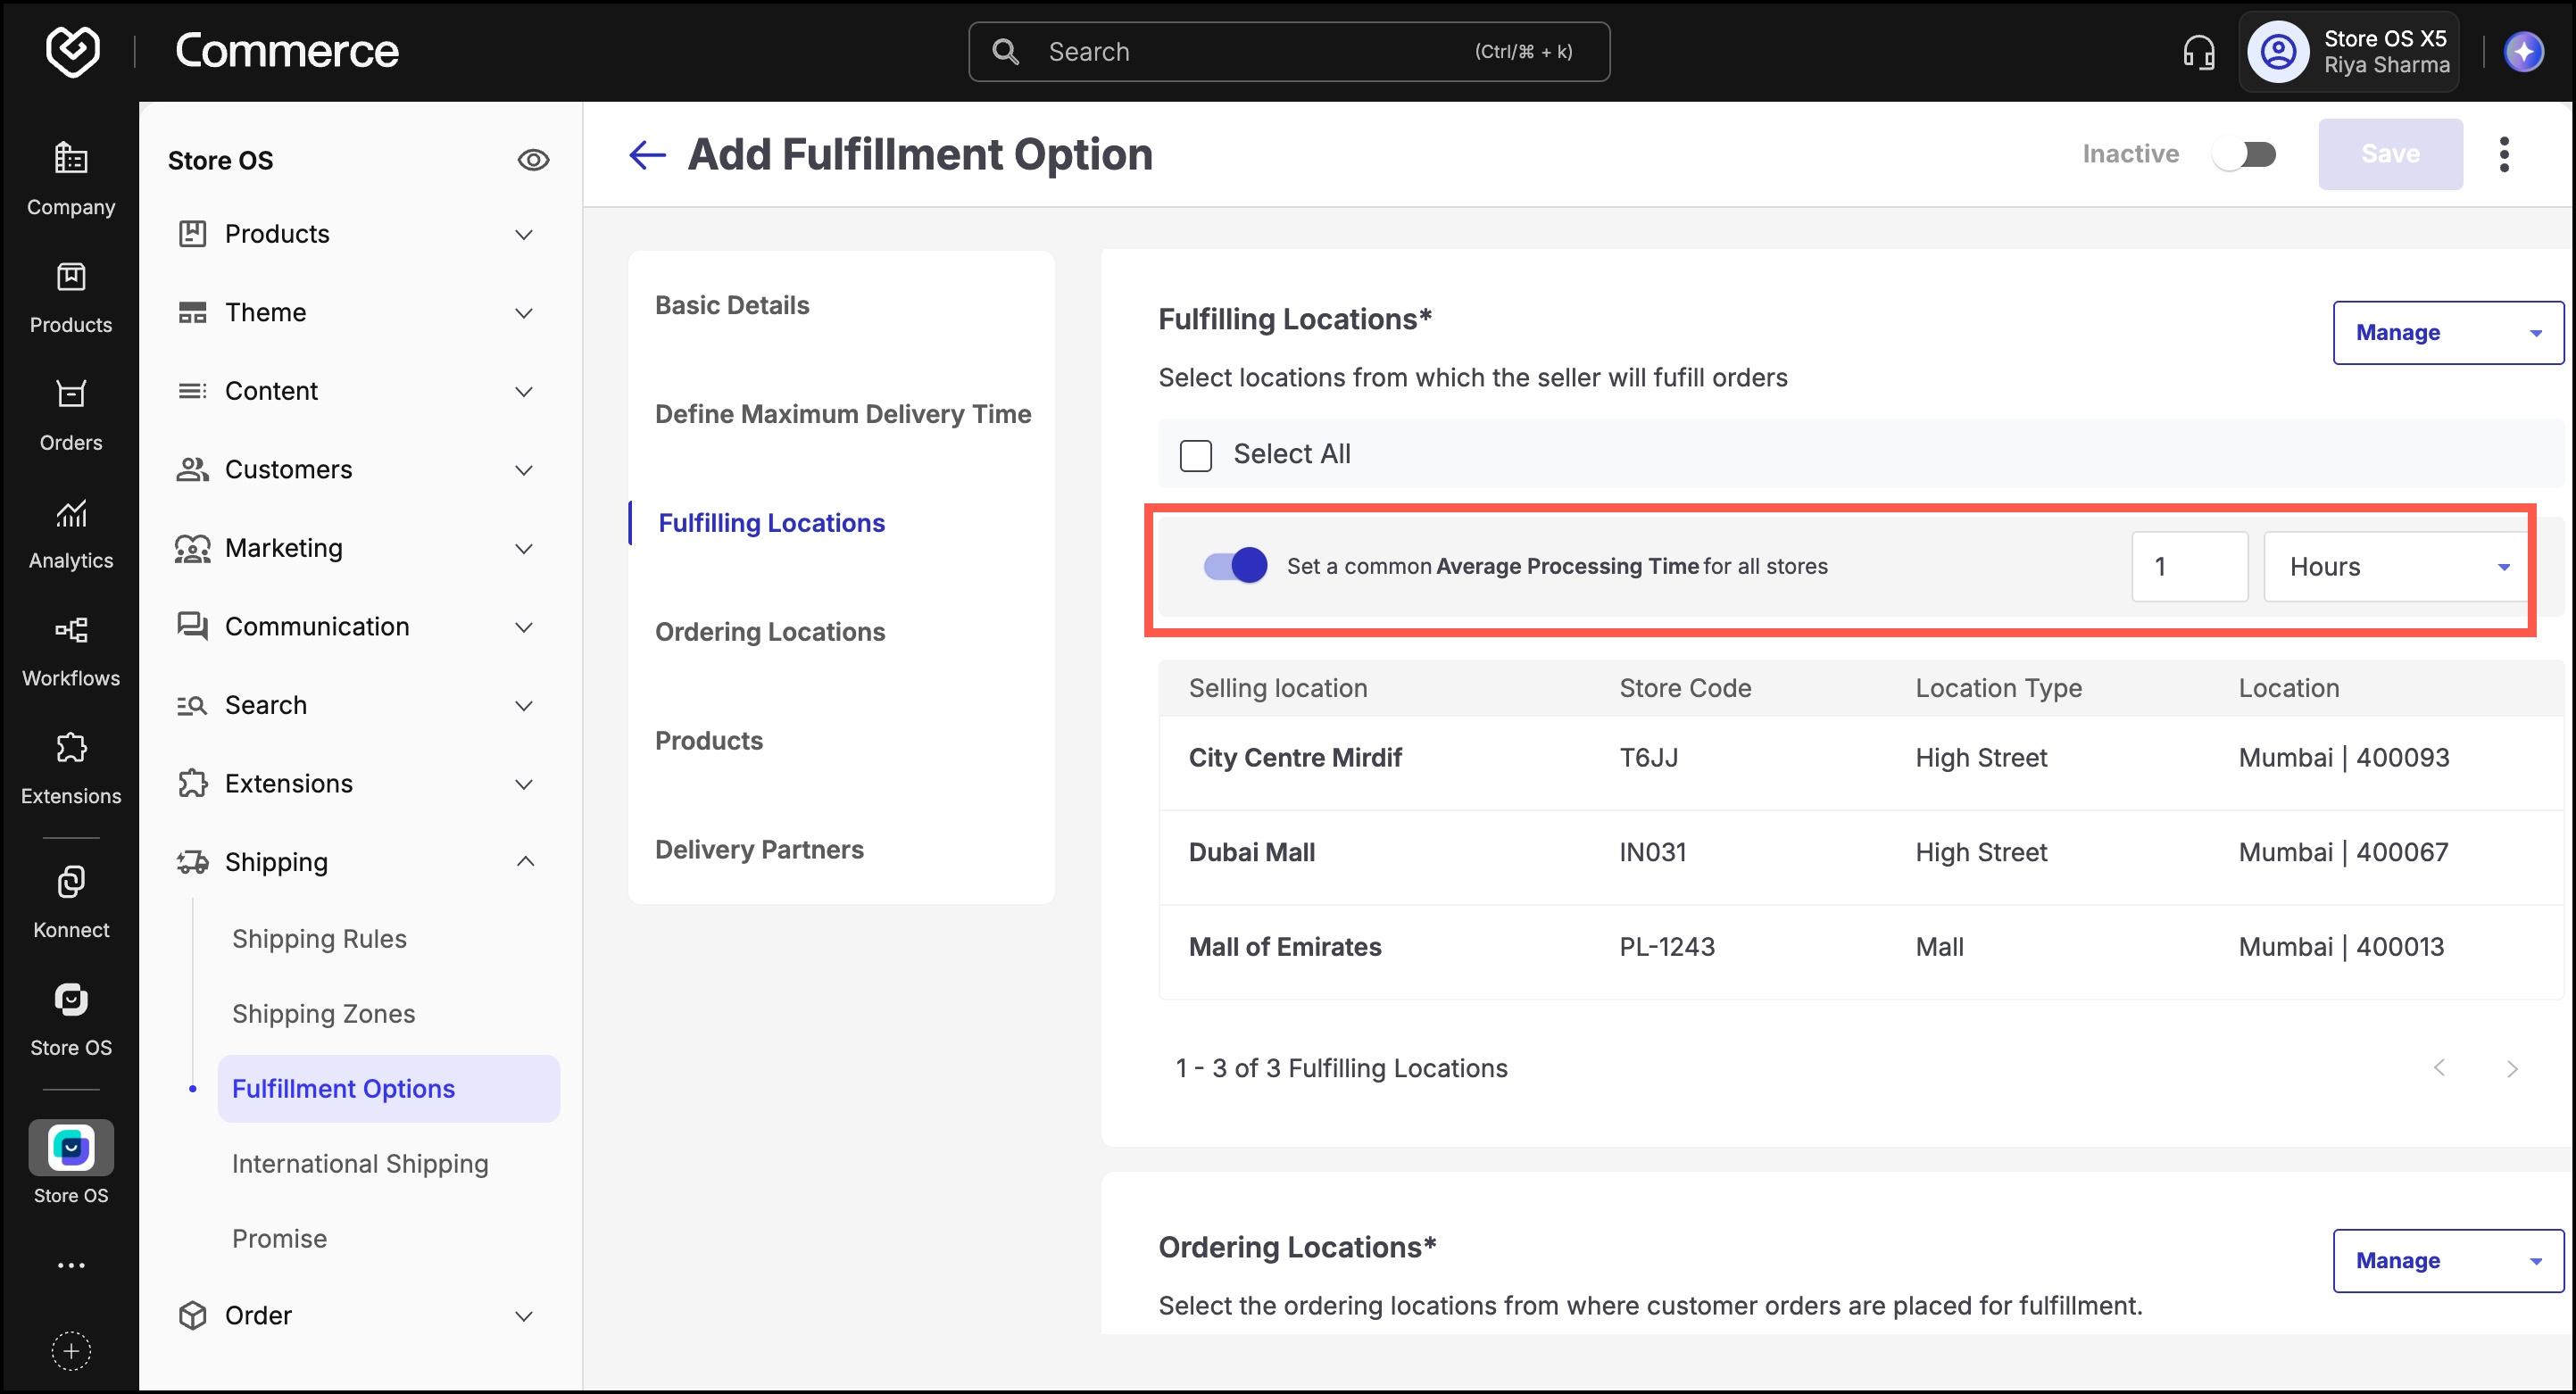
Set a Common Average Processing Time: This setting allows you to define a single, standard processing time that applies to all selected fulfilling locations for this fulfillment option.
Navigate to the Ordering Locations section.
Click Add, and choose from:
- Add Manually
- Bulk Upload
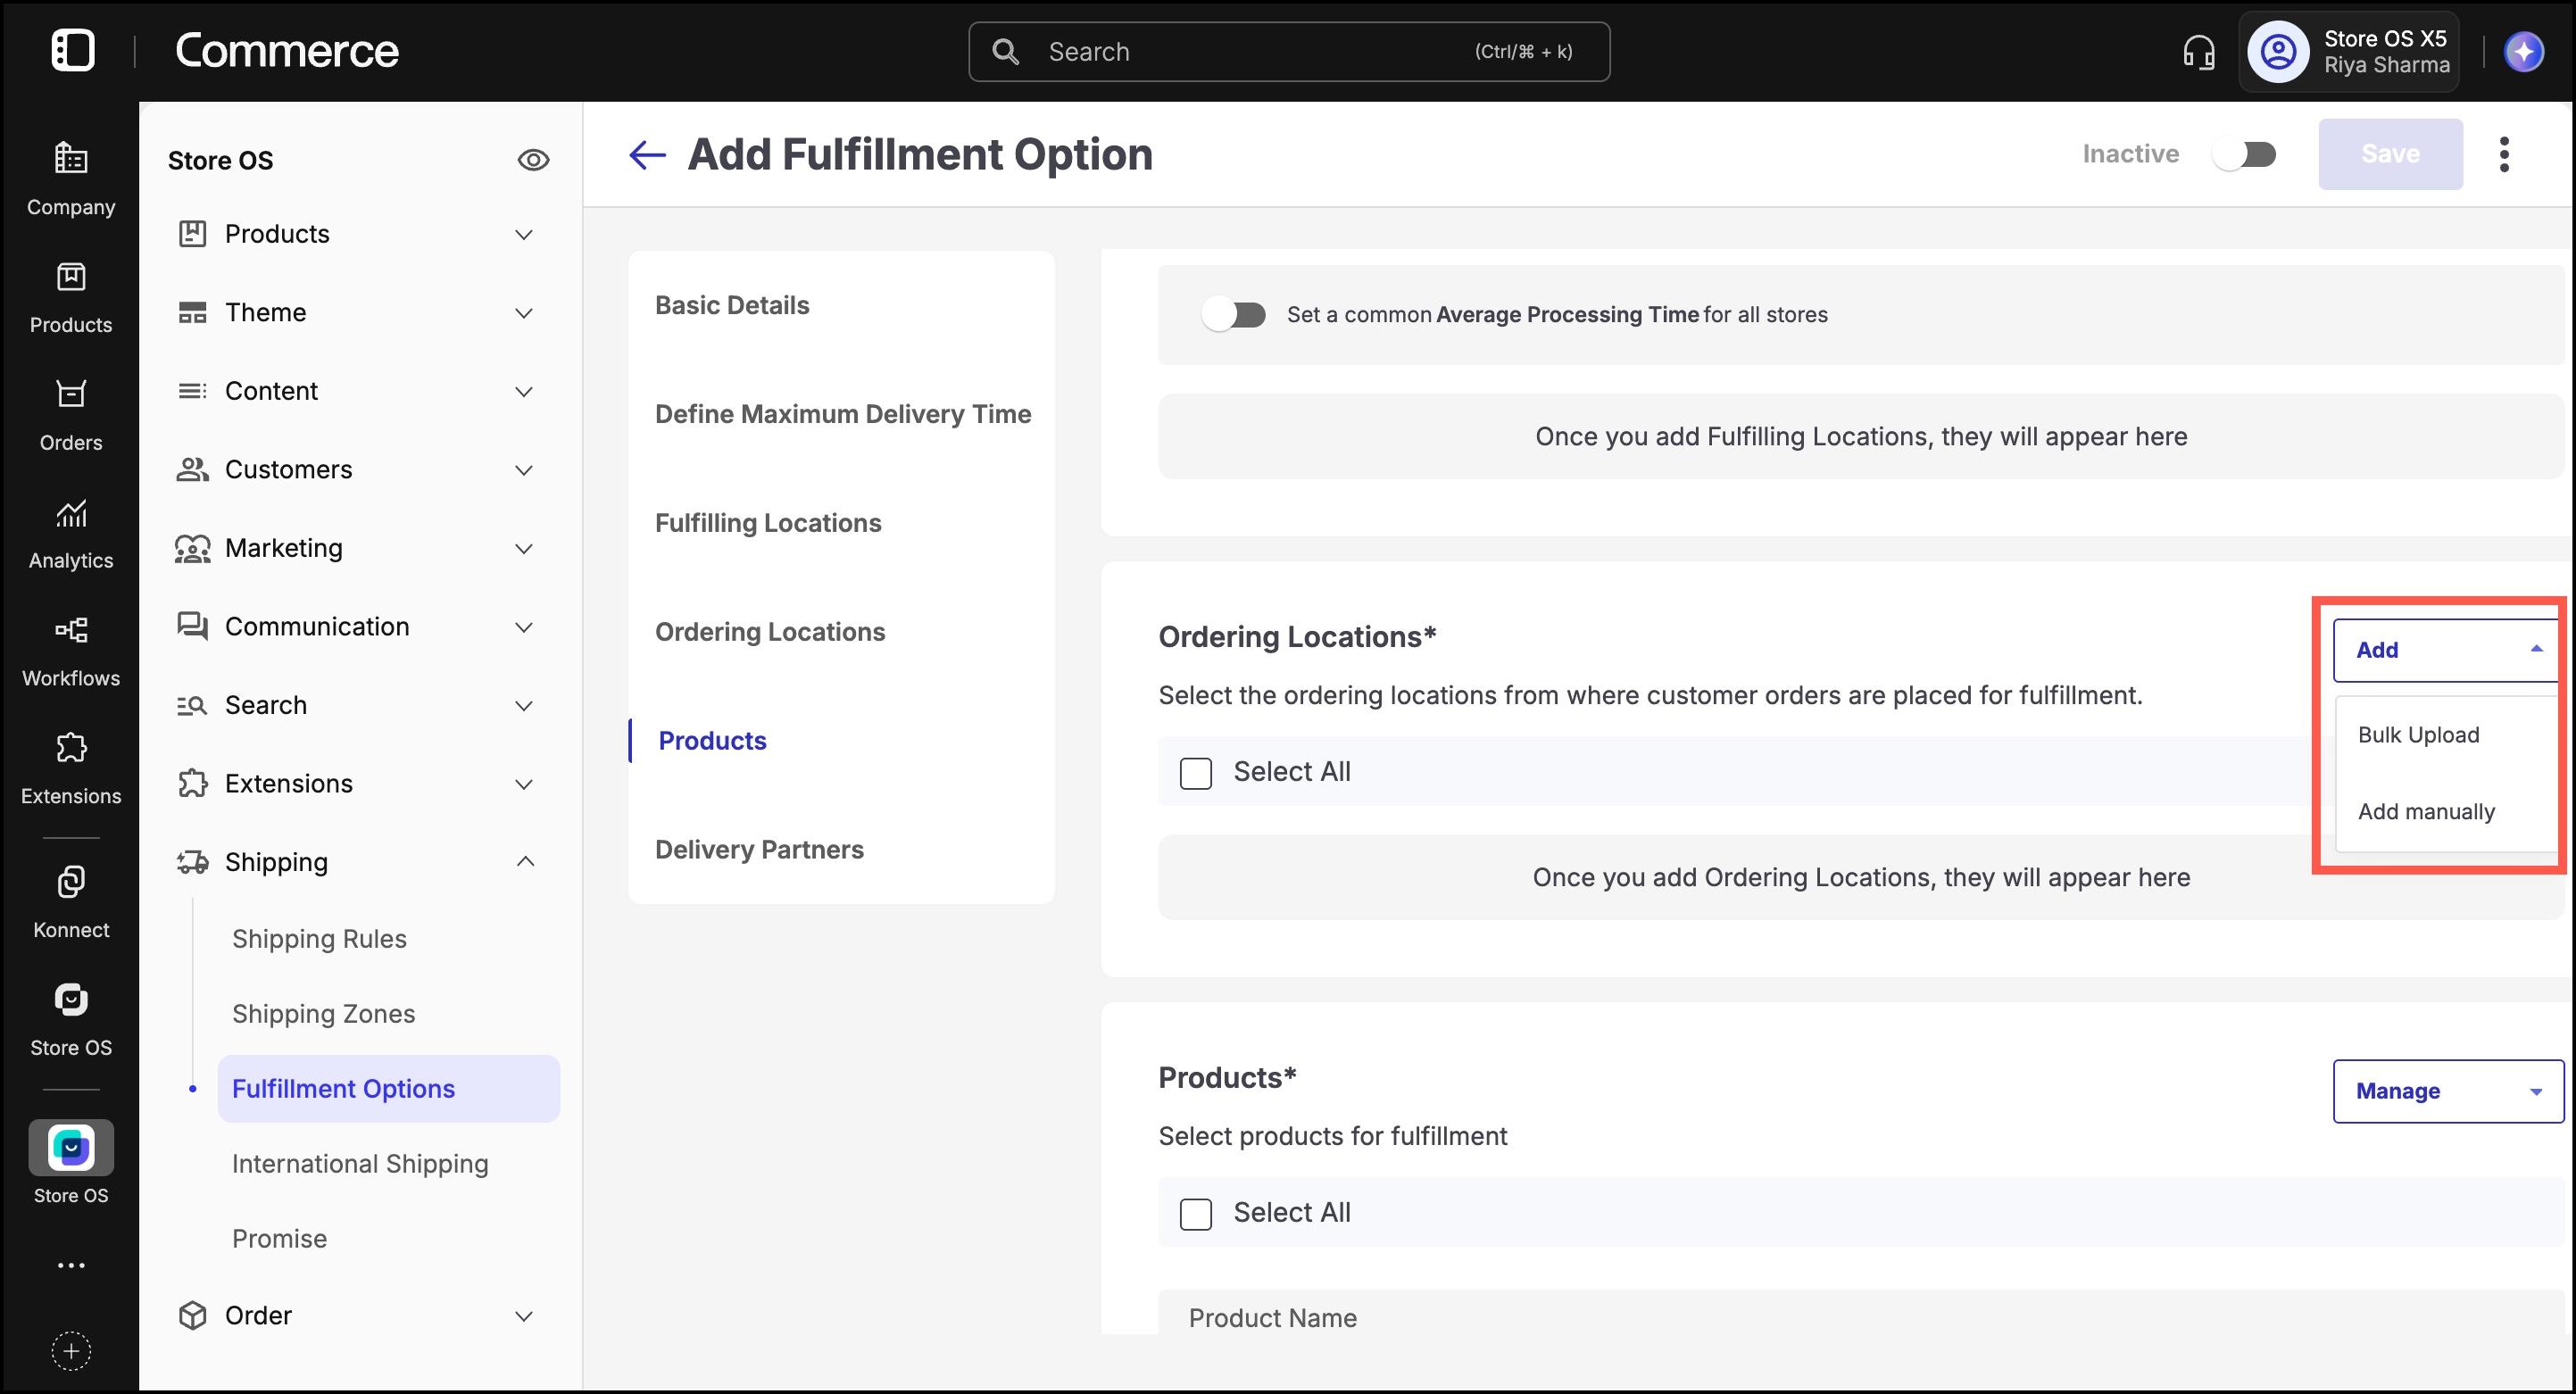
We are adding ordering locations manually here. Select the desired ordering locations (physical stores) where this fulfillment flow will be available.
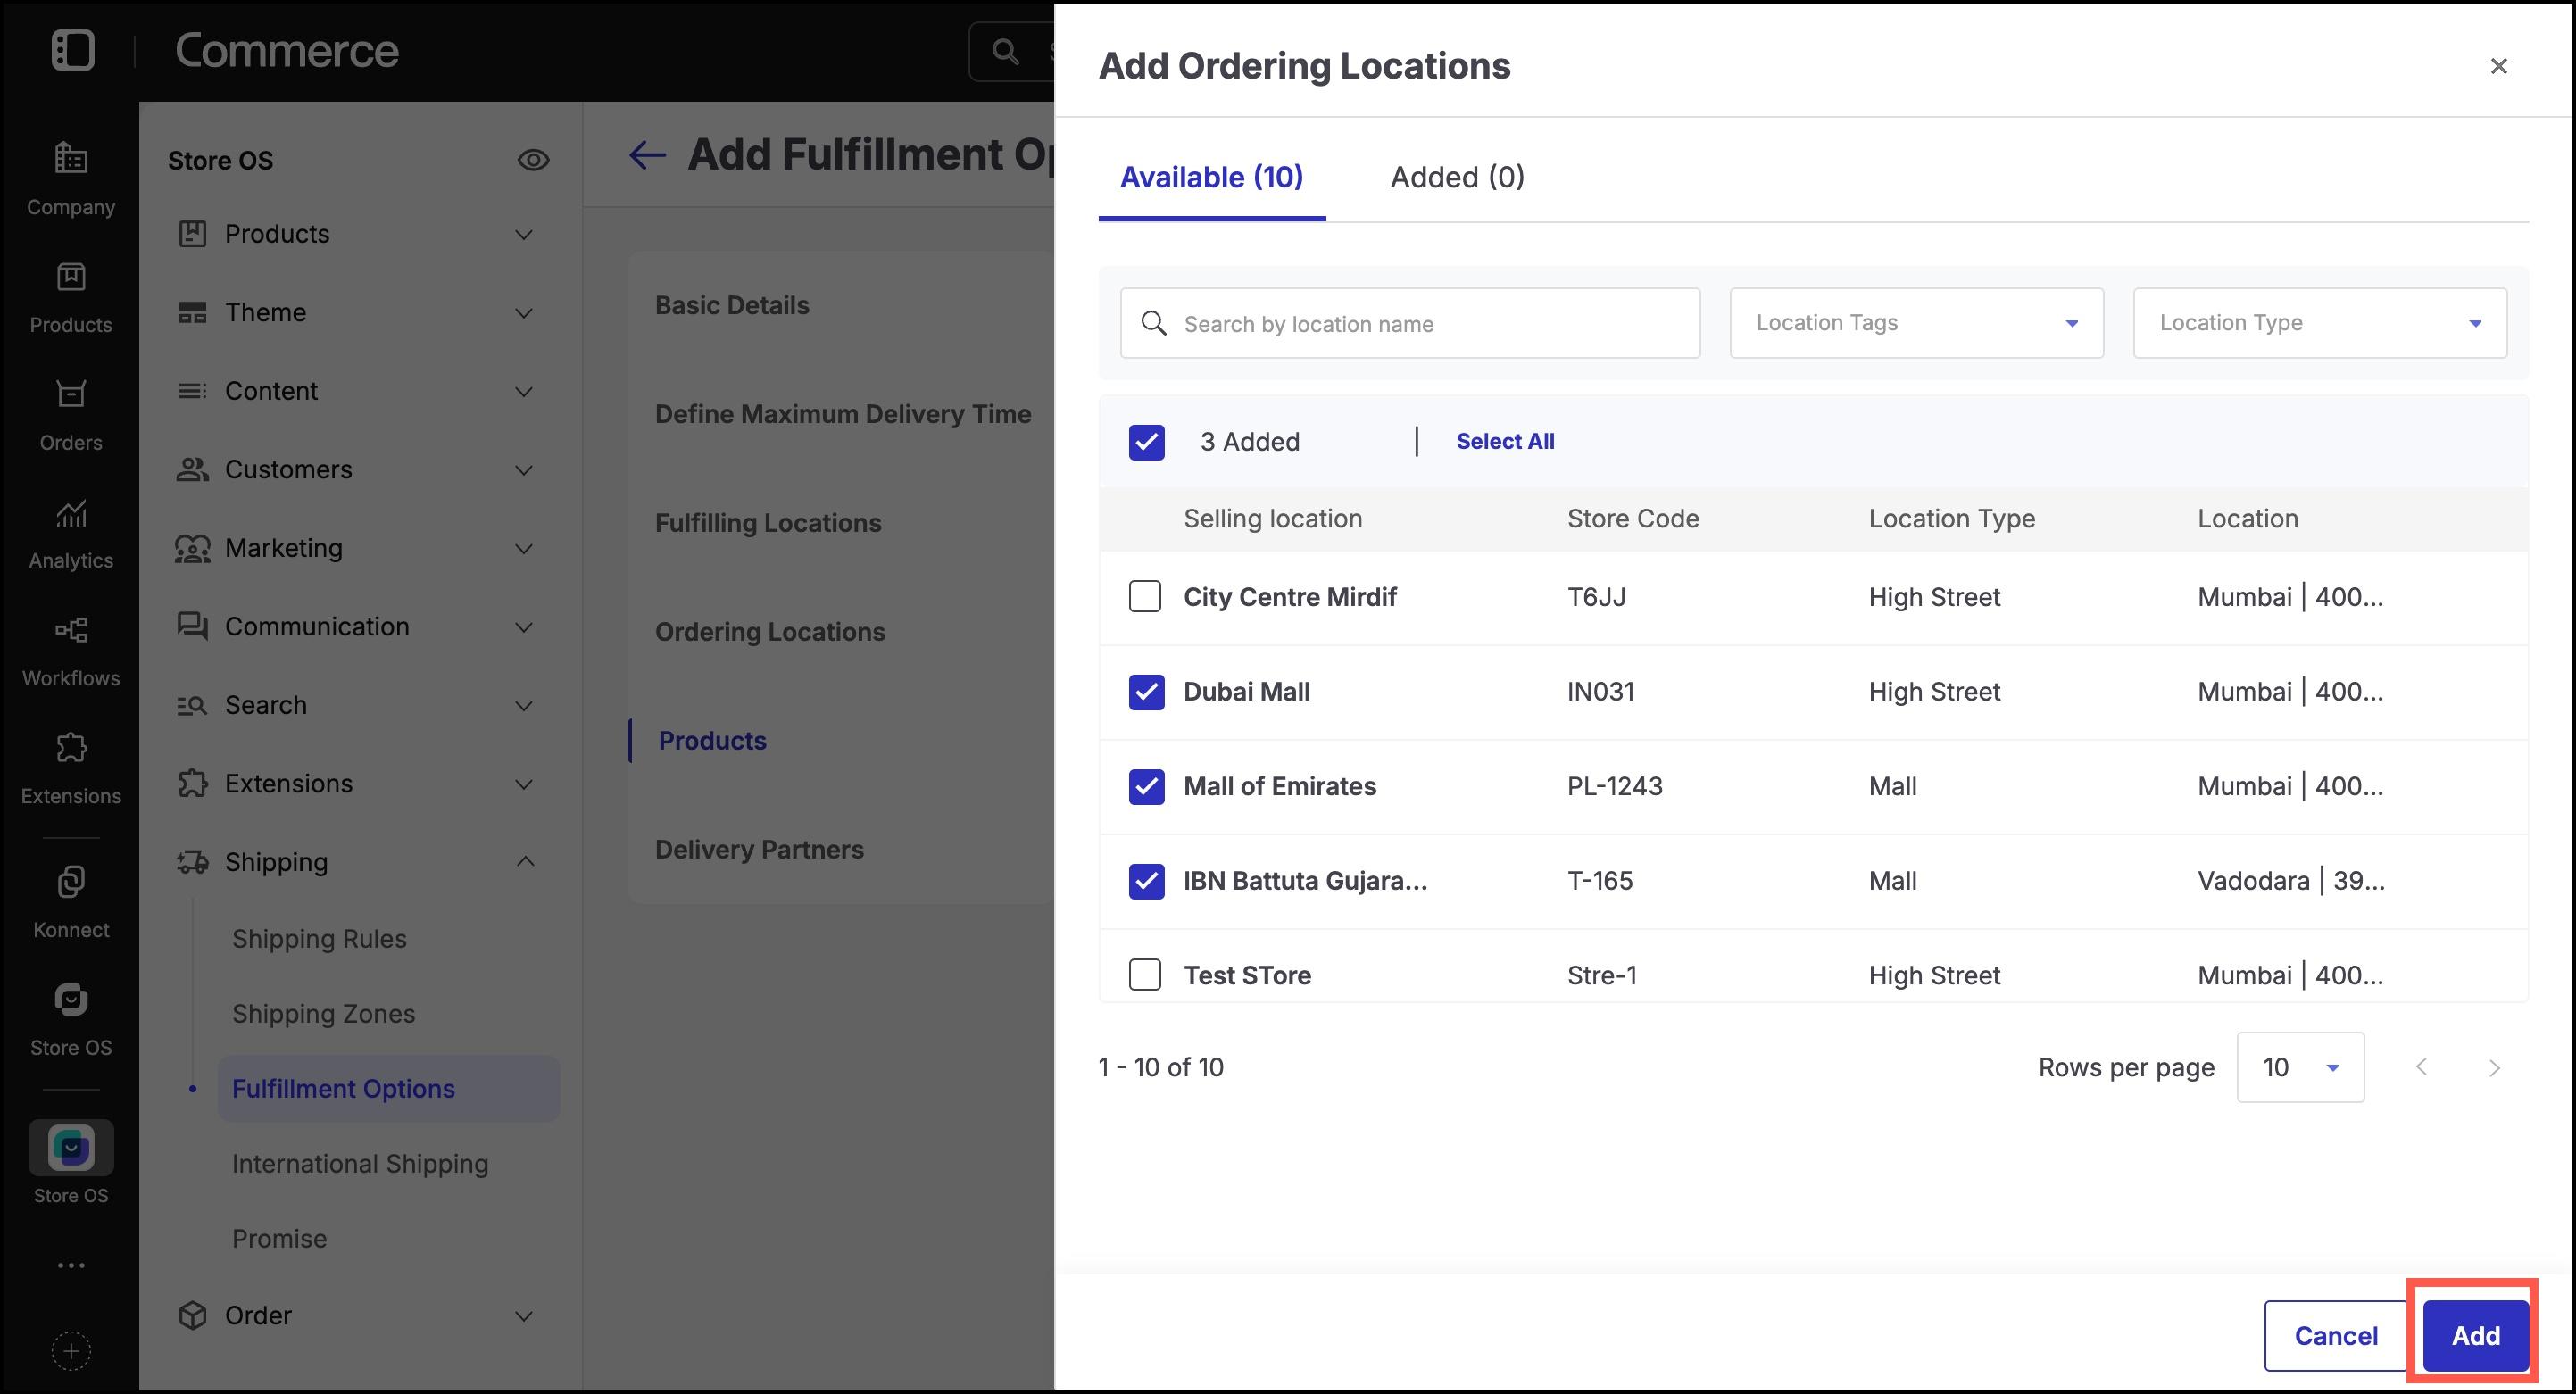
Click Add once products are selected and then click Done to confirm the selection.

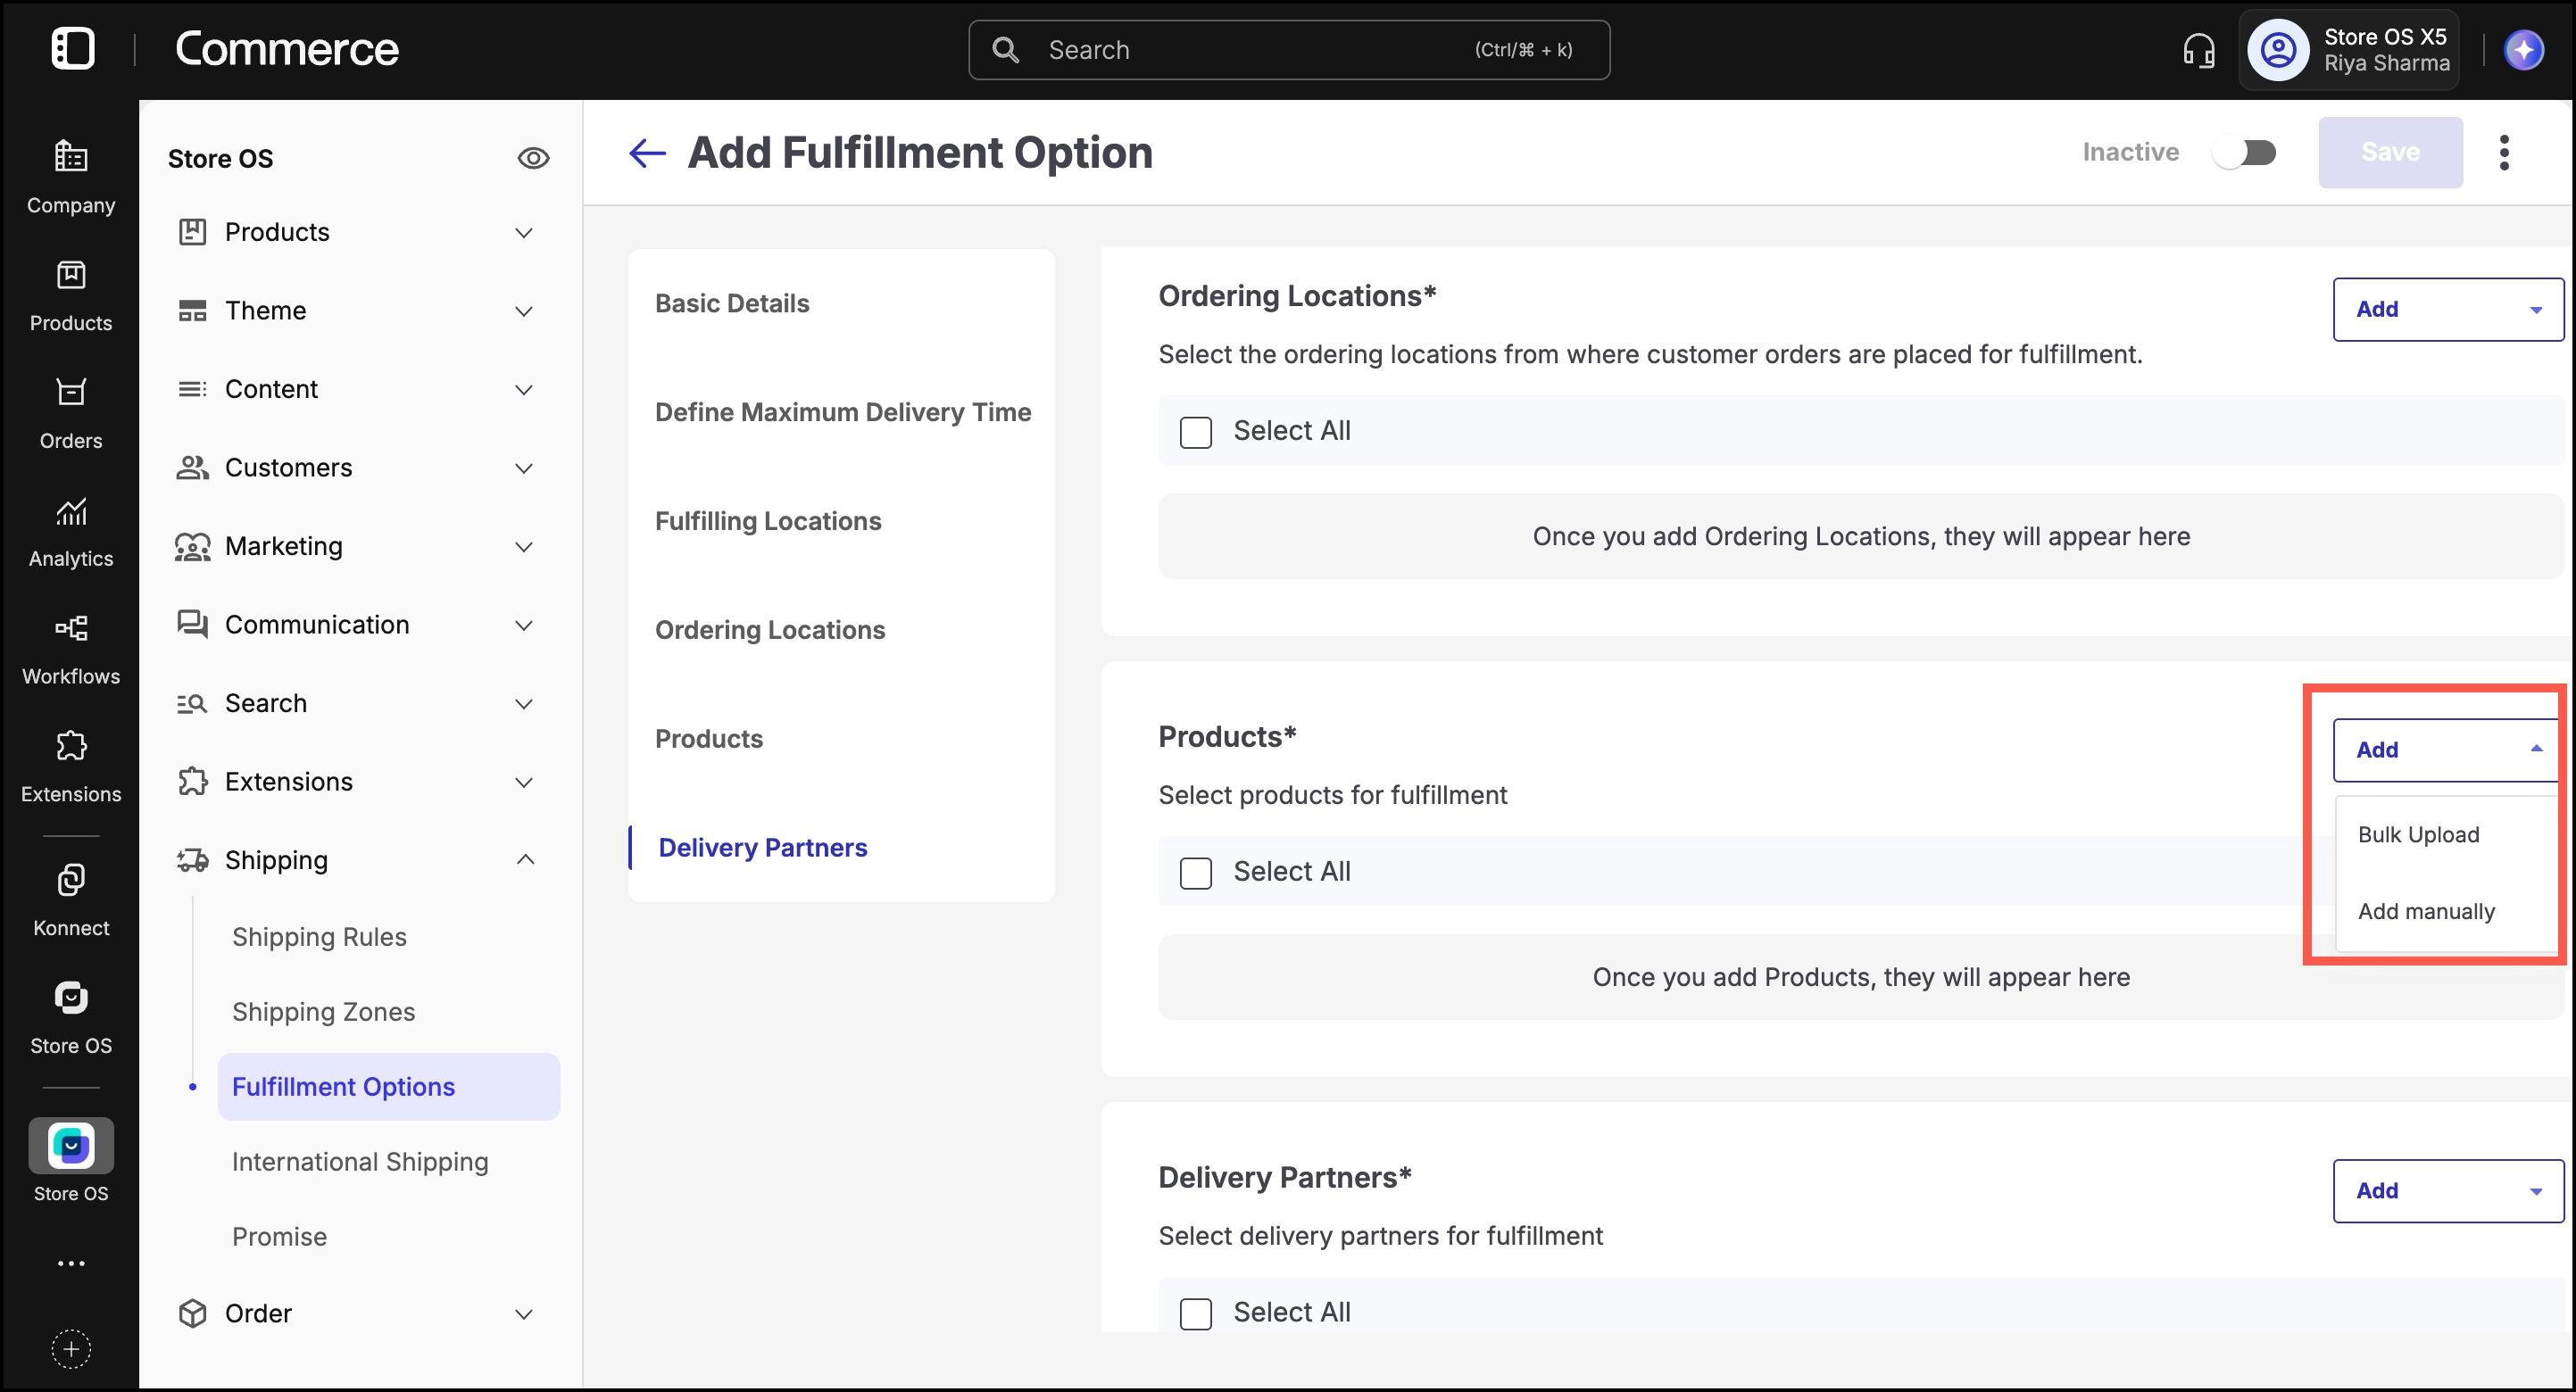
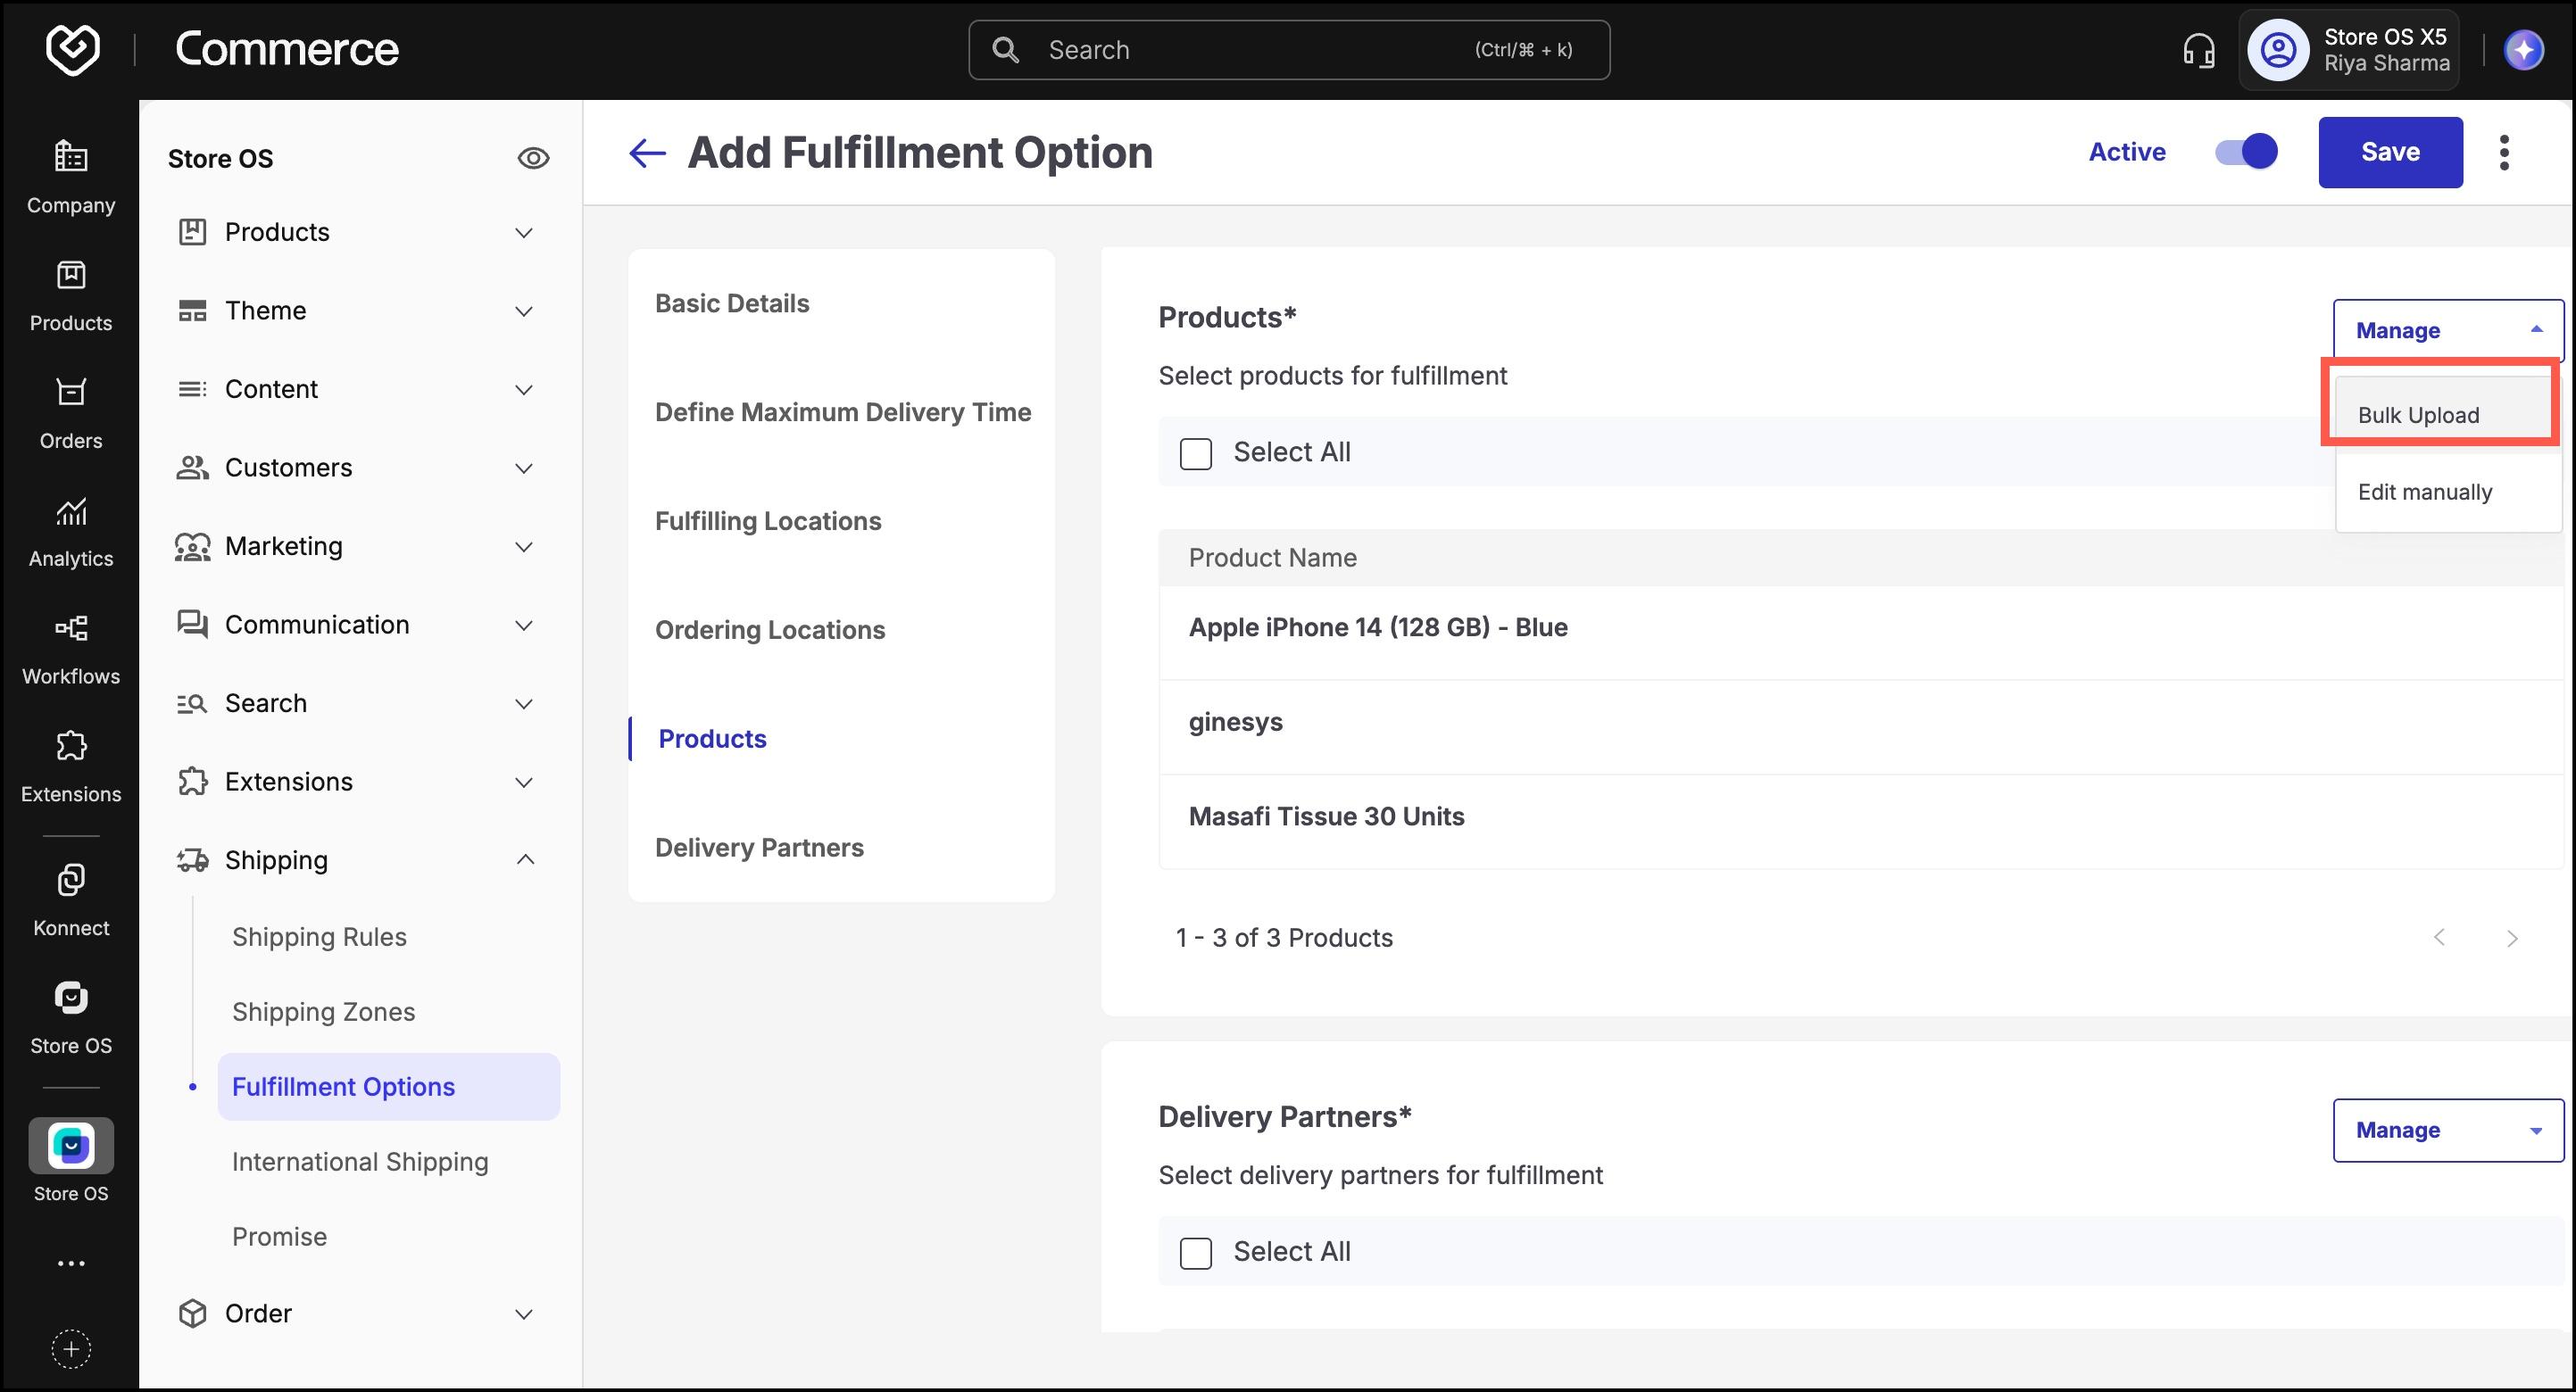
- Go to the Products section.
- Click Add, and choose either:
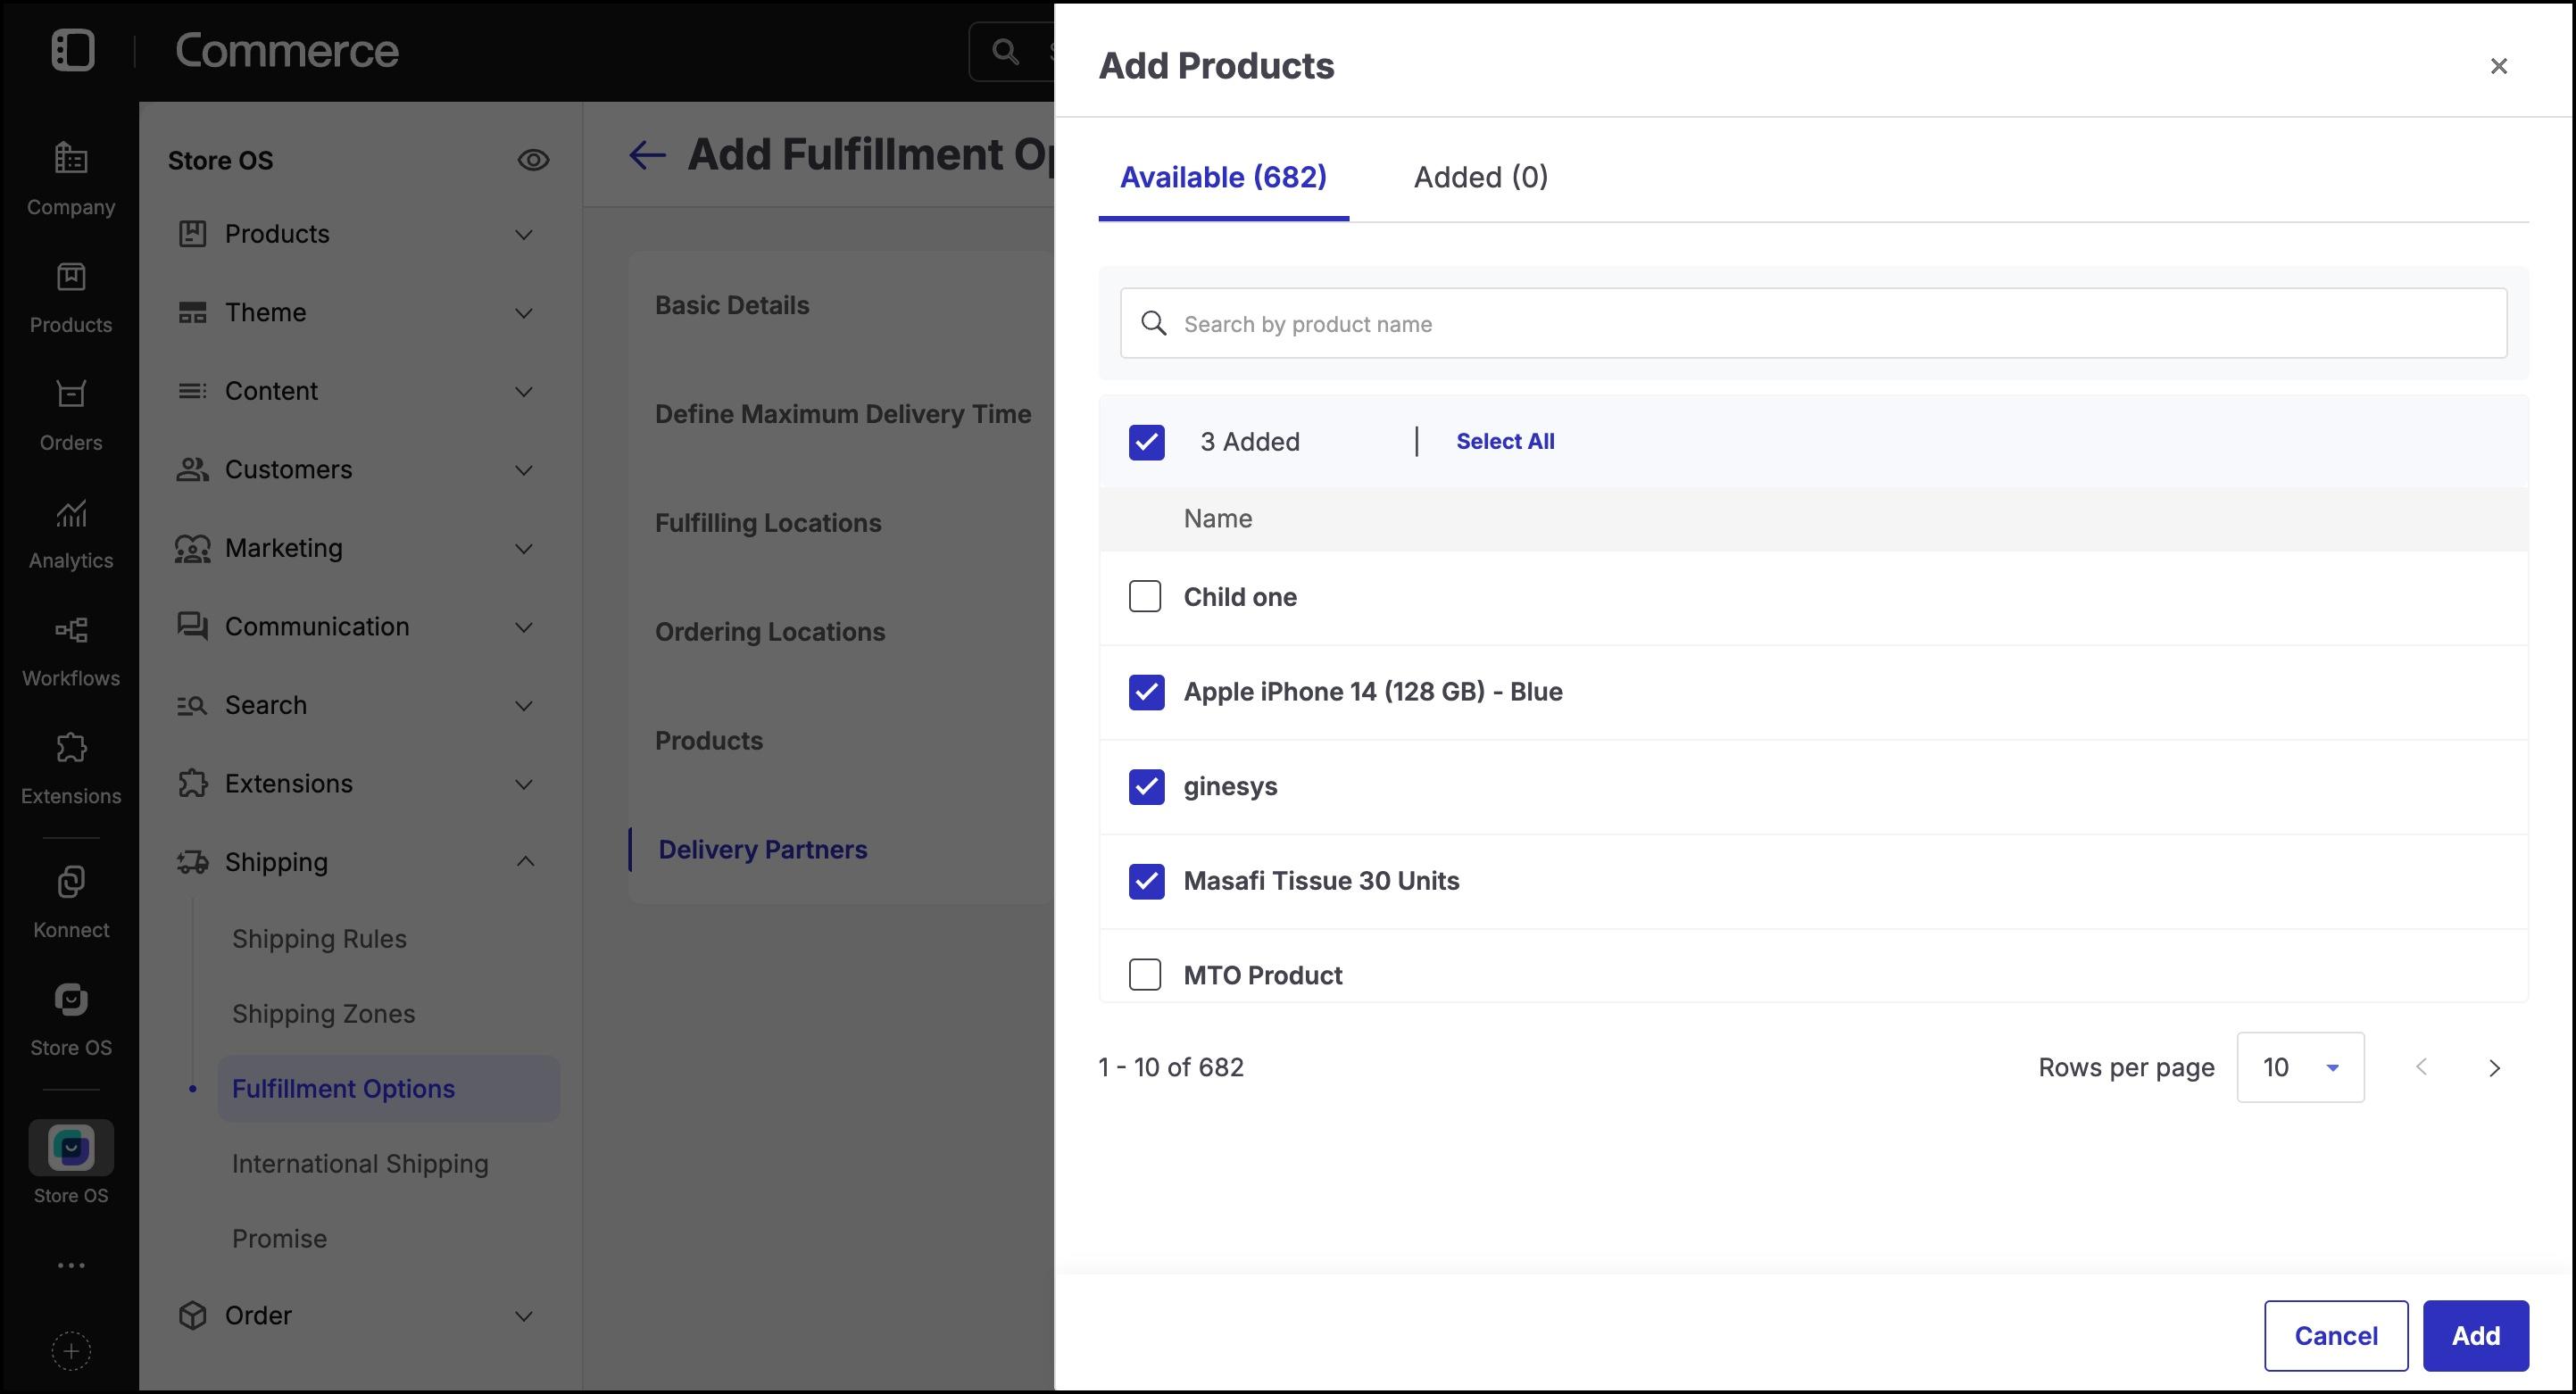
- Add Manually: Search and select specific products.
- Bulk Upload: Upload a CSV of product identifiers.
We are adding products manually here. Once products are selected, click Add and then click Done to confirm the selection.
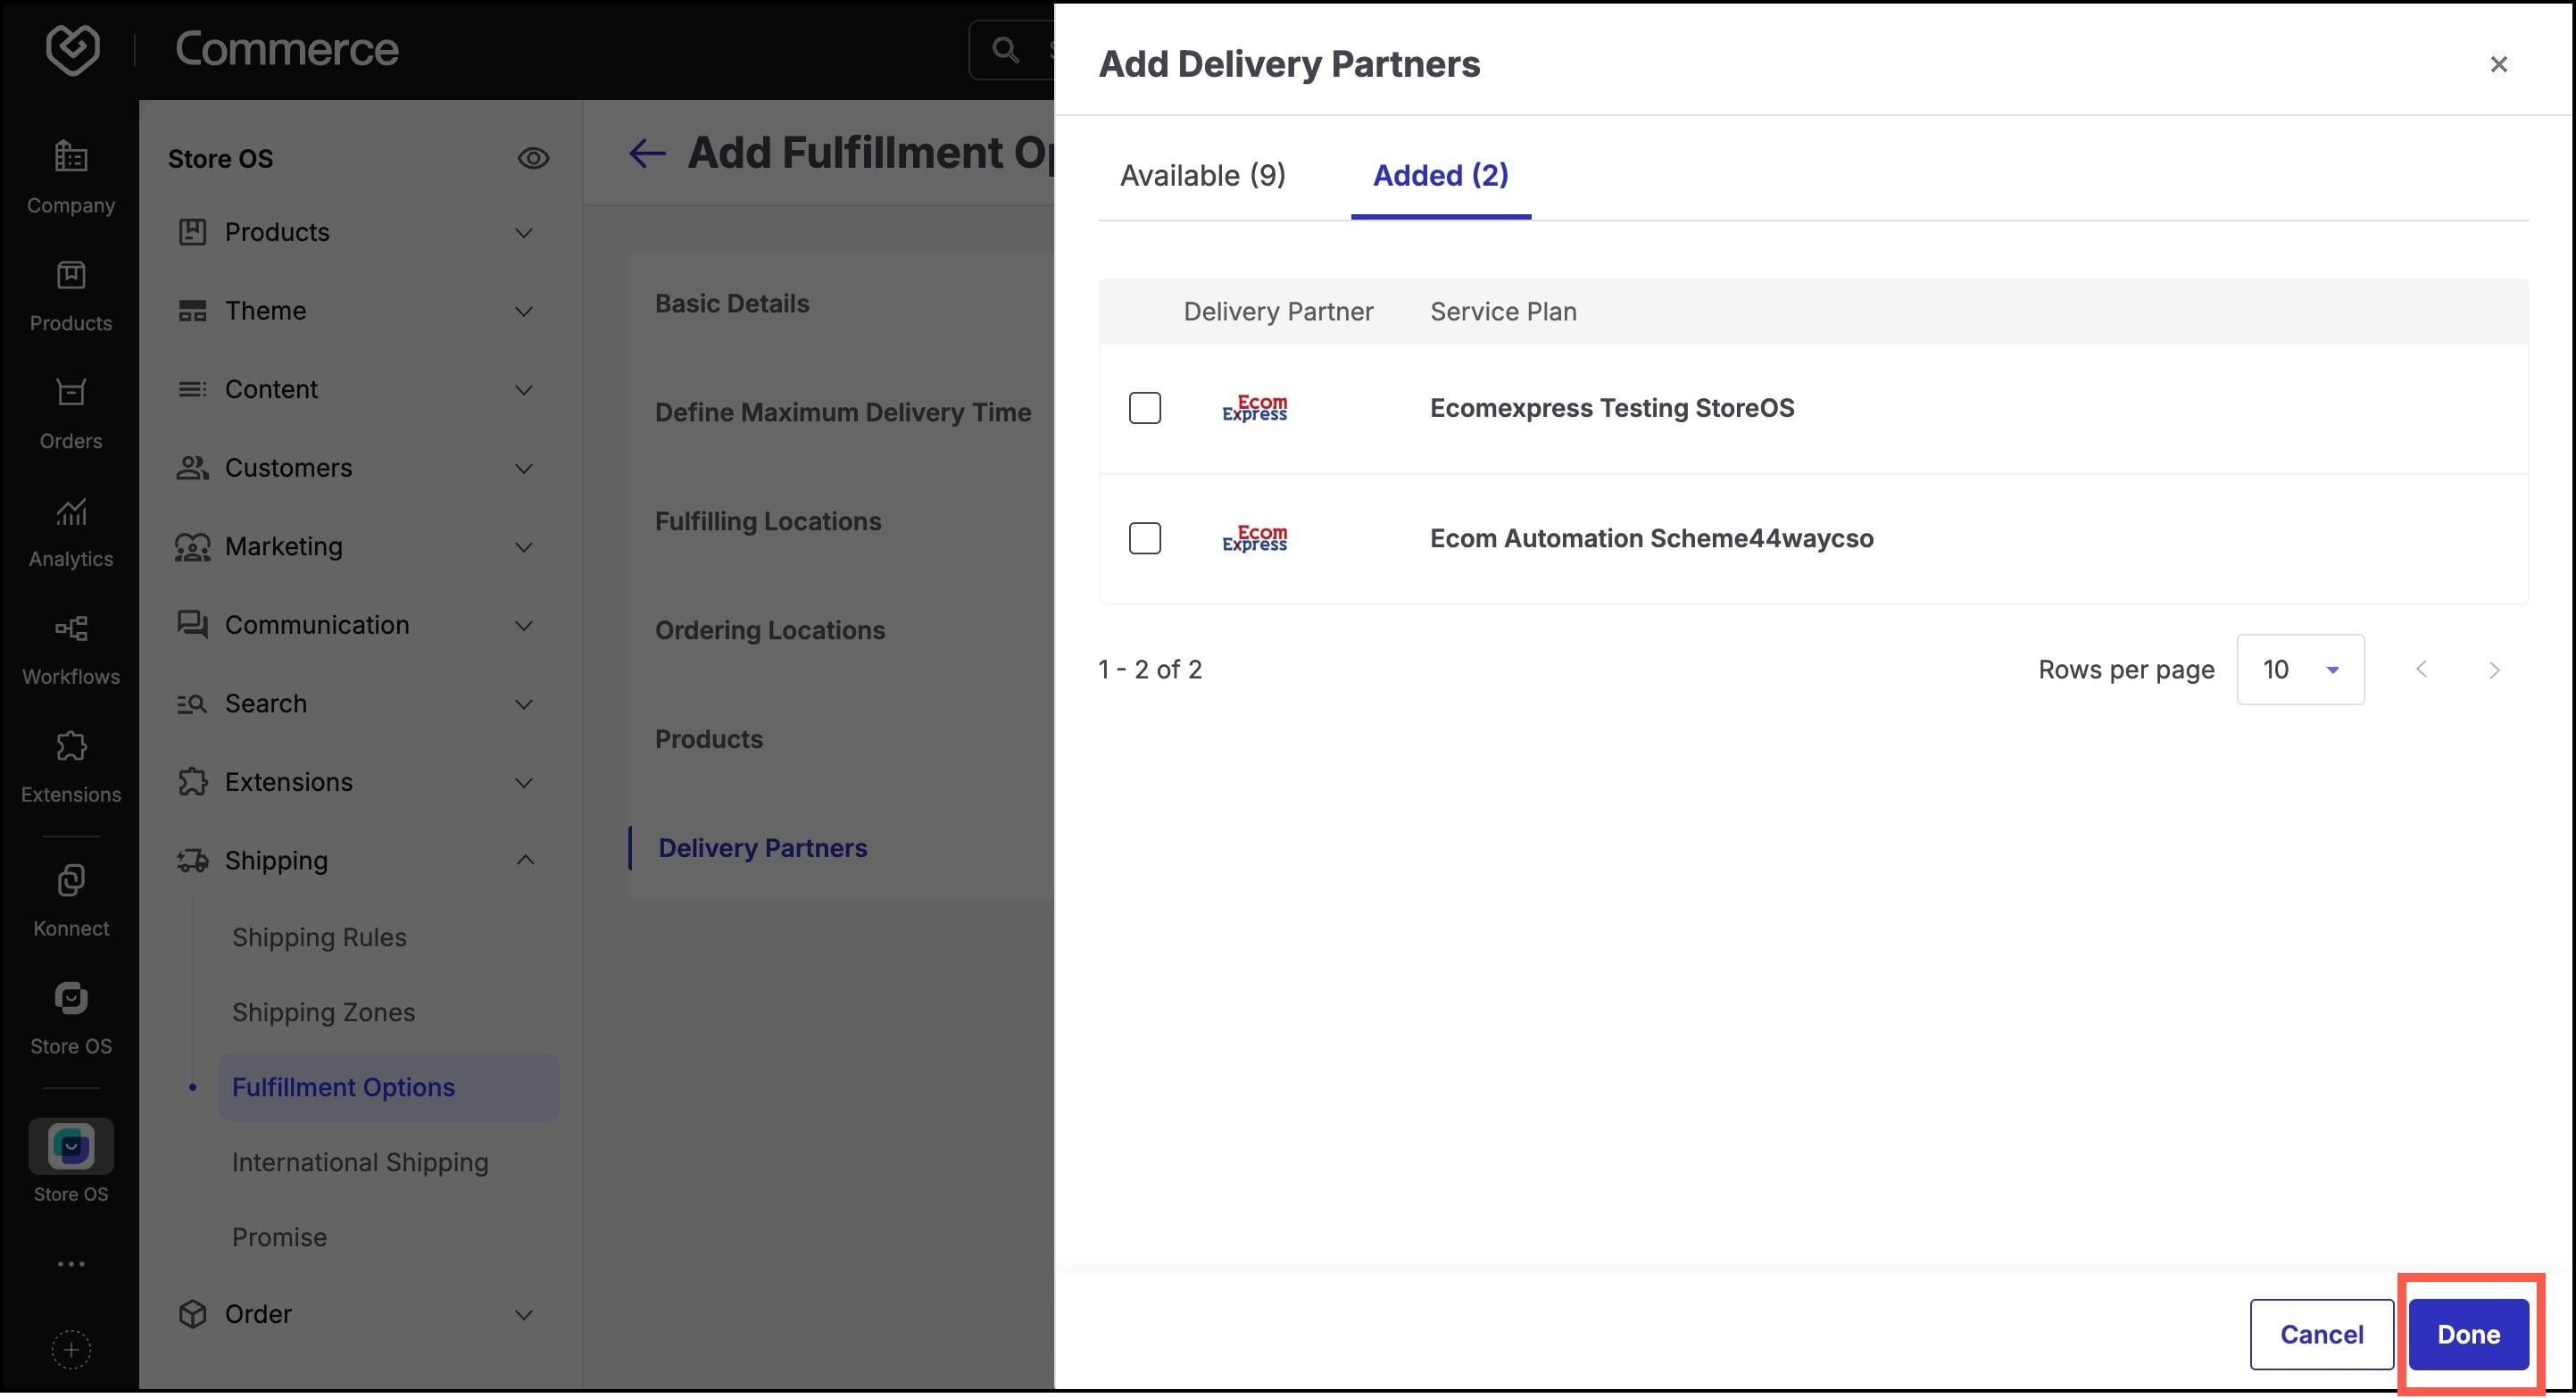
- In the Delivery Partners section:
Click Add, then choose Add.
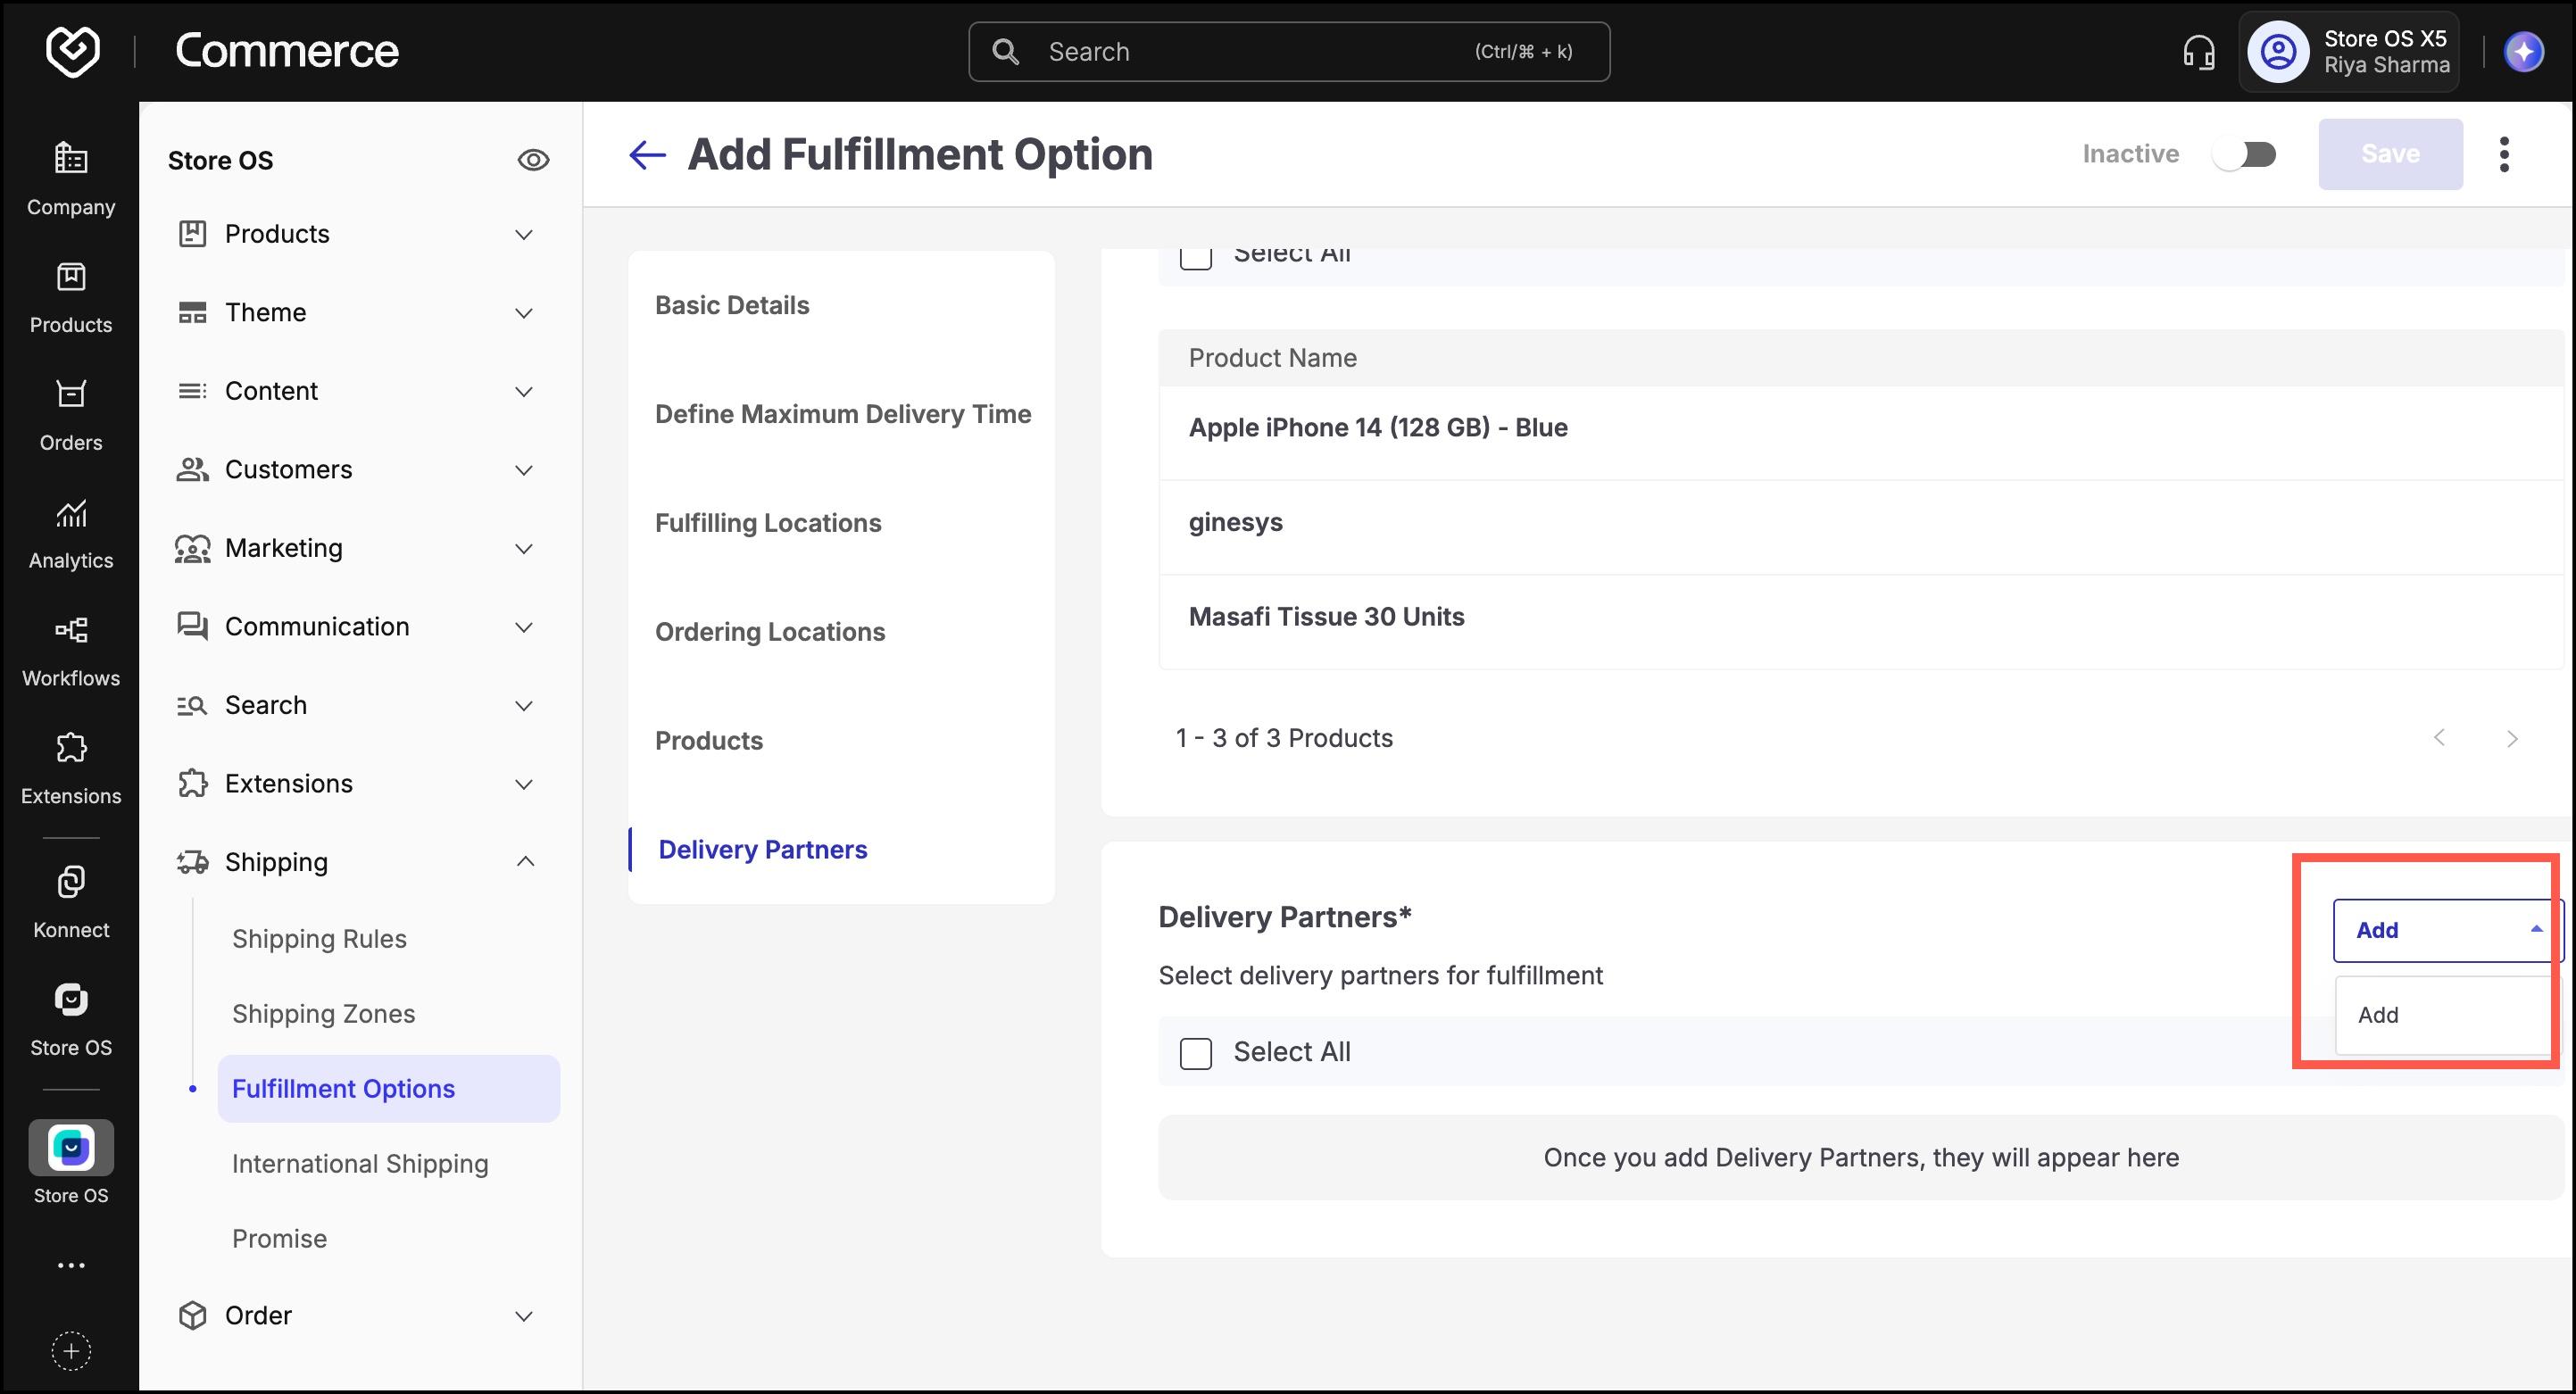
Select a delivery partner capable of meeting the delivery promise defined for this fulfillment option.

Click Done.
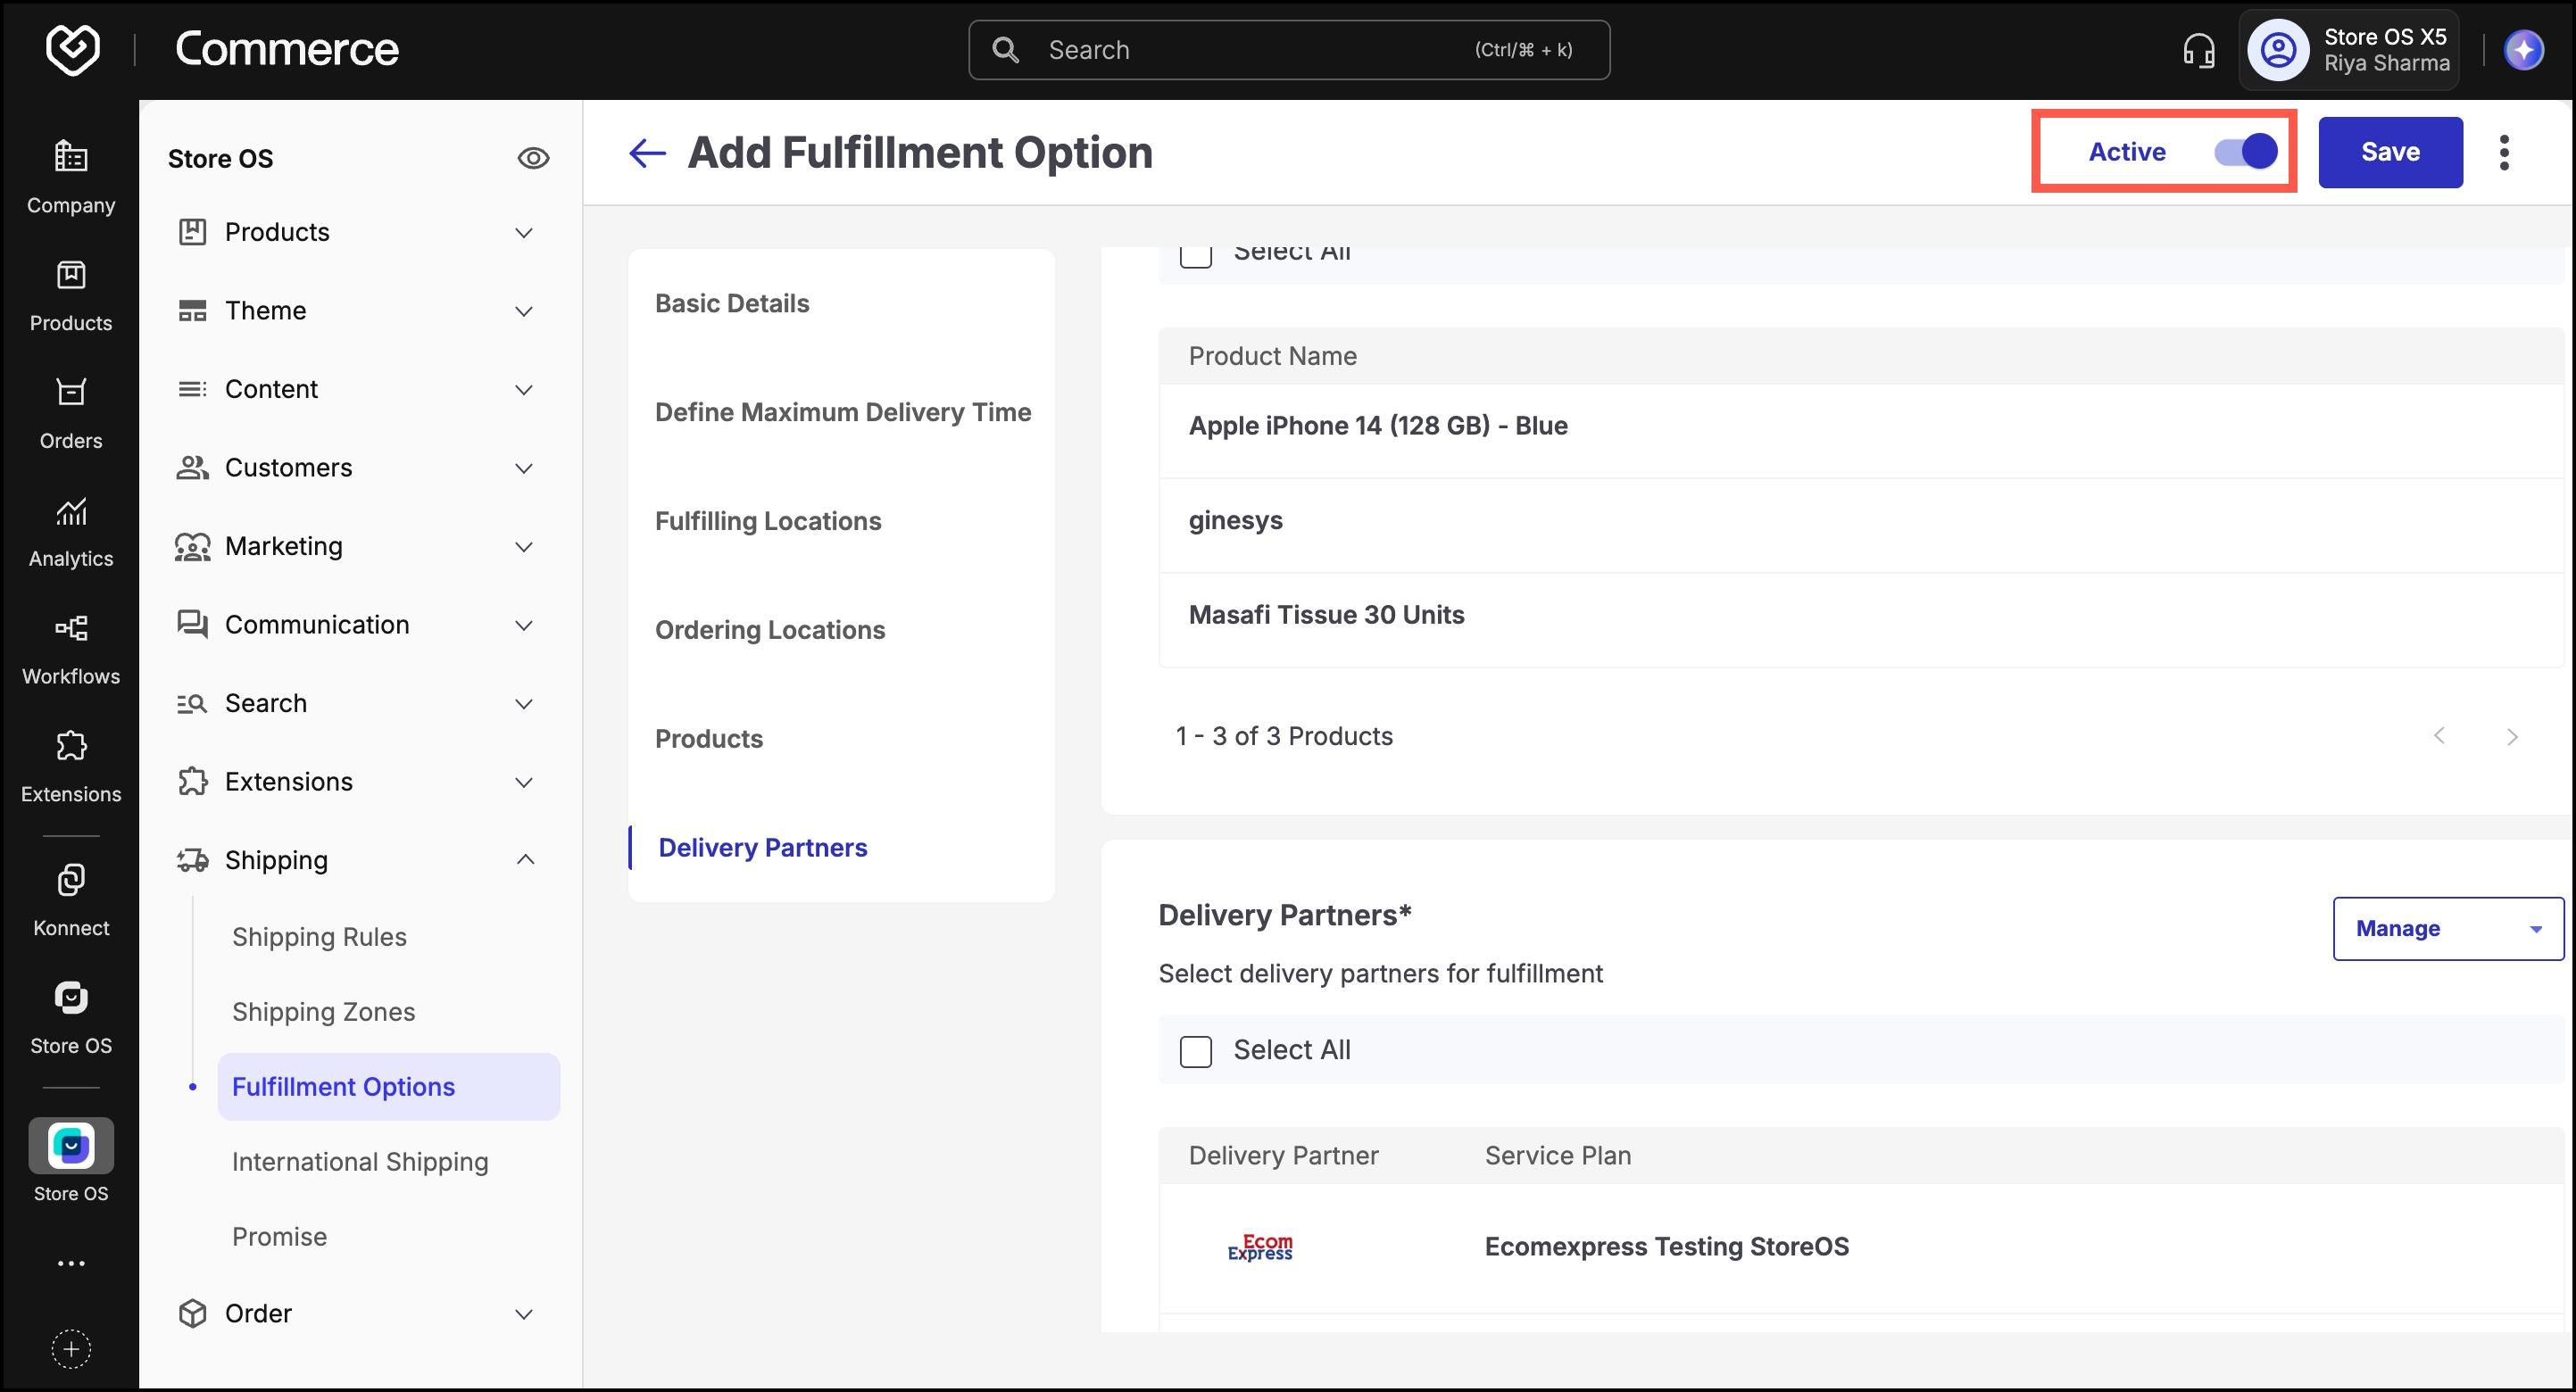
Toggle the Inactive/Active switch in the top-right corner to activate the fulfillment option.
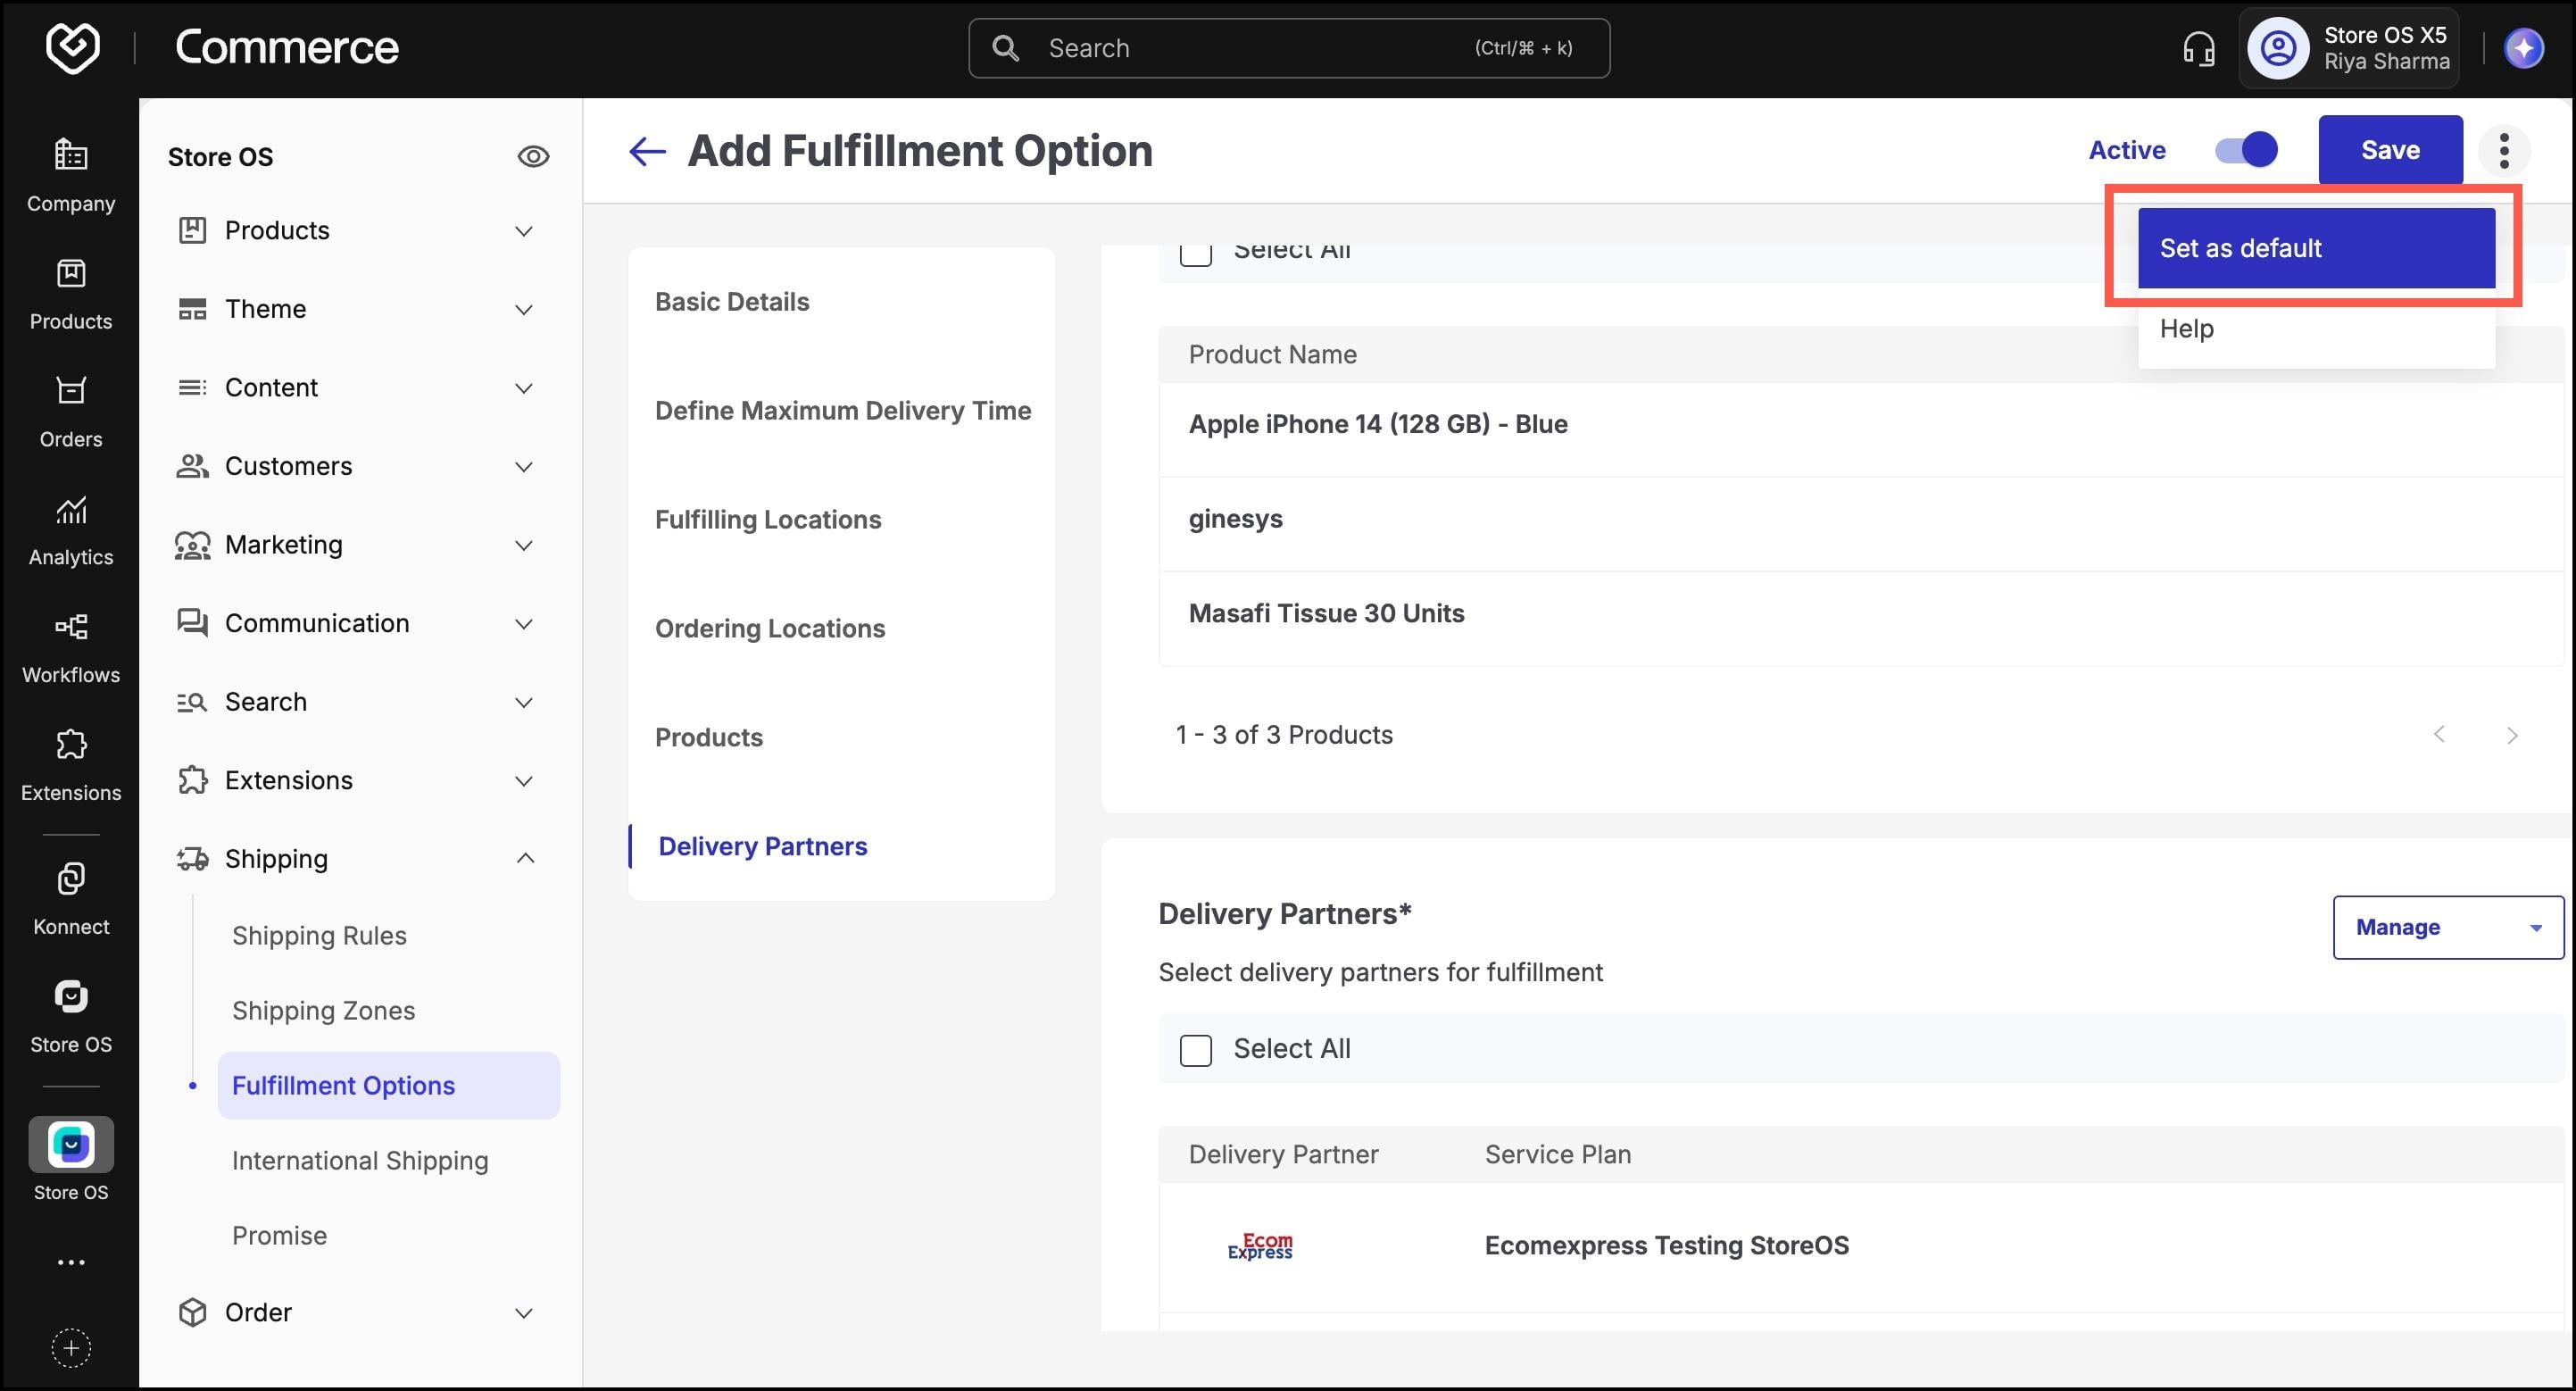
(Optional) Click the three-dot menu to set this as the Default option for applicable products/stores.
Select the business unit for which you want the fulfillment option to be the default option. Select Store OS here.
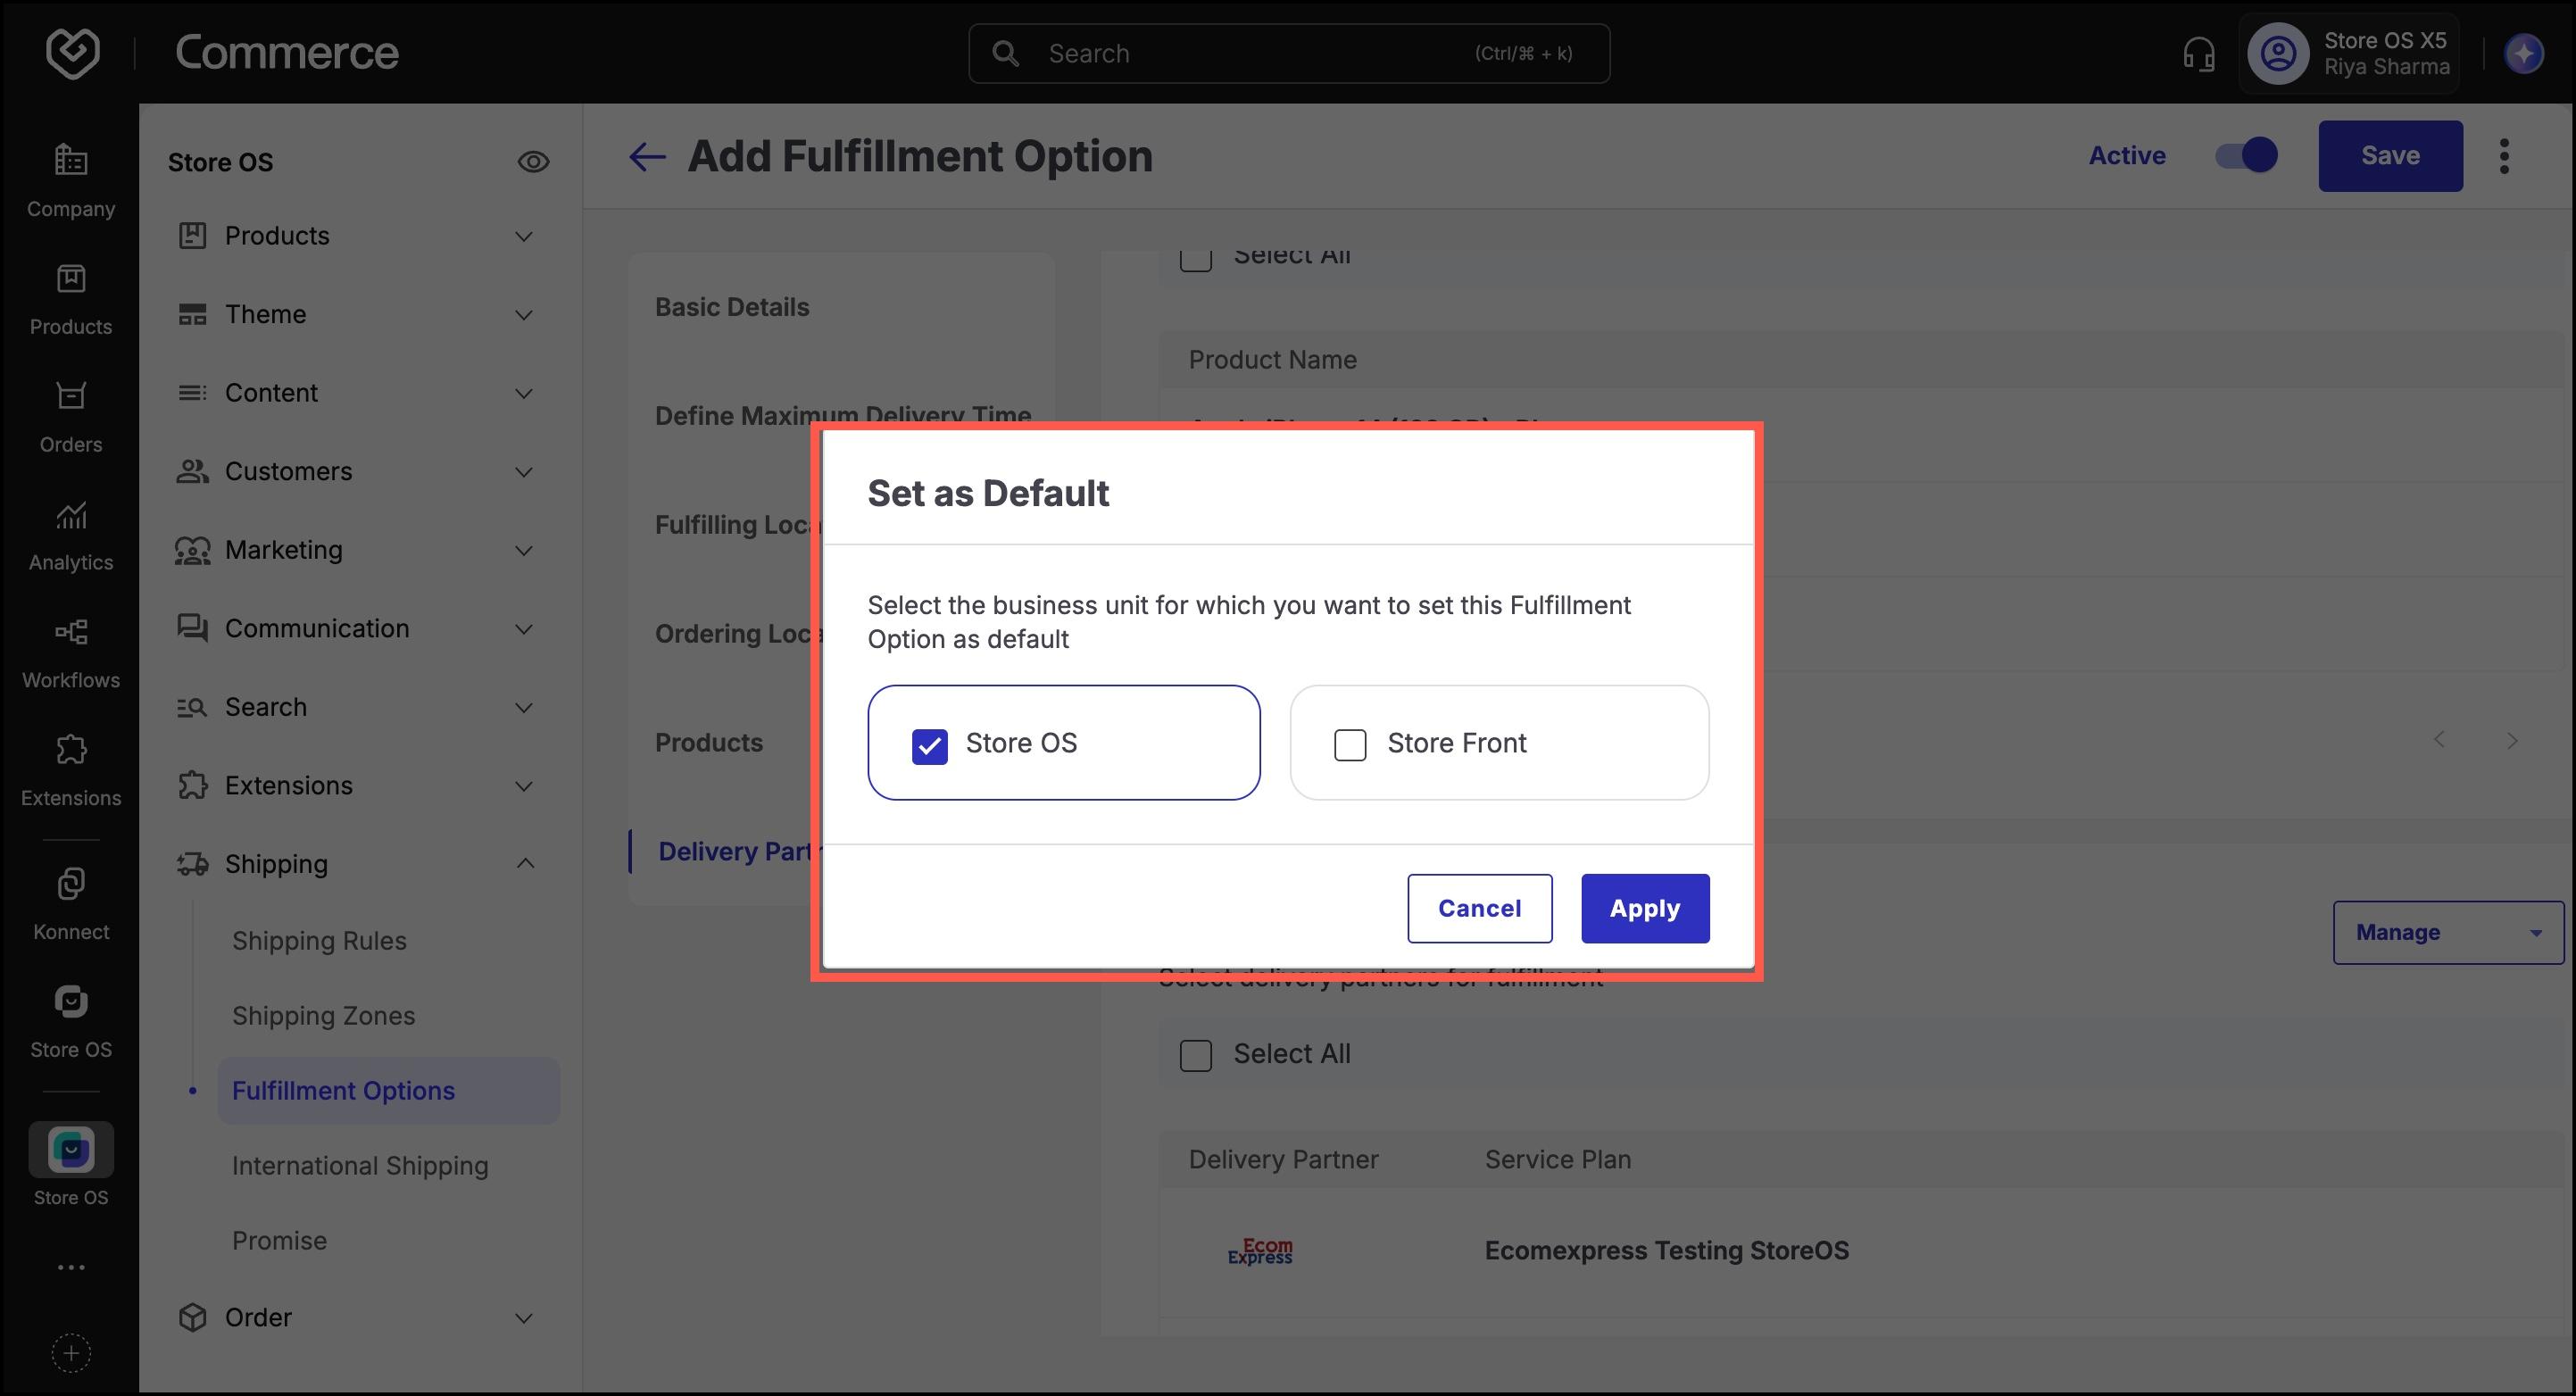
- Click Save to apply your changes.
For Products and Locations, you can upload in bulk:
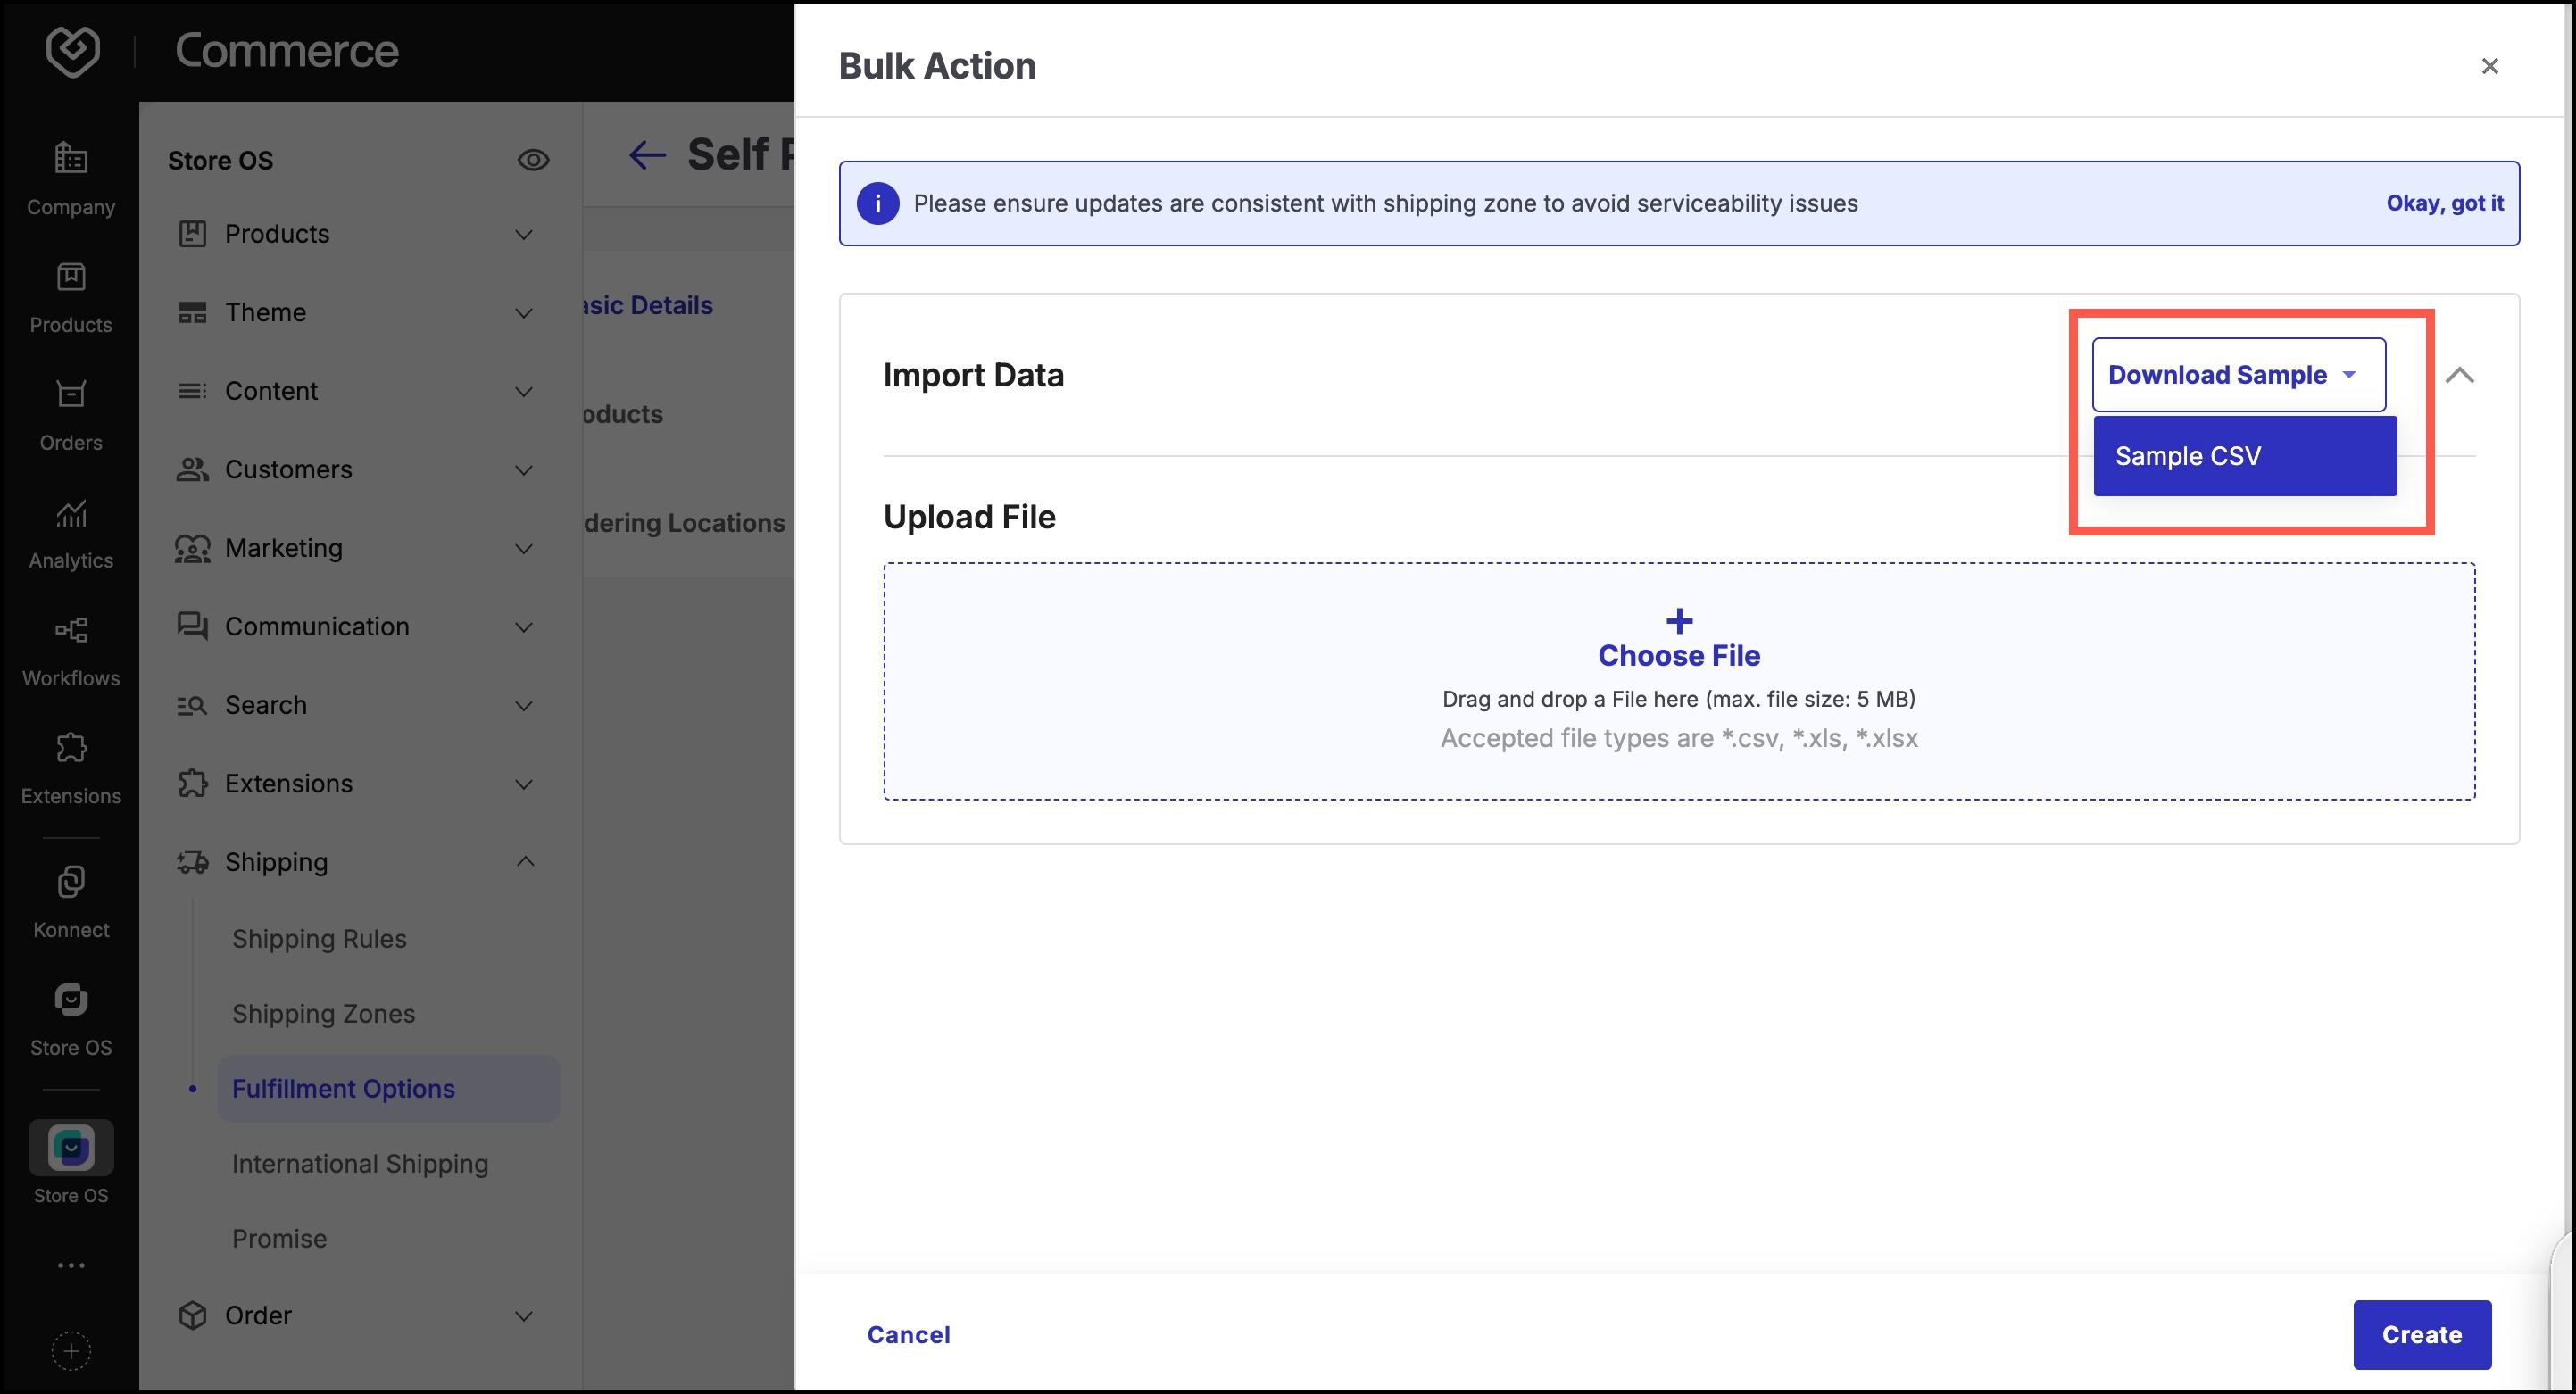
In the relevant section (Products or Ordering Locations), click Add > Bulk Upload.
Click Download Sample to download the CSV template.
- Fill the file with required data:
For products: Type, Item Code, Brand Name
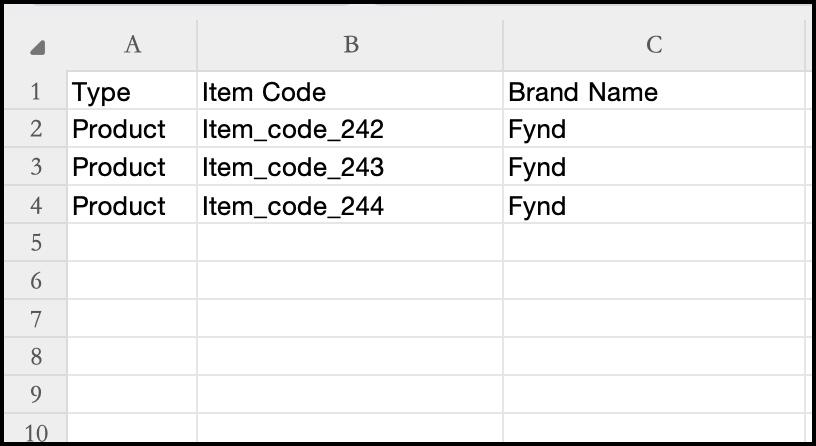
Figure 22: Fill products For locations: Store Code
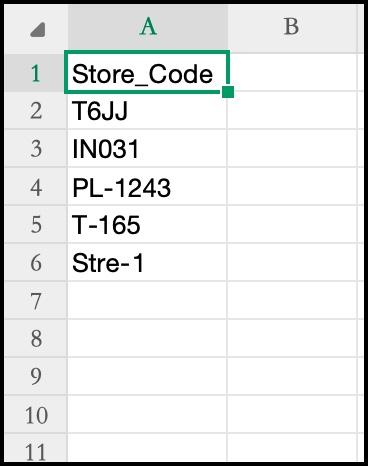
Figure 23: Fill locations
- Click Upload File, select your CSV, and complete the import.

- Click Done to confirm.